Table of Contents >> Show >> Hide
- Why Do Headlights Turn Cloudy?
- Does Toothpaste Really Clean Headlights?
- Supplies You Need
- How to Clean Headlights with Toothpaste: Step-by-Step
- Before-and-After Expectations
- When Toothpaste Is Not Enough
- Toothpaste vs. Headlight Restoration Kit
- Safety Tips Before You Start
- How to Keep Headlights Clear Longer
- Common Mistakes to Avoid
- Real-World Experience: What It Is Like to Clean Headlights with Toothpaste
- Conclusion
Cloudy headlights have a sneaky way of making a perfectly good car look tired, older, and slightly embarrassed to be seen in daylight. Even worse, foggy or yellowed headlight lenses can reduce how much light reaches the road, which makes nighttime driving harder than it needs to be. The good news? You may not need a pricey kit or a professional detailer for mild haze. Sometimes, the humble tube of toothpaste sitting near your sink can help restore a clearer, brighter look.
This guide explains how to clean headlights with toothpaste, why the method works, when it does not work, and how to make the results last longer. It is simple, affordable, and surprisingly satisfying. Think of it as a mini spa day for your car, minus the cucumber water and soothing flute music.
Why Do Headlights Turn Cloudy?
Most modern headlight lenses are made from polycarbonate plastic. This material is strong, lightweight, and impact-resistant, which is great when your car meets bugs, gravel, rain, road salt, and years of weather. The downside is that the outer protective coating can break down over time because of sunlight, heat, pollution, and everyday driving grime.
Once that coating wears down, the plastic begins to oxidize. That oxidation is what creates the chalky, yellow, cloudy look on the surface. Dirt alone is not usually the main problem. If your headlights look dull even after a normal car wash, you are probably dealing with oxidation rather than simple dust.
Common causes of cloudy headlights
- UV exposure from sunlight
- Road grime, salt, sand, and small debris
- Car wash chemicals and harsh cleaners
- Age-related wear on the factory lens coating
- Moisture trapped inside the headlight housing
Toothpaste can help with mild surface haze, but it cannot fix every headlight problem. If the cloudiness is inside the housing, if the lens is cracked, or if the plastic is deeply pitted, toothpaste will not perform magic. It is toothpaste, not a tiny mechanic in a minty helmet.
Does Toothpaste Really Clean Headlights?
Yes, toothpaste can clean headlights when the haze is light to moderate and located on the outside of the lens. The reason is simple: many toothpastes contain mild abrasives. Those abrasives help polish teeth, and they can also gently remove a thin layer of oxidized buildup from plastic headlight lenses.
For the best result, use a basic white, non-gel toothpaste. Whitening toothpaste with baking soda can work well because it usually has a slightly gritty texture. Gel toothpaste is less effective because it often lacks the polishing power needed to cut through haze.
What toothpaste can do
- Remove light oxidation from the lens surface
- Improve clarity temporarily
- Make headlights look cleaner and less yellow
- Help restore some brightness for short-term use
What toothpaste cannot do
- Repair deep scratches or cracks
- Remove moisture from inside the headlight
- Replace a damaged UV protective coating permanently
- Restore severely yellowed lenses like a professional kit can
In other words, toothpaste is a great budget-friendly first step. It is not always the final answer, especially if your headlights look like they have been living under the sea since 2009.
Supplies You Need
You do not need a garage full of tools. Most of the supplies are probably already at home.
- White non-gel toothpaste
- Microfiber cloths or soft cotton rags
- Mild car wash soap or dish soap
- Clean water in a spray bottle or bucket
- Painter’s tape or masking tape
- Soft-bristle brush or old toothbrush
- Clean towel for drying
- Optional: baking soda for extra polishing power
- Optional: car wax, headlight sealant, or UV protectant
Avoid using rough scrub pads, steel wool, or harsh household chemicals. They may scratch the lens or damage the paint around it. The goal is to polish the headlight, not punish it.
How to Clean Headlights with Toothpaste: Step-by-Step
Step 1: Wash the Headlights First
Start by washing the headlight lenses with soap and water. This removes loose dirt, bugs, dust, and road film. Skipping this step is like brushing your teeth while eating crackers. You will only grind debris into the surface and risk scratching the plastic.
Rinse the lens thoroughly and dry it with a clean microfiber towel. Make sure the surface is dry before applying toothpaste.
Step 2: Tape Around the Headlight
Use painter’s tape or masking tape to protect the painted areas around each headlight. Toothpaste is mild, but rubbing it repeatedly near paint or trim can still leave marks. Taping takes two minutes and can save you from saying words your neighbors do not need to hear.
Step 3: Apply Toothpaste
Squeeze a generous amount of white toothpaste onto a damp microfiber cloth or directly onto the headlight lens. You do not need half the tube. A tablespoon-sized amount is usually enough for one headlight to start.
If the lens is very cloudy, mix a small amount of baking soda into the toothpaste to create a thicker polishing paste. Keep the mixture slightly damp so it spreads smoothly.
Step 4: Rub in Small Circular Motions
Using firm but gentle pressure, rub the toothpaste over the headlight in small circular motions. Cover the entire lens evenly, paying extra attention to the yellowest or foggiest areas. Work for about three to five minutes per headlight.
You should see the toothpaste turn slightly dirty or yellowish as it lifts oxidized residue. That is a good sign. It means the surface layer is being polished away.
Step 5: Let It Sit Briefly
Let the toothpaste sit on the lens for two to three minutes. Do not let it dry into a hard crust. If it begins drying too fast, mist it lightly with water. The paste should stay workable, not become a fossil.
Step 6: Rinse Thoroughly
Rinse the headlight with clean water until all toothpaste is removed. Wipe the lens with a clean cloth as you rinse to make sure no paste remains around edges or seams.
Step 7: Dry and Inspect
Dry the lens completely with a microfiber towel. Step back and compare the cleaned headlight with the untreated one. If the lens still looks hazy, repeat the process once more. Most mild cases improve after one or two passes.
Step 8: Add Protection
This is the step many people skip, and it is also the step that helps the results last. Toothpaste removes oxidation, but it does not replace the original UV coating. After the lens is clean and dry, apply a headlight sealant, UV protectant, or a small amount of car wax according to the product directions.
Protection matters because sunlight will continue attacking the plastic. Without a protective layer, the haze may return quickly, especially if the car is parked outside every day.
Before-and-After Expectations
With mild oxidation, toothpaste can make headlights look noticeably clearer. The lens may go from dull and yellow to brighter and more transparent. You may also notice a cleaner beam pattern at night.
However, the improvement is usually temporary. Depending on weather, parking conditions, and lens condition, results may last a few weeks to a few months. A proper headlight restoration kit with sanding pads, polish, and UV sealant typically lasts longer because it removes damage more evenly and adds better protection.
When Toothpaste Is Not Enough
Toothpaste is best for light haze. If your headlights are severely yellow, deeply scratched, rough to the touch, or still cloudy after several cleaning attempts, you may need a dedicated restoration kit or professional service.
You should also skip the toothpaste method if the cloudiness is inside the headlight housing. Internal moisture often looks like fog, droplets, or streaks behind the lens. That problem usually comes from a failing seal, vent issue, or crack. Polishing the outside will not solve it.
Signs you need more than toothpaste
- The lens feels rough, pitted, or deeply scratched
- The yellowing returns within days
- There is condensation inside the housing
- The bulb looks dim even after cleaning
- The headlight beam is uneven or weak
If visibility remains poor after cleaning, inspect the bulbs, wiring, alignment, and housing condition. Headlights are a safety feature, not just a beauty accessory for your bumper.
Toothpaste vs. Headlight Restoration Kit
Toothpaste is cheap, quick, and useful for light haze. A headlight restoration kit is more effective for heavier oxidation. Kits usually include sandpaper or polishing pads, compound, and a protective coating. They require more time and care, but they can produce clearer and longer-lasting results.
Use toothpaste if:
- The haze is mild
- You want a low-cost test before buying a kit
- You need a quick cosmetic improvement
- You have basic household supplies available
Use a restoration kit if:
- The lens is heavily yellowed
- The surface feels rough
- You want longer-lasting results
- You are comfortable sanding and sealing the lens
Safety Tips Before You Start
Park in a shaded area before cleaning headlights. Direct sunlight can dry the toothpaste too quickly and make the job harder. Work on cool lenses, not headlights that have been baking in the sun or recently running for a long drive.
Do not use aggressive chemicals such as acetone, paint thinner, bug spray, or strong solvents. Some internet hacks may look dramatic in short videos, but they can damage plastic, paint, rubber trim, or protective coatings. If a cleaning trick sounds like it belongs in a science experiment with emergency goggles, skip it.
How to Keep Headlights Clear Longer
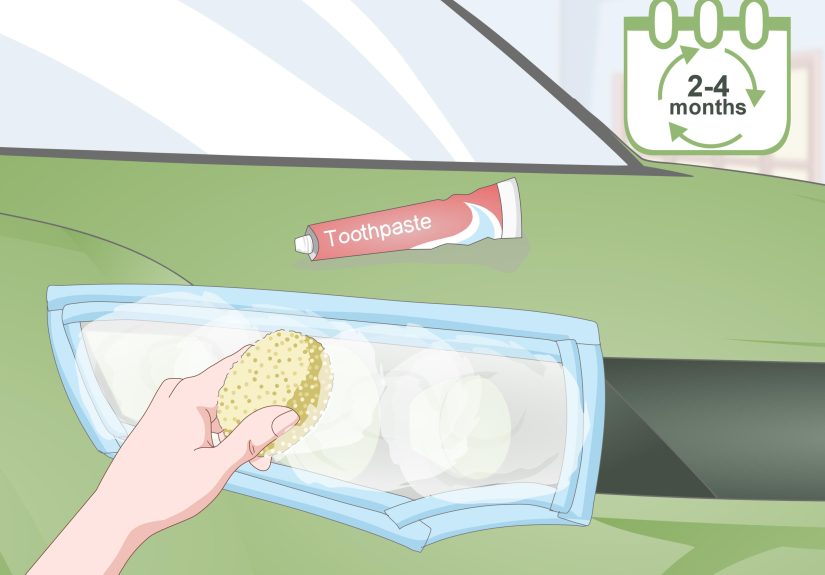
Once your headlights are clean, maintenance is easy. Wash them whenever you wash your car, especially after rain, snow, mud, or dusty drives. Apply a UV protectant or wax every few months if your vehicle is parked outside. Parking in a garage or shaded area can also slow oxidation.
Make it a habit to check your headlights at night against a garage door or wall. If one side looks dimmer than the other, the issue may be more than a dirty lens. A weak bulb, poor alignment, or electrical problem can also reduce visibility.
Common Mistakes to Avoid
Using gel toothpaste
Gel toothpaste usually does not have enough abrasive texture to polish oxidation effectively. Choose a plain white toothpaste instead.
Scrubbing too hard
Pressure helps, but too much pressure can scratch the plastic or damage surrounding trim. Let the mild abrasive do the work.
Skipping painter’s tape
Taping protects paint and trim. It is one of those small steps that feels unnecessary until suddenly it is very necessary.
Forgetting UV protection
Cleaning without sealing is like washing your car and immediately parking under a tree full of angry birds. The results may not last.
Real-World Experience: What It Is Like to Clean Headlights with Toothpaste
The first time many people try the toothpaste method, they expect it to be either a miracle or a total internet prank. The truth lands comfortably in the middle. On a lightly hazed headlight, the improvement can be surprisingly visible. The lens may not look brand-new, but it can look cleaner, brighter, and less yellow after about ten minutes of work.
A realistic example: imagine an older sedan that sits outside most of the year. The headlights are not completely opaque, but they have that cloudy, tired look that makes the front end seem neglected. After washing the lens, taping the paint, and rubbing white toothpaste in circles for several minutes, the cloth begins picking up yellowish residue. When the lens is rinsed and dried, the surface looks clearer. Not showroom perfect, but definitely better. The owner gets that small DIY victory feeling, the kind usually followed by standing with hands on hips and admiring the car like a proud suburban wizard.
The experience also teaches patience. If you rush the job, the results are uneven. One area may look clear while another still looks foggy. Working in small sections helps. A damp cloth gives better control than a dry one, and adding a little water keeps the toothpaste from clumping. If the paste dries too quickly, it becomes harder to polish and rinse away.
Another lesson is that the second pass often matters. The first round removes surface grime and some oxidation. The second round can refine the clarity. However, there is a limit. If the headlight is deeply damaged, more toothpaste will not necessarily help. At some point, you are just giving your headlight a very enthusiastic dental appointment.
The biggest mistake beginners make is expecting permanent results. Toothpaste does not add a durable UV coating. After a few weeks of sun exposure, the haze can start returning. That does not mean the method failed; it means the lens still needs protection. Applying a UV sealant or automotive wax after cleaning makes the project feel more complete and helps preserve the result.
From a practical standpoint, toothpaste cleaning is best before a night drive, before selling a car, before a vehicle inspection, or whenever you want a quick improvement without spending much money. It is also a great test. If toothpaste makes a noticeable difference, a full restoration kit may work even better. If toothpaste does almost nothing, the lens may be too far gone or the issue may be inside the housing.
One small tip from experience: clean both headlights even if only one looks bad. A single polished headlight next to a cloudy one creates an odd mismatched look, like your car woke up with one eye open. Also, take a quick before-and-after photo. It helps you see the improvement more clearly and gives you proof that your elbow grease did not suffer in vain.
Overall, cleaning headlights with toothpaste is a useful DIY trick when expectations are realistic. It is cheap, simple, and low-risk when done carefully. It will not replace professional restoration for severe damage, but for mild haze, it can make your car look fresher and help your headlights perform better. Not bad for something that usually spends its life fighting coffee breath.
Conclusion
Cleaning headlights with toothpaste is one of the easiest DIY car-care projects you can try at home. It works because white toothpaste contains mild abrasives that can polish away light oxidation on plastic lenses. The process is simple: wash the headlights, protect the paint, apply toothpaste, scrub gently, rinse, dry, and add UV protection.
For mild haze, this method can make headlights look clearer and improve the appearance of your vehicle. For severe yellowing, deep scratches, or internal moisture, a headlight restoration kit or professional repair may be the better choice. Either way, do not ignore cloudy headlights. Clear lenses are not just about making your car look younger; they help you see and be seen when driving at night.
Note: This DIY guide is intended for exterior headlight haze only. If your headlights remain dim after cleaning, inspect the bulbs, electrical system, lens condition, and headlight alignment before relying on the vehicle for nighttime driving.


