Table of Contents >> Show >> Hide
- What “Free Craft Templates” Really Means (And Why It’s a Big Deal)
- Where to Find the Free BHG Templates
- What Kinds of Templates You’ll See (With Real Examples)
- How to Print Templates So They’re the Right Size (A.K.A. Avoiding Dollhouse Garland)
- Cutting, Tracing, and Transferring: Three Smart Ways to Use Templates
- Want Faster, Cleaner Cuts? Here’s What Actually Helps
- Troubleshooting: The “Why Is This Not Working?” Checklist
- How to Store Templates So You Actually Reuse Them
- Creative Ways to Remix BHG Templates Into Your Own Projects
- Real-World Crafting Experiences ( of What Usually Happens)
- Conclusion
If your craft drawer has ever whispered, “Buy more supplies,” while your budget whispered, “Absolutely not,”
welcomeyou’re among friends. One of the easiest ways to make a project look polished (without paying “fancy-craft-store”
prices) is to start with a good template. And that’s where Better Homes & Gardens (BHG) quietly becomes
your crafty bestie: the magazine shares free, downloadable craft templates that match projects featured in its issues.
This article is your practical, no-fluff guide to finding those templates, printing them at the right size (so your “garland”
doesn’t turn into “confetti”), and using them like a pro on paper, fabric, and even pumpkins. We’ll also talk about common printing
hiccups, how to store templates for repeat use, and creative ways to remix BHG patterns into your own original décor.
What “Free Craft Templates” Really Means (And Why It’s a Big Deal)
A craft template is basically a reliable outlineshapes, patterns, guides, or stencilsthat helps you cut, trace, fold, or assemble
a project accurately. The reason templates feel magical is simple: they remove the hardest part of crafting for many peoplethe
measuring, sketching, and “Is this symmetrical or am I just optimistic?” stage.
On BHG’s template page, you’ll find downloadable PDFs tied to specific seasonal magazine craftsthink
gift toppers, ornaments, garlands, leaf-themed tabletop accents, Valentine’s Day cards, paper poinsettias,
and pumpkin stencils. The projects change by season and holiday, which means the templates are often the kind you actually
want right now (and not, say, a Fourth of July wreath in Februaryunless you’re that person, in which case, I respect it).
Where to Find the Free BHG Templates
The easiest route is BHG’s official “Free Craft Templates” hub page, which organizes templates by month/issue theme and includes
direct “download” links for the matching PDFs. The templates are hosted as printable files (typically PDFs), and each set corresponds
to a project category (holiday décor, table accents, paper crafts, etc.).
Quick download checklist
- Open the BHG Free Craft Templates page.
- Scroll to the month/project you want (for example, holiday gift toppers or pumpkin stencils).
- Click the download link to grab the PDF template set.
- Save the file to a folder you’ll remember (future-you deserves nice things).
- Print using the “actual size/100% scale” approach described below.
Pro tip: some template listings reference magazine issue pages for instructions (for example, a table décor template might point you
to a specific issue and page number). If you’re recreating the project exactly, keep the instructions nearbytemplates are the “shape,”
but instructions are the “how to turn shape into a thing that doesn’t collapse.”
What Kinds of Templates You’ll See (With Real Examples)
BHG templates aren’t one-note. They span paper, party décor, seasonal table settings, holiday ornaments, and family-friendly projects.
Here are a few examples of the kinds of templates you’ll typically find:
Holiday décor, ornaments, and garlands
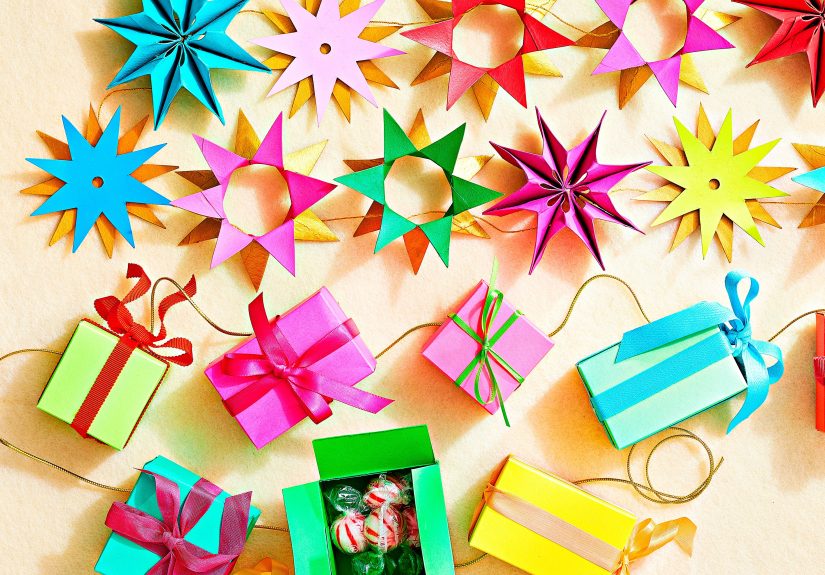
Holiday templates are often designed for “big visual payoff, low stress.” One month may focus on gift toppers and ornaments that look
boutique-worthy but rely on simple cutting and folding. Another might offer multiple shapes to mix into a coordinated garland
(stars, leaves, boxes, and so on). These templates are especially useful if you’re making a setbecause consistency is what makes
“DIY” look “designer.”
Tabletop accents for gatherings
Seasonal entertaining templates often include leaves, napkin-ring shapes, and foldable accents that turn a table setting into a theme.
The nice part: you can reuse the same leaf or accent template across different holidays by changing paper color, paint, or finish.
One template, many vibes.
Paper crafts and party details
Paper templates can be deceptively fun. For example, cardstock-based shapes may be designed to layer and fasten (a brad is often a
simple “secret weapon”), making 3D elements that double as place settings, treats, or décor. The template gives you repeatable pieces
so you can assemble quicklygreat if you’re making 8–12 of something for a table or party.
Halloween graphics and pumpkin stencils
Pumpkin stencils are a classic “template wins” category, because nobody wants to freehand a bee, a honeycomb pattern, or a clean phrase
at 9:47 p.m. the night before guests arrive. Stencils let you carve, etch, or poke patterns with more controland that usually means
a cleaner result and fewer “oops” moments.
Home projects and pet-friendly pieces
Occasionally, the templates branch into functional DIYlike a pet bed pattern. These are especially handy because accuracy matters:
a pillow cover that’s off by half an inch is “rustic”; a pet bed that’s off by half an inch is “why is the cat side-eyeing me?”
How to Print Templates So They’re the Right Size (A.K.A. Avoiding Dollhouse Garland)
The most common issue with printable craft templates isn’t cutting. It’s printing. Specifically: printers and PDF viewers love to
“help” by resizing your document. That’s sweet. It’s also how your full-size wreath pattern becomes a coaster.
The golden rule: print at 100% (or “Actual Size”)
When printing a PDF, look for settings like Actual Size, 100%, or Do not scale.
Avoid options like Fit, Shrink oversized pages, or anything with “fit to printable area.”
Those are great for reports. For templates, they’re a chaos generator.
Use a quick “sanity check” before printing a whole set
- Print page 1 only first, then measure any reference marks (or compare to known sizes).
- If the template is meant for standard letter paper (8.5×11), confirm the print dialog shows that size.
- Turn off “borderless” or “edge” printing unless the instructions specifically require it.
Paper choice matters more than you think
Many templates work best on standard printer paper for tracing, but if you’re cutting final pieces (like ornaments or sturdy toppers),
print directly on cardstock. Just keep in mind:
- Thicker paper may feed differentlyuse the printer’s “heavy paper” or “cardstock” setting if available.
- Some printers slightly shift alignment on thick stock; do a test print if precision matters.
Cutting, Tracing, and Transferring: Three Smart Ways to Use Templates
Once you’ve printed your template, your next step depends on your material. Here are the most reliable approaches for common crafting
situations.
1) Cut-and-go (best for paper, cardstock, and light cardboard)
If your final material is paper-based, the fastest method is also the simplest:
- Cut out the printed template shape (rough cut first, then detail cut).
- Trace it onto your final material if you need multiples, or cut the printed piece as-is.
- For repeat use, mount the template to thin cardboard (like cereal-box weight) to create a sturdier pattern.
2) Trace-transfer (best for fabric, felt, and softer materials)
For fabric crafts, you usually want a crisp outline without permanently damaging your material. A popular method uses
tracing paper (and a pencil/pen) to transfer the shape. The basic idea: you trace the template, flip or position it, then redraw the
lines so the marks transfer to your fabric. Use painter’s tape to keep layers from sliding like they’re auditioning for an ice show.
If your project involves sewing, consider marking with tailor’s chalk or a washable fabric marker rather than a permanent pen.
Your future laundry routine will thank you.
3) Stencil-style transfer (best for wood, walls, and pumpkins)
For sturdier surfaces, you can convert a printed template into a stencil:
- Print the template and tape it in place.
- For carving/etching: poke along the lines or cut out “windows” where the design should appear.
- For painting: use light adhesive or stencil tape to hold edges down so paint doesn’t creep under the paper.
For pumpkin carving specifically, templates are the difference between “cute fall moment” and “abstract squash regret.”
If you’re carving, keeping the pumpkin looking fresh longer matters too. A common BHG tip is soaking the pumpkin in a
1-part vinegar to 10-parts water solution before cutting, and keeping the stem/top intact while cutting an opening
at the bottom or back for cleanup and lighting.
Want Faster, Cleaner Cuts? Here’s What Actually Helps
You don’t need a studio full of gadgetsbut a few basics can make templates dramatically easier to use:
Must-have basics
- Sharp scissors for curves and general cutting.
- Craft knife + self-healing mat for crisp corners and detailed cutouts (especially stencils).
- Metal ruler for straight lines (because “eyeballing” is how angles become opinions).
- Hole punch + brads for layered paper shapes that need a pivot point or 3D form.
- Painters tape for temporary positioning without tearing paper.
Optional “level up” tools
If you do a lot of template crafts, a cutting machine can be a game-changer. But there’s a big caveat:
printed templates and machine cutting require correct calibration and print settings.
-
Print-then-cut workflows typically require printing in a single continuous session and avoiding any print scaling.
If you print outside the intended workflow, the registration/sensor marks can end up incorrectly sized. - Calibration matters. If cuts are drifting off the printed lines, calibration routines can help the machine cut more precisely.
Troubleshooting: The “Why Is This Not Working?” Checklist
Templates are simpleuntil the printer decides today is a great day to develop a personality. Here are quick fixes for the most common problems.
The template printed too big or too small
- Reprint using “Actual Size” or “100%.”
- Turn off “Fit to Page,” “Shrink to printable area,” and similar scaling options.
- Confirm your paper size matches the PDF (most are letter size, 8.5×11).
The design is cropped or shifted
- Avoid “narrow margins” or “borderless” printing unless instructed.
- Use the print preview and keep layout set to 1 page per sheet.
- If you’re doing a print-then-cut craft, avoid centering or edge printingthose can throw off sensor alignment.
The printer output looks fuzzy or streaky
- Use the highest print quality for detailed templates (especially ones with fine lines).
- Check ink levels before printing a multi-page set.
- For precise cutting workflows, plain white, non-textured paper is often the most consistent for calibration prints.
How to Store Templates So You Actually Reuse Them
Free templates are only “free” until you’ve printed them eight times because you can’t find the file you downloaded. Let’s prevent that.
Digital organization
- Create a folder called “BHG Templates” (or “Templates I Will Definitely Use Again”).
- Subfolder by season: Winter, Spring, Summer, Fall, Holidays, Parties.
- Rename files with a quick descriptor (e.g., “BHG_pumpkin_stencils,” “BHG_leaf_tabletop,” “BHG_poinsettia_template”).
Physical organization
- Slip printed templates into sheet protectors in a binder.
- Mount favorites to thin cardboard for durability.
- For tiny pieces (gift toppers, ornaments), store sets in labeled envelopes.
Creative Ways to Remix BHG Templates Into Your Own Projects
Templates are a starting point, not a cage. Once you have a good shape, you can spin it into dozens of variations. Here are a few ideas:
Turn one template into a full collection
- Leaf templates: make place cards, garlands, napkin rings, gift tags, or wall art.
- Starbursts/gift toppers: scale down for ornaments or scale up for a statement backdrop.
- Poinsettia petals: use different papers (crepe, metallic, vellum) to create texture shifts.
Swap materials for a “new” look
Print a template once, then recreate it across materials: kraft paper for rustic charm, glossy cardstock for party sparkle,
felt for softness, or thin wood veneer for a more permanent finish. Same shape, new personality.
Make it personal with color and detail
If a template looks “too standard,” add one signature detail: a contrasting edge, a stamped pattern, a painted gradient,
or a small metallic accent. Tiny upgrades read as intentional design.
Real-World Crafting Experiences ( of What Usually Happens)
The first time many crafters download a free template, the experience is a mix of excitement and mild printer distrust.
It often starts like this: you choose a gorgeous holiday garland template, hit print, and immediately notice your printer
is making a sound like it’s chewing celery. You stand there, negotiating with it. You promise fresh paper. You offer a
gentle pat on the top tray. Eventually, it printsexcept the shapes are slightly smaller than expected. That’s the moment
you learn the ancient truth: “Fit to page” is not your friend.
Once the scale is corrected, the craft itself usually becomes the fun part. A common scenario is a last-minute decorating sprint:
you’re hosting people, and suddenly the room feels like it needs “a little something.” BHG templates shine here because they’re
designed for quick winsrepeatable shapes that assemble fast. Crafters often print a template set, cut while watching a show,
and end up with a pile of components that look unimpressive until they’re strung together. Then, like magic, a few paper pieces
become a mantel moment.
Another frequent experience: the “one template, five versions” spiral. You make one set of gift toppers, love them, and decide to
make morethen realize that changing paper stock changes everything. Metallic paper looks stunning but can be harder to fold cleanly.
Thick cardstock holds shape beautifully but may require stronger adhesive. Vellum gives you a soft glow but can show tape lines if
you’re not careful. The template stays the same, but the materials turn it into a design experiment (the good kind).
Pumpkin stencils bring their own brand of dramausually time-based. Many people start carving with plenty of daylight and confidence,
then discover they’re still poking holes at night while someone asks, “Are we doing spooky or cute?” Templates help keep the design
crisp, but the real victory is consistency: a repeated pattern looks intentional even if your cutting isn’t perfect. And when someone
compliments the result, you get to casually say, “Oh, it was just a little stencil situation,” like you didn’t spend 20 minutes
persuading the pumpkin lid to sit flat.
Finally, there’s the experience crafters love most: pulling a template back out the next year and realizing it still works. When you
store templates welldigitally labeled, physically protectedyou’re not starting from scratch. You’re building a personal “mini craft
library.” That’s when free templates stop being a one-off download and start becoming part of your seasonal traditions: the same leaf
shapes at Thanksgiving, the same ornament forms at winter holidays, the same paper flowers for spring tableseach time with a new color
palette or a fresh detail that makes it yours.
Conclusion
Free craft templates from Better Homes & Gardens are a smart shortcut to projects that look refined without feeling complicated.
Download the PDFs, print at the correct scale, and use the template method that matches your materialcut, trace, or stencil.
Once you get the hang of it, you’ll spend less time measuring and more time making (which is the whole point). And if your printer
tries to “help” by resizing your template? You now know how to politelybut firmlysay no.


