Table of Contents >> Show >> Hide
- The Golden Rules of Flea Market Flipping (So You Don’t Bring Home Regrets)
- The Makeover Game Plan: Prep Like You Mean It
- 48 Amazing Projects, Hacks, and Revamps
- A) Quick Wins (Low Effort, High Impact)
- B) Furniture Flips That Look Custom (But Aren’t Complicated)
- C) Kitchen & Dining Upcycles (Where Function Matters)
- D) Wall Decor, Shelving, and Architectural Charm
- E) Textiles, Soft Goods, and “No-Sew” Confidence Boosters
- F) The “WaitThat Was a Flea Market Find?” Finishing Touches
- Extra Pro Moves: Make Your Flip Look Expensive (Without Spending Expensive)
- +: The Real-Life Experience of Flipping Flea Market Finds (What You’ll Learn the Fun Way)
- Conclusion: Make Your Home a Little More You
- SEO Tags
Flea markets are basically “choose-your-own-adventure” bookstoresexcept the plot twists are missing drawer pulls,
mystery stains, and one chair leg that’s… spiritually present. The good news: those quirks are exactly why secondhand
treasures make the best DIY projects. With a little strategy (and a little patience), you can turn overlooked stuff into
high-style home decor that looks curated, not cobbled together.
This guide gives you a smart game plan plus 48 practical, creative ideasranging from quick
afternoon hacks to full-on “wow, you built that?” revamps. The goal isn’t perfection. It’s personality, function,
and a home that tells stories (preferably not the story of “I paid full price for this”).
The Golden Rules of Flea Market Flipping (So You Don’t Bring Home Regrets)
1) Shop with a plan, not a vibe
- Measure first: keep your key room measurements and doorway widths in your phone.
- Prioritize “bones”: solid wood, sturdy joints, smooth drawers, stable legs.
- Budget backward: purchase price + supplies + time = real cost.
2) Know when to pass
- Structural damage (wobbly frames, major rot, active pest issues) is usually a “nope.”
- Upholstery can be amazingbut odors, stains, or hidden problems can turn “deal” into “why.”
3) Safety isn’t optional (especially for vintage paint)
If you’re buying older piecesespecially anything that may have been painted decades agotreat unknown finishes with respect.
When in doubt, test and use lead-safe practices or a certified professional for risky work.
(Your lungs do not want a DIY era.)
The Makeover Game Plan: Prep Like You Mean It
Step 1: Clean the piece (yes, even if it “looks fine”)
Most flea market pieces are wearing a “patina” made of dust, oils, and the faint memory of someone’s 1997 meatloaf night.
Start with gentle cleaning methods and always test in an inconspicuous spot. For grime that laughs at mild cleaners,
step up carefullyyour goal is clean, not stripped bare.
Step 2: Repair and stabilize
Tighten screws, glue loose joints, fill dents, and replace missing hardware. Quick repairs make everything that follows
easierpaint applies smoother, drawers glide better, and the final piece feels intentional (not “rescued in a hurry”).
Step 3: Scuff, prime (if needed), then finish strong
Paint and stain need something to grip. Light scuff-sanding can help, and primer is your best friend when you’re dealing
with glossy finishes, tannin-prone wood, knots, or dramatic color changes. Finish with a protective topcoat where durability
matters (tabletops, desks, kitchen pieces).
48 Amazing Projects, Hacks, and Revamps
A) Quick Wins (Low Effort, High Impact)
- Frame a thrifted scarf as art: Stretch a silk scarf over foam board and pop it into a large frame for instant “gallery wall” energy.
- Swap lamp shades like it’s a personality upgrade: A new shade (linen, pleated, or woven) can turn a sad lamp base into a statement.
- Turn a bowl into a catch-all station: One pretty dish by the door becomes a “keys, wallet, sanity” landing zone.
- Upgrade drawer pulls for instant polish: Changing hardware is the fastest way to modernize dressers, nightstands, and cabinets.
- Make mismatched candlesticks look intentional: Paint them one color (or two-tone) for a cohesive set that reads “designer,” not “accidental.”
- Wrap a tired vase in cane webbing or jute: Texture hides scratches and adds warmthespecially great for modern-boho spaces.
- Turn a vintage tray into a bar zone: Add non-slip liner and corral glassware, bitters, and bottles in one portable setup.
- Create “fancy storage” with a thrifted basket: Add a liner and labelsuddenly clutter becomes “curated.”
B) Furniture Flips That Look Custom (But Aren’t Complicated)
- Nightstand makeover with a two-tone paint job: Paint the body one color, drawers another, then seal. It’s simple but looks bespoke.
- Dresser-to-sideboard transformation: Remove the top drawers, add shelves, and use basketshello dining storage.
- Desk refresh for a real workspace: Fill gouges, paint the base, and stain the top for a clean “modern classic” finish.
- Turn a cabinet into a coffee bar: Add hooks for mugs, a tray for syrups, and a shelf for pods/filters.
- Flip a headboard into a bench back: Pair with a simple seat base and you’ve got entryway seating with major character.
- Make a vintage chair modern with new upholstery: Keep the frame, refresh the fabric. Even a staple-gun beginner can pull this off.
- Add cane webbing to cabinet doors: Remove old panels, staple cane behind the frame for airy texture and a high-end look.
- Paint a bookcase and style it like a pro: One color, consistent shelf spacing, and a mix of books + objects = instant “put together.”
- Convert a small dresser into a bathroom vanity (dry areas): Seal well, cut for plumbing, and use a top suited to moisture exposure.
- Stool-to-side-table glow-up: Paint it, add a round wood top if needed, and it becomes a perfect bedside perch.
- Turn old dining chairs into a matching set: Paint frames uniformly, re-seat with the same fabric. Uniformity is the magic trick.
- Make a console from an old table: Cut down depth if needed, reinforce, and use it behind a sofa or in a hallway.
- Update a trunk into a coffee table: Add hairpin legs and a tray topstorage plus surface, no extra furniture required.
- Transform a sewing table into a chic vanity: Add a mirror, small organizers, and a stoolglam without “glam prices.”
- Rescue a wobbly piece by bracing the back: A simple cross brace or backing panel can turn “unsafe” into “solid.”
- Paint an old hutch interior a surprise color: Keep the outside neutral, go bold inside. It’s the design equivalent of a wink.
C) Kitchen & Dining Upcycles (Where Function Matters)
- Use vintage crocks as utensil holders: Heavy, stable, and charmingperfect next to the stove.
- Turn a cutting board into wall decor: Hang a mix of wood boards as rustic art (bonus: they’re removable when you need them).
- Create a tiered fruit stand from plates: Drill and stack thrifted plates with a central rod for instant countertop organization.
- Make a serving station from a rolling cart: Add hooks, baskets, and a tray top for a movable snack and drink hub.
- Turn teacups into dessert cups or candle holders: A little wax and wick makes a giftable candle with vintage charm.
- Convert a bread box into a charging station: Drill a discreet cord hole and hide the messyour outlet deserves dignity.
- Make a spice rack from a small shelf: Add a front rail and mount ittiny kitchen, big improvement.
- Use a vintage glass jar set for pantry storage: Labels + consistent containers = “I have my life together” vibes.
D) Wall Decor, Shelving, and Architectural Charm
- Turn an old window frame into a photo grid: Clip photos behind panes for a rotating “family gallery.”
- Make a mirror bigger with a DIY frame: Add trim around a plain mirror to get that “custom built-in” look.
- Use shutters as hanging organizers: Add hooks for keys, dog leashes, or necklacespretty and practical.
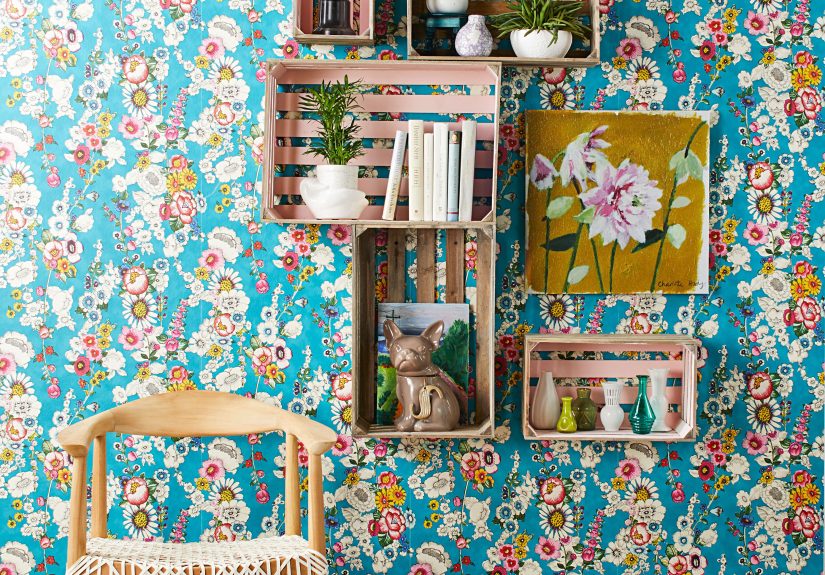
- Convert crates into modular wall shelves: Mount in a grid or staggered pattern for storage that looks intentional.
- Turn a ladder into a blanket rack: Sand lightly, seal, and lean itno installation required, maximum cozy.
- Create a peg rail from reclaimed wood: Add hooks and mount it in an entry or kitchen for instantly smarter storage.
- Make a statement gallery from thrifted frames: Paint frames one color, mix sizes, and insert art prints or fabric scraps.
- Turn a vintage door into a headboard: Sand, seal, mountyour bed gets “historic charm,” not “generic showroom.”
E) Textiles, Soft Goods, and “No-Sew” Confidence Boosters
- Turn tablecloths into curtains with clip rings: No sewing, instant softness, and a surprisingly expensive-looking result.
- Make pillows from thrifted sweaters: Stuff, hand-stitch (or fabric-glue), and enjoy cozy texture for cheap.
- Refresh a bench with a staple-gun cushion: Use foam + batting + fabric and you’ve got custom seating in an afternoon.
- Layer vintage quilts as throws: One quilt adds color, pattern, and the comforting energy of “someone loved this.”
F) The “WaitThat Was a Flea Market Find?” Finishing Touches
- Turn old tools into hooks: Mount hand tools on a board for a rustic mudroom organizer with real personality.
- Make an industrial pendant from a wire basket: Add a pendant light kit and you’ve got a statement fixture (safely installed).
- Create plant stands from mismatched stools: Paint them a single color and cluster at different heights for a mini indoor jungle.
- Transform a vintage suitcase into hidden storage: Stack as decor, store out-of-season items inside, and pretend you’re “very organized.”
Extra Pro Moves: Make Your Flip Look Expensive (Without Spending Expensive)
- Pick a “house palette”: 2 neutrals + 1 accent color keeps secondhand pieces from feeling random.
- Repeat materials: If you add brass hardware once, echo brass somewhere else (lamp base, frame, hooks).
- Choose one “hero” per room: Let one dramatic flea market find shine; keep supporting pieces quieter.
- Don’t rush cure time: Dry isn’t always cured. Gentle use first, heavy use later.
+: The Real-Life Experience of Flipping Flea Market Finds (What You’ll Learn the Fun Way)
The best part about flea market flipping isn’t just the finished pieceit’s the whole adventure wrapped around it.
You start the day with a plan (“I’m only looking for a small side table”), and somehow end up carrying a vintage
birdcage, three frames, and a mysterious brass thing that might be a candle snuffer or a tiny medieval weapon.
That’s normal. Welcome.
Shopping secondhand teaches you to see potential instead of perfection. At first, you notice flaws: scratches, chips,
faded finishes, and hardware that looks like it survived a dramatic breakup. Then your brain flips a switch and starts
translating: “That scratch is character,” “that drawer just needs a glide,” “that weird shine is begging for a scuff and primer.”
You get better at spotting quality fastsolid wood, strong joints, and pieces that feel heavy in a good way, like they’re
anchored to reality and not made of compressed hope.
You also learn the emotional math of thrifting. There’s the thrill of the find (heart rate: up), the negotiation
(confidence: pretending to exist), and the victory walk to the car (arms: suddenly too short). If you’re lucky, you’ll
catch yourself smiling for absolutely no reason other than “I got this for $18.” That joy is the secret ingredient
people can’t buy at big-box stores.
Then comes the project phasewhere optimism meets prep work. Cleaning is the unglamorous part, but it’s the moment you
realize the piece has been living a full life. Grime in corners, sticky residue on tops, maybe a faint perfume that
screams “estate sale chic.” Once it’s clean, you start making real decisions: keep the patina or go modern? Bold paint
or subtle stain? New hardware or polish the original? Every choice pushes the piece closer to your style, and that’s
where it stops being “a flea market dresser” and becomes your dresser.
Mistakes happen, and they’re part of the process. Paint drips. A color looks perfect in the can and questionable on wood.
You sand too much on one edge and accidentally invent a “distressed” look. The good news is that most DIY errors are
fixable: sand, patch, repaint, recoat. Flipping teaches patience and problem-solving in a way that feels low-stakes but
pays off dailybecause you’ll see the results every time you walk into that room.
The most satisfying moment is the “before-and-after whiplash.” When you slide a drawer that used to stick, or when a
lamp you almost passed becomes the warm focal point of a corner, you realize the project gave you more than decor.
It gave you confidence. And once you’ve pulled off a good flip, you’ll never look at “ugly” furniture the same way again.
You’ll see possibility everywhereat flea markets, curb finds, hand-me-downs, even in that weird brass thing (which,
by the way, was a candle snuffer… probably).
Conclusion: Make Your Home a Little More You
Flea market finds are more than bargainsthey’re raw materials for creativity. Whether you start small with a hardware swap
or go big with a dresser-to-sideboard transformation, the formula stays the same: choose good bones, prep carefully,
and finish with intention. The result is a home that feels layered, personal, and impossible to duplicatebecause you built it.


