Table of Contents >> Show >> Hide
- Why Passport Photos Get Rejected So Often
- First Things First: What Happens After a Passport Photo Is Rejected?
- How Long Do You Have to Fix a Rejected Passport Photo?
- How to Fix the Problem Without Getting Rejected Again
- What to Do If Your Online Passport Renewal Photo Is Rejected
- Should You Retake the Photo at Home or Use a Professional Service?
- What Not to Do After a Rejected Passport Photo
- How to Avoid Passport Application Delays From Here On Out
- Final Thoughts: A Rejected Passport Photo Is Annoying, Not Fatal
- Real-World Experiences and Lessons Learned
- SEO Metadata
Few things can ruin your productivity quite like hearing, “Your passport photo is not acceptable.” It is the bureaucratic equivalent of being told your homework is neat, thoughtful, and completely wrong. The good news is that a rejected passport photo usually does not mean your entire travel dream has gone up in smoke. In most cases, it means you need to fix the photo problem quickly, correctly, and without getting creative in the worst possible way.
If your passport photo is rejected, the smartest move is to treat it like a time-sensitive do-over. Do not panic. Do not argue with the photo. Do not submit the same image again and hope the passport gods suddenly become sentimental. Instead, follow the instructions you receive, retake the photo using current U.S. passport photo requirements, and send the replacement on time.
This guide walks through exactly what to do if your passport photo is rejected, why passport photos get denied in the first place, how to avoid another round of rejection, and what to do whether you applied by mail, in person, or through online passport renewal. By the end, you should know how to fix the issue fast and get your passport application moving again.
Why Passport Photos Get Rejected So Often
A rejected passport photo is frustrating, but it is also common. Photo problems are among the biggest reasons passport applications get delayed. That is because the U.S. passport system is strict about identity images, and even small mistakes can trigger a rejection. A photo may look perfectly fine to a normal human with functioning eyeballs and reasonable expectations, yet still fail official review.
The most common reasons include poor lighting, shadows on the face or background, the wrong size, low resolution, glasses, an exaggerated expression, a busy background, digital editing, or an old photo that no longer reflects your current appearance. Sometimes the issue is obvious. Sometimes it is annoyingly tiny, like your head being slightly too small in the frame or your image looking just a little too compressed.
Digital photos can also fail because of file problems. If you are renewing online, your upload may be flagged for image quality, incorrect cropping, unsupported format, or because it looks like a scan of a printed picture. In other words, passport photo rejection is often less about “bad photo” and more about “noncompliant photo.” That distinction matters.
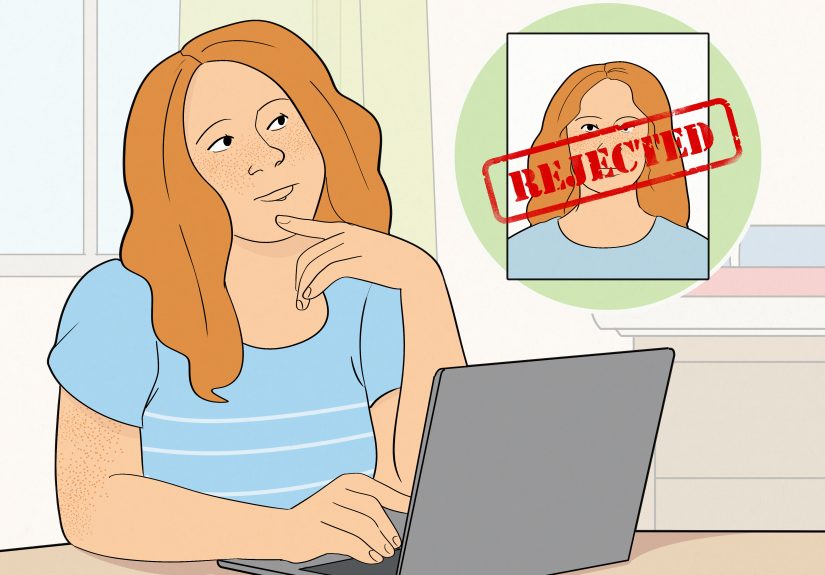
First Things First: What Happens After a Passport Photo Is Rejected?
If your passport photo is rejected, the next step is usually straightforward. The U.S. Department of State will contact you and tell you that your photo cannot be accepted. That contact may come as a letter or, in some cases, an email. The message will tell you that additional information is needed and that you must respond within the deadline provided.
For a photo issue, the practical next step is simple: submit a new passport photo that meets the requirements. If you ignore the notice or miss the deadline, your passport application can stall long enough to become a much bigger headache. So the rule here is not “deal with it later.” The rule is “handle it immediately, before your application starts collecting dust in a federal holding pattern.”
Your Immediate Action Plan
- Read the rejection notice carefully from top to bottom.
- Check the deadline and treat it as non-negotiable.
- Get a brand-new compliant photo taken.
- Include the notice or the required identifying paperwork when sending the replacement.
- Do not send the same questionable photo again.
- Do not write on the front or back of the photo unless the instructions specifically say so.
If the rejection happened during online passport renewal, you may also need to upload a corrected digital passport photo rather than mail in a printed one. Either way, the mission is the same: fix the image, not the application story.
How Long Do You Have to Fix a Rejected Passport Photo?
Timing matters. If the State Department asks you to send a new photo, you generally need to respond within the window stated in the notice. In practice, that means moving quickly instead of letting the letter lounge on your kitchen counter under a coupon flyer and two rubber bands.
A fast response can keep your passport application from sliding into a longer delay. A slow response can turn a simple photo retake into a bigger administrative reset. So if your passport photo is rejected, your next steps should happen now, not “after the weekend,” not “when work calms down,” and definitely not “when Mercury leaves retrograde.”
How to Fix the Problem Without Getting Rejected Again
The best retake is a boring retake. Passport photos are not the place for artistic choices, moody lighting, dramatic angles, beauty filters, or “this one feels more like me.” Official photos are supposed to make you look like yourself on an extremely average day.
Use the Correct Passport Photo Basics
- The photo must be in color.
- It must be recent and reflect your current appearance.
- The photo must be 2 x 2 inches for printed applications.
- Your face must be centered and directly facing the camera.
- Your expression should be neutral, with both eyes open.
- The background must be plain white or off-white.
- No glasses, unless a rare medical exception applies.
- No filters, beauty edits, AI-generated touchups, or retouching.
That is the baseline. Now let us talk about the details that trip people up.
Watch the Lighting Like a Hawk
Lighting is one of the biggest reasons a passport photo gets rejected. Harsh overhead light can throw shadows under your eyes. Side lighting can darken part of your face. Backlighting can wash out your features or make the background look wrong. Even a photo that seems “pretty good” may be rejected if facial details are obscured.
Try soft, even lighting with no strong shadows. Natural light often helps, but only if it is even and not blasting across one side of your face like you are being interrogated in a detective drama.
Do Not Let the Background Get Fancy
A plain white or off-white background is required. Not cream with texture. Not “sort of white if you squint.” Not your apartment wall with framed art just outside the crop line. The background needs to be clean, flat, and free of objects, patterns, and shadows.
If you are taking the photo at home, stand several feet away from the wall so the background stays even. For babies, many parents use a plain white sheet or cover a car seat with one. The goal is for the face to be the only thing doing any visual work.
Size and Position Are Sneakily Important
One of the most irritating passport photo issues is that your photo can be clear, centered, and otherwise respectable, yet still fail because your head is too small or too large in the frame. U.S. passport photo requirements are particular about head size and image proportions.
For a printed passport application, use the exact 2 x 2-inch format. For a digital passport photo used in online renewal, the image must be square and meet the upload standards. Leave a little room around your face so the image can be cropped properly. Do not zoom so far out that you look like a witness in a true-crime reenactment.
Skip the Digital “Improvements”
This one catches more people than you might think. Many travelers assume small edits are harmless. They are not. Smoothing skin, removing red-eye with editing software, changing the background digitally, sharpening the image too aggressively, or using app-based touchups can all cause trouble. A passport photo should not look “enhanced.” It should look accurate.
If you used an app that automatically brightened your face, erased background imperfections, or made your skin look suspiciously airbrushed, retake the photo instead of trying to rescue it. A realistic face beats a polished one every time.
What to Do If Your Online Passport Renewal Photo Is Rejected
If your digital passport photo is rejected during online passport renewal, the solution is usually to upload a new image that actually follows the rules. The online system may catch some basic issues when you submit the file, but that does not guarantee approval. A government employee still reviews the photo later, which means a digital image can pass the tool and still fail human review.
When retaking a digital photo, avoid selfies, screenshots, scans of printed pictures, and heavily compressed files. Make sure the image is sharp, in color, recent, and properly framed. Use the original file from your camera or phone rather than a version that was texted, downloaded from social media, or passed through multiple apps. That is how good images turn into pixelated little tragedies.
Digital Photo Tips That Actually Help
- Use a high-quality original image.
- Do not scan a paper passport photo for online renewal.
- Do not use a selfie taken at arm’s length.
- Keep the file clean and unfiltered.
- Check crop, centering, and background before uploading.
- Use the official government system, not a random third-party site pretending to be official.
Should You Retake the Photo at Home or Use a Professional Service?
Both can work. If you are careful and follow the rules, taking a passport photo at home is absolutely possible. That said, many people decide that after one rejection, they no longer wish to become independent researchers of chin-to-crown measurements. That is fair.
Professional photo services can reduce the risk of another rejection, especially if you are on a deadline. In the United States, travelers commonly use passport acceptance facilities, pharmacies, shipping and print centers, and AAA branches that offer passport photos. These services are useful because staff members typically know the current photo requirements and can spot obvious issues before you walk out the door.
If you choose the home route, do a test round, compare it against official examples, and be brutally honest. If the image is “probably okay,” it may not be okay enough.
What Not to Do After a Rejected Passport Photo
When people are frustrated, they tend to improvise. Improvisation is lovely in jazz and terrible in passport processing. Avoid these mistakes:
- Do not resend the same photo with “slight edits.”
- Do not crop aggressively and hope for the best.
- Do not wear glasses because “they are part of your identity.”
- Do not use a photo that is more than a few months old just because you like your hair in it.
- Do not ignore the notice while planning travel.
- Do not submit through unofficial websites that charge extra and add confusion.
How to Avoid Passport Application Delays From Here On Out
If your passport photo was rejected, your new goal is not merely “send another one.” Your goal is “send one that clears review the first time.” That means slowing down just enough to check every detail. Review official photo examples. Compare your retake to the current requirements. Use a clean background. Check your expression. Confirm the image is recent. Make sure the file or print format matches the type of application you are using.
It also helps to think one step ahead. If you are applying by mail, follow the application instructions carefully when attaching the photo. If you are applying online, upload the original digital image and let the system guide the crop. If you are traveling soon, do not leave the replacement photo for later. A rejected passport photo is manageable; a rejected passport photo plus a looming departure date is an entirely different genre of stress.
Final Thoughts: A Rejected Passport Photo Is Annoying, Not Fatal
If your passport photo is rejected, the next steps are surprisingly manageable: read the notice, meet the deadline, get a new compliant photo, and submit it exactly as instructed. That is the path forward. No drama required.
The real trick is not treating the retake like a casual errand. Treat it like a small but important compliance project. Passport photos are judged by strict standards, not vibes. Once you accept that, the process becomes much easier.
So yes, your passport photo got rejected. That stings. But it is fixable, common, and usually much less serious than it feels in the moment. Take the new photo properly, send it in quickly, and let your passport application get back to doing its job.
Real-World Experiences and Lessons Learned
One of the most common experiences people have after a passport photo rejection is disbelief. They stare at the original image and think, “This looks perfectly normal.” And honestly, that reaction makes sense. Most rejected photos do look normal to the average person. The problem is that passport review is not based on whether a photo feels acceptable. It is based on whether it matches technical rules exactly. That gap between “looks fine” and “is compliant” is where a lot of trouble begins.
A typical example is the home photo that almost works. A traveler stands in front of a light wall, asks a family member to snap a few pictures, chooses the best one, and submits it feeling pretty confident. Later, the rejection notice arrives because there was a faint shadow behind the head, the lighting was uneven, or the face was slightly turned. That kind of experience teaches a hard but useful lesson: “almost correct” is not the same as correct.
Another common experience involves digital files. Someone takes a sharp original photo, but then sends it through a messaging app, downloads it again, crops it in a random editing tool, and uploads the compressed version. By the time the file reaches the application, the image quality has dropped enough to trigger a problem. The person remembers the original photo looking crisp, but the version submitted is softer, noisier, or more pixelated. The lesson there is simple: always upload the clean original file whenever possible.
Parents of infants often have their own special passport-photo war stories. Babies do not care about image compliance, symmetry, or whether both eyes are open at the same time. Many parents end up taking dozens of shots before getting one usable image. A white sheet over a car seat or crib can help, but patience becomes the real equipment. The experience usually ends with parents realizing that a successful baby passport photo feels less like taking a picture and more like winning a tiny, adorable negotiation.
Then there are travelers on deadlines, who tend to learn the sharpest lesson of all. A rejected passport photo is stressful by itself, but it becomes much more stressful when flights, cruises, family events, or work travel are already on the calendar. People in that situation often say the same thing afterward: they wish they had treated the photo like an official document from the start rather than a quick side task. In other words, the photo was the easiest part of the application until it suddenly was not.
There are also positive experiences. Plenty of people recover quickly after a rejection by switching to a professional photo service or by carefully redoing the image at home with official examples open on a second screen. Once they understand the rules, the second attempt often goes smoothly. The biggest takeaway from those stories is encouraging: a rejected passport photo usually does not mean disaster. It usually means one careful retake, one prompt response, and one very clear reminder that government photos are not the place for improvisation.


