Table of Contents >> Show >> Hide
- Why Big Metal Keys Work as Wall Decor
- What You Need Before You Start
- Step 1: Prep the Metal Like You Mean It
- Step 2: Choose the Right Paint Finish
- Step 3: Prime First When the Surface Calls for It
- Step 4: Paint the Keys for a Smooth, Durable Finish
- Step 5: Plan the Layout Before Touching the Wall
- Step 6: Hang Big Metal Keys Securely
- Best Rooms and Styling Ideas for Big Metal Keys
- Common Mistakes to Avoid
- Real Experiences With Painting & Hanging Big Metal Keys On The Wall
- Conclusion
Some wall decor whispers. Big metal keys do not. They clank, gleam, throw shadows, and instantly make a room feel like it has a story to tell. Maybe the story is “mysterious old library,” maybe it is “modern farmhouse with a flair for drama,” or maybe it is simply “I found these giant metal keys and refused to let them live a boring life in a storage bin.” Whatever your design personality, painting and hanging big metal keys on the wall is one of those home decor projects that looks impressive without requiring a degree in architecture or a workshop full of intimidating power tools.
The trick is doing it right. Metal can be moody. If you skip prep, paint may chip, peel, or look uneven. If you hang heavy decor carelessly, your “statement wall” can turn into a “repair the drywall and question your life choices” situation. The good news is that with the right prep, the right paint, and the right hanging method, oversized metal keys can become durable, stylish, and surprisingly versatile wall art.
This guide walks through the full process, from cleaning and painting to placement and secure installation. Whether you want a vintage bronze finish, a matte black modern look, a distressed antique vibe, or something delightfully over-the-top in gold, here is how to make big metal keys look like intentional design instead of random hardware with a superiority complex.
Why Big Metal Keys Work as Wall Decor
Large metal keys have a built-in sense of drama. Their elongated shape naturally draws the eye up or across a wall, which makes them especially effective in narrow spaces, long hallways, over sofas, above console tables, or in awkward blank spots that standard framed art cannot quite handle. They also bring texture to a room. A painted canvas may add color, but metal keys add dimension, sheen, weight, and a little old-world intrigue.
They fit into more design styles than you might think. In farmhouse spaces, they feel rustic and charming. In industrial interiors, they play nicely with brick, wood, and black accents. In traditional rooms, antique finishes make them feel collected and elegant. In eclectic homes, they are the kind of unexpected object that makes guests say, “Okay, that is weird… but in a good way.”
Another bonus is flexibility. You can hang one oversized key as a focal point, pair two or three in a symmetrical grouping, or create a gallery-style arrangement mixed with mirrors, framed prints, or decorative sconces. If the wall feels flat, a few large metal keys can wake it right up without requiring a full room makeover.
What You Need Before You Start
For painting
- Big metal keys
- Mild soap and water or a degreasing cleaner
- Clean cloths or microfiber towels
- Wire brush or sandpaper
- Drop cloth or cardboard
- Metal primer, if needed
- Spray paint or brush-on paint made for metal
- Clear protective topcoat, optional
- Gloves and a dust mask
For hanging
- Tape measure
- Level
- Pencil
- Stud finder
- Appropriate screws, picture hangers, D-rings, or wall anchors
- Drill or screwdriver
Before you buy hardware, weigh each key or check the packaging. Decorative metal keys range from surprisingly light to “this thing probably once guarded a castle.” The hanging method should match the real weight, not your hopeful guess.
Step 1: Prep the Metal Like You Mean It
Prep is the difference between a finish that looks crisp and one that looks like the paint gave up halfway through. Even if the keys look clean, metal often carries dust, oils, residue, or old flaky finish that interferes with adhesion. Wash each piece with mild soap and water or a degreasing cleaner, then dry it thoroughly. Metal and moisture are not the friends you want at this party.
Next, inspect the surface. If there is loose paint, rust, or a rough coating, remove it with sandpaper or a wire brush. You do not have to sand every inch down to shiny bare metal unless the existing finish is failing badly, but you do want a sound, clean surface. Focus especially on ridges, decorative grooves, and edges where old coating loves to hide like a tiny saboteur.
If the key is glossy, lightly scuffing the surface helps primer or paint grab on better. Wipe away all sanding dust before moving on. This is the moment where many DIY projects go wrong. People sand, admire their own dedication, then immediately paint over the dust. Do not be that person.
Step 2: Choose the Right Paint Finish
For most big metal keys, spray paint is the easiest route. It covers ornate shapes more evenly, reaches crevices better than a brush, and usually gives the smoothest finish. Brush-on metal paint works too, especially if you want a hand-painted or distressed look, but it can leave visible brush marks if you rush the job.
Popular finish choices include:
- Matte black: Clean, modern, bold, and easy to style
- Oil-rubbed bronze: Warm, classic, and slightly dramatic
- Antique gold: Vintage, elegant, and eye-catching
- Silver or pewter: Sleek and reflective in contemporary spaces
- Distressed white: Cottage, farmhouse, or shabby chic
- Hammered metal finish: Great for hiding minor surface imperfections
If the keys will hang outdoors or in a humid area, choose paint designed for interior/exterior metal use. If they are going in a bedroom, hallway, or living room, you have more freedom to prioritize appearance. Still, durability matters. Nobody wants beautifully painted keys that start shedding flakes like metallic dandruff.
Step 3: Prime First When the Surface Calls for It
Primer is not always glamorous, but it is often the quiet hero of a good paint job. If your keys are bare metal, lightly rusted, dark in color, or have a tricky slick finish, a metal primer helps paint adhere better and can add corrosion protection. It also improves color payoff, especially when you are covering dark metal with a lighter shade.
If you are using an all-in-one paint-and-primer product rated for metal, you may be able to skip a separate primer coat. Still, read the label instead of trusting the can like it is your best friend from childhood. Product instructions matter, especially for dry times, recoat windows, and surface compatibility.
Apply primer in light, even coats. Let it dry fully before painting. Rushing from primer to paint before the surface is ready is a fantastic way to create wrinkles, tackiness, or the kind of finish that makes you lean your head to one side and mutter, “Something feels off.”
Step 4: Paint the Keys for a Smooth, Durable Finish
Set the keys on a protected surface in a well-ventilated area. If using spray paint, keep the can at the distance recommended on the label and begin spraying slightly off the object before sweeping across it. Release the spray after you pass the edge. That little technique helps prevent blotches and drips at the start and end of each pass.
Use several light coats instead of one heavy coat. Yes, this requires patience. Yes, patience is annoying. But heavy coats are how you get runs, tacky spots, and the classic DIY finish known as “melted candle energy.” Thin, even coats build better color and a smoother surface.
Turn the keys as needed to reach the sides, edges, and decorative cutouts. Let each coat dry according to the product instructions before adding the next. Once the finish looks even, you can stop there or apply a clear topcoat for added durability. A matte clear coat preserves a soft look, while satin or gloss can boost shine and make metallic finishes pop.
If you want an aged or distressed effect, let the base coat dry, then dry-brush a second color lightly over raised details. For example, black with a touch of gold on the edges looks rich and antique. White with rubbed bronze peeking through feels more farmhouse. Silver over charcoal can look industrial and dramatic. This is where the keys start going from “object” to “personality.”
Step 5: Plan the Layout Before Touching the Wall
Do not eyeball the arrangement while holding a drill in one hand and blind optimism in the other. Lay the keys on the floor first and experiment with spacing. If you are hanging more than one, try a few arrangements: straight horizontal, staggered vertical, symmetrical pairings, or a loose cluster mixed with other decor.
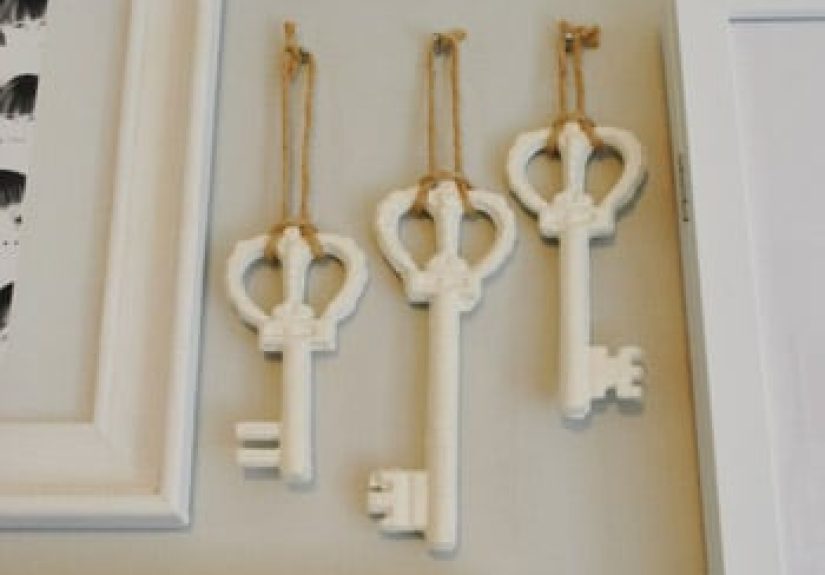
A single oversized key usually works best when centered over a console, bed, mantel, or bench. A trio often looks best when the spacing is consistent and the finish colors relate to each other. If you want the wall to feel curated rather than chaotic, repeat at least one element across the grouping, such as color, finish, size, or orientation.
For placement height, the classic rule is to keep the visual center of wall art around eye level. When hanging above furniture, leave enough space so the arrangement feels connected to the furniture below rather than floating off into the emotional distance.
Step 6: Hang Big Metal Keys Securely
This is the part where style meets physics. If the keys are lightweight and come with built-in hangers, a picture hook or suitable screw may be enough. But if they are heavy, solid metal, or awkwardly shaped, find wall studs whenever possible. Studs provide the most secure support for heavier decor.
If a stud is not available in the exact position you want, use wall anchors rated for the weight of the key. Do not guess, and do not use leftover mystery anchors from a junk drawer unless you know exactly what they are rated for. When hanging multiple keys, distribute the load evenly. Sometimes using two mounting points on one piece prevents tilting and keeps the object closer to the wall.
Steps for hanging:
- Measure the key and mark the desired placement.
- Use a level so the final result does not lean like it had a rough week.
- Locate studs with a stud finder if the key is heavy.
- Install screws, hooks, or anchors based on the key’s hanging hardware and weight.
- Lift the key into place and test for wobble or shifting.
If the key is especially large or antique, consider adding D-rings and picture wire on the back, or even a cleat-style hanging system for extra stability. The goal is not merely to get it on the wall. The goal is to keep it there without drama.
Best Rooms and Styling Ideas for Big Metal Keys
Entryway
Big metal keys in an entryway feel instantly symbolic. They nod to home, welcome, and a slightly theatrical sense of arrival. Hang one above a bench or console table with a mirror and a small tray for everyday essentials.
Living room
Use a single oversized key as a conversation piece above a sofa, or create a trio on a long wall that needs height and texture. Dark matte finishes work especially well against light paint colors.
Bedroom
Antique gold or distressed finishes can soften the look of metal and add romantic charm above a dresser or headboard. Pair them with soft textiles to balance the hard surface.
Dining room
If your dining room needs one surprising element, large metal keys can be a playful alternative to traditional framed art. They work well with candlelight, wood tones, and statement lighting.
Hallway or stairwell
Long keys naturally complement narrow walls and vertical transitions. A staggered arrangement can add movement to otherwise forgettable space.
Common Mistakes to Avoid
- Painting over dirt, grease, or rust without proper prep
- Using thick coats that drip or stay tacky
- Skipping primer on bare or difficult metal surfaces
- Choosing hardware without checking weight ratings
- Hanging heavy pieces on drywall alone without studs or suitable anchors
- Placing the arrangement too high on the wall
- Ignoring scale and hanging tiny decor around a giant statement piece
In other words, let the keys be dramatic. Your installation process should not be.
Real Experiences With Painting & Hanging Big Metal Keys On The Wall
One of the most interesting things about this project is how often people start with uncertainty and end with a wall they absolutely love. Big metal keys can look a little odd when they are lying flat on a worktable. They may appear too dark, too rusty, too old-fashioned, or too random. Then the cleaning happens, the finish goes on, the hardware gets installed, and suddenly the keys look intentional. That transformation is part of the fun.
A common experience is discovering that color changes everything. A set of metal keys that looked dated in their original brownish finish can look crisp and modern in matte black. The same keys can become warm and elegant in brushed gold. Many DIY decorators say they were surprised by how much the new finish changed not only the object itself, but also the mood of the room around it. The keys stopped looking like thrift-store curiosities and started looking like custom wall art.
Another frequent lesson is that surface prep matters more than people expect. At first, it is tempting to skip straight to the fun part and start spraying paint. But once someone has dealt with peeling paint or visible rough spots, they usually become true believers in cleaning, sanding, and priming. Even a ten-minute prep session can make the final finish look smoother, more expensive, and far more durable. It is not glamorous work, but it pays off every single time.
Placement is another area where experience teaches patience. Some homeowners assume a giant key should go exactly in the middle of a wall, only to realize later that it looks better centered over furniture or grouped with another object. Laying pieces on the floor first or taping out the arrangement on the wall can save a lot of unnecessary holes and frustration. What seems like overthinking at the beginning often becomes the reason the finished display feels balanced and polished.
There is also the practical lesson of weight. Decorative metal can be heavier than it looks, especially if the piece is solid rather than hollow. Plenty of people have had the humbling experience of holding a “simple wall accent” and realizing it has the energy of a small anchor. That is why choosing the right hanging method becomes part of the success story. Once the key is properly secured, it feels substantial in a good way. It does not rattle, lean, or threaten to become an emergency.
Perhaps the best part of the experience is how personal the project becomes. Some people choose large metal keys because they love vintage decor. Others use them symbolically, as a nod to home, memory, new beginnings, or even a specific family story. A decorative key above an entry table can feel welcoming. A trio in a hallway can add a collected, traveled look. A single dramatic key in a living room can say, without using any actual words, “Yes, this house has character. Also, I make bold decisions.”
That is why this project keeps showing up in stylish homes. It combines creativity, practicality, and just enough personality to feel memorable. And once the keys are painted and hung correctly, they do more than fill blank wall space. They give the room a point of view.
Conclusion
Painting and hanging big metal keys on the wall is a smart way to turn blank space into a design moment with texture, character, and a little flair. The project works best when you focus on three basics: prep the metal thoroughly, use paint products suited for metal surfaces, and hang the finished pieces with hardware that matches their real weight. Do that, and even a simple decorative key can look polished, secure, and fully at home in your space.
Whether your style leans farmhouse, industrial, vintage, eclectic, or somewhere between “tasteful” and “I enjoy dramatic wall objects,” big metal keys can absolutely work. Choose a finish that suits the room, test your layout before making holes, and give the installation the respect it deserves. The result is wall decor that feels creative, substantial, and a lot more interesting than another forgettable print.


