Table of Contents >> Show >> Hide
- What a Fascia Board Actually Does
- Choosing the Right Replacement Material
- How to Replace a Fascia Board: 11 Steps
- Step 1: Confirm the Damage and Scope the Job
- Step 2: Decide Whether This Is Really a DIY-Level Project
- Step 3: Check Codes, Materials, and Matching Details
- Step 4: Prepare the Area for Safe Removal
- Step 5: Remove the Gutter Sections Blocking Access
- Step 6: Remove the Old Fascia and Check the Drip Edge
- Step 7: Inspect the Rafter Tails and Sub-Fascia
- Step 8: Measure, Cut, and Dry-Fit the Replacement Board
- Step 9: Install the New Fascia Board Properly
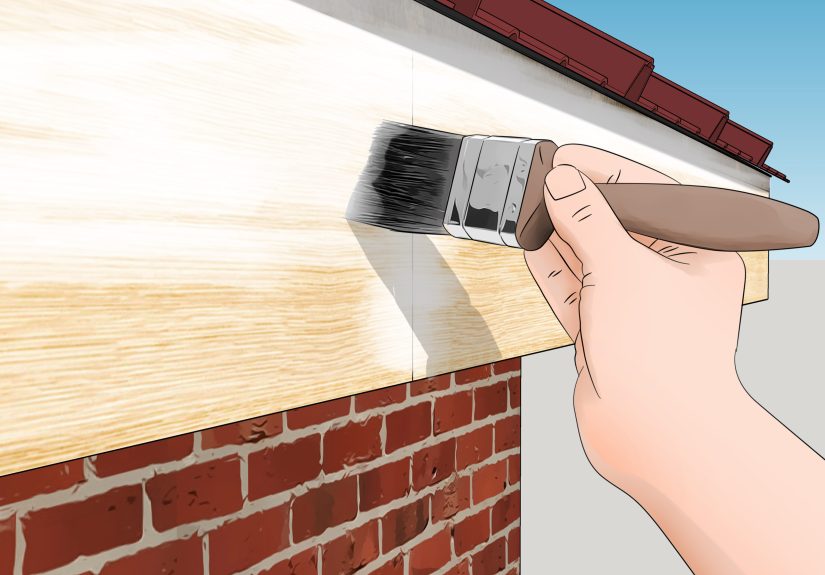
- Step 10: Seal, Prime, and Protect the New Work
- Step 11: Reinstall the Drip Edge, Gutters, and Final Details
- Common Reasons Fascia Repairs Fail Early
- Experience Notes: What Homeowners Usually Learn the Hard Way
- Conclusion
- SEO Tags
Replacing a fascia board sounds like one of those weekend projects that starts with confidence and ends with you standing in the driveway wondering why a “simple trim board” seems to control your gutters, your roof edge, your curb appeal, and apparently your emotional stability. That is because fascia is not just decorative trim. It helps support the gutter line, covers the ends of the rafters, and works with the drip edge and soffit to keep water where it belongs: away from your house instead of sneaking into it like an uninvited raccoon.
If your fascia is peeling, soft, warped, cracked, or making your gutters sag like they have given up on life, replacement may be the smartest move. Still, this is not the kind of repair to treat like casual arts and crafts with a ladder. Roof-edge work involves heights, overhead debris, cutting tools, and the possibility that damage goes deeper than one board. So, think of this guide as a practical, homeowner-friendly overview of how the job is typically approached by a qualified adult or contractor, what to watch for, and how to make smart decisions along the way.
Below, we break the process into 11 clear steps, along with material choices, common problems, and real-world experience notes that can save time, money, and a whole lot of muttering under your breath.
What a Fascia Board Actually Does
A fascia board runs along the roof edge at the eaves. On most homes, it creates a clean finished line, hides the ends of the rafters, and gives the gutter system a solid surface for attachment. In plain English, it is the board that helps your roof edge look neat while quietly dealing with rainwater, wind, and years of temperature swings.
When fascia fails, it rarely does so in a dramatic movie scene. Usually, it starts with small clues: peeling paint, hairline cracks, dark staining, soft wood, loose gutter spikes, or a gutter run that looks slightly droopy. Ignore those early signs, and the problem can spread to the soffit, rafter tails, roof decking, or even interior areas affected by moisture. That is why fascia replacement is often less about cosmetics and more about stopping a water problem before it becomes a budget problem.
Choosing the Right Replacement Material
Before anyone touches the old board, it helps to know what the replacement might be made of. Pressure-treated wood is a common choice because it is familiar, widely available, and easy to paint. Standard appearance-grade wood can also work, but it needs solid weatherproofing and more maintenance over time.
PVC fascia is popular when homeowners want lower maintenance and better resistance to insects and decay. Fiber cement is another durable option, especially when you want a paintable product that handles weather well. Some homes use engineered trim products, while others have aluminum- or vinyl-wrapped fascia covers over a wood backing. The best choice depends on the home’s style, local climate, the condition of the sub-fascia or rafter ends, and whether the gutter system will be reused or replaced at the same time.
The key idea is simple: the visible fascia material may be trim, but the structure behind it still matters. If the support underneath is damaged, replacing only the finished face is like putting a fresh bandage on a broken umbrella and expecting it to handle a thunderstorm.
How to Replace a Fascia Board: 11 Steps
Step 1: Confirm the Damage and Scope the Job
The first step is figuring out whether the problem is limited to one short section or part of a bigger roof-edge issue. A fascia board can look bad in one spot but hide more damage nearby. A smart inspection looks for rot, movement, cracked caulk, failed paint, loose gutters, stained soffit panels, and any sign that water has been slipping behind the drip edge instead of into the gutter.
This matters because a small replacement is very different from a full run replacement. One corner near a garage may be manageable as a contained repair, while a long roofline with multiple soft spots often points to drainage or flashing problems that should be fixed at the same time.
Step 2: Decide Whether This Is Really a DIY-Level Project
This is the reality-check step. If the house is multi-story, the gutters are heavy, the damage extends beyond the fascia, or the roof edge feels unstable, this is professional territory. No shame in that. In fact, the smartest repair decision is often knowing when not to turn a risky exterior project into a personal action scene.
A good rule of thumb is this: when the repair involves heights, rot, overhead work, structural wood, or uncertain flashing details, a licensed roofer, carpenter, or exterior contractor is usually the better call.
Step 3: Check Codes, Materials, and Matching Details
Before replacement starts, confirm any local code requirements for exterior trim, flashing, fasteners, and gutter attachment. Matching the board size and profile also matters more than many homeowners expect. If the new fascia is too thick, too thin, too narrow, or slightly off in profile, the roof edge can end up looking uneven, and the gutter system may not sit correctly.
This is also the time to plan whether the repair will keep the existing gutters and drip edge or replace those parts too. Trying to reuse damaged pieces just because they are “still kind of there” is one of those decisions that feels thrifty for about three weeks.
Step 4: Prepare the Area for Safe Removal
Once the scope is known, the work area needs to be made safe and organized. That means clearing the ground below, choosing a dry weather window, and making sure the ladder setup and surrounding area are stable. It also means working with a helper whenever long gutter sections or trim pieces are involved.
Preparation may sound boring, but this is the step that prevents extra damage. Gutters can bend, soffit panels can crack, and roof-edge trim can get dinged fast when the removal stage is rushed.
Step 5: Remove the Gutter Sections Blocking Access
Because gutters are typically attached to the fascia, they usually have to come off before the old board can be removed. This step is often where homeowners discover that the fascia has been acting as a hero under difficult circumstances for years. Once the gutter is down, stains, soft wood, enlarged fastener holes, or hidden rot become much easier to spot.
If the gutter is still in good shape, it can often be reinstalled later. If it is bent, leaking, poorly pitched, or pulling away from the house, that is a clue the fascia repair should include gutter corrections too.
Step 6: Remove the Old Fascia and Check the Drip Edge
After the gutter sections are out of the way, the damaged fascia can be removed carefully. The goal is not just to get the old board off. The real goal is to remove it without damaging the surrounding roof edge, soffit, or rafters.
This is also the moment to inspect the drip edge. If the drip edge is bent, short, loose, or installed in a way that lets water run behind the gutter, the new fascia will be starting life in a bad relationship with rainwater. Any fascia replacement that ignores drip-edge performance is basically scheduling a sequel.
Step 7: Inspect the Rafter Tails and Sub-Fascia
With the old board removed, the framing behind it needs a serious look. If the rafter tails or sub-fascia are solid, great. If they are cracked, soft, split, or water-damaged, that problem must be addressed before the new finish board goes on.
This is one of the biggest turning points in the whole project. A new fascia installed over compromised backing may look fine on day one, but it will not stay fine. Gutters need a dependable anchor, and roof edges need sound wood behind the visible trim.
Step 8: Measure, Cut, and Dry-Fit the Replacement Board
Only after the support is sound does it make sense to prepare the replacement piece. Accuracy matters here. A fascia board should fit cleanly, align with adjoining sections, and meet corners neatly. Long runs, outside corners, and visible seams deserve extra attention because this is where sloppy work shouts the loudest.
Dry-fitting before final installation helps catch profile issues, reveals whether the board sits flat, and shows whether any small adjustments are needed. Think of it as the home-improvement version of trying on formal shoes before the wedding instead of during the ceremony.
Step 9: Install the New Fascia Board Properly
Once the board fits correctly, it can be fastened in place using exterior-appropriate, corrosion-resistant hardware suited to the material. The important thing is that the new fascia sits straight, lies flat, and ties cleanly into the rest of the roof edge.
If the selected product is decorative trim rather than structural wood, it still needs proper support behind it. In other words, pretty does not mean load-bearing. The support system matters every bit as much as the finished surface.
Step 10: Seal, Prime, and Protect the New Work
After installation, joints, cut ends, and exposed vulnerable areas should be sealed and finished according to the product’s requirements. For paintable fascia, this usually means using paintable exterior caulk where appropriate and finishing the surface with exterior-grade primer and paint or a compatible all-in-one coating.
This step is where longevity gets built in. Fresh fascia that is not protected properly is like buying a raincoat and refusing to zip it. Water only needs a small opening and a little patience.
Step 11: Reinstall the Drip Edge, Gutters, and Final Details
The final step is putting the roof edge back together as a system. That means making sure the drip edge directs water where it should go, the gutter aligns correctly, and any reused or new gutter hardware is secure. A final visual check should confirm that water will be carried off the roof and away from the house instead of sneaking behind the fascia again.
At this point, the repair should not only look clean from the driveway, but also function correctly in the next hard rain. That is the real test. Curb appeal is nice. Dry wood is nicer.
Common Reasons Fascia Repairs Fail Early
Most early failures come down to one of four problems: hidden rot was missed, the drip edge still directs water badly, the gutters were reinstalled incorrectly, or the new fascia was not sealed and finished well. Sometimes the wrong material is used for the climate or the exposure level. Other times, a decorative wrap gets installed over damaged wood underneath, which looks tidy right up until it does not.
The best fascia repairs are system repairs. They do not just swap one board for another. They solve the moisture path, correct the edge details, and leave the roof line better than it was before.
Experience Notes: What Homeowners Usually Learn the Hard Way
There is a big difference between reading about fascia replacement and living through it. In real projects, the first surprise is almost always that the visible damage is not the full story. A board that looks mildly rough from the lawn can turn out to be soft enough to crumble once the gutter comes off. That does not mean every fascia repair becomes a major construction event, but it does mean optimism should travel with a flashlight and realistic expectations.
Another common lesson is that gutters tell on fascia. If the gutter line is sagging, overflowing, or separating from the house, the fascia behind it may have been under stress for a long time. Homeowners often focus on the board because it is the obvious damaged piece, but the smarter move is to look at the whole edge assembly. Was the gutter pitched well? Was the drip edge actually guiding water into it? Were leaves allowed to pile up until water sat against the fascia every time it rained? Those answers usually explain why the board failed in the first place.
Material choice is another area where experience changes people fast. Many homeowners begin by wanting the cheapest board that “looks close enough.” Then they learn that low upfront cost and low long-term hassle are not always the same thing. In a damp climate or a shady area that stays wet, spending more for a lower-maintenance fascia material can be a very sensible move. On the other hand, if the house has historic details and visible trim profiles, matching the original look may matter just as much as the maintenance plan. Good repairs respect both function and appearance.
One more real-world truth: clean finish work matters more than people think. Straight lines, tight corners, smooth joints, and a well-painted surface make the whole roof edge look intentional. A slightly crooked board or sloppy seam can make even a structurally sound repair look unfinished. Fascia is one of those parts of a house that people do not notice when it looks right, but they absolutely notice when it looks wrong.
Finally, almost everyone who has dealt with fascia damage comes away with a new respect for maintenance. Cleaning gutters, checking caulk, watching for peeling paint, and inspecting the roof edge after storms may not be thrilling hobbies, but they are cheaper than emergency repairs. Fascia does not ask for much. It just wants sensible drainage, occasional attention, and a little protection from the weather. Frankly, that is more emotionally stable than most home components.
Conclusion
Replacing a fascia board is not just about swapping old trim for new trim. It is about restoring the roof edge so water flows correctly, gutters stay secure, and hidden wood remains protected. The smartest approach is to start with the cause of the damage, choose the right material, inspect everything behind the board, and treat the drip edge and gutter system as part of the same repair.
When done thoughtfully, fascia replacement improves both appearance and performance. When rushed, it becomes one of those repairs that returns right when you thought you were finished. So whether you are planning a small repair or evaluating a larger roof-edge problem, focus on the full system, not just the face board. That is how you get a cleaner roofline, fewer surprises, and a house that keeps rain in its lane.


