Table of Contents >> Show >> Hide
- Before You Start: Know What Kind of Radiator You Have
- How to Remove a Radiator for Decorating: 15 Steps
- Step 1: Turn off the heating system
- Step 2: Protect the floor and wall area
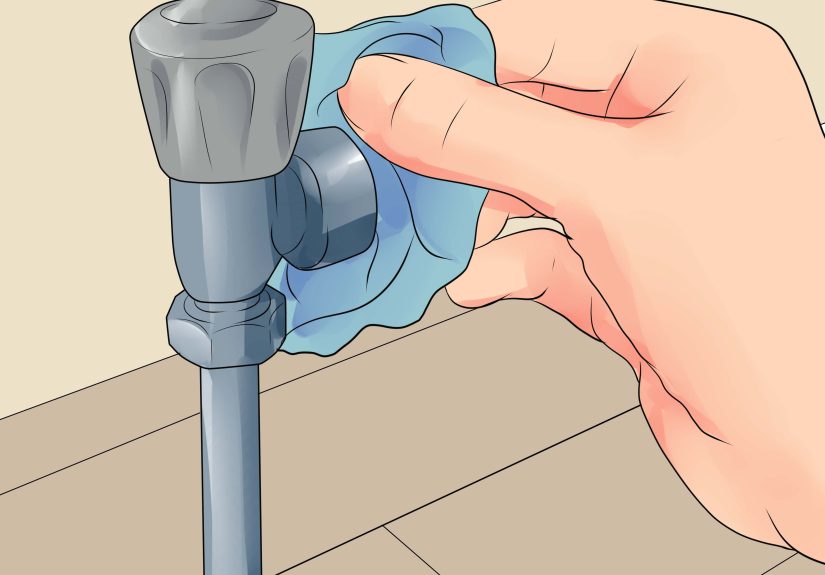
- Step 3: Close the thermostatic or manual valve
- Step 4: Close the lockshield valve and count the turns
- Step 5: Open the bleed valve to release pressure
- Step 6: Loosen the first union nut carefully
- Step 7: Open the bleed valve again to help the radiator drain
- Step 8: Loosen the second valve connection
- Step 9: Cap or cover the radiator openings
- Step 10: Lift the radiator off its brackets
- Step 11: Remove brackets only if necessary
- Step 12: Clean and prepare the wall behind the radiator
- Step 13: Paint, wallpaper, or decorate the exposed area
- Step 14: Rehang and reconnect the radiator
- Step 15: Reopen valves, bleed the radiator, and check for leaks
- Important Safety Notes for Older Homes
- Common Mistakes to Avoid
- Should You Remove the Radiator or Paint Behind It?
- Experiences and Practical Lessons from Removing a Radiator for Decorating
- Conclusion
Removing a radiator for decorating sounds like the kind of job that begins with confidence and ends with a bucket, three towels, and a new respect for plumbers. The good news? If you have a typical hot-water radiator with valves on both sides, you may be able to remove it temporarily, paint or wallpaper behind it, and reinstall it without draining the entire heating system. The even better news? You do not need to turn your living room into a tiny indoor swimming pool.
This guide walks you through how to remove a radiator for decorating in 15 clear steps, including how to shut off the radiator, drain it, lift it safely, decorate behind it, refit it, bleed air from the system, and check for leaks. It is written for homeowners who want a clean wall finish behind a radiator rather than that awkward unpainted rectangle that whispers, “Someone gave up here.”
Before you grab a wrench, a friendly warning: radiator systems vary. Hot-water, steam, electric, cast-iron, panel, baseboard, and apartment-building systems all behave differently. If your radiator is steam-heated, connected to old brittle pipes, part of a shared building system, leaking already, or surrounded by old paint that may contain lead, call a licensed professional. Decorating is fun. Accidentally draining a building riser is not.
Before You Start: Know What Kind of Radiator You Have
The safest approach begins with identification. A hot-water radiator usually has two pipe connections, one for supply and one for return, and may include a thermostatic radiator valve, a manual valve, and a lockshield valve. A steam radiator may have one large pipe, an air vent, and a valve that is designed to be fully open or fully closed rather than used like a faucet. Electric radiators should not be disconnected casually; they involve wiring, circuits, and manufacturer-specific installation rules.
This article focuses mainly on temporarily removing a hot-water radiator for painting, wallpapering, plaster repair, or cleaning behind it. If your setup looks different, treat these steps as general education rather than a command from the DIY heavens.
Tools and supplies you will need
- Adjustable wrench or spanner
- Water pump pliers or locking pliers
- Radiator bleed key or flat-head screwdriver
- Bucket, shallow tray, or bowl
- Old towels and plastic sheeting
- Painter’s tape and drop cloths
- Small container for screws or valve caps
- PTFE plumber’s tape or suitable jointing compound, if needed
- Helper for lifting heavy radiators
- Primer, paint, brush, roller, or wallpaper tools for decorating
How to Remove a Radiator for Decorating: 15 Steps
Step 1: Turn off the heating system
Start by turning off your thermostat and heating system. Let the radiator cool completely before touching valves or pipework. Hot water and hot metal can burn skin quickly, and steam systems can be especially dangerous. A cold radiator is a cooperative radiator. A hot one is basically a cast-iron waffle iron with plumbing.
Wait long enough for the water inside the radiator to cool. If you are working in winter, plan the job for a mild day or a time when the room can be without heat for several hours.
Step 2: Protect the floor and wall area
Lay down plastic sheeting, then add old towels around both radiator valves. Place a shallow container under the valve you plan to loosen first. Even when you isolate a radiator properly, some water will come out. Radiator water may be dark, rusty, or slightly sludgy, so do not trust your favorite rug to “probably be fine.”
Move furniture away from the wall, remove nearby decor, and create enough room to lift the radiator straight off its brackets. Good prep prevents panic.
Step 3: Close the thermostatic or manual valve
At one end of the radiator, you will usually find a valve used to control heat. If it is a thermostatic radiator valve, turn it down to the lowest setting or the frost symbol. If it is a manual valve, turn it clockwise until fully closed. Do not force it if it resists; old valves can snap, leak, or become dramatic at the worst possible moment.
Step 4: Close the lockshield valve and count the turns
The lockshield valve is usually on the opposite side and may have a plain plastic cap. Remove the cap, then turn the spindle clockwise with pliers or a small wrench. Count the number of turns required to close it. Write that number down.
Why count? The lockshield valve helps balance water flow through the heating system. When you reinstall the radiator, opening it the same number of turns helps restore the previous setting. It is a tiny detail that prevents the house from developing one tropical room and one room that feels like a grocery-store freezer aisle.
Step 5: Open the bleed valve to release pressure
Use a radiator bleed key or screwdriver to open the bleed valve at the top of the radiator slightly. You may hear a hiss as pressure releases. Keep a cloth nearby in case droplets appear. Once the hiss stops, close the bleed valve again for the moment.
This helps reduce pressure before you loosen the valve connection. Do not remove the bleed valve completely.
Step 6: Loosen the first union nut carefully
Place your bucket or tray under the first valve connection. Use one wrench to hold the valve body steady and another to loosen the union nut that connects the valve to the radiator tail. Turn slowly. The goal is controlled drainage, not a surprise fountain.
Once water begins to drip, pause and let it drain into the container. If the water flows too quickly, tighten the nut slightly and adjust your bucket position. Keep towels pressed around the joint to catch splashes.
Step 7: Open the bleed valve again to help the radiator drain
After the lower connection is loosened and water is draining, open the bleed valve at the top again. This lets air enter the radiator, allowing water to flow out more smoothly. Without air entering, the radiator can drain slowly, like a stubborn bottle of ketchup.
Empty the bucket as needed. Radiators can hold more water than expected, especially larger panel or cast-iron models.
Step 8: Loosen the second valve connection
When the first side has drained, move your container and towels to the second valve. Hold the valve steady and loosen the second union nut. Work slowly and keep the radiator supported. A small amount of leftover water may still escape.
If either valve continues to release water from the system after being closed, stop and retighten the connection. A passing valve may not be shutting off properly, and that is a job for a plumber.
Step 9: Cap or cover the radiator openings
Once both sides are disconnected, cover the radiator tails with plastic bags, tape, or suitable temporary caps to keep dirty water from dripping while you move it. Do the same for valve ends if needed, but do not damage threads or sealing surfaces.
This small step saves walls, floors, and your socks from mystery drips.
Step 10: Lift the radiator off its brackets
Radiators can be deceptively heavy. Cast-iron radiators are especially serious objects; they do not “sort of” weigh a lot, they weigh a lot. Use a helper, bend your knees, keep the load close to your body, and lift straight up off the wall brackets.
Carry the radiator upright and set it on towels or cardboard, preferably against a stable wall. Do not lay it on a finished floor without protection. If the radiator is too heavy or awkward, stop and get help. Pride is not a lifting technique.
Step 11: Remove brackets only if necessary
If you need to paint or wallpaper cleanly behind the entire radiator area, you may want to remove the wall brackets. Before doing so, mark their positions with painter’s tape or a pencil line. Take a photo with your phone so you know exactly where each bracket belongs.
Store screws and wall plugs in a labeled container. If the wall is crumbly, cracked, or damaged, repair it before reinstalling the brackets.
Step 12: Clean and prepare the wall behind the radiator
The wall behind a radiator often collects dust, heat marks, cobwebs, and the kind of grime nobody wants to discuss at dinner. Vacuum first, then wipe the surface with a mild cleaning solution. Let the wall dry completely.
Fill holes, sand rough patches, and prime stained or repaired areas. Proper surface preparation helps paint adhere evenly and prevents the finished wall from looking like it was decorated during a power outage.
Step 13: Paint, wallpaper, or decorate the exposed area
Now you have the access you wanted. Apply painter’s tape where needed, protect trim, and decorate behind the radiator as you would any other wall. If painting, use primer where necessary and apply thin, even coats. Allow the finish to dry according to the paint or wallpaper manufacturer’s instructions.
Do not rush this stage. Turning heat back on too soon can cause fresh paint to cure unevenly, soften wallpaper adhesive, or create visible texture problems. Let the wall dry properly before reinstalling the radiator.
Step 14: Rehang and reconnect the radiator
Once the decorating work is dry, reinstall any brackets and lift the radiator back into place. Make sure it sits securely and evenly on the brackets. Reconnect both valve unions by hand first to avoid cross-threading, then tighten with a wrench while holding each valve steady.
Do not overtighten. Tight enough to seal is the goal; “I am proving my strength to the plumbing gods” is not.
Step 15: Reopen valves, bleed the radiator, and check for leaks
Open the manual or thermostatic valve. Then reopen the lockshield valve by the same number of turns you counted earlier. Open the bleed valve until air escapes. When a steady trickle of water appears, close the bleed valve.
Check both valve connections carefully with a dry tissue or paper towel. A tissue reveals tiny leaks faster than fingers do. Turn the heating system back on and inspect again as the radiator warms. If your boiler pressure has dropped, follow the manufacturer’s instructions for repressurizing or contact a professional.
Important Safety Notes for Older Homes
If your home was built before 1978, paint around the radiator or wall may contain lead. Avoid sanding, scraping, or disturbing old paint until you know what you are dealing with. Lead dust is a serious hazard, especially for children and pregnant people. When in doubt, use lead-safe practices or hire a certified professional.
Steam radiators also deserve extra caution. A one-pipe steam radiator is not removed the same way as a typical hot-water radiator. Steam valves, unions, vents, and pitched pipework must be handled correctly or the system may leak, bang, hiss, or heat unevenly later. If the radiator is large, antique, painted many times, or connected to stiff old pipework, professional help is money well spent.
Apartment and condo residents should also check building rules before touching radiators. In many multi-unit buildings, radiators are part of a shared heating system. Closing or disconnecting the wrong component can affect neighbors, maintenance staff, and your security deposit’s emotional well-being.
Common Mistakes to Avoid
Removing the radiator while it is hot
Always let the system cool. Hot water, steam, and hot metal can cause burns. Decorating can wait; skin is harder to repaint.
Forgetting to close both valves
Closing only one valve may still allow water to enter from the other side. Close both the control valve and the lockshield valve before loosening any connection.
Not counting lockshield turns
The lockshield setting affects radiator balance. Count the turns when closing it so you can restore the same flow later.
Using too much force on old fittings
Old valves and pipes may be fragile. Support the valve body with a second wrench and stop if anything twists, cracks, or feels wrong.
Turning the heating on before paint has dried
Heat can make fresh paint dry too quickly or unevenly. Give the decorated wall time to cure before warming the radiator.
Should You Remove the Radiator or Paint Behind It?
Removing a radiator gives the cleanest result. You can repair the wall properly, paint edge to edge, apply wallpaper neatly, and clean years of hidden dust. If you are doing a full room makeover, this is often worth the effort.
However, removal is not always necessary. If the radiator sits far enough from the wall, you may be able to use a long-handled mini roller, radiator brush, or angled sash brush. For a quick refresh in a rental or a low-visibility area, painting around the radiator may be perfectly reasonable.
Choose removal when the wall behind the radiator is visible, damaged, stained, or being wallpapered. Choose the no-removal method when the radiator is extremely heavy, the plumbing looks old, the valves are questionable, or the area will barely be seen.
Experiences and Practical Lessons from Removing a Radiator for Decorating
The first real lesson of radiator removal is that the job is less about strength and more about patience. Many DIY projects reward speed, but this one rewards calm hands, good towels, and the humility to stop when something does not feel right. The difference between a smooth radiator removal and a messy one often comes down to ten quiet minutes spent preparing the room.
In practice, the most useful trick is setting up the drainage area before touching any nut. Put the bucket exactly where water will fall, then place towels in a wide zone around it. Radiator water has a special talent for missing containers by half an inch. A shallow tray can work better than a tall bucket because it fits under low valve connections. Keep an extra towel in your non-dominant hand while loosening the union nut. That towel becomes your emergency brake.
Another experience-based tip is to take photos before every stage. Photograph each valve, bracket, pipe angle, and wall fixing before removal. When it is time to reinstall the radiator, those photos answer questions your future self will absolutely forget. Was the bracket lip facing upward? Was the lockshield cap on the left? Did the radiator lean slightly? Your phone remembers. Your brain, covered in paint dust and optimism, may not.
Weight is also easy to underestimate. A radiator may look manageable while attached to the wall, but once disconnected it becomes an awkward metal suitcase full of stubborn droplets. Even a modest panel radiator can be uncomfortable to carry alone, and cast-iron units can require multiple people. Plan the route before lifting. Move chairs, rugs, toys, pets, and anything else that might become part of a slapstick routine.
When decorating behind the radiator, resist the urge to do a quick “hidden wall” job. The area may be partly covered later, but it still affects the room’s overall finish. Dust thoroughly, repair cracks, prime patches, and paint with the same care you give the visible walls. A freshly decorated wall behind a cleanly reinstalled radiator gives the whole room a more professional look. It is the home-improvement version of wearing matching socks: not everyone sees it, but you know.
Reinstallation teaches another lesson: leaks are not always dramatic. Sometimes they appear as a single bead of water on the underside of a fitting. After tightening the valves and refilling the radiator, wipe every joint dry and check with tissue. Look again after ten minutes, again when the radiator warms, and again later in the day. Tiny leaks are easier to fix before they stain the floor or swell the trim.
Finally, know when the project has crossed the line from DIY to professional work. If a valve will not close, if the union nut is seized, if pipework moves when you turn the wrench, if the radiator is part of a steam system, or if you suspect lead paint, calling a pro is not defeat. It is smart project management. The goal is not to prove you can wrestle plumbing into submission. The goal is a beautifully decorated room, a working radiator, and a floor that remains dry enough to brag about.
Conclusion
Learning how to remove a radiator for decorating is a practical skill that can dramatically improve the finish of a room. With the radiator out of the way, you can clean properly, repair damaged plaster, paint cleanly, hang wallpaper neatly, and eliminate the dusty shadow that radiators often leave behind.
The safest method is simple in theory: turn off the heating, isolate both valves, drain the radiator carefully, disconnect it slowly, lift it safely, decorate the wall, reconnect everything, bleed the radiator, and inspect for leaks. The details matter, but none of them require chaos.
If your radiator is hot-water and in good condition, this can be a manageable DIY project. If it is steam, electric, extremely heavy, old, leaking, painted with possible lead-based paint, or part of a shared building system, bring in a qualified professional. A good decorator knows when to use a brush, when to use a wrench, and when to use a phone.


