Table of Contents >> Show >> Hide
- What You Need Before You Start
- Best Nintendo DS Emulator Options for PC and Mac
- How to Install a Nintendo DS Emulator on a Windows PC
- How to Install a Nintendo DS Emulator on a Mac
- First-Time Setup Tips That Make a Big Difference
- Common Problems and How to Fix Them
- Real-World Experiences Installing a Nintendo DS Emulator on PC or Mac
- Final Thoughts
- SEO Tags
If you have been feeling nostalgic for the golden age of dual screens, tiny cartridges, and stylus-based chaos, good news: installing a Nintendo DS emulator on a PC or Mac is much easier than it used to be. You no longer need to wander through sketchy forums that look like they were built during the MySpace era. Today, there are several reliable emulator options, and the setup process is usually straightforward if you stick to trusted sources and keep your expectations realistic.
The short version is this: if you want the simplest all-around choice, melonDS is usually the best place to start. If you like a polished multi-system launcher, RetroArch is a strong option on both Windows and macOS. If you are on a Mac and want something especially beginner-friendly, OpenEmu is still one of the cleanest interfaces around. And if you are on Windows and enjoy older-school emulator tools, DeSmuME is still part of the conversation.
This guide walks you through how to install a Nintendo DS emulator on both PC and Mac, how to configure it without losing your sanity, and how to avoid the classic mistakes people make on day one. That means no vague “just download the ROM and go” advice, because that is exactly how people end up with malware, missing cores, broken saves, or a keyboard layout that makes Mario feel like he is skating on banana peels.
What You Need Before You Start
Before installing anything, gather the basics. First, use a trusted emulator source, preferably the project’s official website, GitHub release page, or official documentation. Second, have a legal backup of a game you own or homebrew software you are allowed to run. Third, decide whether you want a simple standalone emulator or a front-end that manages multiple systems.
You should also know one legal boundary that people love to blur. Emulation software itself is one thing, but downloading pirated game files is another. So keep your setup clean: install the emulator, use legal game files, and skip anything that looks like a “10,000 games included” miracle package. That is not a convenience bundle. That is a neon warning sign wearing sunglasses.
Best Nintendo DS Emulator Options for PC and Mac
1. melonDS
For many users, melonDS is the best Nintendo DS emulator for PC and Mac right now. It is fast, actively maintained, accurate, and friendly enough for beginners without feeling stripped down. It supports standard Nintendo DS gameplay well, and current versions have made Mac installation much more practical than it once was.
Another reason people like melonDS is that it does not feel bloated. The interface is simple, the performance is generally strong on modern hardware, and setup is easier than the old days when emulator installation felt like preparing a tax filing from 2007. For most people asking how to install a Nintendo DS emulator on a PC or Mac, this is the first answer.
2. RetroArch
RetroArch is not just one emulator. It is a front-end that lets you install different emulator “cores” inside one application. That makes it powerful, flexible, and occasionally just a little dramatic. Once configured, though, it is excellent. It works on Windows and macOS, supports controller mapping, offers shaders and screen layout options, and keeps your retro library in one place.
If you like tweaking settings, organizing folders, and telling your software exactly how to behave, RetroArch might be your soulmate. If you want something that works with very little fiddling, you may prefer melonDS or OpenEmu.
3. OpenEmu for Mac
OpenEmu is a Mac favorite because it feels like a native Mac app instead of a science project. It organizes your library beautifully, supports multiple console cores, and makes controller setup refreshingly painless. If you want the easiest-looking Nintendo DS emulator experience on macOS, OpenEmu deserves a serious look.
The catch is that OpenEmu is a front-end that relies on cores, so the Nintendo DS experience depends on the installed DS core rather than a standalone DS app. That is not a deal-breaker. It just means setup is less “install this one thing” and more “install this clean launcher, then let it manage the engine.”
4. DeSmuME for Windows
DeSmuME is a longtime Nintendo DS emulator that many players still recognize immediately. It remains useful, especially on Windows, and it offers classic emulator features such as save states, screen scaling, and configuration options. It is not the freshest-looking option on the list, but it has history, and in emulator land that counts for something.
For brand-new users, melonDS often feels more modern. But if you want a proven Windows DS emulator with a large user base and lots of older troubleshooting information online, DeSmuME still matters.
How to Install a Nintendo DS Emulator on a Windows PC
Step 1: Pick Your Emulator
If you want the easiest path, choose melonDS. If you want a multi-system platform, choose RetroArch. If you prefer a more traditional Windows DS emulator, choose DeSmuME.
Step 2: Download From the Official Source
Go to the emulator’s official site or official release page and download the current Windows build. Avoid “free emulator packs,” random mirror sites, or anything promising preloaded games. The moment a website sounds too excited to help you commit copyright violations, close the tab and back away slowly.
Step 3: Install or Extract the Files
For melonDS, you will usually download a compressed archive or installer depending on the release. Extract it to a normal folder such as your Documents or Games folder. Do not bury it somewhere weird and then forget where it lives. Future You will be annoyed.
For RetroArch, you can either use the installer package or extract the archive manually. A standard user folder is best. Avoid putting it in protected system folders if you can help it, because that can complicate saves, updates, and configuration files.
For DeSmuME, download the current stable or appropriate Windows build, install any required prerequisites if the official project mentions them, and then launch the emulator normally.
Step 4: Launch the Emulator and Configure Basics
Open the emulator and head straight to settings. This is where you set keyboard controls, audio, video scaling, screen layout, and save locations. On Nintendo DS emulators, one of the first practical choices is how the two screens are displayed. Some people prefer vertical stacking for authenticity, while others choose side-by-side or a main-screen focus layout for larger monitors.
Also configure your controller if you plan to use one. Most modern USB and Bluetooth controllers work well, especially with RetroArch and OpenEmu. If you stay on keyboard, make sure your hotkeys are comfortable. Nintendo DS games can require quick stylus or face-button input, and nobody wants to discover mid-boss-fight that “Start” is mapped to a key last seen on the far edge of the keyboard.
Step 5: Load Your Legal Game File
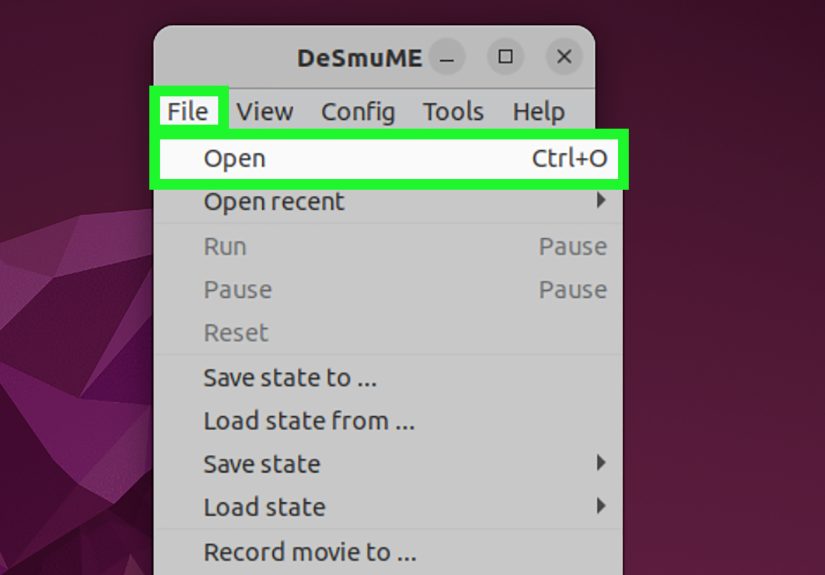
Once your emulator is installed, use the emulator’s file menu or content loader to open your legal DS game backup or homebrew file. The usual file type is .nds. If the game launches, congratulations: the installation worked. If not, check whether the emulator needs additional system files, a core, or a different video backend.
How to Install a Nintendo DS Emulator on a Mac
Option 1: Install melonDS on Mac
Download the current macOS build from the official source. Open the downloaded file and move the app into your Applications folder if that is how the package is delivered. Then launch it.
If macOS warns that the app is from an unidentified developer or blocks it from opening, do not panic. This is usually a Gatekeeper issue, not proof that your laptop is under attack by retro ghosts. Open System Settings > Privacy & Security and use Open Anyway if you trust the source. In some cases, control-clicking the app and choosing Open also works.
After that, configure your controls, screen layout, and save locations just as you would on Windows. If you are using melonDS in standard DS mode, setup is much easier than it used to be. Advanced features may still require extra files, but basic installation is no longer the obstacle course it once was.
Option 2: Install RetroArch on Mac
Download the macOS build, open the DMG file, and drag RetroArch.app into Applications. Launch it, then use the built-in updater or core downloader to install a Nintendo DS core. After that, map your controls, point the app to your content folder, and load your game.
RetroArch is especially useful if you also emulate other systems. If your goal is not just Nintendo DS on Mac but a full retro setup, it is one of the most flexible choices available.
Option 3: Install OpenEmu on Mac
Download OpenEmu from its official source, move it into Applications, and launch it. The setup assistant will walk you through installing cores. Once you are in the main library, go to Preferences if needed and confirm that the Nintendo DS-related core is installed. Then import your game file and configure controls.
OpenEmu is ideal for people who want a Mac-style interface, library view, and easy gamepad support. It is less intimidating than RetroArch for beginners and feels more polished than many standalone emulators.
First-Time Setup Tips That Make a Big Difference
Use In-Game Saves, Not Just Save States
Save states are convenient, but they should not be your only safety net. In-game saves are generally more reliable long-term and more portable between setups. Think of save states as snacks, not the whole meal.
Organize Your Folders Early
Create separate folders for game files, save files, save states, screenshots, and emulator apps. A tidy setup saves time later and makes troubleshooting much easier. “Desktop_final_final_retro2” is not a folder strategy. It is a cry for help.
Keep the Emulator Updated
Emulator projects improve over time. Updates can fix bugs, improve compatibility, and make Mac or Windows support better. If you are using a nightly or experimental build, expect more features and slightly more drama. Stable builds are usually the safer place to start.
Map the Stylus Smartly
Nintendo DS games rely on touch input, so test your stylus mapping early. Many users are comfortable using the mouse for stylus control, even if everything else is on a keyboard or controller. It is not glamorous, but it works surprisingly well once you get used to it.
Common Problems and How to Fix Them
The Emulator Will Not Open on Mac
Check Gatekeeper settings in Privacy & Security and use the official override process if you trust the app source. Re-download the app if the file appears damaged.
RetroArch Feels Complicated
That is because it is. Start by installing only one Nintendo DS core, setting your content directory, and mapping one controller. Do not try to customize every menu and shader in the first ten minutes unless you enjoy recreational confusion.
The Game Runs but the Layout Looks Wrong
Open video or display settings and adjust the dual-screen layout. Some games play best with stacked screens. Others are easier with the main screen enlarged and the touch screen smaller.
My Saves Are Missing
Check whether the emulator is saving to the app folder, your Documents folder, or a dedicated save directory. This happens often after moving an emulator installation to a new location.
The Controller Is Not Working
Reconnect it, restart the emulator, and verify the input bindings. In RetroArch and OpenEmu, controller auto-detection is usually good, but not magical. Sometimes you still have to map buttons manually like it is 2009 and destiny has chosen you.
Real-World Experiences Installing a Nintendo DS Emulator on PC or Mac
In real-world use, installing a Nintendo DS emulator on a PC is usually the easiest route. Most Windows users download melonDS or RetroArch, extract or install the files, map a controller, and are playing within minutes. The biggest surprise is often how light Nintendo DS emulation feels on modern hardware. A laptop that struggles with fifty browser tabs can often handle DS emulation just fine, which is honestly one of the more inspiring underdog stories in modern computing.
Mac users tend to have a slightly different experience. The actual installation is still simple, but macOS security warnings can make the process feel more dramatic than it really is. Many first-time users assume they downloaded the wrong file because the app refuses to open on the first click. Usually, it is just Gatekeeper doing its job. Once that hurdle is cleared, Mac users often report that OpenEmu feels the most natural, especially if they want a library-style interface that looks more like a media app than a classic emulator utility.
Another very common experience involves expectations. People imagine that emulating a Nintendo DS means instant perfection, but the best setup usually comes from a few minutes of thoughtful tweaking. Screen layout matters more than most beginners expect. A game that feels awkward in a tiny stacked layout can suddenly feel great when the main screen is enlarged and the touch screen is tucked neatly underneath. That one setting alone can make the difference between “this is clunky” and “oh wow, this actually works really well.”
Controller setup is another area where user experience changes quickly. At first, keyboard controls seem fine. Then a game asks for movement, shoulder buttons, menu navigation, and touch input all in quick succession, and suddenly your fingers feel like they are trying to solve a Rubik’s Cube during a fire drill. That is when many users switch to a gamepad and keep the mouse for stylus actions. It is a surprisingly effective combination and often ends up feeling more comfortable than a full keyboard-only layout.
Users also learn, usually after one painful mistake, that save states are not a perfect substitute for normal saves. People love save states right up until one behaves strangely after an update, a crash, or a configuration change. Experienced emulator users almost always end up with the same habit: use in-game saves regularly, and treat save states as a convenience feature instead of your only parachute.
One of the most positive experiences people report is how approachable modern emulators have become. Years ago, setting up DS emulation could feel like assembling a spaceship from forum posts and half-broken download mirrors. Now, if you choose the right app and stick to official sources, the process is much more beginner-friendly. That is especially true with melonDS for simple standalone use and OpenEmu for Mac users who want a cleaner interface.
In other words, the real experience of installing a Nintendo DS emulator on a PC or Mac is less about technical wizardry and more about making a few smart choices. Pick a trusted emulator. Keep your files organized. Use legal game backups. Spend five minutes on controls and display settings. Do that, and the whole thing feels less like hacking the Matrix and more like setting up any other app with a slightly nerdier personality.
Final Thoughts
If you are wondering how to install a Nintendo DS emulator on a PC or Mac, the best answer is to keep it simple. For most users, melonDS is the best first stop. RetroArch is excellent if you want a broader retro gaming hub. OpenEmu remains one of the easiest ways to get started on Mac. And DeSmuME still holds value for Windows users who want a classic option.
The winning formula is not complicated: download from official sources, avoid shady “all-in-one” packages, configure controls early, use in-game saves, and respect the legal side of game ownership. Do that, and you will spend less time troubleshooting and more time actually playing. Which, in fairness, is the entire point of this adventure.


