Table of Contents >> Show >> Hide
- Why Refrigerators Start to Smell in the First Place
- What You Need Before You Start
- Step-by-Step: How to Deep Clean Your Refrigerator
- 1. Empty the fridge completely
- 2. Turn the refrigerator off if practical
- 3. Remove shelves, drawers, and bins
- 4. Clean the interior walls and floor
- 5. Do not ignore the door gasket
- 6. Wipe down jars, bottles, and containers before putting them back
- 7. Dry every surface
- 8. Return food in an organized way
- How to Remove Stubborn Refrigerator Odors
- Do Not Forget the Outside of the Refrigerator
- How to Keep Your Refrigerator Odor-Free
- Common Refrigerator Cleaning Mistakes to Avoid
- A Simple Refrigerator Cleaning Routine That Actually Works
- Real-Life Experiences and Lessons From Deep Cleaning a Refrigerator
- Final Thoughts
Your refrigerator works hard every day. It chills leftovers, guards your produce, and quietly hides that mysterious jar you swore you’d use for “a recipe someday.” But when crumbs, spills, forgotten herbs, and suspicious deli containers begin to pile up, your fridge can go from clean-cold sanctuary to a science fair with shelves.
The good news? A deep clean is not complicated. With the right method, you can deep clean your refrigerator, remove stubborn smells, and keep it odor-free without turning the job into a full-blown kitchen meltdown. Better yet, a cleaner fridge helps protect food quality, supports food safety, and makes it much easier to spot what needs to be eaten before it evolves into a personality.
In this guide, you’ll learn how to clean every major part of your refrigerator, how to get rid of lingering odors, and how to keep bad smells from coming back. Think of it as a fridge reset with less drama and more baking soda.
Why Refrigerators Start to Smell in the First Place
Most refrigerator odors come from one of three culprits: spoiled food, hidden residue, or moisture. A leaking container of soup may drip beneath a drawer. Produce can soften, then quietly liquefy. Cheese can become aggressive. Leftovers that looked “probably fine” three Tuesdays ago may begin releasing odors that spread into everything from butter to ice cubes.
Moisture adds another layer of trouble. Damp shelves, drawer tracks, door gaskets, and drip areas can trap residue and encourage mold or mildew. Even when the fridge looks tidy at first glance, smells often come from places you do not immediately see, such as under the crisper drawers, inside shelf seams, around the door seal, or beneath the appliance near the condenser area.
That is why a quick wipe-down is helpful, but a proper deep clean is what actually solves the problem.
What You Need Before You Start
- Cooler or insulated bag for perishable food
- Microfiber cloths or soft sponges
- Mild dish soap
- Warm water
- Baking soda
- Soft toothbrush or small cleaning brush
- Dry towel
- Trash bag
- Cotton swabs for tight corners
If your refrigerator has experienced a major spill, spoiled meat leak, or recall-related contamination, you may also need a sanitizing step after cleaning. For routine deep cleaning, mild soap and a baking soda solution are usually enough. The goal is to remove grime and odor without leaving behind harsh chemical smells where food is stored.
Step-by-Step: How to Deep Clean Your Refrigerator
1. Empty the fridge completely
Start by removing everything. Yes, everything. This is the only way to find sticky rings, mystery drips, and that one lemon that has somehow become decorative. Toss expired food, moldy produce, and anything with a smell that could knock over a houseplant.
Transfer milk, meat, yogurt, and other perishables to a cooler if the cleaning session will take more than a short while. Group similar items together as you remove them so reloading the fridge later is less chaotic.
2. Turn the refrigerator off if practical
If your model allows it and your manual recommends it, turn the unit off or unplug it before a deep clean. This gives you a safer, easier way to clean thoroughly, especially around drawers, controls, and lower interior surfaces. If unplugging is not practical, avoid excess moisture near lights, vents, and controls.
3. Remove shelves, drawers, and bins
Take out every removable part. Wash shelves, bins, and drawers separately using warm water and mild dish soap. If you have glass shelves, do not wash them with warm water while they are still very cold. Sudden temperature changes can cause glass to crack. Let them warm up a bit first, then clean them gently.
Rinse well and dry everything completely. A damp drawer put back too soon can invite odor and mildew faster than you can say “Why does the lettuce smell weird?”
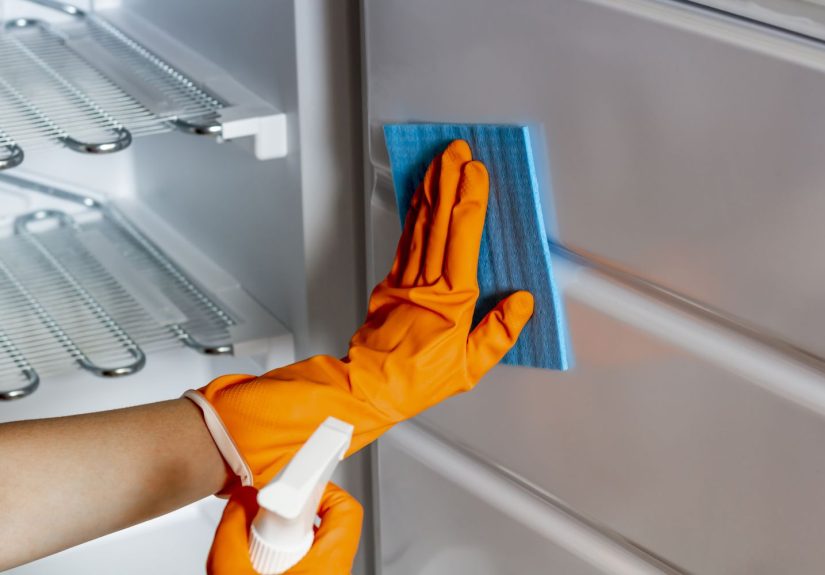
4. Clean the interior walls and floor
For the inside surfaces, use either warm soapy water or a simple baking soda cleaning mix. A reliable option is baking soda dissolved in warm water. It helps lift residue and neutralize food odors without leaving a strong scent behind.
Wipe the ceiling, side walls, shelves supports, and especially the bottom of the refrigerator where spills love to migrate. Use a soft toothbrush for seams, corners, and tracks. For stubborn splatters, let the cleaning solution sit for a few minutes before wiping again.
5. Do not ignore the door gasket
The rubber door seal is one of the most overlooked parts of refrigerator cleaning. It catches crumbs, sticky drips, and moisture, and it can hold onto odors like a grudge. Wipe it carefully with a damp cloth and mild cleaner, then dry it thoroughly.
A clean gasket also helps the door seal properly, which supports efficiency and steady cooling. In other words, cleaning the gasket is both housekeeping and a tiny love letter to your electric bill.
6. Wipe down jars, bottles, and containers before putting them back
Do not clean the refrigerator and then return a sticky barbecue sauce bottle that looks like it survived a food fight. Wipe containers before they go back in. This small step prevents reintroducing odors, residue, and bacteria to your freshly cleaned space.
7. Dry every surface
This step matters more than people think. Moisture left behind can cause musty odors, promote mildew, and make the fridge feel less fresh even when it looks spotless. Use a dry towel to wipe all interior surfaces and removable parts before reassembly.
8. Return food in an organized way
Put items back logically. Keep raw meat sealed and stored where leaks are least likely to contaminate other foods. Use clear bins for snacks or produce. Group condiments together. Store leftovers in tightly sealed containers. Good organization is not just pretty; it makes future cleaning easier and helps prevent odor transfer.
How to Remove Stubborn Refrigerator Odors
If the fridge still smells after cleaning, the source may be hidden residue, absorbed odor, or poor airflow. Here is how to deal with persistent smells:
Use baking soda the smart way
An open box or shallow container of baking soda can help absorb lingering food odors. Place it where air circulates, not buried behind large containers. Replace it regularly. Baking soda is great for maintenance, but it is not magic. It will not fix a rotten spill hiding under a drawer, so clean first and deodorize second.
Try activated charcoal for lingering smells
If an odor is especially stubborn, activated charcoal can help absorb residual smells after the fridge has been cleaned. It is a useful backup when baking soda is not enough, especially after a strong-food incident involving fish, onions, or that casserole no one is willing to claim.
Check the drip pan and hidden areas
Some refrigerators have a drip pan beneath the unit. If your model includes one and it is accessible, inspect and clean it according to the manufacturer’s instructions. A dirty drip pan can create persistent odors that seem to come from nowhere.
Sanitize only when needed
For serious contamination, such as spoiled food leakage after a power outage or a food recall situation, a sanitizing solution may be appropriate after washing. Clean first, then sanitize, then allow surfaces to dry. Routine cleaning does not always require this step, but heavy contamination may.
Do Not Forget the Outside of the Refrigerator
A deep clean is not complete if the exterior is still wearing fingerprints like jewelry. Wipe handles, the top, side panels, and the area around the door. If you have stainless steel, use a cleaner appropriate for that finish or simply a soft cloth with mild soap and water if your manufacturer allows it.
Also check beneath and behind the unit if it is safe to do so. Dust and pet hair can collect around condenser coils or underneath the fridge. Cleaning that area periodically can improve performance and help the refrigerator run more efficiently. Always follow your manufacturer’s instructions before cleaning coils.
How to Keep Your Refrigerator Odor-Free
Clean spills immediately
This is the golden rule. A splash of milk today is a smell problem tomorrow. Wipe messes as soon as they happen.
Store food in sealed containers
Airtight storage helps reduce odor transfer and keeps food fresher. This is especially important for leftovers, chopped onions, marinated foods, and ripe cheeses that like to announce themselves.
Check the temperature
Keep your refrigerator at 40°F or below and your freezer at 0°F. An appliance thermometer is a smart addition if your fridge runs warm or uneven. Proper temperature helps preserve food and slows bacterial growth, which also helps with odor control.
Do a weekly mini-check
Once a week, scan for old leftovers, leaking produce, or expired items. This takes five minutes and can spare you from a full-scale smell mystery later.
Deep clean on a schedule
A monthly light deep clean works well for many households, while a more thorough scrub every season is a good habit if your fridge sees heavy use. The best schedule is the one you will actually keep.
Do not overcrowd the fridge
Air needs to circulate to keep food cold and fresh. When the refrigerator is jam-packed, spills are harder to spot, odors linger longer, and cleaning becomes much more annoying.
Common Refrigerator Cleaning Mistakes to Avoid
- Using harsh scented cleaners that leave behind strong chemical odors
- Putting cold glass shelves into hot water
- Forgetting drawer tracks and door seals
- Returning sticky bottles to a clean refrigerator
- Using baking soda as a shortcut instead of removing the odor source
- Ignoring the bottom of the fridge and the area underneath it
- Cleaning with too much water around controls and electrical parts
A Simple Refrigerator Cleaning Routine That Actually Works
If you want the easiest long-term system, follow this rhythm:
- Daily: Wipe spills right away.
- Weekly: Toss old leftovers and check produce drawers.
- Monthly: Remove a few shelves or bins and wipe the interior.
- Seasonally: Do a full deep clean, inspect the gasket, and clean around or under the appliance.
This routine keeps refrigerator odors from building up and makes deep cleaning far less painful. Instead of facing a giant mess twice a year, you are simply maintaining freshness a little at a time.
Real-Life Experiences and Lessons From Deep Cleaning a Refrigerator
One of the most common refrigerator-cleaning experiences starts with a person opening the door and thinking, “What is that smell?” They check the obvious items first: old leftovers, milk, maybe the produce drawer. Nothing looks dramatic. Yet every time the door opens, the odor floats out like it pays rent. In many homes, the problem turns out to be something tiny but powerful, such as a leaking container under a shelf lip or spinach that melted into green soup inside the crisper drawer. The lesson is simple: fridge odors often hide in places that are technically visible but practically invisible unless the fridge is emptied completely.
Another common experience happens after a holiday or party. The refrigerator becomes a packed museum of sauces, desserts, foil pans, half-cut vegetables, and leftovers no one labels because everyone assumes they will remember. They do not. A week later, the fridge smells like a buffet that lost its will to live. People often discover that overcrowding is a bigger problem than dirt alone. When the shelves are too full, airflow drops, spills go unnoticed, and old food gets pushed to the back until it becomes a surprise. After one deep clean, many homeowners start using clear containers and designated leftover zones simply because they are tired of uncovering archaeological layers of pasta salad.
Families with kids often report a different pattern. The refrigerator is not necessarily filthy, but it becomes sticky in strange ways. Jam on the handle. Yogurt on the shelf. A mystery ring under the juice bottle. In those households, the best experience-based solution is not waiting for a giant cleaning day. It is building a short weekly reset: wipe spills, scan for old lunch items, and wash one or two bins before things get out of hand. That small habit keeps the refrigerator from turning into a sticky, sour-smelling stress box.
Then there is the classic “baking soda alone will save me” phase. Plenty of people place a box in the fridge and hope for the best. It helps, but only after the real source is removed. One of the most useful lessons from real-life cleaning is that deodorizing and cleaning are not the same thing. Baking soda can reduce background odors, but it will not erase a spill hiding under the deli drawer. People usually figure this out after replacing the box, waiting politely, and still smelling old fish every time they reach for butter.
Some of the most memorable experiences come after a power outage or vacation mistake. A refrigerator left closed during an outage can trap a brutal smell, and a fridge left with perishables during travel can become an instant regret chamber. In those cases, deep cleaning becomes less about tidiness and more about rescue. Homeowners often learn to remove every shelf, wash every surface, dry every part, and leave odor absorbers inside afterward. Many also learn a powerful prevention rule: before travel, clear perishables, empty the ice bin if needed, and never trust “I’ll deal with it when I get back.” Future-you deserves better.
The happy part is that almost everyone who does a proper refrigerator deep clean says the same thing afterward: it feels ridiculously satisfying. The fridge smells fresh, the shelves look brighter, groceries are easier to see, and cooking becomes less annoying because nothing is hidden behind three expired dressings and a jar of pickles from another era. A clean refrigerator does not just look better. It changes how the whole kitchen feels. And once you experience that reset, it becomes much easier to keep the refrigerator odor-free for good.
Final Thoughts
Deep cleaning your refrigerator is one of those chores that sounds dull, feels mildly annoying halfway through, and then rewards you like a home-improvement hero when it is done. The trick is to clean thoroughly, dry everything well, and build a few habits that prevent odors from returning.
Remove the source of the smell, not just the evidence. Keep food sealed. Wipe spills early. Use baking soda as support, not as a substitute for cleaning. Follow those steps, and your refrigerator will stay fresh, organized, and far less likely to greet you with the scent of forgotten leftovers and poor decisions.


