Table of Contents >> Show >> Hide
- Why Stencil Your Own Drapes?
- Before You Start: The “Fabric + Paint” Truth Bomb
- Supplies Checklist
- Step-by-Step: How to Stencil Drapery Panels
- Step 1: Pick the Right Curtain Base
- Step 2: Pre-Wash, Dry, and Iron
- Step 3: Set Up Your Workspace Like a Responsible Adult
- Step 4: Plan Your Pattern (The Part That Saves Your Sanity)
- Step 5: Secure the Stencil
- Step 6: Mix and Test Your Paint
- Step 7: Apply Paint in Light Layers (Whisper, Don’t Yell)
- Step 8: Repeat the Pattern Without Losing Your Mind
- Step 9: Dry Fully, Then Heat-Set (If Your Paint Requires It)
- Step 10: Hang, Steam, and Pretend You Bought Them at a Boutique
- Design Ideas That Look Expensive (Without the Expensive Part)
- Troubleshooting: Fixes for the Most Common Curtain Crimes
- Care Tips: How to Keep Stenciled Curtains Looking Fresh
- Cost Breakdown: What You’ll Spend (Usually)
- FAQ
- Final Thoughts: Your Windows, But Make Them Custom
- Extra: of Real-World Experience (So You Don’t Learn the Hard Way)
If you’ve ever stood in the curtain aisle doing mental math (“$189 per panel… times two… plus tax… plus emotional damage”), welcome. Stenciled drapes are the DIY loophole: you start with simple, inexpensive curtain panels and end with custom-looking window treatments that scream designer… while your budget whispers, “thank you.”
In this stenciled drapery tutorial, you’ll learn how to plan a repeat pattern, keep lines crisp (aka stop the dreaded paint-bleed), and finish your panels so they look intentionally high-endnot like a raccoon tried to finger-paint your living room.
Why Stencil Your Own Drapes?
- Custom pattern, custom scale: Want oversized damask? Skinny stripes? A bold border? You’re the boss.
- Budget-friendly: Plain panels + paint typically cost far less than patterned drapes.
- Color control: Match your wall color, rug tones, or that throw pillow you bought impulsively at 2 a.m.
- Rental-friendly vibes: No wallpaper commitmentjust dramatic windows and plausible deniability.
Before You Start: The “Fabric + Paint” Truth Bomb
Fabric is flexible. Paint is… not always. The trick is choosing the right paint, applying it in light layers, and heat-setting (when required) so your masterpiece doesn’t crack, flake, or wash out the first time someone looks at it with a damp cloth.
The good news: this is absolutely doable for beginners. The even better news: once you learn the method, you can stencil everything (drapes, pillows, table runners, tote bags… possibly your soul).
Supplies Checklist
Here’s what you’ll want on hand to make your DIY stenciled curtains look crisp and professional:
- Curtain panels: Cotton, linen, canvas, or drop cloth panels are beginner-friendly.
- Stencil: Mylar stencils are durable and easy to clean. Choose a repeatable pattern if you’re covering the whole panel.
- Paint: Fabric paint or acrylic craft paint mixed with a fabric medium (helps keep paint softer on fabric).
- Stencil tools: Stencil brush, foam pouncer, or dense foam roller (small). Many DIYers like rollers for all-over patterns.
- Low-tack painter’s tape: For securing edges and marking guidelines.
- Repositionable spray adhesive (optional but helpful): Improves stencil contact and reduces shifting.
- Measuring tape + ruler + level: Because “eyeballing it” is how stripes become abstract art.
- Tailor’s chalk or washable fabric pencil: For layout marks.
- Cardboard or foam board: Slide inside the panel to prevent bleed-through.
- Drop cloth / kraft paper: Protect your floor, table, and reputation.
- Iron or steamer: For prep and (often) heat-setting paint.
- Paper towels + baby wipes: For off-loading paint and quick cleanup.
Step-by-Step: How to Stencil Drapery Panels
Step 1: Pick the Right Curtain Base
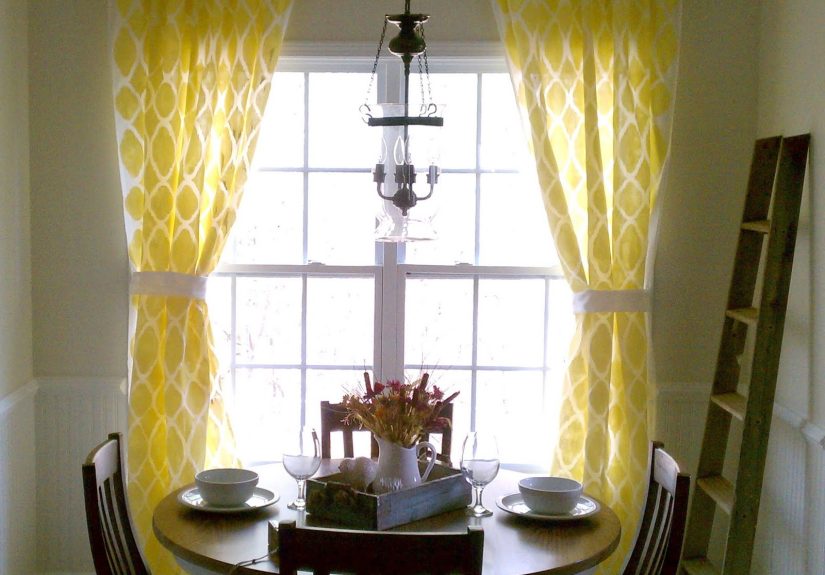
Start with panels that are light-colored and made from natural fibers if possible. Cotton and linen blends are forgiving, hold paint well, and press easily. Drop cloth curtains are popular because they’re affordable, sturdy, and have a casual, slightly textured look that hides tiny imperfections (aka “character”).
Pro move: Buy panels longer than you need. You can hem later, and extra length makes pattern placement easier.
Step 2: Pre-Wash, Dry, and Iron
Wash your panels before stenciling. Many fabrics shrink and come with finishes that can affect paint absorption. After drying, iron thoroughly. Stenciling on wrinkles is like trying to paint eyeliner on a moving train.
Step 3: Set Up Your Workspace Like a Responsible Adult
- Cover your surface with a drop cloth or kraft paper.
- Lay the curtain panel flat and smooth it out.
- Slide cardboard/foam board inside the panel (so paint doesn’t transfer to the back layer).
- Tape the panel edges lightly to keep it from shifting while you work.
Step 4: Plan Your Pattern (The Part That Saves Your Sanity)
Decide where your design will live:
- All-over pattern: Looks like expensive printed fabric.
- Vertical columns: Great for elongating windows and making ceilings feel taller.
- Bottom border: Designer look with less work (and less chance of burnout).
- Panel edges: A subtle frame effectclean and modern.
Use a measuring tape and chalk to mark a centerline or starting guideline. If you’re doing repeats, measure the stencil’s repeat height/width and map it out so the pattern ends neatly near the bottom hem (instead of stopping halfway through a flower like a cliffhanger nobody asked for).
Step 5: Secure the Stencil
Place the stencil on the fabric and secure it with painter’s tape. If you’re using repositionable spray adhesive, apply a light coat to the back of the stencil (in a well-ventilated area), let it get tacky, then press it onto the panel. The goal is snug contactespecially around detailed edges.
Tip: If your stencil has registration marks, use them. If it doesn’t, create your own by marking consistent reference points with small bits of tape.
Step 6: Mix and Test Your Paint
If using acrylic paint, mix in fabric medium according to the medium’s directions. This improves flexibility and helps paint behave better on fabric. If using fabric paint, you can typically use it straight from the bottle.
Always test on a scrap piece of fabric (or the extra hem allowance). This is where you confirm:
- Color (wet paint liesdry paint tells the truth)
- Opacity (one coat vs. two)
- Bleed control (how lightly you need to apply)
Step 7: Apply Paint in Light Layers (Whisper, Don’t Yell)
Load your stencil brush or foam roller with a small amount of paint, then off-load the excess onto a paper towel. This is the #1 secret to crisp edges. Too much paint is how bleeding happens.
- Stencil brush: Use an up-and-down pouncing motion or gentle swirling. Avoid pushing paint under the edges.
- Foam roller: Roll lightlythink “barely there.” Multiple thin passes beat one heavy pass every time.
Lift the stencil carefully to check your work. If you like it, keep going. If not, don’t panicmost issues are fixable in the troubleshooting section below.
Step 8: Repeat the Pattern Without Losing Your Mind
Move the stencil to the next position using your guidelines/registration marks. Re-tape or re-press adhesive areas as needed. If paint builds up on the stencil, wipe it off with a damp cloth and dry it before continuingbuilt-up paint can cause smudges.
Consistency tip: If you’re doing multiple panels, stencil them assembly-line style: do the top section on all panels first, then move down. This helps patterns line up visually across a window wall.
Step 9: Dry Fully, Then Heat-Set (If Your Paint Requires It)
Let panels dry completely before moving them. Many fabric paints (and acrylic + fabric medium combos) recommend heat-setting for durability. Follow your paint/medium label instructions. A common approach is ironing from the reverse side (or through a pressing cloth) for several minutes, covering the entire painted area.
After heat-setting, allow the fabric to cool and cure. “Cure time” varies by productsome are ready quickly, others want a full day (or more) before the first wash.
Step 10: Hang, Steam, and Pretend You Bought Them at a Boutique
Hang your stenciled drapes, then steam out any wrinkles. Step back and admire your work. If someone asks where you got them, you may say “custom.” Because they are. Because you made them. Like a legend.
Design Ideas That Look Expensive (Without the Expensive Part)
1) Classic All-Over Damask
A damask stencil on drop cloth panels is a go-to “designer for less” look. Keep paint tone-on-tone (like warm gray on oatmeal fabric) for a subtle, upscale effect.
2) Modern Geometric Repeat
Try a Moroccan trellis, quatrefoil, or mid-century pattern. Use a crisp, high-contrast color combo (navy on white, black on flax) to make it feel intentional and modern.
3) Bottom Border (Maximum Style, Minimum Effort)
Border stenciling gives a tailored look and takes a fraction of the time of an all-over pattern. Bonus: if you make a tiny mistake, it’s low on the panel where most people won’t notice unless they’re lying on your floor.
4) Faux “Trim” Effect
Stencil a narrow stripe down each vertical edge to mimic designer tape trim. It’s clean, elevated, and great for beginners.
Troubleshooting: Fixes for the Most Common Curtain Crimes
Paint Bleed Under the Stencil
- Use less paint and off-load more aggressively.
- Press stencil edges down firmly (tape or repositionable adhesive helps).
- Apply in multiple light layers instead of one heavy coat.
Stencil Shift (Smudged Edge)
- Use more tape or adhesive next time.
- If paint is still wet, blot gently with a damp cloth (don’t rub).
- If it’s dry, touch up with a tiny brushor incorporate the “oops” into a slightly distressed look.
Uneven Coverage
- Let the first layer dry, then add a second light layer.
- Use a denser foam roller for smoother coverage.
- Mix paint wellespecially if using fabric medium.
Pattern Doesn’t Line Up
- Measure and mark guidelines before you start.
- Work from a centerline outward for symmetrical layouts.
- Choose patterns with forgiving repeats (geometrics are often easier than florals).
Care Tips: How to Keep Stenciled Curtains Looking Fresh
Once fully cured, wash gently. In general:
- Use cold water and mild detergent.
- Avoid bleach and harsh stain removers on painted areas.
- Air dry or tumble dry low if your paint instructions allow it.
- Iron/steam as neededmany stenciled panels behave like normal curtains after proper heat-setting.
Cost Breakdown: What You’ll Spend (Usually)
- Plain curtain panels: $20–$60 (varies by size and fabric)
- Stencil: $10–$40 (reusable)
- Paint + fabric medium: $10–$25
- Tools (brush/roller/tape): $10–$20 if you don’t already own them
For many projects, you’ll land well under the price of mid-range “designer” panelsplus you’ll keep the stencil and tools for future DIYs.
FAQ
Can I stencil polyester curtains?
You can, but results vary. Polyester can be less absorbent and may require specialty paints made for synthetics. Always test first and follow the paint’s instructions for heat-setting and washing.
Can I stencil curtains while they’re hanging?
Technically? Yes. Practically? Not recommended. You’ll get better alignment and cleaner edges with the panel flat on a surface.
Should I use a brush or roller?
For large repeats and all-over patterns, a small dense foam roller is fast and consistent. For intricate stencils and tight corners, a stencil brush or foam pouncer gives better control.
Final Thoughts: Your Windows, But Make Them Custom
The magic of DIY stenciled drapes is that they look like you spent weeks hunting down “the perfect print,” when really you spent an afternoon with paint, a stencil, and the quiet thrill of outsmarting retail pricing. Start simple, keep your paint layers light, and let measuring be your best friend. Your future self (and your bank account) will be extremely proud.
Extra: of Real-World Experience (So You Don’t Learn the Hard Way)
Here’s the part most tutorials don’t say out loud: stenciling curtains is less about artistic talent and more about patience management. People who love their finished stenciled drapery panels almost always have two things in common: they tested first, and they didn’t rush the layout. The “test first” part sounds boring until you realize fabric can darken paint, paint can dry lighter than you expect, and some stencil designs look charming on a flat sample but visually chaotic across eight feet of curtain. A ten-minute test saves you the very specific heartbreak of finishing a whole panel and thinking, “Why does my living room look like a loud necktie?”
Another common lesson: the first repeat is the hardest. Once you place your stencil the first time, you’re basically choosing the entire future of the pattern. DIYers often find it helpful to lightly mark a top baseline and a centerline, then step back and look at it from across the room before painting anything. If it looks slightly off up close, it might still look perfect from normal viewing distance but if it looks off from across the room, trust your eyes and adjust before you commit.
Paint control is where beginners tend to get dramatic. The most repeated advice from people who’ve done this successfully is almost comically simple: use less paint than you think you need. Off-loading your brush or roller feels like you’re throwing away productivity, but it’s actually buying crisp edges. Stenciling rewards multiple light passes and punishes one thick pass. If someone had to pick a single “experience-based” rule, it’s this: heavy paint turns a stencil into a stamp-shaped puddle.
Then there’s the “workflow” wisdom. If you’re doing two panels, stencil them in the same order (top sections first, then middle, then bottom). This keeps the pattern height consistent so the panels look like a matched set. People also learn quickly that cleaning the stencil is not optional if you want sharp detail. As paint builds up, it can create ridges that smear or cause fuzzy edges. A quick wipe every few repeats can keep lines crisp without slowing you down much.
Finally, the most satisfying experience is the moment you hang them. DIYers often describe a weird disconnect: on the table, the panels can look intimidatingly “busy,” but once they’re pleated and catching light at the window, the design calms down and reads like high-end fabric. That’s when the project stops feeling like “I painted curtains” and starts feeling like “I upgraded my whole room.” If you want that feeling on purpose, pick a stencil with a classic shape, keep your color palette tight, and let texture do some of the visual work. In other words: let your curtains be the main characterbut a main character with good taste.


