Table of Contents >> Show >> Hide
- What Are Corner Bookmarks?
- Why DIY Corner Bookmarks Are So Popular
- Supplies You Need for Simple DIY Corner Bookmarks
- Best Paper for DIY Corner Bookmarks
- How to Make a Simple DIY Corner Bookmark
- Easy Decoration Ideas for Corner Bookmarks
- Tips for Making Corner Bookmarks Look Neat
- Corner Bookmark Ideas for Kids
- DIY Corner Bookmarks for Classrooms and Libraries
- Gift Ideas Using DIY Corner Bookmarks
- Common Mistakes and How to Fix Them
- Creative Variations to Try
- How to Store and Care for Corner Bookmarks
- Experiences Related to Simple DIY Corner Bookmarks
- Conclusion
Simple DIY corner bookmarks are proof that the best crafts do not need glitter cannons, a mysterious tool from aisle 47, or a budget that makes your wallet quietly leave the room. With one square of paper, a few folds, and a tiny burst of imagination, you can create a bookmark that hugs the corner of your page like it was born for the job. It is practical, adorable, beginner-friendly, and just dramatic enough to make an ordinary paperback feel like it has hired a personal stylist.
Whether you are a parent planning a rainy-day craft, a teacher preparing a classroom activity, a student trying to make reading time more fun, or a book lover who refuses to use random receipts as bookmarks forever, DIY corner bookmarks are a perfect little project. They slip neatly over the page, stay in place better than many flat paper bookmarks, and can be decorated as animals, monsters, flowers, fruit, hearts, superheroes, or anything else your craft table can emotionally support.
In this guide, you will learn how to make simple DIY corner bookmarks, which materials work best, how to decorate them, how to avoid common folding mistakes, and how to turn a five-minute paper craft into a gift-worthy handmade accessory. No fancy skills required. If you can fold a note, cut paper, and survive a glue stick with dignity, you are ready.
What Are Corner Bookmarks?
A corner bookmark is a small folded paper pocket that fits over the corner of a book page. Unlike a traditional bookmark that slides between pages, a corner bookmark wraps around the top or bottom corner. This makes it easy to spot your place without sticking too far out of the book. It is especially useful for paperbacks, notebooks, planners, journals, cookbooks, and school reading logs.
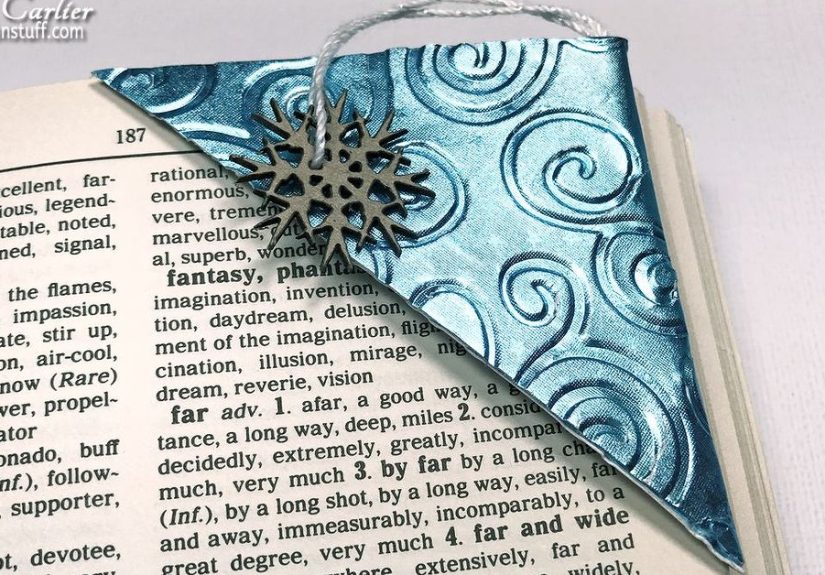
The most popular version is the origami corner bookmark. It starts with a square sheet of paper and uses simple folds to create a triangular pocket. Some versions require no glue at all, while decorated designs may use glue for eyes, ears, teeth, flowers, stickers, or other details. The basic design is wonderfully flexible: once you know the fold, you can create dozens of themes without changing the structure.
Why DIY Corner Bookmarks Are So Popular
Corner bookmarks have become a favorite among crafters because they hit the sweet spot between easy and useful. Many crafts are fun to make but then retire immediately to a drawer called “things I made and now must respect.” Corner bookmarks, however, actually get used. They help readers mark their place, encourage kids to open books, and make small handmade gifts feel personal.
They are also inexpensive. You can make them with construction paper, scrapbook paper, origami paper, cardstock, wrapping paper scraps, magazine pages, or even clean cereal-box cardboard for a sturdier version. The project is easy to scale up for classrooms, library programs, book clubs, birthday parties, or family craft nights. One pack of colorful paper can become a small army of page-hugging creatures.
Supplies You Need for Simple DIY Corner Bookmarks
The basic version requires only one square piece of paper. That is the beauty of it. The decorated version gives you room to play, especially if you want to make animal corner bookmarks, monster bookmarks, flower bookmarks, or seasonal designs.
Basic Materials
- Square paper, ideally 6 x 6 inches
- Scissors, if cutting paper to size
- Glue stick or craft glue for decorations
- Markers, colored pencils, or crayons
- Scrap paper for extra details
Optional Decorating Supplies
- Googly eyes
- Stickers
- Washi tape
- Patterned scrapbook paper
- Ribbon, yarn, or embroidery floss
- Small paper flowers, ears, teeth, or wings
- Clear tape or contact paper for reinforcement
For younger crafters, use safety scissors and keep small decorations such as googly eyes away from very young children. A corner bookmark should bring joy, not launch a household investigation into where the tiny eyeballs went.
Best Paper for DIY Corner Bookmarks
The paper you choose affects how easy the bookmark is to fold and how long it lasts. Standard origami paper is excellent for beginners because it folds cleanly and holds creases well. Construction paper is colorful and easy for kids to decorate, though it can be slightly thicker. Scrapbook paper adds instant personality, especially if it has patterns like stars, flowers, stripes, dots, or vintage bookish designs.
Cardstock creates a stronger bookmark, but it can be harder to fold neatly, especially for small hands. If you want a more durable bookmark without fighting the paper, try making the folded base with regular paper and adding cardstock details on top. For recycled DIY corner bookmarks, use old calendar pages, gift wrap scraps, maps, or magazine pages. Just avoid paper that is too slippery or thin, because it may not grip the page well.
How to Make a Simple DIY Corner Bookmark
This is the classic no-fuss method. Once you make one, the second one will feel easy. By the fifth one, you may start giving them names. That is normal. Probably.
Step 1: Start With a Square
Cut your paper into a square. A 6 x 6 inch square is a great size for most books. For smaller notebooks or children’s books, try 4 x 4 inches. For larger planners, journals, or textbooks, use 7 x 7 inches.
Step 2: Fold Into a Triangle
Place the paper in front of you like a diamond. Fold the bottom corner up to meet the top corner, creating a triangle. Press the fold firmly with your finger. A crisp crease is the secret sauce of origami. It is not glamorous, but neither is a soggy bookmark.
Step 3: Fold the Side Corners Up
Take the left corner of the triangle and fold it up to meet the top point. Repeat with the right corner. You should now have a small diamond shape. Press both folds well.
Step 4: Open the Side Folds
Unfold the left and right corners so you are back to the triangle shape. These crease lines will guide the next folds.
Step 5: Fold Down One Top Layer
The top point of your triangle has two layers. Take only the front layer and fold it down so the point touches the bottom edge of the triangle. This creates the pocket opening.
Step 6: Tuck the Corners Into the Pocket
Fold the left corner up again, then tuck it inside the pocket you just created. Repeat on the right side. Smooth everything down. You now have a corner bookmark that slides over the page.
Step 7: Test It in a Book
Slip the bookmark over the corner of a page. If it feels loose, press the creases again. If it feels too tight, gently open the pocket with your finger. Congratulations: your book now has a hat.
Easy Decoration Ideas for Corner Bookmarks
The basic bookmark is useful, but the decorated bookmark is where the fun begins. A folded paper triangle can become almost anything with a few scraps and a tiny amount of glue.
Monster Corner Bookmarks
Monster bookmarks are popular because they are nearly impossible to mess up. Cut out paper teeth, glue them along the inside edge, add one or more eyes, and draw silly eyebrows. Uneven teeth? Great. Wild expression? Even better. Monsters are very forgiving craft models.
Animal Corner Bookmarks
Make a cat by adding triangle ears, whiskers, and a pink nose. Create a fox with orange paper, white cheeks, and pointy ears. Try a frog with green paper and big round eyes. A bunny bookmark needs long ears, rosy cheeks, and maybe a tiny paper bow if it is feeling fancy.
Fruit Corner Bookmarks
Fruit designs are bright and cheerful. Use red paper with black marker dots for a strawberry, yellow paper for a pineapple, green paper for a watermelon rind, or orange paper for a citrus slice. These are great for summer reading lists, classroom rewards, or cookbook page markers.
Flower Corner Bookmarks
For a softer look, cut small petals from colored paper and glue them around the visible triangle. Add a circle in the center and draw simple details. Flower bookmarks make sweet gifts for Mother’s Day, teacher appreciation, birthdays, or anyone who has ever said, “I do not need more bookmarks,” while clearly needing more bookmarks.
Seasonal Corner Bookmarks
Try pumpkins for fall, snowmen for winter, hearts for Valentine’s Day, shamrocks for March, carrots for Easter, stars for patriotic holidays, or ghosts for Halloween. Seasonal bookmarks are especially useful for libraries, classrooms, and bulletin-board displays.
Tips for Making Corner Bookmarks Look Neat
Even simple DIY corner bookmarks can look polished with a few smart tricks. First, measure your square carefully. If the paper is crooked, the folds will be crooked too. Second, press creases firmly. You can use the back of a spoon, a ruler edge, or a bone folder if you have one. Third, avoid too much glue. A heavy blob of glue can warp paper and make your bookmark lumpy.
When adding decorations, keep bulky items away from the inside pocket. The bookmark needs to slide smoothly over the page. Large buttons, thick foam stickers, and chunky gems may look cute, but they can dent pages or prevent the book from closing neatly. Flat decorations usually work best.
If you want your bookmark to last longer, reinforce the outer edge with clear tape or use contact paper on decorative pieces before attaching them. You can also make two matching bookmark bases and glue them together for extra strength, but keep the pocket open. Accidentally gluing the pocket shut is the crafting equivalent of locking your keys in the car.
Corner Bookmark Ideas for Kids
Simple DIY corner bookmarks are excellent for kids because the project teaches measuring, folding, cutting, color choice, and creative decision-making. It also connects crafting with reading, which is a very sneaky and wonderful combination. A child who makes a dragon bookmark may suddenly need to find a book worthy of that dragon. This is how the bookmark wins.
For younger children, prepare the squares ahead of time and let them focus on folding and decorating. For older kids, challenge them to design a bookmark based on a favorite book character, animal, food, season, or school subject. A science-themed bookmark might look like a planet. A history-themed bookmark could resemble an ancient scroll. A math bookmark could feature numbers, shapes, or a tiny triangle proudly living its best geometric life.
DIY Corner Bookmarks for Classrooms and Libraries
Corner bookmarks are ideal for group settings because they are quick, affordable, and easy to customize. Teachers can use them as reading incentives, first-week-of-school icebreakers, literature-circle activities, or quiet-time crafts. Librarians can include them in summer reading programs, book club meetings, craft stations, or take-home kits.
To keep group crafting organized, cut paper squares before the activity starts. Set up separate supply stations for paper, markers, glue, and decorations. Offer a few sample designs, but leave room for original ideas. Some students will make cats. Some will make aliens. One student will create a taco with wings. Let the taco fly.
Gift Ideas Using DIY Corner Bookmarks
A handmade corner bookmark makes a thoughtful add-on gift. Tuck one into a novel, journal, planner, cookbook, Bible, devotional, sketchbook, or study notebook. Pair a set of bookmarks with a bookstore gift card, a cozy mug, tea bags, pencils, or sticky notes. For teachers, make a bundle of classroom-themed bookmarks. For friends, personalize each one with initials, favorite colors, inside jokes, or tiny illustrations.
You can also make themed sets. A woodland set might include a fox, bear, owl, and rabbit. A food set could include pizza, watermelon, taco, and cupcake designs. A fantasy set might include a dragon, castle, wizard hat, and moon. Once you start making sets, be careful. It begins as one bookmark and ends with a small paper society living on your desk.
Common Mistakes and How to Fix Them
The Bookmark Is Too Loose
Press the folds again and make sure the side corners are tucked deeply into the pocket. If the paper is very thin, try thicker paper next time.
The Bookmark Is Too Tight
Gently open the pocket with your finger. If it still grips too hard, use slightly larger paper or avoid heavy decorations near the opening.
The Paper Tears While Folding
The paper may be too stiff or too weak. Origami paper, printer paper, and medium-weight construction paper are easier to fold than heavy cardstock.
The Decorations Fall Off
Use a glue stick for light paper pieces and craft glue for heavier details. Let the bookmark dry fully before using it in a book.
The Bookmark Looks Uneven
Start with a precise square and line up corners carefully before pressing each fold. The first bookmark may look a little “abstract.” The second will be better.
Creative Variations to Try
Once you master the basic fold, experiment with creative variations. Add a long paper tail to make a rocket bookmark. Cut a scalloped edge for a cloud or flower. Use black paper and white gel pen for a starry-night bookmark. Add tiny paper glasses for a scholarly owl. Use patterned paper for a vintage look. Try metallic paper for a bookmark that says, “Yes, I read, and yes, I sparkle.”
You can also personalize bookmarks with names, reading goals, favorite quotes, or mini book ratings. For students, write “Chapter Champion,” “Page Saver,” or “Reading Buddy” on the front. For adults, try elegant designs with muted colors, botanical patterns, or minimalist line art.
How to Store and Care for Corner Bookmarks
Store your corner bookmarks in a small envelope, pencil pouch, desk drawer, or decorative box. Keep them flat so the pockets do not bend out of shape. Avoid storing them near water, snacks, or mysterious backpack crumbs. Paper bookmarks are brave, but they are not waterproof superheroes.
If a bookmark gets bent, press it under a heavy book overnight. If decorations start to peel, add a tiny amount of glue and let it dry completely. If the bookmark becomes too worn, retire it with honor and make another one. That is the joy of DIY paper crafts: replacements are cheap, fast, and often even cuter.
Experiences Related to Simple DIY Corner Bookmarks
The first time I made a simple DIY corner bookmark, I expected a cute paper triangle and nothing more. What I got was a surprisingly satisfying little craft that made me understand why people keep saying, “Just one more,” while surrounded by twelve unfinished scraps of paper. There is something calming about folding a square into a useful object. It feels organized, like your hands are tidying up the universe one crease at a time.
One of the best experiences with corner bookmarks is making them with kids. The basic fold gives them structure, but the decoration stage lets their personalities run wild. A child may start with the plan to make a cat and somehow end with a rainbow space hamster. That is not a mistake; that is innovation wearing whiskers. Adults often want crafts to look like the sample. Kids remind us that the sample is only the beginning.
Corner bookmarks also work beautifully for reluctant readers. A handmade bookmark can create a small sense of ownership. When a child makes a bookmark with a dinosaur face, a superhero mask, or a silly monster grin, the book becomes more inviting. The bookmark waits on the page like a tiny reading coach saying, “Come back. We were just getting to the good part.” It is not magic, but it can feel close.
For adults, DIY corner bookmarks can become a relaxing screen-free activity. After a long day of emails, notifications, tabs, pop-ups, and the general circus of modern life, folding paper is refreshingly simple. You do not need to be productive in a heroic way. You can just make something small, pretty, and useful. Pair the craft with music, tea, or a quiet audiobook, and suddenly you have a cozy evening that costs almost nothing.
Another useful experience is making corner bookmarks as gifts. They are small enough to tuck into greeting cards, care packages, classroom Valentine bags, teacher gifts, or holiday book exchanges. Handmade bookmarks feel personal without being overwhelming. You are not handing someone a giant craft project that requires display space and emotional commitment. You are giving them a useful little page marker that says, “I thought of you, and I also folded this triangle with care.”
In classrooms and libraries, the best part is seeing how many different results come from the same instructions. Give twenty people the same square of paper, and you will get twenty different bookmarks. Some will be neat and symmetrical. Some will be wildly expressive. Some will have seven eyes. A few will be named. That variety is the charm. Simple DIY corner bookmarks prove that creativity does not always need expensive supplies or advanced skills. Sometimes it just needs paper, folds, and permission to be playful.
Conclusion
Simple DIY corner bookmarks are easy to make, fun to decorate, and surprisingly useful. They are perfect for kids, students, teachers, librarians, book clubs, handmade gifts, rainy afternoons, and anyone who wants to stop using grocery receipts as page markers. With one square of paper and a few folds, you can create a bookmark that is practical, personal, and endlessly customizable.
The best part is that there is no single “right” design. Your bookmark can be elegant, silly, seasonal, colorful, minimalist, book-themed, animal-shaped, monster-faced, or completely strange in the best possible way. Start with the basic fold, then let your creativity take over. Your books deserve better than folded page corners, and your craft drawer deserves a heroic comeback.


