Table of Contents >> Show >> Hide
- Why Ear Piercing Aftercare Matters So Much
- What You Need to Clean an Ear Piercing
- How to Clean Your Ear Piercing Properly
- How Often Should You Clean a New Ear Piercing?
- How Long Does an Ear Piercing Take to Heal?
- Common Mistakes That Can Lead to Infection
- Normal Healing vs. Signs of Infection
- What to Do If Your Ear Piercing Looks Infected
- How Jewelry Affects Healing
- Special Tips for Cartilage Piercings
- Everyday Habits That Help Prevent Ear Piercing Infections
- Real-World Experiences People Commonly Have With Ear Piercing Aftercare
- Conclusion
- SEO Tags
Getting your ears pierced can feel like a tiny style upgrade with a surprisingly large emotional payoff. One little sparkle, and suddenly you are standing differently in the mirror like you just signed a celebrity fragrance deal. But a fresh ear piercing is also a healing wound, and that means aftercare matters more than your choice between studs and hoops.
If you want to prevent irritation, avoid an infected ear piercing, and help your new jewelry settle in peacefully, the goal is simple: keep the area clean, keep your hands off it, and do not attack it with every product in the bathroom cabinet. In other words, your piercing wants calm, not chaos.
This guide breaks down exactly how to clean your ear piercing properly, what products to use, what mistakes to avoid, how long healing usually takes, and when redness is normal versus when it is waving a tiny red flag.
Why Ear Piercing Aftercare Matters So Much
A new ear piercing creates a small channel through your skin. While that channel heals, it is vulnerable to irritation from dirty hands, tight earring backs, friction from pillows or headphones, harsh cleansers, and low-quality jewelry. Bacteria can also get into the area if aftercare is sloppy or if the piercing is touched too often.
That is why proper ear piercing aftercare is less about doing a hundred things and more about doing a few smart things consistently. Gentle care supports healing. Aggressive care often backfires.
And yes, “aggressive care” includes drowning your ear in strong antiseptics like it just returned from battle. Your piercing is trying to heal, not survive a chemistry experiment.
What You Need to Clean an Ear Piercing
Before you start, keep your supplies simple. The best ear piercing cleaning routine is usually the least dramatic one.
Best products to use
- Sterile saline wound wash labeled 0.9% sodium chloride
- Clean hands washed with soap and water
- Clean gauze or disposable paper products if needed
- A mild, fragrance-free cleanser if you are washing in the shower
Products to avoid
- Rubbing alcohol
- Hydrogen peroxide
- Iodine
- Harsh antibacterial soaps
- Strong ointments unless specifically recommended by a clinician
- Homemade salt mixes if you can buy sterile saline instead
- Contact lens solution pretending to be piercing aftercare
That last one deserves emphasis. Not every salty liquid is your piercing’s friend. A proper sterile saline wound wash is a much better choice than random solutions sitting in a drawer next to old lip balm and mystery hair ties.
How to Clean Your Ear Piercing Properly
If you have been wondering exactly how to clean your ear piercing without irritating it, follow this routine.
Step 1: Wash your hands first
Always wash your hands thoroughly with soap and water before touching your ears or jewelry. This is the non-negotiable first move. Dirty hands are one of the easiest ways to introduce bacteria to a healing piercing.
Step 2: Apply sterile saline gently
Spray or soak the front and back of the piercing with sterile saline. Let it sit briefly so any dried discharge or crust softens. If needed, gently dab away loosened debris with clean gauze or a disposable paper product. Do not scrub.
Step 3: Rinse if you used cleanser
If you clean the area in the shower with a mild, fragrance-free cleanser, rinse thoroughly so no soap residue is left behind. Leftover cleanser can dry out the skin and trigger irritation.
Step 4: Pat dry
Pat the area dry gently. Avoid rough towels that may carry bacteria or snag on the jewelry. A disposable paper product is often the easiest low-drama option.
Step 5: Leave it alone
After cleaning, resist the urge to twist, spin, or “check on” the earring every ten minutes. A healing piercing does better with less handling, not more. Think of your jewelry as a houseguest: welcome, but not something you need to constantly reposition.
How Often Should You Clean a New Ear Piercing?
For most people, cleaning once or twice a day is enough. More is not automatically better. Over-cleaning can dry out the skin, cause irritation, and make a normal healing piercing act cranky.
A good routine might look like this: a saline rinse in the morning, a gentle rinse or cleansing shower at night, and otherwise leaving the piercing alone. If crust builds up, soften it first rather than scraping it off like you are removing sticker residue from a laptop.
How Long Does an Ear Piercing Take to Heal?
Healing time depends on the location of the piercing.
- Earlobe piercing: often around 6 to 8 weeks for initial healing
- Cartilage piercing: often several months, sometimes 6 to 12 months
This is where people get tricked. A piercing can look fine on the outside before the inside is fully healed. That means changing jewelry too early, sleeping on it constantly, or stopping aftercare too soon can restart the irritation party.
Common Mistakes That Can Lead to Infection
Knowing how to prevent an ear piercing infection also means knowing what not to do. Here are the biggest troublemakers.
Touching it too often
Every unnecessary touch is an invitation for germs and irritation. If you are absentmindedly flicking your earring while scrolling your phone, your piercing would like to file a complaint.
Using harsh cleaners
Strong chemicals can damage healing skin. That can delay healing and make redness look worse, which then convinces people to use even more harsh products. It becomes a bad cycle fast.
Removing jewelry too soon
Taking out starter jewelry before the channel has healed can cause the hole to shrink, close, or trap irritation. Unless a clinician tells you otherwise, keep the jewelry in during healing.
Sleeping on the piercing
Pressure can increase soreness, swelling, and bumps, especially with cartilage piercings. A travel pillow can help by letting your ear rest in the center opening instead of being mashed all night.
Tight earring backs
If the backing is pressed too tightly against the ear, it can reduce airflow, increase pressure, and make the area more irritated. Your earring should not feel like it is trying to become one with your skull.
Swimming too soon
Pools, hot tubs, lakes, and similar water sources can expose the piercing to bacteria and other irritants. Fresh piercings and questionable water are not a dream team.
Normal Healing vs. Signs of Infection
One of the trickiest parts of ear piercing care is figuring out what is normal. A little tenderness, mild redness, and some crusty dried fluid can happen during healing. That does not always mean infection.
What can be normal
- Mild soreness for a while after piercing
- Light redness around the site
- Small amounts of whitish or pale yellow crust
- Minor swelling early on
- A small irritation bump that is not getting worse
Possible signs of an infected ear piercing
- Worsening pain instead of gradual improvement
- Increasing redness or warmth
- Thick yellow or green drainage
- Bad odor plus swelling and tenderness
- Redness spreading beyond the piercing site
- Fever
- Upper-ear cartilage becoming red, swollen, and very sore
Cartilage piercings deserve extra respect. Infections in the upper ear can become more serious than typical earlobe irritation, so do not try to “wait it out” for too long if the cartilage is angry, swollen, and increasingly painful.
What to Do If Your Ear Piercing Looks Infected
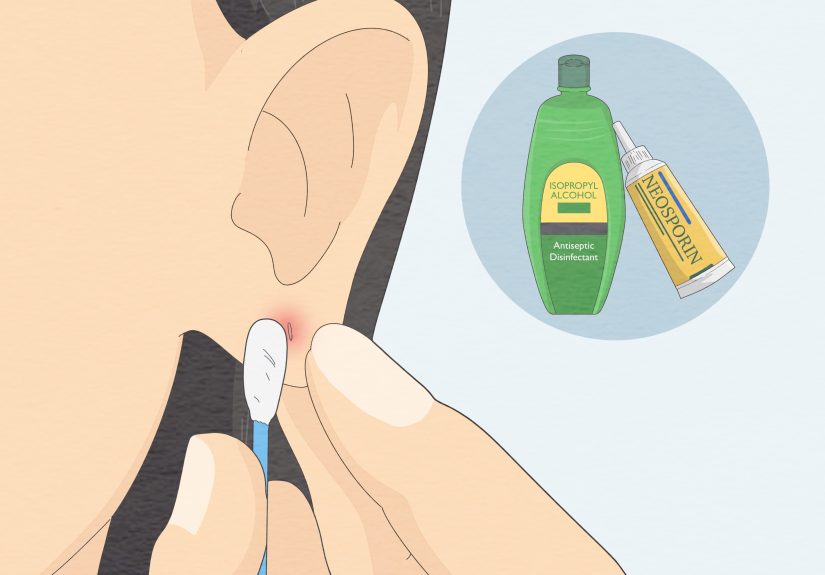
If you think you may have a mild infection, do not panic and do not start playing home chemist.
Start with the basics
- Keep cleaning gently with sterile saline
- Wash your hands before touching the area
- Do not squeeze, pick, or force drainage
- Do not switch jewelry on your own
- Reduce pressure from sleep, hats, earbuds, or headphones
When to see a doctor
Seek medical care if the redness spreads, the pain is getting worse, you have pus-like drainage, you develop fever, the jewelry becomes embedded, or the upper ear cartilage is swollen and tender. Those are not “maybe later” signs. Those are “please let a professional take over now” signs.
If you suspect infection, do not remove the jewelry unless a medical professional tells you to. In some cases, removing it too early can complicate drainage and make the problem harder to manage.
How Jewelry Affects Healing
Sometimes the issue is not your cleaning routine. Sometimes the problem is the jewelry itself. Low-quality metals can irritate sensitive skin, and nickel can trigger allergic reactions in some people. If your piercing stays itchy, red, rashy, or inflamed without improving, the material may be part of the story.
Starter jewelry should fit properly, not pinch, and not be overly snug. If you think the post is too short, the backing is too tight, or the jewelry quality is questionable, visit a reputable piercer for an assessment. This is one of those times when professional help can save you weeks of frustration.
Special Tips for Cartilage Piercings
Cartilage piercings are beautiful, popular, and occasionally dramatic. They usually take longer to heal than lobe piercings and are more easily irritated by pressure.
- Avoid sleeping on that side
- Keep headphones, helmets, hats, and phones clean
- Be careful with hair products
- Do not change jewelry early just because the outside looks calm
- Take persistent swelling seriously
If your upper ear becomes notably red, hot, swollen, or increasingly painful, prompt medical attention matters. Cartilage is not the place to experiment with wishful thinking.
Everyday Habits That Help Prevent Ear Piercing Infections
Good aftercare lives in the small details. These habits make a real difference:
- Change pillowcases regularly
- Keep phones, earbuds, and headphones clean
- Keep hair products away from the piercing
- Avoid snagging the jewelry with brushes, towels, or clothing
- Do not let friends touch your piercing just because they are “curious”
- Be patient before switching jewelry styles
That last point is hard, especially when you are already planning your full curated ear future. But healing first and accessorizing later is almost always the smarter move.
Real-World Experiences People Commonly Have With Ear Piercing Aftercare
One of the most useful things about ear piercing advice is hearing what happens in everyday life, because that is where aftercare either succeeds quietly or falls apart in a very annoying way. A lot of people assume infection happens because they forgot one cleaning session. In reality, trouble often builds from a bunch of small habits that seem harmless until they pile up.
A very common experience is the “I thought it was healed already” moment. The piercing looks calm, the redness is gone, and there is no soreness for a few days, so people decide it is time to swap the starter studs for something cuter. Then the new earrings are harder to insert, the area gets irritated again, and suddenly the piercing is swollen and acting like it has strong opinions. This happens most often because the outside healed faster than the inside, especially with cartilage.
Another common story involves over-cleaning. People get nervous about infection, so they clean the piercing three, four, or five times a day with multiple products. Saline spray, then soap, then alcohol, then ointment, then one more “just in case” swipe before bed. Instead of helping, all that attention leaves the skin dry, tender, and inflamed. The piercing starts to sting, crust more, and look worse, which makes the person clean it even more. It is a frustrating loop, and it is one reason gentle consistency beats panic cleaning.
Sleeping is another huge factor people do not expect. Plenty of new piercings behave perfectly fine during the day, then become sore every morning because the person rolls onto that side in their sleep. This is especially true with helix, tragus, conch, and other cartilage piercings. Many people say the pain improved dramatically once they switched sides or used a travel pillow with the ear resting in the center hole.
Then there is the issue of tight backs. A lot of people do not realize the earring backing is pressing too closely against the skin until the ear becomes sore, puffy, and hard to clean. It can feel like infection when it is really irritation from pressure, friction, and trapped moisture. Once a reputable piercer adjusts the fit, the ear often calms down much faster.
Some people also discover that the real villain was not the cleaning routine at all, but everything around it: hair spray, shampoo residue, dirty headphones, phone screens, hats, or constant touching while studying, gaming, or scrolling. Ear piercings are small, but they live in a very busy part of the body.
The most reassuring shared experience is that many mildly irritated piercings do settle down when people return to basics: clean hands, sterile saline, less touching, cleaner bedding, less pressure, and more patience. That boring routine may not sound glamorous, but in the world of healing piercings, boring is often exactly what works.
Conclusion
If you want to clean your ear piercing properly to prevent infections, the winning formula is refreshingly simple: wash your hands, clean gently, use sterile saline or a mild cleanser, keep harsh products away, avoid touching and twisting, and leave the jewelry in while the piercing heals. Add patience, clean bedding, and decent judgment around pools and pressure, and you are already ahead of the game.
A healthy piercing usually does not need a complicated routine. It needs consistency, a little restraint, and fewer “helpful” experiments. So treat your new ear piercing like a tiny healing project, not a household stain. Your future self, wearing fabulous earrings without drama, will appreciate it.