Table of Contents >> Show >> Hide
- Before You Start: What “Resize” Really Means on iPhone
- Method 1: Resize Visually in the Photos App by Cropping
- Method 2: Use the Mail App to Reduce Image File Size
- Method 3: Use the Shortcuts App for Exact Image Dimensions
- Method 4: Use a Third-Party App for Full Control
- Which iPhone Image Resizing Method Is Best?
- Tips to Resize Images on iPhone Without Ruining Quality
- Common Mistakes People Make
- Quick FAQ
- Conclusion
- Real-World Experiences: What Resizing Images on iPhone Actually Feels Like
- SEO Tags
Resizing an image on an iPhone sounds like one of those tasks that should take exactly one tap, two seconds, and maybe a tiny parade. In reality, it depends on what you mean by resize. Do you want to make the photo look smaller on screen? Reduce the file size for email? Change the image dimensions to exact pixels? Or just stop a website from yelling, “File too large” like it pays rent in your browser?
The good news is that iPhone gives you several easy ways to get the job done. The even better news is that you do not need to be a designer, a photographer, or the kind of person who says things like “aspect ratio” at parties. Whether you are posting on social media, sending an attachment, listing something for sale, or trying to save storage space, there is a method that fits.
In this guide, you will learn four quick and easy methods for how to resize an image on an iPhone. We will also clear up one common confusion right away: cropping and resizing are related, but they are not identical twins. Cropping changes what part of the image is visible. Resizing changes the dimensions or the file size. Sometimes you need one. Sometimes you need both. Sometimes you need coffee first.
Before You Start: What “Resize” Really Means on iPhone
If you want better results, it helps to know which kind of resizing you actually need. Most people are solving one of these problems:
- Reduce file size so the image is easier to email, upload, or share.
- Change image dimensions so it fits a website, form, social post, or print layout.
- Change aspect ratio so it works better as a square, wallpaper, thumbnail, or story image.
- Batch resize photos so you do not spend your entire afternoon resizing 27 pictures one by one like a medieval scribe.
Once you know the goal, choosing the best method becomes much easier. Here are the four options that work best on an iPhone.
Method 1: Resize Visually in the Photos App by Cropping
Best for: Social posts, wallpapers, profile pictures, and quick visual edits
If your goal is to make the image fit a certain shape or frame, the built-in Photos app is the fastest place to start. It does not give you exact pixel-by-pixel control like a dedicated image resizer, but it is perfect for quick edits when you want the photo to look right.
For example, maybe your image is too wide for a profile photo, too tall for a product thumbnail, or awkwardly framed for a square Instagram post. Cropping fixes that in seconds.
- Open the Photos app.
- Select the image you want to edit.
- Tap Edit.
- Tap the Crop tool.
- Drag the corners to crop manually, or choose a preset aspect ratio such as square or wallpaper.
- Tap Done to save your changes.
This method is quick, clean, and built right into iOS. It is ideal when appearance matters more than exact dimensions. It also helps when you want to remove extra background space, improve composition, or make the image fit a social-media-friendly shape.
The downside is simple: this is not true dimension-based resizing in the strict technical sense. You are changing the visible area and aspect ratio, not necessarily setting the image to a specific width and height. So if a website asks for something exact like 1200 x 628 pixels, Photos alone may not be enough.
Quick example: Let’s say you took a picture of your dog looking like he is auditioning for a shampoo commercial, but half the image is just messy living room chaos. Crop it to a square, center the fluffy celebrity, and suddenly it looks intentional instead of accidental.
Method 2: Use the Mail App to Reduce Image File Size
Best for: Email attachments, quick sharing, and making a photo smaller without extra apps
This is the classic iPhone trick that many people discover by accident and then guard like family treasure. When you attach a photo in the Mail app and send it, iPhone can offer size options such as small, medium, large, or actual size. That makes it one of the easiest ways to reduce photo size on iPhone.
It is especially useful when the problem is not the visual shape of the image, but the file size. Maybe the original photo is huge, your email attachment is too heavy, or you just want a lighter version for sharing.
- Open the image in Photos.
- Tap the Share button.
- Choose Mail.
- Address the email to yourself or the intended recipient.
- Tap Send.
- Choose a size option such as Small, Medium, or Large.
After the image is sent, you can download the smaller version from your email and save it back to Photos if needed. It is a simple workaround, and honestly, it still feels a little sneaky in the best possible way.
Why this method works well:
- No extra app required
- Very fast for one or two images
- Great for reducing photo file size on iPhone
- Useful when you are sending pictures to teachers, clients, coworkers, or relatives who still think 18MB attachments are a personal attack
What to watch out for:
- You do not get exact pixel dimensions.
- It is not ideal for bulk editing.
- You are creating a smaller copy mainly through the sharing process.
If all you need is a smaller image fast, this method is wonderfully low drama.
Method 3: Use the Shortcuts App for Exact Image Dimensions
Best for: Precise resizing, repeat use, and batch resizing multiple photos
If you want more control, the Shortcuts app is where iPhone quietly turns into a productivity wizard. With a simple shortcut, you can resize images to a specific width or height, process multiple photos, and save the resized copies without using a third-party app.
This is the best built-in option when you need exact dimensions. For example, maybe a website requires a banner image at a certain width, or you need several pictures resized before uploading them to an online store.
Here is the basic setup:
- Open the Shortcuts app.
- Tap the + button to create a new shortcut.
- Add the action Select Photos.
- Add the action Resize Image.
- Enter the width or height you want.
- Add Save to Photo Album or Save File.
- Name the shortcut something obvious, like Resize Photos.
Once the shortcut is created, you can run it anytime. Select one image or several, choose your output size, and let the shortcut do the heavy lifting. Very satisfying. Very efficient. Mildly addictive, if we are being honest.
Why this method is excellent:
- Lets you change image dimensions on iPhone more precisely
- Works well for repeated tasks
- Can resize multiple images faster than manual editing
- Keeps the process on-device with no need to upload files elsewhere
Potential drawbacks:
- Setup takes a few minutes the first time
- The interface feels less intuitive than Photos or Mail for total beginners
- You still need to pay attention to quality if you are making images dramatically smaller
Quick example: Imagine you sell handmade products online and every marketplace image needs to be similar in size. Instead of resizing them one by one like a very patient squirrel, you can run a shortcut and knock out the whole batch.
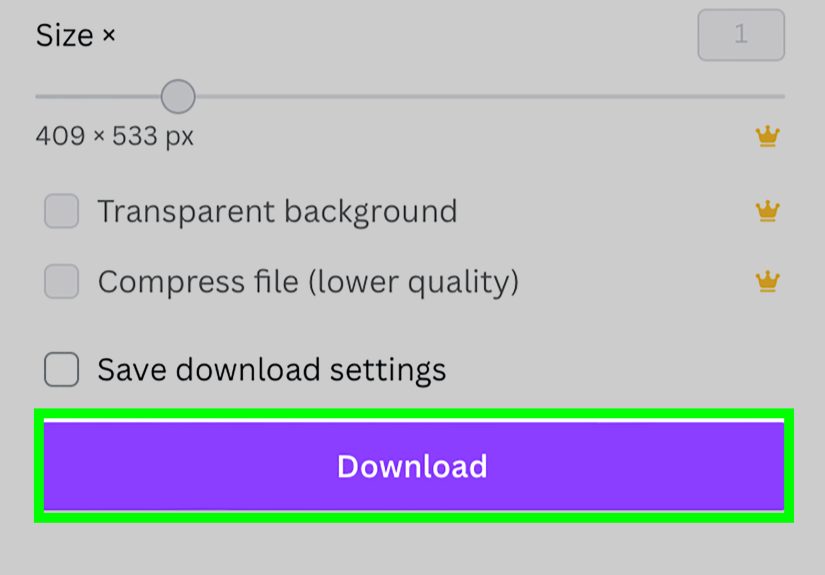
Method 4: Use a Third-Party App for Full Control
Best for: Custom width and height, quality settings, printing, and one-tap convenience
Sometimes you want a tool built specifically for resizing photos on iPhone, not a creative workaround. That is where third-party apps come in. Apps such as Adobe Express and Image Size are popular because they make custom resizing easier and more visual.
These apps are especially helpful when you need:
- Exact pixel dimensions
- Preset ratios for social platforms
- Output quality controls
- Simple resizing without building a shortcut first
A typical process looks like this:
- Install a trusted image resizer app from the App Store.
- Open the image you want to resize.
- Enter a custom width and height or choose a preset.
- Keep the aspect ratio locked unless you intentionally want to stretch the image.
- Save the resized copy.
This method gives you the most flexibility. If you work with product photos, blog graphics, online forms, printable images, or frequent uploads, a dedicated app can save time and give you more consistent results.
The main caution here is simple: choose a reputable app, check permissions, and avoid downloading five random “super magic ultra resize” apps that look like they were designed during a caffeine emergency. One good app is plenty.
Which iPhone Image Resizing Method Is Best?
The best method depends on what you actually need:
- Use Photos if you want the image to look better or fit a certain shape.
- Use Mail if you want a smaller file fast for sharing.
- Use Shortcuts if you need exact dimensions or batch resizing.
- Use a third-party app if you want the easiest custom controls and more advanced options.
If you only resize images once in a while, Mail or Photos is probably enough. If you do it often, Shortcuts or a dedicated app will make your life much easier.
Tips to Resize Images on iPhone Without Ruining Quality
Resizing is useful, but nobody wants their photo to come out looking like it was printed on a potato. Keep these tips in mind:
- Keep the aspect ratio locked unless you want a stretched image.
- Do not reduce dimensions more than necessary. Tiny files are convenient, but they can get soft or blurry.
- Save a copy instead of overwriting your favorite original.
- Use the right method for the job. Cropping is not the same as compressing.
- Check the destination requirements first. Some websites care about pixels, while others only care about file size.
Common Mistakes People Make
When people try to resize an image on an iPhone, the same hiccups show up again and again:
- They crop when they really needed to compress.
- They email a photo to shrink it, then wonder why the dimensions are still not perfect for a website form.
- They forget to save the original and later regret it.
- They enter custom dimensions without preserving proportions and accidentally create a face that looks like it belongs in a carnival mirror.
A little clarity goes a long way. Once you know whether you need smaller file size, smaller dimensions, or a different shape, the process becomes much less annoying.
Quick FAQ
Can I resize a photo on iPhone without an app?
Yes. The easiest no-extra-download options are the Photos app, the Mail app, and the Shortcuts app.
Does cropping make a photo smaller?
It can reduce the visible area and often results in a smaller image overall, but it is not the same as manually setting exact dimensions or file size.
What is the best way to reduce photo size on iPhone for email?
The Mail app is usually the fastest method because it lets you choose a smaller attachment size before sending.
How do I resize multiple images on iPhone?
The Shortcuts app is one of the best built-in options for batch resizing multiple photos.
What if I need exact width and height?
Use Shortcuts or a reputable third-party image resizer app that allows custom dimensions.
Conclusion
Learning how to resize an image on an iPhone is one of those tiny tech skills that pays off again and again. It helps you share faster, upload easier, save storage, and avoid the classic “why is this file so massive?” moment. The trick is choosing the right method for the right job.
If you want fast visual changes, crop in Photos. If you want a lighter attachment, use Mail. If you want precision and repeatable results, build a Shortcuts workflow. And if you want the easiest route to custom dimensions, grab a trusted third-party app. Four methods, no panic, and your images stop acting like they own the place.
In other words, your iPhone is already more capable than it looks. You just needed the right door to open.
Real-World Experiences: What Resizing Images on iPhone Actually Feels Like
In real life, resizing an image on an iPhone is rarely about “image science.” It is usually about speed, convenience, and solving a mildly annoying problem before it turns into a bigger one. Maybe you are trying to upload a photo for a school portal, send a cleaner attachment for work, list an item for sale, or post a picture online without waiting forever for it to load. The practical experience is less about technical perfection and more about finding the quickest method that gets the job done without wrecking quality.
For a lot of people, the first resizing experience happens by accident. They go to email a photo, hit send, and suddenly the iPhone politely asks whether they want to send the image as small, medium, large, or actual size. That moment feels a bit like discovering a secret hallway in your own house. You realize your phone has been quietly hiding a useful tool the whole time. The Mail method often becomes the go-to choice for casual users because it is easy, fast, and does not require learning anything fancy.
Then there is the Photos app experience, which is often the most intuitive. People open a picture, drag the crop handles, choose a square or wallpaper ratio, and instantly feel more in control. It is satisfying because the result is visual and immediate. You can see the image improve in front of you. This makes it especially popular for profile photos, social media posts, and backgrounds. The only catch is that many users assume cropping and true resizing are exactly the same thing. That confusion is extremely common, and honestly, understandable.
Users who resize images more often usually have a different experience. Once someone discovers the Shortcuts app, the whole process can shift from “quick fix” to “tiny personal automation empire.” At first, Shortcuts can seem a little intimidating, like it expects you to wear glasses and speak fluent robot. But once the shortcut is built, it feels brilliant. Tap a button, choose photos, and let the iPhone do the repetitive work. People who sell products online, manage blog graphics, submit forms, or handle multiple uploads often love this method because it saves time and removes repetition.
Third-party apps tend to appeal to people who want more control without building anything themselves. The experience there is usually smoother for exact width and height settings, especially when you need custom dimensions, file-type options, or quality controls. Many users like having presets because it cuts down on guesswork. Instead of wondering whether an image will fit, they can choose the size they need and move on with their day.
The biggest shared experience, though, is trial and error. Almost everyone resizes an image once, checks the result, and thinks, “Close enough,” or “Well, that was definitely not what I meant.” The good part is that iPhone gives you multiple ways to fix the problem. Once you know which method matches your goal, resizing images becomes much less frustrating and much more routine. And that is the sweet spot: fewer tech headaches, faster sharing, and one more tiny digital chore officially under control.


