Table of Contents >> Show >> Hide
- Why Removing a Header from Page Two Feels Weird
- How to Remove a Header from the Second Page in Microsoft Word
- Step 1: Turn on formatting marks before you touch anything
- Step 2: Place your cursor at the end of page one
- Step 3: Insert a Next Page section break
- Step 4: Place your cursor at the end of page two
- Step 5: Insert another Next Page section break
- Step 6: Open the header on page two
- Step 7: Turn off Link to Previous for page two
- Step 8: Go to page three and turn off Link to Previous there too
- Step 9: Delete the header content on page two and close Header & Footer
- Common Mistakes That Make the Header Refuse to Disappear
- What About Google Docs, Apple Pages, and LibreOffice?
- When the Easy Fix Is Actually Better
- Experiences from Real-World Document Battles
- Conclusion
If you have ever tried to remove a header from the second page of a document, you already know the joke: the header acts like it pays rent and refuses to leave. You delete it on page two, and suddenly page one loses its header too. You add a page break, and Word shrugs. You click random buttons, and now the whole document looks like it was formatted during a mild earthquake.
The good news is that removing a header from the second page is absolutely possible. The even better news is that once you understand sections, the whole mystery stops being mysterious and starts being annoyingly logical. In most word processors, headers are tied to sections, not just individual pages. That means a simple page break usually is not enough. If you want page two to behave differently, you need to isolate it.
This guide walks you through how to remove a header from the second page in a way that actually works, especially in Microsoft Word, which is where most people hit this problem first. Along the way, you will also learn why page breaks fail, why Link to Previous matters so much, and how the same idea translates to Google Docs, Apple Pages, and LibreOffice. If your goal is a clean second page with no header while the rest of the document keeps its formatting, you are in the right place.
Why Removing a Header from Page Two Feels Weird
Here is the key idea: in Microsoft Word, a header belongs to a section, not a single page. So if page one and page two are in the same section, they usually share the same header. Deleting the header from page two can also delete it from page one because Word thinks they are part of the same header region.
That is why people often get stuck. They insert a regular page break and expect page two to become independent. It does not. A page break only moves text to the next page. It does not create a new section with its own header settings. If you want only the second page header removed, the second page needs its own section. And because page three should probably keep its own header too, page two usually needs to be sandwiched between two section breaks.
There is one more trap worth mentioning. Some users really mean, “I want the first page to be different, and I do not want the header starting on page one.” In that case, the Different First Page option may solve the problem instantly. But if you specifically want page two blank while page one and page three keep headers, you need the full section-break method below.
How to Remove a Header from the Second Page in Microsoft Word
The steps below focus on Microsoft Word because it is the most common place this issue shows up. These instructions work best on desktop versions of Word, where section controls and header tools are easiest to manage.
-
Step 1: Turn on formatting marks before you touch anything
Start by opening your document and turning on Show/Hide formatting marks. In Word, this usually appears as the paragraph symbol on the Home tab. This step is not glamorous, but it is incredibly useful because it lets you see page breaks and section breaks clearly.
Why does this matter? Because half of the frustration with header problems comes from not knowing where one section ends and another begins. With formatting marks visible, you can actually see whether you inserted the right kind of break. Think of it as turning on the lights before trying to fix a squeaky staircase.
-
Step 2: Place your cursor at the end of page one
Scroll to the end of the first page and click after the final character on that page. This is where you want page two to begin as its own section. Be careful not to click inside the header area. You want the cursor in the main body of the document.
If your content shifts around while you do this, do not panic. That can happen when hidden formatting appears. What matters is that the cursor sits exactly where page one ends and page two begins.
-
Step 3: Insert a Next Page section break
Go to Layout > Breaks > Next Page. This creates a new section starting on page two. That means page two can now have its own header settings instead of sharing everything with page one.
This is the moment many users skip and later regret. A regular page break is not enough. You need a section break because the goal is not just moving content down. The goal is giving page two a separate formatting identity.
-
Step 4: Place your cursor at the end of page two
Now go to the bottom of page two and place the cursor after the last piece of content on that page. Again, keep the cursor in the document body, not in the header. This prepares page three to become a separate section too.
Why do this? Because if page two is the only page that should lose its header, then page three must not remain tied to page two. In other words, page two needs its own little island, not a timeshare.
-
Step 5: Insert another Next Page section break
Go back to Layout > Breaks > Next Page one more time. Now page two sits in its own isolated section between page one and page three.
This is the real secret to removing a header from the second page only. You are not just editing page two. You are creating a middle section that can be formatted independently. If you skip this second break, changes to page two may spill into page three.
-
Step 6: Open the header on page two
Double-click the header area at the top of page two. Word should show you the Header & Footer tools. You may also see a label such as Header – Section 2. That is exactly what you want. It confirms page two is part of its own section.
Take a quick look for the phrase Same as Previous. If you see it, page two is still linked to page one’s header. That link must be broken before you delete anything, or Word will cheerfully remove more than you intended.
-
Step 7: Turn off Link to Previous for page two
On the Header & Footer tab, click Link to Previous to turn it off. Once this link is disabled, page two no longer inherits the header from page one.
This step is huge. Breaking the link does not erase the header by itself. It simply gives you permission to change page two without affecting the earlier section. If Word formatting had a catchphrase, it would probably be, “Nothing happens until you unlink it.”
-
Step 8: Go to page three and turn off Link to Previous there too
Next, click into the header area on page three. Word will show a different section label, usually Header – Section 3. If it says Same as Previous, click Link to Previous again to turn it off for this section as well.
This step prevents page three from inheriting the “blank header” state from page two. It is one of the most commonly missed steps. People unlink page two, delete the header, celebrate for three seconds, then notice page three also went blank. This is why.
-
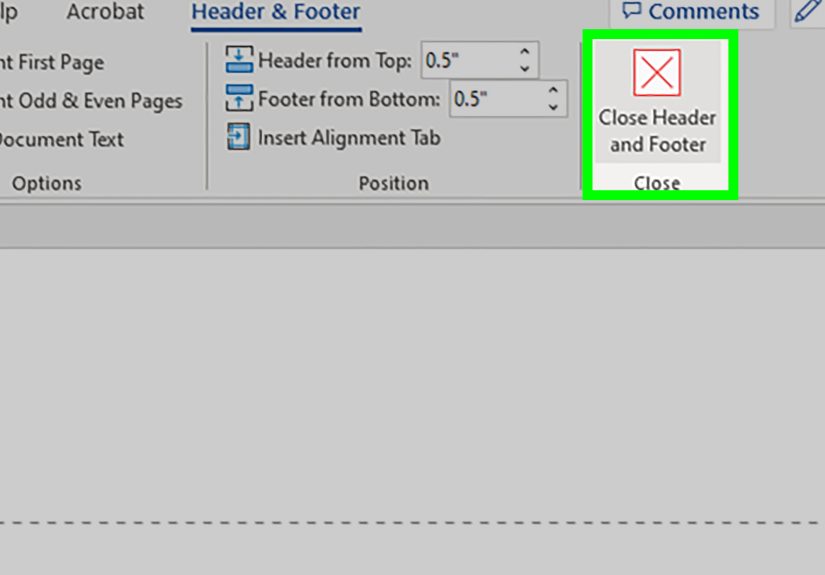
Step 9: Delete the header content on page two and close Header & Footer
Return to page two, click inside the header area, select the header text or elements, and delete them. Once the header is empty, close the header editor by double-clicking in the document body or choosing Close Header and Footer.
At this point, page two should have no header, while page one and page three can keep their own headers. Mission accomplished. No confetti will fall from the ceiling, but you will probably feel like you earned some.
Common Mistakes That Make the Header Refuse to Disappear
Using a page break instead of a section break
This is the classic mistake. A normal page break creates a new page, but it does not give that page its own header settings. If you need a unique header on one page, section breaks are the real tool.
Forgetting to unlink page three
If you remove the header from page two but do not break the link on page three, the blank formatting can continue forward. Always check both sides of the isolated page.
Accidentally turning on Different First Page
After section breaks are inserted, Word may treat the first page of a new section differently if Different First Page is enabled. That can create confusing results, especially with page numbers. If your header vanishes in a way that makes no sense, check that setting.
Deleting the section break afterward
Once everything works, do not remove the section breaks just because they look untidy. If you delete them, Word can merge sections and undo the header setup you just built.
What About Google Docs, Apple Pages, and LibreOffice?
If you are not using Word, the logic is still similar, even if the buttons wear different clothes.
Google Docs
In Google Docs, page-specific headers also depend on sections. You generally insert a section break, click into the header, and turn off Link to previous. Then you remove or edit the header for that section. One small catch: headers and footers are tied to pages mode, so pageless documents will not behave the same way.
Apple Pages
Pages uses section-based controls too, but the wording is slightly different. After creating a new section, you can use settings like Hide on first page of section. That is especially helpful when the page you want to affect becomes the first page of a section.
LibreOffice Writer
LibreOffice often handles this through page styles rather than the exact Word approach. You may need a manual page break with a different page style, then modify whether that style includes a header. Same principle, different toolbox.
When the Easy Fix Is Actually Better
Before you spend five minutes building section breaks, ask yourself one honest question: do you really need to remove the header from page two only, or do you simply want a different first page? If page one is a title page and page two is the beginning of the main document, then Different First Page might solve the problem faster than the full nine-step method.
But if this is a résumé, proposal, report, legal document, or school assignment where page two must be clean while surrounding pages keep specific headers, the full section workflow is the right move. It is more precise, more reliable, and much less likely to explode your formatting halfway through the document.
Experiences from Real-World Document Battles
People run into this problem in surprisingly ordinary situations. A student wants a clean second page because the professor asked for a title page without repeating header information. A job seeker wants a two-page résumé where the first page has a branded header, but the second page needs a smaller continuation layout. An office worker is formatting a proposal and wants the executive summary to look polished without repeating the same bulky header on the next page. The scenario changes, but the frustration is always the same: the header acts like a shared family account, and nobody can figure out who still has access.
One of the most common experiences is the false sense of victory. Someone deletes the header on page two, sees it disappear, and thinks the job is done. Then they scroll up and realize page one lost its header too. That moment usually leads to dramatic sighing, suspicious clicking, and the kind of muttering normally reserved for printers. In reality, nothing was “wrong” with the software. The document was simply still one section, so the header was behaving exactly as designed. Unfortunately, “technically correct” is not always emotionally helpful.
Another frequent experience involves the page break trap. Many users instinctively insert a page break because it sounds logical. After all, the issue is on a page, so surely a page break should help. But a page break only changes where the text starts. It does not create a new header relationship. This is why so many people feel like Word is ignoring them. The software is not ignoring them; it is following section rules that are mostly invisible until you turn on formatting marks. Once people see section breaks on the screen, the problem becomes far less mysterious.
There is also the classic page-three surprise. A user isolates page two, unlinks its header, deletes it, and then notices page three is blank too. That is usually when they assume the whole method failed. In truth, the middle page was isolated correctly, but the following section was still linked backward. Page three was simply copying page two’s new blank state. This particular mistake is so common because it feels unintuitive. Most people do not expect to manage the page after the page they are editing. But with headers, neighboring sections matter a lot.
Professionals who work with long documents often develop a kind of survival routine. They turn on Show/Hide before making any structural change. They name sections mentally as they go. They avoid deleting section breaks once the layout is stable. And they test changes on a copy of the file before touching the final version. That may sound cautious, but it saves a shocking amount of time. Large reports, contracts, and manuals can have a domino effect where one deleted break changes page numbers, margins, headers, footers, and sometimes your faith in civilization.
The most encouraging experience, though, is what happens after people finally understand the section logic. Suddenly, headers stop feeling random. They become manageable. Users can build title pages, chapter openers, appendix sections, and cleaner mid-document layouts without panic. The task that once felt like black magic becomes a repeatable process. And that is really the whole point of learning how to remove a header from the second page: not just to fix one document, but to stop losing twenty unnecessary minutes every time a header decides to get dramatic.
Conclusion
Removing a header from the second page is less about deleting text and more about controlling document structure. In Microsoft Word, the cleanest method is to isolate page two with section breaks, unlink the headers on both sides, and then remove the header from that middle section. Once you understand that headers belong to sections rather than pages, the process becomes much easier to repeat. Whether you are formatting a report, résumé, school paper, or client proposal, these nine steps will help you get the layout you want without wrecking the rest of the document.


