Table of Contents >> Show >> Hide
- Meet Jicama: The Crunchy Root With a Wild Side
- Can You Grow Jicama Where You Live?
- Seeds, Timing, and Getting a Head Start
- Site and Soil: Set the Stage for Big Tubers
- Planting Jicama: Step-by-Step
- Care and Feeding: Keep the Vine Happy (But Focused)
- Pests and Problems (Usually Minor, Occasionally Annoying)
- Harvesting Jicama: Digging Up the Crunch
- Storage and Kitchen Use: Keep It Crisp
- Common Mistakes (and How to Avoid Them)
- Experience Notes: What Growing Jicama Feels Like (500+ Words of Real-World Expectations)
- Conclusion
Jicama (pronounced HEE-kah-mah) is the crunchy, mildly sweet root that shows up in slaws, snack trays,
and “wait… what is that?” conversations at cookouts. Think of it as a water chestnut that went to
Mexico, got a glow-up, and came back with better texture. If you’ve ever wished you could harvest something that
tastes like a fresh, juicy crunch… from underground… while a vine tries to redecorate your backyard fencewelcome.
This guide walks you through growing jicama in a home garden, from seed to harvest, with the practical details
(timing, soil, watering, trellising) and the real talk (it’s a long-season crop; the vine is ambitious; and yes,
parts of the plant are toxicmore on that soon). By the end, you’ll know exactly what to do, when to do it,
and how to get those crisp tubers without accidentally raising a decorative jungle.
Meet Jicama: The Crunchy Root With a Wild Side
Jicama (Pachyrhizus erosus) is a warm-season, tropical-to-subtropical vine in the legume family grown for
its edible underground tuber. Above ground, it behaves like it’s auditioning for a role in “Fast & Furious:
The Trellis Drift.” Below ground, it’s quietly building the prize: a round or turnip-like root with firm white flesh
that stays crisp in salads and holds up in quick stir-fries.
Important safety note (seriouslyread this once)
Only the peeled root flesh is eaten. The leaves, stems, flowers, and especially the seeds are considered
poisonous and should not be consumed. Treat the plant like a “root-only restaurant”: enjoy the tuber, skip everything else.
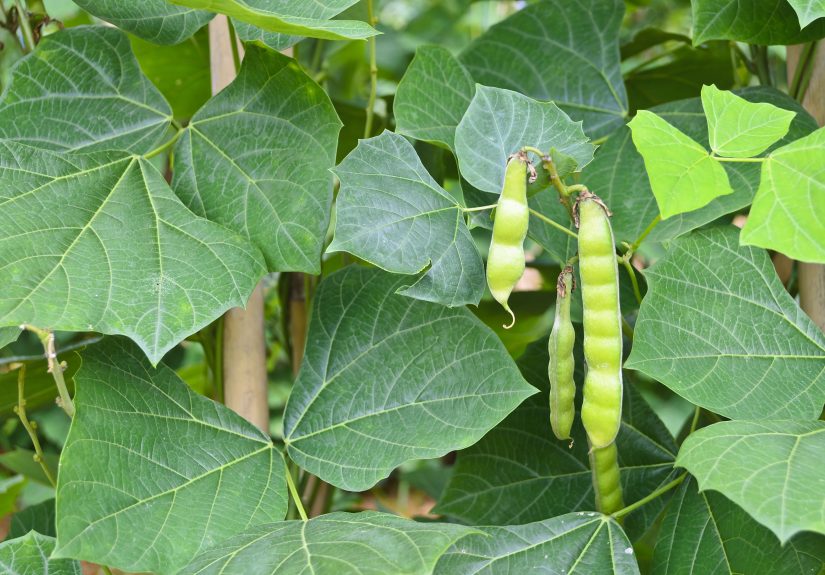
Keep plants away from curious kids and pets, and don’t snack on “mystery beans” that form in pods.
Can You Grow Jicama Where You Live?
Jicama loves heat and hates frost. For a solid harvest, most gardeners need a long, warm windowoften
150+ frost-free daysbecause tubers bulk up late in the season. It’s easiest in warm regions (think
parts of the Southwest, Gulf Coast, Florida, Hawaii, and other frost-light areas), but determined gardeners in
cooler zones can still pull it off with a head start and smart season-extending tactics.
Why “shorter days” matter
Here’s the twist: jicama’s tuber formation is influenced by day length. Long summer days tend to push vine growth,
while shortening days later in the season help shift energy toward root development. That’s why a warm fall can be
the difference between “nice little tuber” and “I grew my own crunchy bowling ball.”
Best USDA zones (and what to do if you’re not there)
- Best chance: warm, long-season areas (often zones 9–11 and other frost-free pockets).
- Possible with strategy: zones 7–8 with indoor starts, aggressive warmth, and a long warm fall.
- Challenging: short summers and early frosts unless you use containers you can move or a greenhouse.
If your season is short, your game plan is simple: start early, plant into warm soil, keep the vine healthy, and
protect it as long as possible before frost. Jicama is a “late payoff” croplike sourdough, but with more trellis.
Seeds, Timing, and Getting a Head Start
Start with seed (that’s the standard)
Most home gardeners grow jicama from seed. Expect germination to be slower in cool conditions and much faster
when the soil is truly warm. If you want higher germination rates, soak seeds overnight in warm water before planting.
When to start indoors
In most of the U.S., starting seeds indoors is the difference between harvesting jicama and harvesting disappointment.
A common approach is to start seeds 8–10 weeks before your last expected spring frost. Use a heat mat if
your indoor space runs cooljicama wants warmth like it’s on vacation.
When to transplant outside
Transplant after all frost danger has passed and the soil has warmed well. Jicama seedlings are not impressed
by chilly nights. Harden them off gradually (a week of increasing outdoor time) so they don’t go from “cozy windowsill”
to “why is the sun yelling at me?” overnight.
Example timelines (so you can picture it)
- Warm coastal/zone 10-ish: start seeds mid-winter; plant outdoors in early spring; harvest late summer to fall.
- Zone 8 (long summer, mild fall): start seeds late winter; transplant late spring; aim to harvest in fall before frost.
- Zone 7 (shorter fall): start early indoors, use black plastic or warm mulch, and plan for smaller tubers unless fall stays warm.
Site and Soil: Set the Stage for Big Tubers
Sunlight
Full sun is non-negotiable. Aim for 8+ hours of direct light daily. If your garden has a “kinda sunny” spot,
save it for lettuce and emotional support herbs.
Soil texture and drainage
Jicama prefers well-draining soiloften a sandy loam is idealbecause soggy ground invites root problems. Good drainage
plus consistent moisture is the sweet spot: damp, not swampy.
Soil pH and fertility
A slightly acidic to mildly alkaline range works well (roughly pH 6.5–8.0). Mix in compost before planting to boost
structure and nutrients. Because jicama is a legume, it generally doesn’t need heavy nitrogen fertilizing. Too much nitrogen
encourages leafy growth at the expense of tubersaka “congratulations on your beautiful vine; where’s the root?”
Bed prep tips that pay off
- Work in several inches of compost or well-rotted organic matter.
- Loosen the soil deeply so tubers can expand without hitting concrete-hard clods.
- Avoid fresh manure or high-nitrogen fertilizers late season.
- If roots ever peek above the soil, gently hill soil up around them and plan to peel thoroughly at harvest.
Planting Jicama: Step-by-Step
Option A: Direct sow (warm regions)
- Wait until nights are warm and soil is consistently heated.
- Plant seeds about 1 inch deep.
- Space seedlings, after thinning, to 10–12 inches apart.
- Keep evenly moist until seedlings establish.
Option B: Transplant (most of the U.S.)
- Start seeds indoors 8–10 weeks before your last frost.
- Transplant after frost risk is gone and soil is warm.
- Set plants 10–12 inches apart, with generous row spacing (around 4 feet between rows) if planting in-ground.
- Water in well and mulch to hold warmth and moisture.
Don’t skip the trellis
This vine can grow longsometimes very long. Give it a sturdy trellis, fence, cattle panel, or arch. The goal isn’t just
neatness; good airflow helps prevent leaf issues, and keeping growth supported makes flower removal and general
maintenance way easier.
Care and Feeding: Keep the Vine Happy (But Focused)
Watering
Consistent moisture supports steady growth and smoother tubers. A common target is about 1–2 inches of water per week,
depending on heat and rainfall. Drip irrigation or a soaker hose is ideal. Avoid constant saturationjicama likes a drink,
not a daily bath.
Fertilizing (less nitrogen, more “tuber support”)
Use a balanced approach early on, then shift toward fertilizers with more phosphorus and potassium to support root development.
Many gardeners feed once or twice during the long season or apply a monthly “tuber-friendly” fertilizerjust don’t overdo nitrogen.
Pruning and flower removal (the secret sauce)
Jicama can flower and form seed pods, but letting it set seed can pull energy away from tubers. If your goal is
a bigger root, remove flower buds and flowers as they appear. You can also pinch growing tips to encourage a bushier
plant and keep vines manageable. Think of it as gently reminding the plant, “We’re here for the root, not the romance.”
Temperature protection
Jicama struggles when temperatures drop into the cold range and will be damaged by frost. If your fall cools quickly,
use floating row covers on chilly nights, and harvest before a hard freeze. In container setups, you can move plants to a
warmer spot (sunroom, greenhouse, sheltered patio) to extend the season.
Pests and Problems (Usually Minor, Occasionally Annoying)
Jicama is often less bothered by pests than many vegetables, but it’s not magically invisible. You may see:
Common pests
- Aphids: rinse off with a strong spray of water; insecticidal soap if they persist.
- Spider mites: more likely in hot, dry conditions; increase humidity around plants and spray off leaf undersides.
- Weevils (sometimes): keep mulch tidy and consider physical barriers or appropriate organic controls.
Common diseases
- Root rot: almost always tied to poor drainage or overwatering. Fix soil and watering habits first.
- Virus issues (like mosaic patterns): often spread by sap-sucking insects. Remove badly affected plants to prevent spread.
Your best prevention is boringbut effective: full sun, good airflow, well-drained soil, and consistent (not excessive) watering.
Boring is beautiful when it comes with tubers.
Harvesting Jicama: Digging Up the Crunch
When to harvest
In many home gardens, jicama is harvested around 150 days after planting/transplanting, often right before the first frost.
You can harvest smaller roots earlier, but flavor and size generally improve with time. Many gardeners aim for tubers around
3–6 inches in diameter for the best texture and taste.
How to harvest (without turning it into a tragic shovel story)
- Follow the vine to the base and gently loosen soil around the plant.
- Use a fork or shovel to dig widetubers can be bigger than you expect.
- Lift carefully and avoid stabbing the root (jicama bruises like a peach with feelings).
- Brush off soil. Don’t wash until you’re ready to use it, unless the root is going straight to the kitchen.
Optional: curing for storage
If you plan to store roots, keeping them dry and letting them rest in a warm, dry place for a short period can help.
Then store in a cool, dark spot with good ventilation.
Storage and Kitchen Use: Keep It Crisp
Best storage conditions
Jicama stores best cool and dryoften around the mid-to-high 50s °F. Under ideal conditions, whole roots can keep for
weeks to months. If you refrigerate, keep moisture low to reduce decay and texture loss.
After you cut it
Once peeled and cut, wrap tightly or store in an airtight container in the refrigerator for up to about a week. Bonus:
jicama resists browning better than many cut produce items, so it stays snack-tray handsome longer.
Quick serving ideas (because you will harvest and immediately want a reward)
- Sticks with lime juice and chili powder
- Shredded into slaw with cabbage and cilantro
- Thin matchsticks in stir-fries (add late to keep crunch)
- Roasted or sautéed gently for a mellow, slightly sweet bite
- Pickled relishes and crisp toppings
Common Mistakes (and How to Avoid Them)
- Planting too early: cold soil slows germination and stunts plants. Wait for real warmth.
- Too much nitrogen: you’ll grow a gorgeous vine and a tiny tuber. Go easy on N.
- No trellis: the vine will sprawl, shade itself, and become harder to manage. Support it.
- Letting it set seed pods: energy can shift away from tubers, and seeds are toxic. Remove flowers unless saving seed intentionally (and carefully).
- Harvesting too soon: jicama is a long-game crop. Give it time, especially late season.
- Storing wet roots: moisture invites decay. Keep them dry and ventilated.
Experience Notes: What Growing Jicama Feels Like (500+ Words of Real-World Expectations)
If you’ve never grown jicama, the first “experience” to expect is emotional whiplash: it starts slow, then turns into a vine
that behaves like it pays rent. Many gardeners report that germination is the first test of patience. Even when you do everything
rightwarm soil, moist (not drenched) mix, and seeds soaked overnightjicama can still take its sweet time to sprout. You’ll check
the pots like a detective, convinced something is happening under the surface. Then one morning: there it is, a seedling popping up
like it owns the place. From that point forward, the plant’s confidence will only increase.
The second experience is the “trellis moment.” At first, you think, “This is fine. It’s a cute little plant.” Two weeks later, you’re
Googling “how strong is my fence, emotionally?” because the vine begins reaching, looping, and climbing. If you don’t provide support early,
it will sprawl and tangle with whatever is nearbytomatoes, peppers, your dignity. A sturdy trellis makes jicama easier to water, easier to inspect,
and much easier to manage when it starts producing flower buds.
Flower buds are another memorable chapter. In many climates, buds show up later in the season. The first time you see them, it’s tempting to celebrate:
“My jicama is thriving!” And yesit is. But if your goal is a bigger tuber, this is when you become the gentle villain in the story and pinch them off.
It feels wrong the first time (like canceling a party you already put on the calendar), but most growers find that keeping the plant focused on roots
improves results. If you want to save seed, a common approach is to allow one plantor even one portion of a plantto flower and set pods, while
you remove flowers on the rest. That way you’re not sacrificing your entire harvest to a seed-making side quest.
The biggest “experience” surprise for many gardeners is that you won’t see much evidence of tuber progress above ground. The vine can look fantastic,
and you still won’t know what’s happening underground. This is where jicama teaches you faith. You keep watering consistently, feeding lightly, and
protecting it from cold snaps, even though you can’t peek at the prize without disrupting the plant. When days shorten and nights stay warm, you may
notice the vine’s energy shiftless frantic new growth, a slightly more mature look to the plant. That’s often a good sign the underground work is ramping up.
Harvest day feels like a treasure hunt. You dig wide and carefully, and there’s always a moment where you hit something solid and think,
“Please be jicama, please be jicama.” Then you lift the root and realize it’s bigger than you expectedor smaller than you hopedand either way,
it’s yours. Smaller tubers can still taste great, especially sliced thin and used fresh. Bigger tubers are satisfying, but some gardeners note that
extremely oversized roots can get tougher. If you’re aiming for the best eating quality, harvesting when tubers are mid-sized tends to hit the sweet spot.
Finally, there’s the kitchen experience: peeling, slicing, and taking that first crunchy bite. Homegrown jicama has a clean, fresh snap that’s hard to beat,
and it pairs beautifully with bold flavors (lime, chili, vinegar, sesame, garlic). The best part is how it behaves once cutit doesn’t immediately brown or turn mushy
like some other produce. That means your “I’ll just prep a few sticks” moment often becomes “Oops, I ate half the harvest while standing at the counter.”
Consider yourself warned. Deliciously warned.
Conclusion
Growing jicama is absolutely doable if you give it what it wants: warmth, time, sun, drainage, and a trellis sturdy enough to handle a vine with big dreams.
Start seeds early, transplant into warm soil, keep moisture consistent, and remove flowers if you want the plant to focus on tuber development. Harvest near frost,
store roots cool and dry, and enjoy a crunchy homegrown ingredient that makes salads, slaws, and snack plates feel instantly more interesting.


