Table of Contents >> Show >> Hide
- Choose the Right Maple (Because “Maple” Isn’t Just One Tree)
- Pick the Perfect Spot
- Best Time to Plant a Maple
- Before You Dig: Set Yourself Up for Success
- Step-by-Step: How to Plant a Maple Tree the Right Way
- Step 1: Measure the root ball and locate the root flare
- Step 2: Dig a hole that’s wide, not deep
- Step 3: Prepare the tree (don’t be shy)
- Step 4: Set the tree at the correct depth
- Step 5: Backfill with the original soil
- Step 6: Water thoroughly
- Step 7: Mulch like a professional, not a volcano artist
- Step 8: Stake only if necessary
- First-Year Care: The Make-or-Break Basics
- Years 2–3: Turning “Surviving” Into “Thriving”
- Common Maple Problems (And How to Prevent Them)
- Special Notes for Japanese Maples
- Quick Maple Planting Checklist
- Conclusion
- Real-World Experiences: What Gardeners Notice After Planting a Maple (And What They Wish They’d Known)
- The “It’s not growing!” panic (aka transplant reality)
- The surprise of the buried root flare
- Watering mistakes are usually about timing, not effort
- Japanese maples teach the lesson of “afternoon shade matters”
- Mulch volcanoes are common (and easily fixed)
- The best “secret” is boring: pick the right size and location
Planting a maple tree is basically signing up for a long-term relationship with shade, fall color, and the occasional “Why are you dripping sap on my car?” moment. Do it right, and you’ll get decades of beauty (and bragging rights). Do it wrong, and your maple will spend its life quietly judging you… while struggling.
This guide walks you through choosing the right maple, planting it correctly (spoiler: depth matters a lot), and keeping it happy through the critical first few yearswithout turning your yard into a science project. You’ll also get a real-world “what actually happens” section at the end, because trees don’t read instruction manuals.
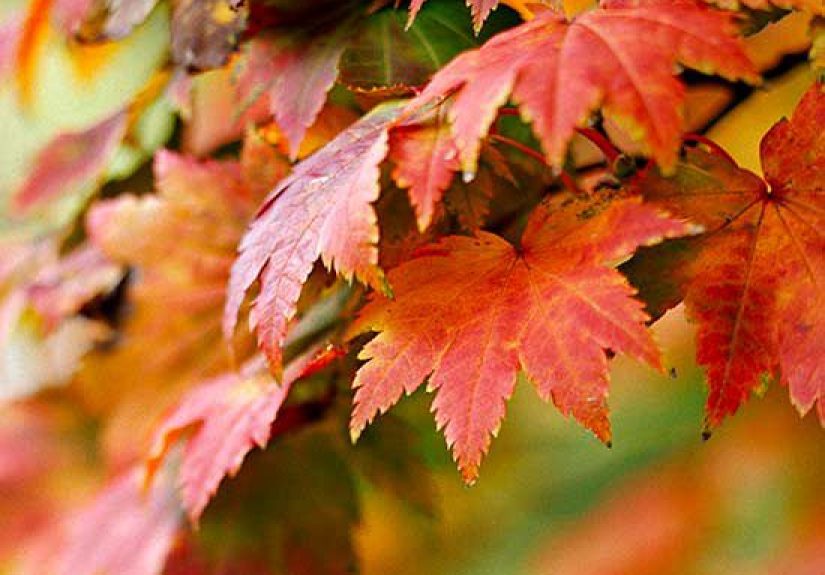
Choose the Right Maple (Because “Maple” Isn’t Just One Tree)
“Maple” is like “pizza.” There are many types, and choosing the wrong one for your situation can still work… but you might regret it.
Common maples you’ll see in U.S. landscapes
- Red maple (Acer rubrum): Adaptable, fast-growing, and famous for red fall color. Great for many yards if you have room.
- Sugar maple (Acer saccharum): Slower-growing, classic form, brilliant fall color, and yesmaple syrup fame. Often prefers well-drained soils and doesn’t love salt or harsh urban conditions.
- Silver maple (Acer saccharinum): Very fast growth, but can have weaker wood and aggressive surface roots. Works in some settings, not ideal everywhere.
- Japanese maple (Acer palmatum): Smaller, ornamental, and stunningespecially in partial shade. A favorite near patios and entryways.
Pro tip: Match the mature size to your space. A cute nursery tree can become a 40–60+ foot giant depending on the species and cultivar. If you’re planting under power lines or next to a driveway, choose a smaller ornamental maple (or plant farther away).
Pick the Perfect Spot
A maple can tolerate a lot, but it won’t thrive if you plant it in the wrong place and then act surprised. Here’s what to look for:
Sunlight
- Most large shade maples: Prefer full sun to partial sun for best growth and fall color.
- Japanese maples: Often do best with morning sun and afternoon shade (especially red-leaf types), which helps prevent leaf scorch in hot, dry weather.
Soil drainage
Maples generally like moisture, but they don’t want to sit in a swamp 24/7 (unless you’re planting a species/cultivar suited to wetter sites). If water stands for hours after a rain, consider improving drainage or choosing a better spot.
Space and “future you” planning
- Keep large maples well away from foundations, sidewalks, and septic systems.
- Plan for the canopy: leave room for branches so you’re not pruning it into a weird lollipop shape later.
- Avoid planting where winter road salt spray hitsmany maples have low salt tolerance.
Best Time to Plant a Maple
In most of the U.S., the best planting windows are:
- Fall: Often ideal because soil is still warm, roots grow, and the tree isn’t fighting summer heat.
- Early spring: Also excellentespecially before hot weather arrives.
Can you plant in summer? Technically yes. Practically, it’s like adopting a puppy during finals week. You can do it, but you’d better be ready to water consistently.
Before You Dig: Set Yourself Up for Success
1) Call before you dig
If you’re in the U.S., contact your local utility locating service (commonly by dialing 811) a few days before digging. Hitting a line is the kind of “surprise” nobody wants.
2) Find the root flare (the most ignored star of tree planting)
The root flare is where the trunk widens and transitions into the main roots. It should end up at soil grade or slightly above when you finish planting. Many nursery trees are buried too deep in their pots or root balls, so you may need to brush away soil to find it.
3) Check the roots
Container-grown trees often develop circling or girdling roots (roots that wrap around the trunk or root ball like a belt). If you plant that as-is, you’re basically installing future problems. You want roots that can grow outward into the surrounding soil.
Step-by-Step: How to Plant a Maple Tree the Right Way
-
Step 1: Measure the root ball and locate the root flare
Measure the root ball height and width, then identify the root flare by gently removing excess soil from the top of the root ball if needed. Ignore the temptation to plant based on the top of the potting soilyour goal is root flare placement, not “whatever the nursery did.”
-
Step 2: Dig a hole that’s wide, not deep
Dig the hole 2–3 times as wide as the root ball, but only as deep as needed so the root flare sits at (or slightly above) the finished soil level. Wide holes encourage roots to spread into loosened soil, which helps establishment.
-
Step 3: Prepare the tree (don’t be shy)
Remove the container. If roots are circling, loosen them gently and straighten what you can. For dense, pot-bound root balls, it’s often better to make a few vertical slices and tease roots outward so they don’t keep spiraling.
-
Step 4: Set the tree at the correct depth
Place the tree so the root flare is visible and ends up at grade or slightly above. If it settles after watering, you still want the flare to remain visible. Planting too deep is one of the most common reasons newly planted trees decline over time.
-
Step 5: Backfill with the original soil
Use the soil you removed to backfill around the root ball. Break up large clods. Lightly firm the soil as you go to remove big air pockets, but don’t stomp it into concrete. Roots need oxygen as much as they need water.
-
Step 6: Water thoroughly
Water slowly and deeply right after planting to settle the soil. If you want a helpful trick, build a low soil berm just outside the planting hole to hold water over the root zone during the first seasonespecially in sandy soils.
-
Step 7: Mulch like a professional, not a volcano artist
Spread 2–3 inches of mulch over the root zone, keeping it pulled back a few inches from the trunk. Mulch touching the trunk traps moisture, invites pests, and can contribute to trunk disease. Think “donut,” not “volcano.”
-
Step 8: Stake only if necessary
Many trees don’t need staking. Stake only if the site is windy or the root ball is unstable. Use soft ties, allow slight movement, and remove staking after the tree stabilizes (often within one growing season). A tree that can sway a little develops stronger trunk taper.
First-Year Care: The Make-or-Break Basics
Watering (your maple’s love language)
The number one job in year one is consistent watering. Most new trees do best with deep watering that soaks the root zone, then allows slight drying between waterings. A common target is roughly the equivalent of about an inch of water per week from rain/irrigation, adjusted for your heat, soil type, and tree size.
- Week 1–2: Check daily; water as needed so the root ball stays evenly moist (not soggy).
- Weeks 3–12: Deep watering a few times per week is often better than a daily sprinkle.
- Remainder of the first growing season: Deep water weekly (more during heat waves or drought).
Reality check: The root ball can dry out faster than the surrounding soil, especially for container-grown trees. Always check moisture near the root ball, not just the surface mulch.
Fertilizer: slow down, eager beaver
In many cases, you don’t need fertilizer the first year. A newly planted tree is busy growing roots; pushing top growth too soon can increase stress. If a soil test shows a true deficiency, address it thoughtfullyotherwise focus on water and mulch.
Protection
- Deer/rabbits: Use fencing or trunk guards where browsing is common.
- Mower/trimmer damage: Keep grass away from the trunk and don’t nick the bark. Mechanical injury is a sneaky tree-killer.
- Heat and sun scorch: Japanese maples, especially, may need afternoon shade in hot regions.
Years 2–3: Turning “Surviving” Into “Thriving”
Watering evolves, but doesn’t disappear
By year two, roots are exploring outside the original root ball. You can water less frequently, but more deeply, encouraging roots to chase moisture outward. During drought, keep helpingestablishment takes time, and larger maples can take multiple seasons to fully settle in.
Pruning: think “training,” not “haircut”
Maples usually need light pruning, not extreme shaping. In late winter or early spring (before heavy growth), remove dead or damaged branches and fix obvious structural issues (like rubbing branches). Avoid “topping” at all costsit creates weak growth and long-term problems.
Mulch maintenance
Refresh mulch as it decomposes, keeping the layer around 2–3 inches and maintaining that mulch-free space around the trunk. This helps conserve moisture, moderates soil temperature, and reduces competition from grass.
Common Maple Problems (And How to Prevent Them)
1) Leaf scorch
Brown edges or crispy leaves in summer often come from heat, drought stress, or intense sunespecially for Japanese maples in full afternoon sun. Solutions: improve watering consistency, increase mulch coverage, and provide afternoon shade if possible.
2) Planting too deep
Deep planting can lead to stress symptoms like poor growth, dieback, and trunk issues over time. Prevention is simple but strict: plant with the root flare at soil grade or slightly above, and don’t bury it with extra soil or mulch.
3) Girdling or circling roots
These can slowly strangle a tree as it grows. Prevention: inspect and correct circling roots at planting, dig a wide hole, and avoid burying the flare. If you suspect girdling roots later, consult a certified arboristsome corrections are possible, but timing matters.
4) Chlorosis (yellow leaves with green veins)
This can happen when soil pH is too high for the tree to access iron and other nutrientsmore common in some regions with alkaline soils. A soil test can confirm the cause. Solutions might include adjusting soil conditions or choosing a tree better suited to your soil.
5) Salt stress
Some maples have poor salt tolerance, showing twig dieback or leaf burn when exposed to road salt or salty irrigation water. Plant away from road spray zones, and rinse salt-laden soil in early spring if that’s a recurring issue in your area.
Special Notes for Japanese Maples
Japanese maples are the “fine art” version of maples: gorgeous, but slightly more particular.
- Light: Morning sun with afternoon shade is often ideal, especially for red and variegated cultivars.
- Soil: Well-drained, slightly acidic soil with organic matter tends to keep them happiest.
- Water: Consistent moisture is keyavoid standing water and avoid drought stress.
- Heat: In hot summers, even well-watered trees can show sunburn/bronzing in intense sun.
Quick Maple Planting Checklist
- Right tree, right place (mature size, sun, soil, salt exposure)
- Call utilities before digging (common U.S. practice: 811)
- Locate the root flare before planting
- Dig wide, not deep (2–3× root ball width)
- Correct circling roots
- Plant with root flare at grade or slightly above
- Backfill with native soil; don’t bury the root ball top
- Water deeply after planting and consistently in year one
- Mulch 2–3 inches, pulled back from trunk (no volcano mulch)
- Stake only if needed; remove early
Conclusion
Maples reward good planting more than almost any other “yard upgrade.” The secret isn’t fancy fertilizer or magical potionsit’s fundamentals: correct depth (hello, root flare), a wide planting hole, sensible mulching, and faithful watering while roots establish. Do that, and you’ll have a tree that grows stronger each year, cools your home, supports wildlife, and puts on a fall show that makes your neighbors “casually” slow down when they drive past.
Real-World Experiences: What Gardeners Notice After Planting a Maple (And What They Wish They’d Known)
Even when you plant a maple correctly, the first year can feel like a suspense movie: you’re staring at leaves, Googling normal behavior, and wondering if your tree is thriving or quietly plotting its exit. Here are some common, real-life patterns gardeners reportplus what tends to help.
The “It’s not growing!” panic (aka transplant reality)
Many people expect visible top growth right away. But young maples often spend their early energy growing roots, not branches. You might see modest leaf growth above ground while roots are expanding below. A tree can be doing exactly what it shouldand still look “unchanged” to an impatient human. Gardeners who worry less usually do one thing more: they check soil moisture near the root ball and keep watering steady through heat spells.
The surprise of the buried root flare
A lot of folks only learn about the root flare after something goes wrong. One common “aha” moment: you remove the pot, and the top of the soil is several inches above where the trunk actually begins to flare. Gardeners who take the time to find the flare and plant at the correct height often say it feels weird at firstlike the tree is “too high.” Then later they realize it was exactly right, because the tree settles a bit after watering and rains.
Watering mistakes are usually about timing, not effort
People who lose a newly planted maple often weren’t “lazy”they were inconsistent. A deep soak once a week can be great… unless a surprise 90-degree week shows up and the root ball dries out between waterings. Many experienced gardeners adjust watering based on weather and soil, not the calendar. They also learn that mulch helps dramatically with water stability, especially in sunny locations.
Japanese maples teach the lesson of “afternoon shade matters”
Homeowners often plant a Japanese maple in full sun because the nursery tag says it tolerates sun. Then midsummer arrives, and leaves show scorch or bronzing. The best long-term outcomes tend to happen when gardeners plan for protection from harsh afternoon suneither by picking a spot with dappled shade, planting near the east side of a structure, or using other trees for filtered light. Once that balance is right, Japanese maples often become surprisingly low-drama.
Mulch volcanoes are common (and easily fixed)
Many people start with good intentions: “I’ll mulch to hold moisture.” Then they pile it against the trunk because it looks neat. Later they notice bark staying damp, or pests hiding in the mulch, or the trunk looking unhealthy. Gardeners who correct this early usually do finepull mulch back, keep the donut shape, and let the trunk breathe. It’s one of the easiest changes that can make a big difference.
The best “secret” is boring: pick the right size and location
The happiest maple stories usually start with a practical choice: a tree that fits the space at maturity and matches the site. When the tree isn’t fighting the environmentwrong sun, wrong soil moisture, too close to pavementcare becomes simpler. And the gardener gets to enjoy the tree instead of constantly trying to “fix” the spot. In other words, the most experienced gardeners don’t have magic tricksthey have fewer avoidable problems.


