Table of Contents >> Show >> Hide
- What You Need Before You Start
- How to Make Slime with Soap: 11 Steps
- Step 1: Pick the Right Soap
- Step 2: Protect Your Workspace
- Step 3: Add the Cornstarch to the Bowl
- Step 4: Pour in the Soap
- Step 5: Stir Until a Thick Paste Forms
- Step 6: Let It Rest for 2 Minutes
- Step 7: Adjust the Texture
- Step 8: Knead It with Your Hands
- Step 9: Add Optional Extras
- Step 10: Play-Test the Slime
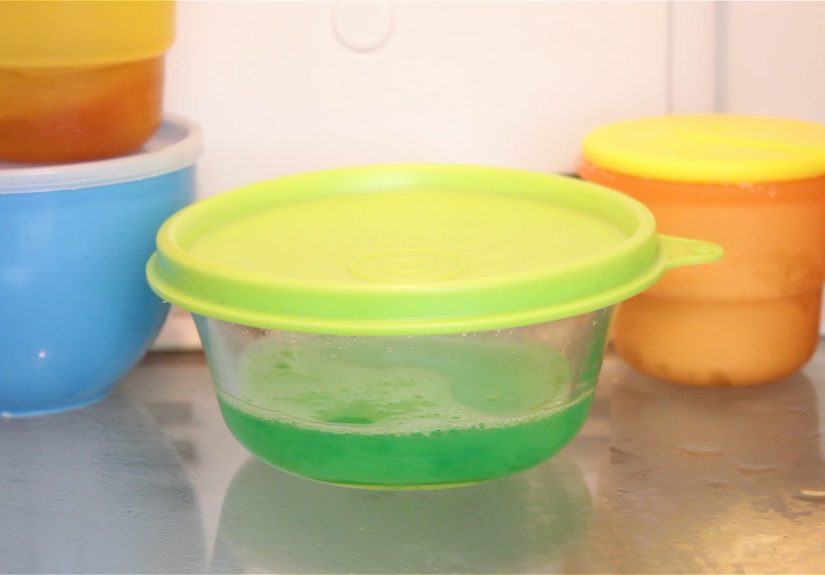
- Step 11: Store It the Smart Way
- Why Soap Slime Works
- Common Mistakes and Easy Fixes
- Safety Tips for Making Slime with Soap
- Who Will Love This Slime Recipe?
- Soap Slime Variations to Try Next
- Experience Notes: What Making Soap Slime Actually Feels Like
- Final Thoughts
- SEO Tags
Some crafts whisper, “I’m educational.” Slime kicks open the door, cannonballs into your kitchen, and announces itself with jazz hands. If you want a gooey, squishy project that feels like science class wearing party socks, learning how to make slime with soap is a great place to start.
The best part? You do not need a chemistry lab, a cart full of mystery activators, or a dramatic soundtrack. A simple soap-based slime can come together with everyday ingredients, and it is especially handy when you want a no-fuss, no-glue-style activity for kids, tweens, or adults who claim they are “just helping” and then somehow play with the slime for 40 minutes.
In this guide, you will learn a simple borax-free method, how to fix slime that is too sticky or too crumbly, and how to store it so your masterpiece does not become a tragic little crust in a bowl. Let’s get our hands gloriously messy.
What You Need Before You Start
- 1/2 cup cornstarch
- 1/3 cup liquid dish soap or thick body wash
- 1 mixing bowl
- 1 spoon or spatula
- Food coloring, optional
- A few drops of lotion, optional, for a softer feel
- Airtight container or resealable bag for storage
This simple slime recipe works best when your soap is on the thicker side. Thin, watery soap can still work, but you may need more cornstarch and a little more patience. Think of this project as part recipe, part texture negotiation.
How to Make Slime with Soap: 11 Steps
Step 1: Pick the Right Soap
Start with a liquid dish soap or a thick body wash. Clear soap can give you a brighter final color, while colored soap can tint the slime on its own. If you choose a heavily scented soap, congratulations: your slime may smell like a tropical vacation or a lemon-scented kitchen. Either way, it has personality.
Avoid harsh cleaners or products with strong degreasers beyond regular dish soap. You want a playful craft material, not something that feels like it belongs in a janitor’s closet.
Step 2: Protect Your Workspace
Before you mix anything, cover your table with a placemat, tray, parchment paper, or an old towel. Slime making is not impossible to clean up, but it does have a gift for wandering into places it was not invited. Roll up sleeves, tie back long hair, and keep paper towels nearby.
This is also the moment to set expectations with kids: slime is for hands and bowls, not sofas, rugs, pets, or younger siblings.
Step 3: Add the Cornstarch to the Bowl
Measure about 1/2 cup of cornstarch into your mixing bowl. Cornstarch gives the mixture body and helps transform plain soap from slippery liquid into something much more doughy, stretchy, and satisfying.
If you plan to make a bigger batch, you can scale up, but keep the same basic approach. Start modestly. It is easier to fix a small bowl of slime than a giant bowl of chaos.
Step 4: Pour in the Soap
Add about 1/3 cup of liquid dish soap or body wash to the cornstarch. Do not panic if the mixture looks wrong at first. In fact, it almost always looks wrong at first. That is part of the show.
If you want colored slime, add a drop or two of food coloring now. Stir gently so the color spreads evenly. A little coloring goes a long way unless your dream is to temporarily dye your fingertips like a tiny abstract painter.
Step 5: Stir Until a Thick Paste Forms
Use a spoon or spatula to mix the cornstarch and soap together. At the beginning, the texture may seem clumpy, chalky, or stubborn. Keep stirring. Scrape the sides of the bowl. Press the mixture together. As the ingredients combine, the paste will begin to smooth out.
This stage is where many people assume they have failed. They have not. They are simply in the awkward middle school phase of slime development.
Step 6: Let It Rest for 2 Minutes
Once the mixture is combined, let it sit for about 2 minutes. This short rest helps the texture settle and makes it easier to judge what the slime actually needs. Freshly mixed slime can be misleadingly sticky or overly stiff for a moment.
Think of it as giving your slime a tiny spa break. It has been through a lot already.
Step 7: Adjust the Texture
Now check the consistency. If the slime is too wet or sticky, add a small spoonful of cornstarch and mix again. If it feels too dry, crumbly, or resistant to stretching, add a tiny squirt of soap. Work in small amounts. Slime responds better to gentle corrections than dramatic ingredient dumps.
The goal is a texture that holds together, feels smooth in your hands, and stretches a little before breaking. Soap slime is not usually as rubbery as glue-based slime, so do not expect superhero-level elasticity. Expect soft, squishy, and fun.
Step 8: Knead It with Your Hands
Once the mixture is thick enough to handle, lift it out of the bowl and knead it with clean hands. Squeeze, fold, press, and stretch it for a minute or two. This is where the slime really becomes slime.
If it sticks to your fingers, dust in a little more cornstarch. If it cracks apart like sad cookie dough, add a drop of soap and keep kneading. Hands are usually better than spoons at finishing the texture.
Step 9: Add Optional Extras
At this point, you can customize the slime. A tiny drop of lotion can make it feel silkier. A pinch of fine glitter can make it sparkle. A bit of extra food coloring can deepen the shade. Keep add-ins modest, because too much liquid can throw the balance off and send you back into troubleshooting mode.
Want a theme? Make pastel slime for spring, orange slime for fall, or blue “ocean slime” with a few plastic shells on the side. Just do not add anything sharp, breakable, or small enough to turn a craft into a safety lecture.
Step 10: Play-Test the Slime
Stretch it. Squish it. Roll it into a ball. Flatten it into a pancake and fold it back together. Good soap slime should feel soft and pliable, not like soup and not like sidewalk chalk.
This is also the best time to decide whether you want it thicker or softer. Some people love a firmer putty feel. Others want a looser, drippier texture. Neither is wrong. Slime is a deeply personal relationship.
Step 11: Store It the Smart Way
When playtime is over, place your slime in an airtight container or a resealable plastic bag. This helps keep it from drying out. Stored properly, soap slime may last for a short period, though homemade slime is usually at its best fresh.
If it starts to dry, knead in a tiny bit of soap. If it becomes too wet after sitting, mix in a little cornstarch. If it smells odd, looks dirty, or has clearly reached the end of its slimy journey, toss it and make a new batch.
Why Soap Slime Works
If you enjoy knowing why a recipe behaves the way it does, here is the simple version. Soap changes how the mixture feels and moves, while cornstarch thickens it and gives it structure. Together, they create a soft sensory material that lands somewhere between slime, putty, and dough depending on your ratios.
That is why this project feels more forgiving than some classic slime recipes. It is less about chasing a perfect chemical reaction and more about adjusting a texture until it feels right in your hands. In other words, it is science with room for improvisation.
Common Mistakes and Easy Fixes
Your slime is too sticky
Add cornstarch a little at a time and knead after each addition. Too much all at once can make the slime stiff.
Your slime is too crumbly
Add a small squeeze of soap or a drop of lotion. Knead thoroughly before deciding it still needs more.
Your slime feels more like paste than slime
Let it rest briefly, then knead it longer. Sometimes the texture improves just from handling. If needed, adjust with tiny amounts of soap.
Your slime dries out fast
Store it immediately after play in an airtight container. Homemade slime left uncovered will lose moisture quickly.
Your color looks muddy
Use fewer colors, and mix gently. Too much stirring with multiple dyes can create a brownish “mystery swamp” effect.
Safety Tips for Making Slime with Soap
Soap slime is a fun home craft, but it is still important to treat it like a play material, not a snack. It should not be eaten, and younger children should be supervised during slime activities. Keep it away from eyes, mouths, and pets.
If someone has very sensitive skin, try a patch test with the soap first or choose a gentler, fragrance-free product. After playtime, wash hands with soap and water and wipe down the play area. That simple cleanup routine keeps the project fun instead of turning it into a mystery stickiness incident later.
Also, skip experimental ingredient mixing with strong household cleaners. A simple soap-and-cornstarch slime is plenty exciting without turning your craft session into a cautionary tale.
Who Will Love This Slime Recipe?
This soap slime recipe is especially good for:
- Parents who want a quick indoor activity
- Teachers planning simple sensory play
- Kids who want slime without complicated ingredients
- Beginners who want to learn how to make slime with soap before trying stretchier recipes
- Anyone who enjoys hands-on crafts and does not mind a little mess in the name of joy
It is easy, affordable, and adaptable. That combination is hard to beat.
Soap Slime Variations to Try Next
Soft cloud-style version
Add a tiny amount of lotion and knead well for a silkier feel.
Bright rainbow slime
Split the batch into smaller pieces and color each one differently, then twist them together.
Scented body wash slime
Use a pleasantly scented body wash for a fun sensory twist. Just choose a mild product.
Seasonal slime
Match your colors to holidays or seasons. Green for spring, orange for Halloween, red and green for winter. Slime, like fashion, can be seasonal.
Experience Notes: What Making Soap Slime Actually Feels Like
The first time you make slime with soap, the experience is a mix of curiosity, skepticism, and a strange level of emotional investment in a bowl of goo. You start by thinking, “This seems easy enough.” Then you stir the ingredients together and almost immediately begin to doubt everything. It looks lumpy. It feels weird. It clings to the spoon like it has trust issues. For a brief moment, you wonder whether you have invented a new type of failed pancake batter.
Then something delightful happens. As you keep mixing, the texture begins to change. The clumps soften. The mixture starts to gather itself. It becomes less like a kitchen accident and more like an actual craft project with potential. When you finally pick it up and knead it in your hands, that is the turning point. Suddenly, it feels cool, squishy, and weirdly satisfying. It is the kind of texture that makes people say, “Wait, let me try it,” even if they insisted five minutes earlier that slime was not their thing.
Kids usually react fast. They poke first, then squeeze, then stretch, and then immediately begin giving their slime a backstory. It is a sea monster. It is a magic cloud. It is “radioactive cupcake goo.” Adults tend to approach with caution, but once the slime starts cooperating, they get pulled in too. There is something surprisingly relaxing about kneading a small lump of soft, flexible slime after a long day. It is low-stakes, hands-on fun, and sometimes that is exactly what the brain ordered.
There is also a learning curve, which is honestly part of the charm. One batch may be too sticky. Another may be too stiff. You start noticing tiny details, like how a thicker soap gives a smoother texture or how even a small extra spoonful of cornstarch can completely change the feel. That trial-and-error process makes the activity feel more personal. You are not just following a recipe; you are tuning a texture.
And yes, it can get messy. There may be a bit on the table, a little on someone’s fingers, and possibly a dramatic moment where a child announces that the slime has “escaped.” But compared with many elaborate crafts, soap slime is manageable. Cleanup is usually straightforward, and the fun-to-effort ratio is impressively high.
In the end, the experience of making slime with soap is not just about the finished blob. It is about the process: the experimenting, the laughing, the small adjustments, the satisfaction of fixing a batch that looked hopeless two minutes ago. It is sensory play, beginner science, and creative chaos rolled into one. And that is exactly why so many people keep coming back for another batch.
Final Thoughts
If you want a simple, playful project that does not require a scavenger hunt through three different stores, this is one of the easiest ways to get started. Learning how to make slime with soap is not about perfection. It is about experimenting, adjusting, and ending up with something soft, squishy, and wildly entertaining.
So grab a bowl, choose a soap, and embrace the glorious weirdness. Your slime may not change the world, but it can absolutely improve a rainy afternoon.


