Table of Contents >> Show >> Hide
- What Is a Paper Money Pouch (and Why Make One)?
- Materials and Tools
- Choose the Right Paper (So It Doesn’t Rip in the Wild)
- Size Planning: Make It Fit US Bills Comfortably
- Method 1: The No-Glue Origami Money Pouch (Fast + Clean)
- Method 2: The Gusseted Paper Money Pouch (Holds More)
- Method 3: The Reinforced Paper Wallet-Style Pouch (Durable + Practical)
- Make It Look Good: Design and Personalization Ideas
- Troubleshooting: Fix Common Folding Problems
- FAQ: Quick Answers Before You Fold Yourself Into Confusion
- Real-Life Experience: What I Learned Making Paper Money Pouches
- Conclusion
Cash is a great gift. It’s also a great way to stick to a budget, stash “coffee money,” or keep spare bills from
turning your bag into a crumpled-paper museum. The only problem? Loose bills have a talent for disappearing at the
exact moment you’re standing in line and pretending you definitely know how to use tap-to-pay.
Enter: the paper money poucha simple DIY cash holder that’s part origami envelope, part mini wallet,
and part “look, I’m organized now.” In this guide, you’ll learn a few reliable ways to fold and build a money pouch
using common paper, plus tricks to make it sturdier, nicer-looking, and gift-readywithout turning it into a
47-step craft that requires a glue gun and a degree in geometry.
What Is a Paper Money Pouch (and Why Make One)?
A paper money pouch is a small folded pocket designed to hold folded bills (and sometimes a note, gift card, or
a couple of receipts you swear you’ll file later). Depending on the style, it can be:
- No-glue origami (folds lock into place)
- Envelope-style (a flap tucks in or seals with tape/sticker)
- Gusseted pouch (has “sides” so it can hold more)
- Paper wallet (a flatter holder with reinforced seams)
It’s perfect for DIY cash gifts, cash stuffing, travel tips, allowance systems, fundraiser collections,
and those times you want to hand someone money without doing the awkward “here, take this loose bill from my pocket”
move.
Materials and Tools
The beauty of this project is that you can go as minimal or as extra as you like.
Basic (No-Cut, No-Glue Option)
- One sheet of paper (printer paper, origami paper, or light cardstock)
- A flat surface
- Your hands (two recommended, but one-handed folding is a fun boss level)
Optional “Make It Look Like You Tried” Extras
- Scissors (for trimming)
- Tape or double-sided tape
- Glue stick
- Ruler (helpful for clean edges)
- Bone folder or the edge of a spoon (for crisp creases)
- Stickers/washi tape/seal labels
- Markers, stamps, or colored pencils
Choose the Right Paper (So It Doesn’t Rip in the Wild)
You want paper that folds sharply but doesn’t tear when you make tight creases. A few good options:
-
Origami paper: Thin, easy to fold, great for locking folds and clean corners. Best when you want a
traditional origami money holder. -
Printer paper: Convenient and surprisingly workable. It’s a bit springy, but it holds creases well
if you press firmly. -
Light cardstock: Makes a sturdier cash envelope, but thick paper can fight you on tight locks.
If you go cardstock, avoid ultra-thick “poster board” vibes.
Pro tip: If your paper is slippery, fold slower and press each crease firmly. If it’s thick, score your fold line
gently with a ruler edge or bone folder so you don’t get lumpy corners.
Size Planning: Make It Fit US Bills Comfortably
A money pouch is basically a tiny home for your billsso the “floor plan” matters. US paper currency is
standardized in size, which makes designing pouches easier: you can build around one consistent dimension.
For a simple pouch, you’ll usually fold bills in half (or thirds) and design the pocket to fit that folded size.
If you’re gifting a crisp bill and want it to slide in smoothly, leave a little extra room in width and height.
Quick Sizing Rules (No Math Panic)
- For folded-in-half bills: your pouch pocket should be a bit wider than half the bill length.
- For folded-in-thirds bills: the pocket can be slimmer and more “gift envelope” style.
- Want a pouch that holds multiple bills? Choose the gusseted method or reinforce seams with tape.
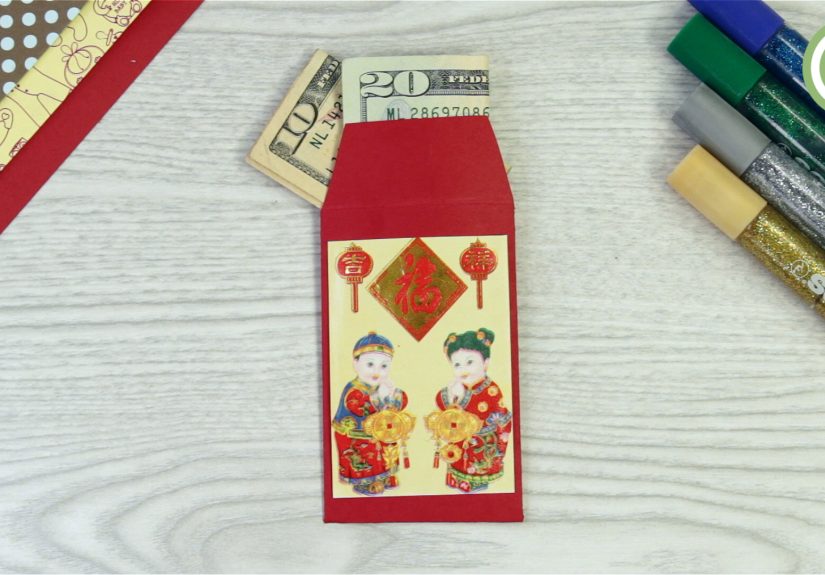
Method 1: The No-Glue Origami Money Pouch (Fast + Clean)
This is the go-to option when you want a neat origami money envelope look with a pocket and a flap
that tucks in. It’s also excellent for last-minute gifting, because it screams, “I planned this,” even if you folded
it in your car.
Step-by-Step
-
Start with a rectangle. Printer paper works great. If you want a smaller pouch, trim the sheet down
(for example, cut it to a half-sheet size) so it doesn’t end up big enough to store a full sandwich. -
Make a guide crease. Fold the paper in half lengthwise, then open it back up. This crease is your
center line for symmetry. -
Create the pocket base. Fold the bottom edge up about one-third of the sheet. Press firmly. This
folded section becomes the pocket “front.” -
Fold the sides inward. Bring the left edge toward the center line, then do the same with the right
edge. You should now see a pocket shape forming at the bottom. -
Lock the pocket corners. At the bottom, you’ll have overlapping flaps. Tuck one flap inside the
other (or use a small piece of double-sided tape if your paper is thick and refuses to cooperate). -
Make the top flap. Fold the top portion down until it meets the pocket. Crease. Then fold it back
up and pinch a small crease line where you want the flap to tuck. -
Create a tuck-in point. Fold the flap’s bottom edge slightly upward (a thin fold) to form a stiff
“lip.” This helps it slide into the pocket and stay closed. -
Test the fit. Slide in a folded bill. If it’s too tight, unfold and adjust the side folds slightly
outward. If it’s too loose, fold the sides in a hair more.
Upgrade Ideas
- Add a closure: sticker seal, washi tape “belt,” or a tiny binder clip (very “office chic”).
- Write a label: “Coffee Fund,” “Emergency Tacos,” “Travel Tip,” or “Totally Not Candy Money.”
- Decorate the flap: stamps, doodles, or a simple monogram for a classy cash holder.
Method 2: The Gusseted Paper Money Pouch (Holds More)
If you want something that can carry a stack of bills (or a folded note plus bills), a gusseted pouch is the move.
“Gusset” is a fancy word for “the sides puff out so it has depth,” which is also what my backpack does after
I “just carry one small thing.”
Step-by-Step
-
Choose a sturdy sheet. Regular printer paper works, but light cardstock or craft paper feels more
gift-ready. -
Form a tube. Place the paper vertically. Fold one long side inward about 1/2–1 inch. Add tape along
that folded edge. Roll the other side over it to form a tube and press to seal. -
Make the bottom fold. Flatten the tube so the seam sits on one side (not directly in the middle).
Fold the bottom edge up about 1.5–2 inches and crease. -
Create the gusset corners. Open the bottom fold and “squish” each corner into a triangle shape so
the bottom forms a flat base. Crease sharply. (If you’ve ever folded a paper bag bottom, this will feel familiar.) -
Seal the base. Fold the bottom triangles inward, then fold the bottom flap up and tape/glue it down.
For extra strength, add a second strip of tape across the seam. -
Shape the sides. Pinch the left and right sides inward to create side gussets. Press creases so the
pouch can sit flatter or expand when filled. -
Create the top closure. Fold the top edge down once (about 1/2 inch), then fold again. You can tuck
this fold, clip it, sticker-seal it, or punch holes and tie with string.
When to Use This Style
- You’re gifting multiple bills and want it to feel like a mini gift bag.
- You want a reusable cash envelope for budgeting categories (gas, groceries, fun money).
- You want to add a note, confetti (fine), or a tiny card (also fine).
Method 3: The Reinforced Paper Wallet-Style Pouch (Durable + Practical)
If you want something that survives pockets, backpacks, and the general chaos of daily life, reinforce it. This
approach borrows from classic paper wallet builds: folds plus tape along stress points. It’s not “pure origami,”
but it is pure common sense.
Step-by-Step
-
Start with a rectangle. Half a sheet of printer paper is a great size. Fold it in half like a book
and crease. -
Create the pocket depth. Open it back up and fold the bottom edge up about 1/3 of the paper. This
becomes your pocket front. -
Fold side seams. Bring the left and right edges inward (like making an envelope). Overlap them
slightly so there are no gaps. -
Reinforce with tape. Tape the inside of the side seams and the bottom cornersthese are the areas
that rip first when you shove in a thick stack. -
Create a flap or “belt.” Fold the top down to close. Add a strip of paper or washi tape around the
pouch like a belt, or use a sticker seal.
Durability Boosters
- Edge tape: clear tape along the mouth of the pocket stops tearing.
- Corner patches: small squares of tape on corners add life.
- Double paper: glue two sheets together (pattern outside, plain inside) for a sturdier feel.
Make It Look Good: Design and Personalization Ideas
A paper money pouch can be simple, but a few details make it feel intentionallike a real DIY cash gift holder
instead of “I folded this while watching TV and panicked.”
- Theme it: birthday colors, graduation school colors, holiday patterns.
- Add a message: a short note on the inside flap (“For your next adventure”).
- Use a “window”: cut a small shape in the front and back it with clear tape to show a hint of the bill.
- Make it a set: multiple labeled pouches for budgeting“Food,” “Fun,” “Fuel,” “Future Me.”
- Sticker seal: one seal instantly makes it look like a real envelope.
Troubleshooting: Fix Common Folding Problems
“My flap won’t stay closed.”
- Make a sharper crease on the tuck-in lip.
- Use slightly thinner paper (thick paper pops open).
- Add a sticker seal or a thin strip of washi tape as a closure.
“The pouch is too tight for bills.”
- Reduce the side fold overlap so the pocket is wider.
- Fold bills in thirds instead of half.
- Choose the gusseted method if you’re holding multiple bills.
“The bottom keeps ripping.”
- Reinforce corners with tape.
- Don’t overfill; paper has feelings.
- Use a slightly heavier paper for the gusseted pouch or reinforce seams for the wallet-style pouch.
FAQ: Quick Answers Before You Fold Yourself Into Confusion
Can I make a money pouch without cutting anything?
Yes. Use the origami method (Method 1). Cutting is optionalmostly for resizing paper or adding design details.
What’s the best paper for a beginner?
Printer paper is the easiest to find and forgiving. If you want crisp folds and a nicer look, try origami paper or
light craft paper.
Can I make it waterproof?
Not fullypaper is still paper. But you can add a layer of clear tape on the outside, use contact paper, or slip
the finished pouch into a small plastic sleeve if you’re worried about spills.
Will it work for other currencies?
Absolutely. Adjust the pouch width and height based on that currency’s size. The gusseted pouch is especially
adaptable because it has depth and doesn’t rely on a tight lock.
Real-Life Experience: What I Learned Making Paper Money Pouches
The first time I made a paper money pouch, I had the kind of confidence that only comes from watching a 30-second
“super easy” craft video. You know the onessomeone folds paper twice, smiles mysteriously, and suddenly there’s a
flawless envelope holding perfectly crisp cash. I thought, “That’s it. I’m basically an artisan now.”
Cut to ten minutes later: I had a lopsided rectangle that looked like it had survived a small storm. My flap wouldn’t
tuck. My pocket wouldn’t open. My creases were soft and sad, like I had folded everything with emotional hesitation.
The real villain? Paper choice. I used thick cardstock because I wanted it to feel “premium,” but thick paper can
fight tight folds. It kept springing open like it was personally offended by the idea of being shaped.
On attempt number two, I switched to plain printer paper. Suddenly the folds made sense. The pouch lay flatter. The
corners behaved. It still wasn’t perfect (my “center line” was more of a “suggestion line”), but it worked. And that’s
when I learned the first rule of paper pouches: start simple, then upgrade. If you can fold a working
pouch from basic paper, you can later make one from fancy patterned sheets without spiraling into craft despair.
The next big lesson was crease pressure. Light, polite folds give you a pouch that opens unexpectedlylike a tiny
paper mouth saying, “I refuse to be contained.” When I started pressing creases firmly (sometimes using the back of
a spoon like a budget-friendly bone folder), everything improved. The flap tucked cleaner. The pocket stayed shaped.
The whole pouch looked less like it had been folded during a bumpy bus ride.
Then I discovered the power of tiny reinforcements. A single strip of clear tape along the pocket mouth can add a
shocking amount of durability. It’s like giving your pouch a tiny paper seatbelt. Corner patches help tooespecially
if you plan to stuff multiple bills inside or carry it around as a mini wallet. If you’re making pouches for budgeting
categories, this matters, because those envelopes get opened a lot. Paper can handle repetition, but it likes backup.
My favorite “this is actually brilliant” moment came when I started labeling pouches. Not in a boring waymore like
“Gas Money,” “Snacks,” “Emergency Donut Reserve,” and “Future Me Will Thank Me.” Suddenly the pouch wasn’t just a
holder; it was a system. If you’ve ever tried cash stuffing, you know how satisfying it is to have little envelopes
that make your money feel assigned and purposeful instead of vaguely floating around your life.
For gifting, the game changed when I stopped treating the pouch like an envelope and started treating it like
packaging. Patterned paper on the outside, plain paper inside. A sticker seal. A short note under the flap. It takes
about 60 extra seconds and makes the whole thing feel intentional. I once made a graduation set: a money pouch plus a
tiny folded note that said, “Spend some, save some, celebrate a lot.” It was simple, but the handmade presentation
made the gift feel warmer than just handing over a bill like you’re paying a tiny invoice.
Of course, there were failures. One pouch ripped at the bottom because I tried to cram in too many bills (paper has a
limit, and it will enforce that limit dramatically). Another wouldn’t close because I made the pocket too tightturns
out leaving a little wiggle room is the difference between “sleek” and “impossible.” But every mistake made the next
pouch better. That’s the sneaky joy of these projects: you’re practicing precision without it feeling like homework.
Now, if someone tells me they need a quick DIY cash gift holder, I don’t panic. I grab a sheet of paper, fold a pouch,
slap on a sticker seal, and suddenly I look like the kind of person who owns matching storage bins. And honestly?
That’s a gift in itself.
Conclusion
Making a paper money pouch is one of those small DIY wins that’s practical, customizable, and weirdly satisfying.
Choose a method that matches your goalfast origami folds for a clean cash envelope, gussets for more capacity, or
reinforced seams for everyday use. With the right paper and a few crisp creases, you’ll have a money pouch that looks
thoughtful, keeps bills tidy, and adds a handmade touch to gifting or budgeting.


