Table of Contents >> Show >> Hide
- What You Need Before You Start
- Why a Lace Front Wig Is Worth Making
- How to Make a Lace Front Wig in 14 Steps
- Step 1: Measure Your Head Correctly
- Step 2: Choose the Right Lace Frontal and Bundles
- Step 3: Prep Your Natural Hair and Visualize the Hairline
- Step 4: Mount the Wig Cap on the Canvas Head
- Step 5: Position and Pin the Lace Frontal
- Step 6: Sew the Frontal Down First
- Step 7: Plan Your Bundle Layout
- Step 8: Sew the First Bundle at the Nape
- Step 9: Continue Sewing Rows Upward
- Step 10: Fill the Crown and Meet the Frontal Cleanly
- Step 11: Trim the Excess Cap and Lace
- Step 12: Add an Elastic Band and Optional Combs
- Step 13: Customize the Hairline
- Step 14: Style, Install, and Test the Final Look
- Common Mistakes to Avoid
- How to Care for Your Finished Lace Front Wig
- What Making Your First Lace Front Wig Actually Feels Like
- Final Thoughts
- SEO Tags
If you have ever looked at a flawless lace front and thought, “There is no way a human being made that in a living room,” good news: a human being absolutely did. Maybe with patience, a mannequin head, and a level of focus usually reserved for assembling furniture with suspiciously vague instructions, but still. A lace front wig is one of the best ways to get a natural-looking hairline, flexible styling, and a custom fit without paying custom-unit prices every single time.
The secret is not magic. It is method. When you break the process into clear stages, making a lace front wig becomes much less intimidating and much more doable. In this guide, you will learn how to make a lace front wig in 14 practical steps, from measuring your head and pinning the frontal to sewing bundles, customizing the hairline, and finishing the unit so it actually looks like it belongs on a head instead of a costume rack.
Whether you are making your first beginner-friendly unit or trying to sharpen your wig-making skills, this step-by-step tutorial will walk you through the process in plain American English, with real-world tips, common mistakes, and a few sanity-saving reminders along the way.
What You Need Before You Start
Before you make a lace front wig, gather your tools. Running around the room looking for curved needles halfway through step seven is a character-building experience, but not the fun kind.
- Lace frontal, usually 13×4 or 13×6
- Hair bundles, usually 2 to 4 depending on length and density
- Canvas block head or mannequin head
- Wig stand
- Dome wig cap or ventilated wig cap
- T-pins
- Curved needle and strong weaving thread
- Scissors
- Soft tape measure
- Clips or clamps for sectioning hair
- Elastic band
- Optional wig combs or clips
- Tweezers for plucking
- Optional bleach, developer, and tint products for knot customization
Why a Lace Front Wig Is Worth Making
A lace front wig uses a sheer lace panel at the front hairline so the wig looks more realistic and blends more naturally with the skin. That is the entire reason people keep coming back to them: the front can look soft, believable, and far less “I bought this five minutes ago” than a basic cap construction.
Making your own unit also gives you more control over fit, density, parting space, and hair quality. You can decide whether you want a sleek middle part, a side part with drama, a glueless setup, or a beginner-friendly unit that survives your morning routine without emotional damage.
How to Make a Lace Front Wig in 14 Steps
Step 1: Measure Your Head Correctly
Start with measurements. A pretty wig that slides backward like it is trying to escape the conversation is not a success story. Use a soft tape measure to record your head circumference, front-to-nape length, and ear-to-ear distance over the top. If you want a more customized fit, also note temple-to-temple and nape width.
Write everything down. Do not trust your memory. Your memory is wonderful for song lyrics from 2012, but not for cap measurements.
Step 2: Choose the Right Lace Frontal and Bundles
Next, match your frontal and bundles in texture, color, and overall quality. If the frontal is silky straight and the bundles are giving “mildly confused body wave,” the final result will look off. Human hair is often easier to customize and restyle, especially if you plan to curl, color, or bleach knots. A 13×4 frontal gives good front coverage, while a 13×6 frontal gives deeper parting space.
For a natural look, keep density in mind. More hair is not always better. Sometimes more hair is just more hair, and sometimes it is a helmet.
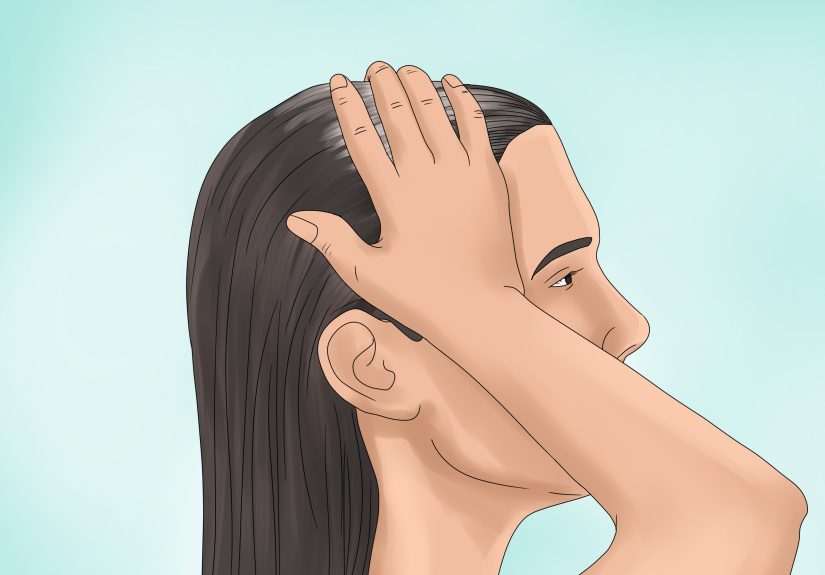
Step 3: Prep Your Natural Hair and Visualize the Hairline
Before building the unit, flatten your own hair or think through how the wig will sit against your real hairline. Many people braid their hair into flat cornrows or wrap it down so the final fit is smooth. This matters because bulky hair underneath can throw off your measurements and make a beautifully made wig sit oddly once installed.
This is also a good time to decide where you want the frontal to fall from ear to ear and how much forehead space you want in front.
Step 4: Mount the Wig Cap on the Canvas Head
Place your wig cap on the canvas block head and pin it down securely with T-pins. The cap should be tight enough to stay still but not stretched so much that it changes shape. If your block head matches your measurements, great. If not, pad it as needed so the cap mimics your actual head size.
This step sounds simple, but it sets the foundation for everything else. A cap that shifts while you sew will turn the whole project into a geometry problem nobody asked for.
Step 5: Position and Pin the Lace Frontal
Lay the lace frontal at the front of the cap and pin it from the center outward. Make sure it is symmetrical and aligned properly from ear to ear. This is not the moment for “close enough.” Check both sides, step back, and make sure the lace is sitting flat without bunching.
The frontal should define your future hairline, so spend extra time here. A careful setup saves you from fixing a crooked unit later with false confidence and tiny scissors.
Step 6: Sew the Frontal Down First
Thread your needle and begin sewing the frontal onto the cap, usually starting at the center and moving toward each side. Small, secure stitches work better than huge, dramatic ones. The goal is stability without puckering the lace.
Keep the stitches neat and consistent. Do not pull too tightly, or the lace can ripple. Do not sew too loosely, or the frontal may lift later. Basically, aim for “secure but respectful.”
Step 7: Plan Your Bundle Layout
Before sewing in any bundles, place them across the cap to map out your rows. Start at the nape and visualize how the tracks will curve upward toward the crown. This little planning session helps you avoid awkward gaps and prevents the dreaded moment when you realize you used too much hair in the back and not enough at the top.
If you are using long bundles, remember that extra length can make the wig look fuller, so you may not need as many packs as you think.
Step 8: Sew the First Bundle at the Nape
Take your first bundle and begin sewing it at the back of the cap near the nape. Follow the curve of the cap from one side to the other. Keep your stitches close enough to hold the weft securely, and knot the thread at the ends for extra strength.
This first row matters because it anchors the structure of the wig. If it is sloppy, everything stacked above it will be slightly off. No pressure, but also yes, a little pressure.
Step 9: Continue Sewing Rows Upward
Work your way upward in curved rows, stacking the bundles neatly and leaving just enough space between tracks for fullness without exposing the cap. As you reach the upper back and crown area, the rows will naturally become shorter.
Many wig makers fold the weft at the end of each row instead of cutting it every time. Folding can reduce shedding and keep the construction stronger. Just make sure the fold lies flat so it does not create bumps.
Step 10: Fill the Crown and Meet the Frontal Cleanly
As you approach the frontal, slow down and reduce the spacing between rows if needed. This area is the most visible after the hairline, so you want it to look smooth and full. Sew the last rows close to the back edge of the frontal without crowding it.
Think of this stage as the transition zone. If the bundles and frontal do not connect cleanly, the wig can look choppy or patchy from above. That is not the kind of realism anyone is aiming for.
Step 11: Trim the Excess Cap and Lace
Once the sewing is done, trim away the extra cap under the lace frontal with small scissors. Work slowly and avoid cutting too close to the stitching. After that, trim the front lace itself, leaving a small natural-looking margin instead of cutting in one harsh straight line.
Some people prefer cutting the lace in a soft zigzag pattern to make the edge less obvious. That little detail can make the hairline look more natural once the wig is installed.
Step 12: Add an Elastic Band and Optional Combs
Turn the wig inside out and sew in an elastic band near the nape or ear-tab area for a snugger fit. If you like additional security, add combs or clips inside the unit. Adjustable straps and bands can make a big difference, especially if you want a glueless lace front wig that stays put without drama.
This is one of those steps that beginners sometimes skip, then regret immediately. A secure fit makes styling easier, wear more comfortable, and removal much less suspenseful.
Step 13: Customize the Hairline
Now for the part that separates “nice wig” from “wait, that is a wig?” Lightly pluck the hairline with tweezers to reduce bulk and create a softer, more gradual density. You can also bleach the knots or tint the lace so the frontal blends better with your skin tone.
Go slowly. Over-plucking is easy and heartbreak is real. It is much easier to remove a few more hairs later than to explain why your wig has the hairline of a stressed cartoon villain.
Step 14: Style, Install, and Test the Final Look
Put the finished wig on and check the fit, hairline, and overall balance. Part it where you want, shape the baby hairs if that is your style, and trim or layer the wig if necessary. Then move around a bit. Turn your head. Sit down. Stand up. Let the wig prove itself in real life.
If something feels off, adjust it now. Great wig making is often a game of tiny refinements rather than one dramatic final move.
Common Mistakes to Avoid
- Skipping measurements: This is the fastest route to a cap that fits like a polite suggestion.
- Using mismatched hair: Frontal and bundles should look like they belong to the same family.
- Sewing the rows too far apart: Gaps can expose the cap and make styling harder.
- Over-plucking the hairline: Natural is good. Bald by accident is not.
- Cutting the lace too bluntly: A hard straight line can make the front edge more visible.
- Ignoring fit and support: Elastic bands and clips exist for a reason.
How to Care for Your Finished Lace Front Wig
Once your wig is made, treat it with care. Detangle gently from the ends upward. Wash with wig-friendly products instead of whatever random shampoo is sitting in the shower like it owns the place. Avoid scrubbing or twisting the hair, and let the wig air-dry on a stand whenever possible.
If your wig is human hair, you can usually style it with heat more freely than synthetic hair, but heat protectant is still your friend. If it is synthetic, check the fiber type before using any hot tools. And no matter what the wig is made of, rough handling shortens its lifespan faster than almost anything else.
What Making Your First Lace Front Wig Actually Feels Like
The first time you make a lace front wig, you usually start out wildly optimistic. You line up your tools, place the mannequin head on the stand, and feel like a hair architect. For the first twenty minutes, it is all confidence and ambition. Then the frontal shifts, the thread knots itself into a tiny argument, and you realize wig making is equal parts creativity, patience, and negotiation.
That is completely normal.
Most beginners discover very quickly that the process is less about speed and more about rhythm. Measuring your head seems boring at first, but later it feels like genius when the finished unit actually fits. Pinning the frontal can take longer than expected because one side always wants to act different. Sewing bundles sounds simple until you notice that keeping rows even takes real concentration. And the first time you trim lace, your hands may suddenly behave like they belong to someone who drank too much coffee.
But then something funny happens: the wig starts to look like a wig. A real one. Not a pile of supplies. Not a beauty-store science project. An actual wearable piece. That moment is incredibly satisfying, especially when you put it on and see the hairline coming together.
There is also a learning curve with customization. Many people go into the process thinking the sewing is the hardest part, only to realize that plucking the hairline and adjusting density require the most restraint. It is easy to get excited and overdo it. A better approach is to customize lightly, step back, look again, and make small changes. Lace front wigs reward patience more than bravado.
Another common experience is discovering your personal preferences. Some people love a super secure glueless band setup. Others prefer combs. Some want a dense glamorous unit that says, “Yes, I did arrive dramatically,” while others want everyday softness and movement. Making your own wig teaches you what works for your head, your styling habits, and your tolerance for maintenance.
There is also the practical side. A handmade lace front wig can save money over time, especially if you already know what texture and length you like. It gives you more control over quality, fit, and finish. If you have ever bought a wig online and opened the package with the emotional energy of someone checking exam results, you already know why control matters.
And perhaps the best part is confidence. Not just the confidence that comes from wearing a good wig, but the confidence that comes from making one yourself. You understand how it is built. You know how to repair it, tighten it, refresh it, and restyle it. You are not just wearing the unit. You know its whole backstory.
So if your first attempt is not flawless, welcome to the club. Very few lace front wigs are born perfect on day one. Skill builds with repetition. Each wig teaches you something: better spacing, cleaner folds, smarter parting, softer plucking, stronger stitching. What feels complicated the first time starts to feel logical the third or fourth time.
In other words, making a lace front wig is part beauty project, part technical craft, and part trust exercise with a curved needle. Messy at moments? Absolutely. Worth it? Also absolutely.
Final Thoughts
If you want a custom look, a better fit, and more control over your final style, learning how to make a lace front wig is a smart skill to have. The process is detailed, but it is not impossible. With the right supplies, careful measurements, and a step-by-step approach, you can create a unit that looks natural, feels secure, and suits your style far better than a random one-size-fits-all purchase.
Start simple. Focus on clean construction. Do not rush the frontal. And remember: if the first wig teaches you more than it impresses you, that is still a win. Expertise does not arrive in a single stitch.


