Table of Contents >> Show >> Hide
- What You Need Before You Start
- Why Mesh Size Matters
- How to Make a Handmade Fishing Net: 15 Steps
- Step 1: Choose the Net’s Purpose
- Step 2: Pick the Right Twine
- Step 3: Load the Shuttle Properly
- Step 4: Set Up a Solid Anchor Point
- Step 5: Make Your First Loop on the Gauge
- Step 6: Create the First Mesh Carefully
- Step 7: Form the Second Mesh
- Step 8: Repeat Until You Have a Mesh Chain
- Step 9: Check Tension Every Few Meshes
- Step 10: Join the First Row into Shape
- Step 11: Start the Second Row Across the Chain
- Step 12: Keep Building Rows to the Desired Depth
- Step 13: Use a Stronger Finishing Knot on the Last Row
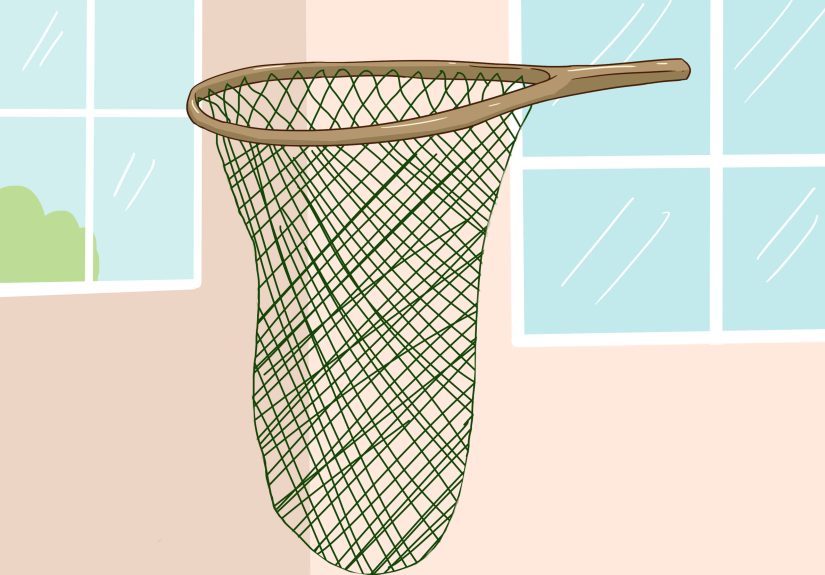
- Step 14: Attach the Net to a Hoop or Frame
- Step 15: Tighten, Trim, and Test
- Beginner Tips That Make a Big Difference
- Common Mistakes to Avoid
- Why Handmade Nets Still Matter
- Experience: What It Really Feels Like to Make a Handmade Fishing Net
- Conclusion
- SEO Tags
If you have ever looked at a fishing net and thought, “That can’t be too hard,” welcome to one of humanity’s oldest and most satisfying little lies. Making a handmade fishing net is absolutely doable, but it is also one part craft, one part patience, and one part convincing your fingers to behave like tiny engineers. The good news? Once you learn the rhythm, it becomes oddly relaxing. You are not just tying string. You are building a tool, one mesh at a time.
This guide walks you through a beginner-friendly way to make a handmade fishing net using a shuttle, a gauge, and a simple netting method that creates even diamond-shaped meshes. Whether you want a small landing net, a bait net, or just a handmade project that feels more useful than yet another candle holder, this process will get you there. We will keep it practical, readable, and a little fun, because nobody ever tied better knots while being bored to tears.
What You Need Before You Start
Before you make your first mesh, gather the basics. You will need netting twine, a netting shuttle or needle, a mesh gauge, scissors, and a sturdy anchor point such as a nail, hook, clamp, or post. If you are building a finished landing net, you will also need a hoop or frame and extra twine for hanging the webbing onto that frame.
For beginners, a synthetic twine such as Dacron or polypropylene is a smart choice because it is strong, lightweight, and resistant to rot. Choose a mesh gauge based on the kind of net you want. Smaller gauge means tighter mesh; larger gauge means larger openings. That sounds obvious, but it is the kind of detail that becomes very important after you have already tied fifty knots and realized you built a net for catching submarines instead of minnows.
Why Mesh Size Matters
Mesh size is not just a style decision. It affects what the net can actually do. A small mesh works well for smaller bait species or a landing net meant to hold fish securely. A larger mesh reduces drag and weight, but it also lets smaller fish slip through. In other words, your gauge is not just a tool. It is the boss of the entire project.
Also, handmade fishing nets may be legal to make but not automatically legal to use everywhere. State rules on cast nets, dip nets, seines, and other net types vary wildly. So build with joy, but fish with homework.
How to Make a Handmade Fishing Net: 15 Steps
Step 1: Choose the Net’s Purpose
Start by deciding what kind of handmade fishing net you want to make. A small landing net for creek fishing needs a different shape and mesh size than a bait net or decorative practice net. Knowing the end use helps you choose twine thickness, mesh gauge, and final dimensions before you commit to hours of knotting.
Step 2: Pick the Right Twine
Use a twine that is strong enough for actual fishing but still easy to handle. Beginners usually do best with medium-weight synthetic twine because it slides more cleanly than rough natural fibers and stands up better to water. Very thin twine saves money, but it is harder to control and easier to damage. Very thick twine can make the knots bulky and awkward. Goldilocks rules apply here.
Step 3: Load the Shuttle Properly
Wrap the twine onto your shuttle neatly and do not overfill it. If the shuttle is packed like a Thanksgiving suitcase, it will not pass cleanly through the meshes. Smooth, even winding makes the whole process faster and keeps the twine from tangling every ten seconds, which is excellent for both efficiency and blood pressure.
Step 4: Set Up a Solid Anchor Point
Tie or hook a starting cord onto a stable point at a comfortable working height. A nail in a wall, a clamp on a workbench, or a post in a garage works well. You want the anchor to stay put while you tension the twine, because chasing a moving setup around the room is not an advanced technique. It is just annoying.
Step 5: Make Your First Loop on the Gauge
Wrap the twine around your gauge and tie the first loop so you establish the size of your mesh. This first loop becomes the beginning of the pattern, so take your time. If your first mesh is crooked, every row after it will try to follow its bad example like an enthusiastic troublemaker.
Step 6: Create the First Mesh Carefully
Slip the first loop off the gauge and place it onto the anchor point or starting line. Keep the knot positioned consistently. In traditional netting, the orientation of the knot matters because it helps keep each mesh even and repeatable. Consistency here pays off later when the net begins to grow and you want it to look handmade, not hand-confused.
Step 7: Form the Second Mesh
Bring the twine under and around the gauge, pass the shuttle through the first loop, and tighten the knot to create a second mesh. The exact motion feels clumsy at first, then suddenly it clicks. Once it does, you begin to understand why net-making has stuck around for so long. It is repetitive, yes, but in the nice, satisfying way.
Step 8: Repeat Until You Have a Mesh Chain
Continue tying one mesh after another until you form a chain long enough for the width or circumference you want. Keep the gauge in place for each knot so your meshes stay uniform. Straighten the chain with your fingers as you go. Small adjustments now are much easier than trying to fix a crooked row later, after the net has become emotionally attached to its mistakes.
Step 9: Check Tension Every Few Meshes
Stop every few knots and look at the work. Are the mesh openings even? Are the knots sitting on the same side? Is one section getting tighter than the rest? Good netting is less about speed than rhythm and control. If something looks off, correct it early. Fishing nets do not usually “work themselves out.” They just become weird on purpose.
Step 10: Join the First Row into Shape
Once your first row is long enough, join it into the shape you need. For a tubular or circular start, connect the ends so the row becomes a ring. For a flat panel, keep it open. Many handmade fishing nets begin as a loop or tube because it makes it easier to build depth without a seam. This step is where the project stops looking like string experiments and starts looking like an actual net.
Step 11: Start the Second Row Across the Chain
Thread a dowel or support through the first row if needed, then begin knotting across that row from left to right. Each new knot attaches to the previous row and creates the next level of mesh. If you are making a bag-style or landing-style net, this is the point where the webbing gains real structure and depth.
Step 12: Keep Building Rows to the Desired Depth
Continue working row after row until the net reaches the depth you want. For a small landing net, you may only need a modest pocket. For a deeper catch net, you will continue much farther. Try to keep your work area organized and your twine feeding smoothly. Net making is one of those crafts where the tools are simple, but good habits make you look much more talented than you feel.
Step 13: Use a Stronger Finishing Knot on the Last Row
When you reach the final row, use a more secure finishing knot if your pattern allows for it. Many net makers prefer a stronger variation at the end so the last row does not loosen with use. This is especially helpful if the net will be stretched, lifted, or repeatedly dragged through water. The final row is not the place to get casual.
Step 14: Attach the Net to a Hoop or Frame
If you are making a landing net, space the finished webbing evenly around the hoop and tie it on in several temporary spots first. Then secure each mesh to the frame with a hanging knot. Work evenly around the hoop so the net hangs symmetrically. If one side is tight and the other side droops like a hammock for exhausted squirrels, rebalance it before you call the job finished.
Step 15: Tighten, Trim, and Test
Once the net is attached, check every knot, trim excess twine, and gently test the shape. Open the pocket, tug the frame, and make sure the mesh spreads evenly. If needed, add a drawstring or reinforce the bottom row. Then do a dry run before you ever take it near water. A five-minute test in the yard is much cheaper than discovering your “finished” handmade fishing net still has trust issues.
Beginner Tips That Make a Big Difference
The fastest way to improve is to focus on consistency, not speed. Keep the gauge in the same position, pull each knot with similar tension, and stop when your hands get sloppy. Most ugly mesh is not caused by bad technique. It is caused by impatience wearing a fake mustache and pretending to be confidence.
Practice with a small section first. Make a sample strip of mesh before committing to a full net. This lets you test twine thickness, gauge size, and knot rhythm without investing a full evening into something that may need rethinking. You can also use that practice strip to learn how much twine your net actually consumes, which is a surprisingly important little detail.
Common Mistakes to Avoid
Overfilling the shuttle: This makes it hard to pass through the mesh and increases tangles.
Changing tension mid-project: Uneven pull creates uneven netting.
Choosing the wrong mesh size: A net that is too open or too tight may be impractical for your intended catch.
Skipping regulation checks: A homemade fishing net can still violate local rules if the type, size, or use is restricted.
Ignoring final inspection: One weak knot can ruin a lot of otherwise beautiful work.
Why Handmade Nets Still Matter
There is something deeply satisfying about making a fishing net by hand. You begin with a shuttle, a gauge, and a length of twine. A while later, you have a functional piece of gear shaped entirely by your own hands. That is not just practical. It is old-school useful in the best possible way.
Handmade nets also teach patience, pattern recognition, and material awareness. You start noticing how twine behaves when wet, how mesh changes under tension, and how a tiny difference in gauge changes the whole net. It is craft knowledge, but it is also field knowledge. And that is why people still do it, even in an age when you can buy a net online in less time than it takes to tie three meshes.
Experience: What It Really Feels Like to Make a Handmade Fishing Net
The first time I tried to make a handmade fishing net, I had the confidence of a person who had watched exactly one demonstration and immediately decided I was basically a maritime artisan. Ten minutes later, I had created something that looked less like a fishing net and more like a philosophical argument between knots. One side was too tight, the other side was floppy, and the middle seemed committed to abstract expressionism. Still, that messy beginning taught me something important: the process is learnable, but only if you slow down enough to let your hands catch up with your enthusiasm.
What surprised me most was how quickly the rhythm started to matter. At first every move felt separate. Hold the gauge. Feed the shuttle. Pass the twine. Tighten the knot. Check the loop. Repeat. But after a while the steps blended together into a steady motion that felt less like following instructions and more like playing a quiet, repetitive instrument. It became almost meditative. You stop thinking about every single knot and start thinking about the pattern. Then, after a few more rows, you stop thinking so hard at all and just work. That is when the craft becomes enjoyable.
I also learned that materials make a huge difference. Cheap or fuzzy cord might be fine for practice, but once you try a cleaner synthetic twine, the whole project gets easier. The shuttle moves better, the knots cinch more predictably, and the meshes look neater with less effort. It is one of those rare life moments when spending a little more on the right material actually saves frustration instead of just upgrading your ability to complain stylishly.
Another memorable lesson came when I attached the net to a frame. I assumed that if the webbing itself looked fine, the hoop attachment would be easy. That was adorable. Getting the spacing even around the frame took real patience. Too tight in one section, and the net pocket twisted. Too loose in another, and the whole thing sagged. I ended up retying several attachment points before the shape looked balanced. Annoying in the moment, yes, but it made the final result far better.
The best part came later, though, when I held the finished net and realized I actually trusted it. Not in a dramatic movie-trailer way. Just in the simple, satisfying way that says, “Yes, this thing will do the job it was built to do.” That feeling is hard to beat. Store-bought gear can be convenient, but handmade gear carries a different kind of pride. You know where every knot sits because you put it there. You know why the mesh is that size because you chose it. And if something ever needs repair, you are not helpless. You are the repair department.
That is why learning how to make a handmade fishing net is worth the effort. Even if your first one is imperfect, it teaches you useful skills. Even if your second one is still a little weird, it teaches you control. And by the third one, you may catch yourself doing something remarkable: enjoying the process as much as the finished product. At that point, congratulations. You are no longer just making a net. You are participating in one of the oldest practical crafts around, and doing it with your own hands. That is a pretty great trade for a little twine and some stubbornness.
Conclusion
Learning how to make a handmade fishing net is not about perfection on day one. It is about understanding the basics: choose the right twine, use a gauge for consistent mesh, build the rows patiently, finish the edges securely, and match the design to the job. Once you get those pieces right, the rest is repetition, refinement, and a little knot-related humility.
Make one small net first. Let it teach you. Then make the next one better. That is how most crafts work, and net making is no exception. One mesh at a time, one row at a time, and before long, you have something useful, sturdy, and proudly handmade.
Note: Always check your state and local fishing regulations before using any handmade fishing net in the water.


