Table of Contents >> Show >> Hide
- What Makes a Barn Quilt “Faux Vintage” (and Why It Looks So Good)
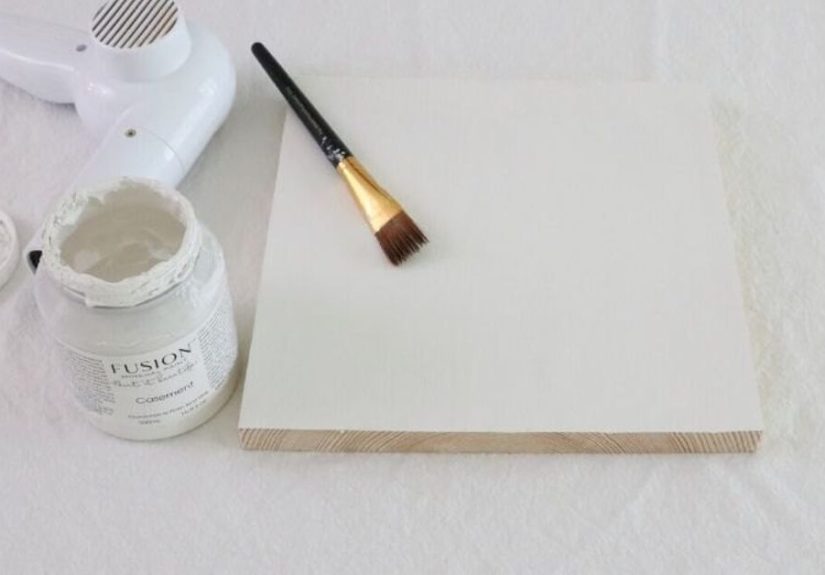
- Materials and Tools
- Step 1: Choose a Pattern That Looks Great at “Big Scale”
- Step 2: Decide Your Size (and Why Thickness Matters)
- Step 3: Prep the Board Like You’re Building a Tiny Outdoor Sign
- Step 4: Prime Both Sides for Durability
- Step 5: Transfer Your Pattern (Three Reliable Methods)
- Step 6: Tape for Crisp Lines (Without Paint Bleed)
- Step 7: Paint in the Right Order
- Step 8: Touch Up Like a Perfectionist (but a Calm One)
- Step 9: Add a Faux Vintage Finish That Looks Real
- Step 10: Seal It for Indoors or Outdoors
- Step 11: Mounting and Display Options
- Step 12: Troubleshooting Common Barn Quilt Problems
- Step 13: A Quick Example Plan (So You Can Start Today)
- Field Notes: The “Experience” Part Nobody Tells You (About )
- Wrap-Up: Your Barn Quilt, Your Rules
Barn quilts are the kind of bold, geometric folk art that make a plain wall (or shed, or porch, or “mystery blank spot above the couch”)
instantly feel intentional. The twist in this DIY is the “faux vintage” finish: you’ll paint a crisp quilt-block design, then gently age it
so it looks like it’s been catching sun and weather for yearswithout actually waiting years.
This guide walks through the whole process: choosing a pattern, prepping the board, getting razor-sharp lines, adding believable wear, and sealing it
so it holds up. The end result is rustic wall decor with big personalitylike farmhouse charm got a geometry degree.
What Makes a Barn Quilt “Faux Vintage” (and Why It Looks So Good)
A classic barn quilt is a single quilt-block pattern scaled up and painted on a sturdy panel. “Faux vintage” means you’re aiming for two things at once:
clean design (so the pattern reads from across the yard) and soft aging (so it doesn’t look like it was painted during a lunch break yesterday).
- Clean geometry comes from careful layout, good tape technique, and painting in the right order.
- Believable aging comes from subtle sanding, dry brushing, and a thin “grime” glaze focused where real weathering happens.
- Durability comes from sealing edges, priming properly, and using outdoor-rated paint and a UV-protective clear coat.
Materials and Tools
Best board choices (pick one)
- Exterior-grade plywood (common, affordable, easy to cut). Choose a smooth face if possible.
- MDO signboard (smoother, designed for painted outdoor signage, excellent for crisp patterns).
- ACX plywood (a good middle groundgenerally smoother than basic sheathing).
Paint and finishing supplies
- Exterior primer (bonding or stain-blocking primer is ideal)
- Exterior acrylic/latex paint (satin or flat/matte looks most “old-school”)
- Painter’s tape (a quality multi-surface tape helps)
- Optional: edge-sealing filler (wood filler or exterior spackle)
- Optional aging supplies: fine sandpaper (180–220), sanding block, a small stiff brush, glazing liquid or clear matte medium
- UV-resistant clear coat (spar urethane or an exterior clear finish)
Tools
- Tape measure + pencil
- Square or straightedge
- Level (helpful for layout)
- Brushes (1–2" angled + small detail brush)
- Mini foam roller (great for smooth coats)
- Drop cloth, mixing cups, stir sticks
Safety basics (quick but important)
- Wear eye protection when cutting/sanding.
- Paint/clear coat with good ventilation; follow the label for dry times and cleanup.
- If hanging outdoors, mount securely for wind and weather.
Step 1: Choose a Pattern That Looks Great at “Big Scale”
Barn quilt patterns work because they’re built from simple shapes that stay readable from a distance. If this is your first project, pick something with
strong symmetry and not too many tiny slivers (tiny slivers are where patience goes to retire early).
Beginner-friendly quilt block ideas
- Ohio Star-style blocks (triangles + a center square)
- Pinwheel (dynamic and forgiving)
- Flying Geese (simple repeats)
- Compass Star (a little more complex, very classic)
Pick a color palette that already feels “vintage”
A faux vintage barn quilt usually looks best with slightly muted colors and a matte or satin sheen.
Try combinations like:
- Deep navy + cream + weathered barn red
- Forest green + antique white + warm charcoal
- Dusty blue + soft black + aged linen
Step 2: Decide Your Size (and Why Thickness Matters)
For indoor decor, 24"–36" squares are easy to handle and dramatic on a wall. For outdoor display, many people go largerjust remember:
bigger panels need better support to avoid warping.
- Thickness tip: If you go large, choose a thicker panel or add a simple frame on the back (1x2s work well).
- Warp-prevention tip: Prime and paint both sides of the board so moisture changes affect it more evenly.
Step 3: Prep the Board Like You’re Building a Tiny Outdoor Sign
The paint job only looks as good as the surface underneath. Prep is the unglamorous hero of crisp lines and long life.
Sand, clean, and seal problem spots
- Lightly sand the front face to knock down splinters and improve adhesion.
- Fill voids and rough patches with wood filler; let it dry fully.
- Sand smooth and wipe off dust (a damp cloth or tack cloth helps).
Don’t ignore the edges (edges are where outdoor projects go to fail)
Plywood edges soak up moisture like a sponge at a spill party. Seal them with filler or multiple primer coats, sanding between coats until smooth.
Rounded edges also hold paint better than sharp corners.
Step 4: Prime Both Sides for Durability
Use an exterior primer, and apply it to the front, edges, and the back. This reduces warping risk and helps paint stick.
If the panel will live outdoors, give the edges extra lovean extra coat or two is cheap insurance.
- Pro move: After priming, do a quick “inspection sand” with 220 grit for a smooth, tape-friendly surface.
- Dry time matters: Let primer cure fully before taping. Rushing this step is how tape removes your optimism in flakes.
Step 5: Transfer Your Pattern (Three Reliable Methods)
Method A: The grid method (classic and accurate)
- Draw a grid on paper (your pattern) and a matching grid on the board.
- Scale up by keeping the same number of squares, just larger squares.
- Sketch shapes square-by-square onto the board.
Method B: A cardboard template (great for repeats)
Cut triangles/squares from cardboard and trace them. If your pattern repeats pieces, templates keep everything consistent.
Method C: Projector transfer (fastest, if you have one)
Project the pattern onto the board and lightly trace the lines. You’ll still tape for clean edges, but tracing is speedy.
Step 6: Tape for Crisp Lines (Without Paint Bleed)
Clean lines are the whole barn quilt vibe. Tape can absolutely deliverif you do two things:
burnish the edge and seal the edge.
Burnish the tape
- After applying tape, press the edge firmly with a plastic card or putty knife.
- Work slowly around corners and intersections where seepage likes to sneak in.
Seal the tape edge (pick one)
- Base-color seal: Brush a thin coat of the underlying color along the tape edge first. If anything bleeds, it matches the base.
- Clear caulk seal: A whisper-thin bead of clear, paintable caulk smoothed along the tape edge can block seepage on textured areas.
Let your sealing coat dry to the touch before painting your next color. This tiny step is the difference between “wow” and “why is my triangle fuzzy?”
Step 7: Paint in the Right Order
The easiest way to stay sane is to paint from largest areas to smallest, and from light to dark when possible.
Lighter colors often need more coats, so it’s nice to do them first.
A practical painting sequence
- Paint the background color (entire face). Let it dry fully.
- Tape off the largest shapes for your second color. Paint and dry.
- Continue taping/painting additional colors one at a time.
- Save tiny points, narrow stripes, and detail shapes for last.
Brush vs. roller
- Foam roller: Smooth, even coverage (great for background and larger shapes).
- Angled brush: Better control near tape and edges.
When to remove tape
Remove tape slowly at a 45-degree angle. Many DIYers get the cleanest lines by pulling tape when paint is dry to the touch but not fully hardened.
If paint feels rubbery, wait a bit longer; if it feels brittle, score lightly along the tape edge with a sharp utility blade before pulling.
Step 8: Touch Up Like a Perfectionist (but a Calm One)
Even with great tape technique, a few spots might need cleanup. Use a small artist brush and fix edges with a steady hand.
Touch-ups look best when the paint is fully dry, so you’re not smearing semi-wet layers.
Step 9: Add a Faux Vintage Finish That Looks Real
The key word is subtle. You’re going for “beautifully weathered,” not “dragged behind a truck.” Build aging in thin layers so you can stop
the moment it looks right.
Technique 1: Edge sanding (the most believable wear)
- Use 220 grit on a sanding block.
- Lightly sand outer edges, corners, and a few high points in the design.
- Vary the pressure. Real wear is uneven.
Technique 2: Dry brushing (instant “sun-faded” character)
- Dip just the tip of a stiff brush in a lighter version of your paint color (or an off-white).
- Wipe most paint off on a paper towel until the brush is nearly dry.
- Lightly drag across areas that would naturally fade: broad surfaces and along edges.
Technique 3: A soft “grime glaze” (the secret to vintage depth)
Mix a tiny amount of dark paint (charcoal or brown) with glazing liquid or water to create a translucent wash. Brush it on, then wipe back with a rag.
Focus on seams, corners, and around the perimeterplaces where dirt and moisture would settle.
Technique 4: “Stain-over-paint” for ultra-natural aging (optional)
For an extra-layered look, a very thin stain or tinted glaze can warm up the whole surface. Test on the back first. A little goes a long way,
and you can always add morebut removing it is… emotionally complicated.
Step 10: Seal It for Indoors or Outdoors
If your barn quilt will live outdoors (or even in a sunny window), a UV-resistant clear coat helps protect color and slow fading.
Look for a product designed for interior/exterior wood.
Clear coat tips
- Matte or satin clear coat keeps the vintage look. Gloss can make it look “new.”
- Apply thin coats and follow recoat times on the label.
- Seal the edges thoroughlyagain, edges are the drama magnets.
Step 11: Mounting and Display Options
How you hang it depends on size, location, and whether it’s outdoors.
Indoor hanging
- D-rings and picture wire (good for smaller sizes)
- Keyhole hangers (clean look, sits flatter)
- French cleat style mounting (best for heavier or larger panels)
Outdoor mounting
- Use hardware rated for exterior use.
- Mount into solid structure (studs, blocking, or proper anchors).
- Leave a tiny air gap behind the panel if possible to help drying after rain or humidity.
Step 12: Troubleshooting Common Barn Quilt Problems
Problem: Paint bled under the tape
- Burnish tape edges more firmly next time.
- Seal tape edges with base color or a tiny bead of clear, paintable caulk.
- Use less paint near tape; heavy paint floods under edges.
Problem: The board warped
- Prime/paint both sides to balance moisture movement.
- Add a back frame for stiffness, especially on larger panels.
- Store flat while drying; don’t lean it in a damp garage corner for a week.
Problem: Paint is peeling or scuffing
- Make sure the surface was sanded and properly primed.
- Use exterior-grade paint for outdoor installs.
- Add a compatible exterior clear coat, especially in sun and rain zones.
Step 13: A Quick Example Plan (So You Can Start Today)
Here’s a simple starter approach for a 30" x 30" faux vintage barn quilt:
- Choose a bold star or pinwheel block with 3 colors.
- Prime front/back/edges; sand smooth after priming.
- Paint the full background (cream). Let dry.
- Grid and transfer the pattern lightly in pencil.
- Tape for color #2 (navy), burnish, seal, paint, dry.
- Repeat for color #3 (barn red). Touch up edges.
- Lightly sand corners and a few high points.
- Dry brush with a lighter cream to “fade” areas.
- Add a thin warm glaze wash; wipe back.
- Seal with a matte/satin exterior clear coat.
Field Notes: The “Experience” Part Nobody Tells You (About )
The first experience most DIYers have with a faux vintage barn quilt is discovering how many tiny decisions live inside a “simple geometric pattern.”
The good news: those decisions are exactly what makes the final piece look handmade instead of mass-produced.
One of the biggest real-world lessons is that surface smoothness affects everything. When the board is even slightly fuzzy, tape can lift
fibers and paint can creep. A quick sanding after priming feels like an optional extrauntil it becomes the reason your lines look sharp and your tape pulls clean.
In practice, the smoothest barn quilts usually come from a cycle of “prime, dry, sand lightly, wipe clean,” repeated with a little patience.
The second common experience is learning that paint bleed isn’t a moral failure; it’s usually a physics problem. Paint seeps under tape when there’s
an air gap, when the surface is textured, or when too much wet paint gets pushed toward the edge. Burnishing helps, but the “aha” moment tends to be sealing the tape edge.
Brushing the base color along the tape line first feels almost too easyyet it turns the frustrating part of the project into a predictable system.
Color selection is another hands-on reality check. On a screen, bold colors look perfect; on a large board, they can look louder than expected. Many makers end up
preferring slightly muted tonesdeep, complex shades instead of bright primary colorsbecause they photograph well and feel more “heritage.” A practical trick is to
choose one color you love, then pick the other two as quieter supporting actors. The pattern stays readable, but it doesn’t scream at your neighbor’s porch swing.
Then comes the aging step, which can feel like you’re about to ruin hours of careful taping. This is where “vintage” is less about randomness and more about
placing wear where wear would actually happen: edges, corners, and high points. A light touch with a sanding block can instantly remove the “brand new”
look. Dry brushing adds sun-faded softness without obliterating the pattern. A thin glaze wash brings depthespecially if you wipe it back and keep it concentrated near
corners and seams. Most people find that the best faux vintage finish is built in layers, stepping back every few minutes to check whether it still reads as a barn quilt
first, and “old” second.
Finally, there’s the durability realization: if the panel will live outdoors, the edges and back matter nearly as much as the front. Sealing both sides and using a UV-resistant
clear coat doesn’t just protect colorit helps your work stay crisp through seasonal changes. In the end, the best experience is seeing the finished piece from across the room
(or yard): clean geometry, softened age, and the unmistakable feeling that you made something that looks like it has a story.
Wrap-Up: Your Barn Quilt, Your Rules
A faux vintage barn quilt DIY is part paint project, part layout puzzle, and part “trust the process” exercise. Take your time with prep, seal your tape edges,
and age it gently in layers. You’ll end up with rustic wall art that feels classic, personal, and just the right amount of weathered.


