Table of Contents >> Show >> Hide
- What You’ll Need
- Safety First (Because Holiday Lights Should Sparkle, Not Spark)
- Step 1: Decide Your Look (So You Don’t “Accidentally” Create Modern Art)
- Step 2: Measure Your Railing Like You Mean It
- Step 3: Pick the Best Attachment Method for Your Railing Type
- Step 4: Dry-Run Your Layout (Yes, Test the Lights First)
- Step 5: Install the Lights on the Deck Railing (Three Reliable Methods)
- Step 6: Wrap Posts and Handle Corners Like a Pro
- Step 7: Make Plug Connections Weather-Resistant
- Step 8: Set a Timer (Because You Have Better Things to Do)
- Troubleshooting: Common Deck Railing Light Problems
- Deck Railing Christmas Light Ideas That Look Expensive (But Aren’t)
- Quick FAQ
- Neat Conclusion: Your Railing, But Make It Festive
- Extra: of Real-World “Been There” Experiences (So You Don’t Have To)
Your deck railing is basically begging to be the star of the holiday show. It’s already a perfect straight line, it’s already outside, and it’s already
where people stand to judge your decorating choices while holding hot cocoa like it’s a microphone. The only problem? Installing Christmas lights on a
deck railing can go from “festive” to “frayed wire chaos” if you wing it.
This guide walks you through a safe, sturdy, no-damage way to install Christmas lights on a deck railingwhether it’s wood, composite, vinyl,
aluminum, cable, or glass. You’ll get the best attachment options, a step-by-step plan, design ideas, and troubleshooting tipsplus a longer “experience”
section at the end that covers the stuff nobody tells you until you’re outside in the cold holding a tangled ball of lights like a confused cat.
What You’ll Need
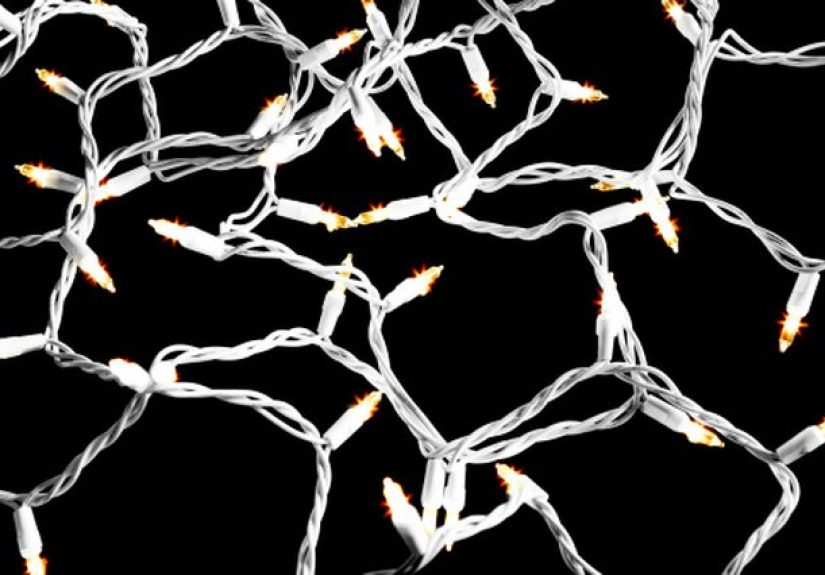
Lights & power basics
- Outdoor-rated LED string lights (look for packaging labeled “outdoor use”)
- Outdoor-rated extension cord(s) long enough to reach without stretching
- GFCI-protected outlet (or a portable GFCI adapter if needed)
- Outdoor timer or smart plug rated for outdoor use
- Weatherproof connection cover for plug connections (optional but highly recommended)
Fasteners (choose one main method)
- Railing light clips (best “pro” look; minimal fuss)
- UV-resistant zip ties (best budget option; super secure)
- Outdoor adhesive hooks/clips (great for smooth vinyl/metal when it’s warm enough)
- Garland ties (if you’re wrapping lights through garland for a fuller look)
Handy extras
- Measuring tape (or a phone note plus “I’ll remember it” confidence)
- Microfiber cloth + mild soap (for cleaning the railing)
- Scissors or flush cutters (for zip ties)
- Outdoor-rated electrical tape (only for bundling, not for “fixing” damage)
- Work gloves (zip ties can be tiny plastic paper cuts with ambition)
Safety First (Because Holiday Lights Should Sparkle, Not Spark)
Before we get to the pretty part, do the boring partbecause this is where the “easy project” stays easy.
- Inspect every strand. If you see cracked sockets, bare wire, or fraying, retire that strand. No heroic “it’ll probably be fine” energy.
- Use outdoor-rated gear outdoors. Lights and extension cords should be labeled for outdoor use.
- Plug into GFCI protection. Outdoor setups and moisture go together like winter and dry hands. GFCI helps reduce shock risk.
- Don’t overload circuits. LEDs draw less power than old incandescent sets, but limits still matter. Read the manufacturer instructions on how many strands can connect end-to-end.
- Skip nails, staples, and anything sharp. If it punctures a cord, it’s not a “fastener,” it’s a future problem.
- Turn lights off when you’re asleep or away. Timers make this painless and help your display last longer.
- Avoid trip hazards. Route cords away from walking paths and stairsespecially if guests are involved.
Step 1: Decide Your Look (So You Don’t “Accidentally” Create Modern Art)
Before you start attaching anything, pick a style. It saves time and prevents the classic mistake: finishing one side and realizing you’ve invented
“Christmas Minimalism: The Sad Version.”
Popular deck railing light styles
- Clean outline: One straight line along the top rail (classic, tidy, easy).
- Spiral wrap: Wrap lights around the top rail like a candy cane (more glow, more work).
- Post accents: Wrap each post, then connect along the rail (photogenic and balanced).
- Drape/swag: Gentle curves between posts (cozy, “Hallmark exterior establishing shot”).
- Layered look: Lights + garland + ribbon (maximum festive, maximum compliments).
Step 2: Measure Your Railing Like You Mean It
Measuring sounds optional until you’re outside with a strand that ends six inches short of the outlet. Measure:
- Railing length: Total linear feet you want to cover.
- Power route: Distance from outlet to your starting point (add slack so nothing is under tension).
- Posts & corners: Extra length needed to wrap posts or turn corners neatly.
Quick example
If your deck has a 12-foot front railing and a 10-foot side railing (22 feet total), and you’re wrapping four posts (about 1.5–2 feet per post depending
on spacing), you could easily need 28–30 feet of lights. Then add the run to the outlet. When in doubt, choose slightly longer and plan where to hide the
extra behind a post or underneath the rail.
Step 3: Pick the Best Attachment Method for Your Railing Type
The best way to install Christmas lights on a deck railing depends on what your railing is made of and how permanent you want this to be.
Wood railings
- Best: Railing clips or zip ties.
- Also works: Screw-in hooks can work if you’re okay with tiny holes, but avoid hanging by the wire itselfsupport the strand by the socket or a clip.
- Avoid: Staples, nails, or anything that can crush/pierce insulation.
Composite railings
- Best: Clips designed to grip the rail profile; zip ties on the inside edge.
- Caution: Adhesive hooks may fail if the surface is textured or cold during application.
- Avoid: Drilling unless you know the manufacturer’s guidance (composite can crack or look messy fast).
Vinyl railings
- Best: Clips or outdoor adhesive hooks (if the surface is clean and the temperature is within the adhesive’s recommended range).
- Tip: Stick hooks under the top rail where they’re less visible.
- Avoid: Over-tight zip ties that dent vinyl.
Aluminum/metal railings
- Best: Clips that snap on, or zip ties placed on the underside/inside so they don’t show.
- Tip: Use UV-resistant ties so they don’t crumble mid-season.
- Avoid: Metal fasteners that can cut insulation or cause abrasion.
Cable, glass, or modern systems
- Best: Attach to posts/top capnot to glass panels or tension cables.
- Tip: Use low-profile clips on the top cap or inside post edges for a clean look.
Step 4: Dry-Run Your Layout (Yes, Test the Lights First)
Plug in the lights and confirm they work before you attach a single clip. This is the holiday equivalent of checking your phone battery before leaving
the house. Then do a “dry run”:
- Lay the strand along the railing without fastening it.
- Identify where the plug end will reach power.
- Decide where you’ll hide extra length (behind a post is ideal).
- Mark key spots: corners, post wraps, and where you want the strand to look straight.
Step 5: Install the Lights on the Deck Railing (Three Reliable Methods)
Method A: Railing clips (cleanest look)
- Clean the railing where clips will grip (dirt = slipping later).
- Start at the power source and work outward so you don’t end up short.
- Place clips every 12–18 inches (closer if the strand is heavier or wind is strong).
- Keep gentle tensionstraight, not stretched.
- At corners, add an extra clip so the strand doesn’t pull away.
Method B: Zip ties (most secure)
- Choose UV-resistant zip ties (standard indoor ties can get brittle outdoors).
- Attach on the inside edge of the rail when possible for a cleaner look.
- Don’t crank them down like you’re tightening a bolt. Snug is good; crushing the wire is not.
- Trim tails flush so nobody gets scratched (zip ties love to choose violence).
- For draped swags, tie at the top points and use a second tie mid-sag if needed to prevent stretching.
Method C: Outdoor adhesive hooks/clips (no wrap, no tie)
- Check the temperature requirement on the packagemany adhesives fail if applied in cold weather.
- Clean the surface with mild soap and let it dry completely.
- Place hooks on the underside of the top rail so they’re hidden.
- Press and hold as directed, then allow curing time before loading with the light strand.
- Plan for removal (choose removable outdoor hooks when possible).
Step 6: Wrap Posts and Handle Corners Like a Pro
Posts and corners are where a “good enough” install starts to look messy. Here’s how to make them look intentional:
Wrapping posts
- Start at the back side (the less visible side) and wrap forward.
- Even spacing beats tight spacing. If bulbs bunch up, your post becomes a glowing traffic cone.
- Secure at top and bottom with a clip or tie so wind doesn’t unwind your masterpiece.
Turning corners
- Add a clip right before and right after the corner so the strand “turns” cleanly.
- Avoid hard bends that kink the wire. A smooth arc is safer and looks better.
Step 7: Make Plug Connections Weather-Resistant
The connection between your lights and extension cord is the Achilles’ heel of outdoor lighting. Help it survive:
- Keep connections off the deck floor if possible (moisture collects low).
- Use a weatherproof connection cover or a rated outdoor box designed for cord connections.
- Create a drip looplet the cord dip below the outlet before rising up, so water runs off instead of into the plug.
- Don’t “waterproof” with random tape alone. Tape can help bundle cords, but it’s not a substitute for proper outdoor-rated protection.
Step 8: Set a Timer (Because You Have Better Things to Do)
A timer or smart plug keeps lights from running all night and helps reduce wear. A common schedule is 4–6 hours in the evening, then off overnight.
Bonus: you’ll never again stumble outside in pajamas to flip a switch like a seasonal raccoon.
Troubleshooting: Common Deck Railing Light Problems
“My lights keep sagging.”
- Add more attachment points (closer spacing).
- Use zip ties or sturdier clips on windy sides of the deck.
- Reduce drape depthgentle curves hold up better than deep swoops.
“My adhesive hooks fell off.”
- Temperature may have been too cold during installation.
- Surface may have been damp or dusty.
- Switch to clips or zip ties for winter reliability.
“Half the strand went out.”
- Check the plug connection first.
- Inspect for a tripped GFCI (especially after rain).
- Look for one loose bulb (some strands go out when a bulb isn’t seated).
- If you find damage to the wire, replace the stranddon’t patch it for outdoor use unless the manufacturer specifically supports repair.
Deck Railing Christmas Light Ideas That Look Expensive (But Aren’t)
1) Lights + garland = instant “magazine porch”
Run lights along the inside edge of the top rail, then drape garland over the outside. The bulbs glow through the greenery, hiding cords and making the
whole thing look intentionallike you planned it weeks ago and not at 9:47 p.m.
2) Warm white on the rail, color on the posts
Keep the railing line classic with warm white, then wrap posts with color-changing mini lights. This adds depth without making your deck look like a
disco ball audition.
3) Create “zones”
Outline the main railing, then add a second strand around the stairs or gate area. Guests naturally gravitate to lit paths (and you avoid “Where are the
stairs?” questions).
Quick FAQ
Can you use staples to hang Christmas lights on a railing?
It’s strongly discouraged. Staples and nails can damage wire insulation and create safety issues. Clips, zip ties, or hooks designed for lights are safer.
How far apart should you clip or tie lights on a deck railing?
A good starting point is every 12–18 inches. Use closer spacing for heavier strands, draped styles, or windy decks.
What’s the easiest way to hang lights without damaging the railing?
Use railing clips made for holiday lights. For maximum hold, use UV-resistant zip ties on the inside edge where they’re less visible.
Neat Conclusion: Your Railing, But Make It Festive
Installing Christmas lights on a deck railing is one of those projects that looks fancy but is totally doableif you plan your layout, use the right
fasteners, and treat outdoor electricity with the respect it deserves. Measure first. Test first. Clip or tie securely. Protect plug connections. Set a timer.
Then step back and enjoy the glowpreferably with a warm drink and the smug satisfaction of not having to re-do anything in the freezing wind tomorrow.
Extra: of Real-World “Been There” Experiences (So You Don’t Have To)
If you’ve never installed Christmas lights on a deck railing before, here’s what people usually learn in the least glamorous way possible: the job isn’t
hard, but the little details are what make it either (1) smooth and satisfying or (2) a chilly outdoor comedy sketch.
First, the “I’ll just eyeball it” measuring strategy has betrayed more decorators than glitter has betrayed vacuum cleaners. A railing run looks short until
you remember corners, posts, and the distance to the outlet. That’s why a quick dry-run matters. Laying the strand along the rail before fastening anything
instantly shows you whether you’ll end at a perfect hiding spot (behind a post) or right in the middle of the most visible section of the deck like a cord
doing a sad little wave.
Second, wind is a personality test. On calm days, widely spaced clips feel fine. Then a gust hits at 2 a.m., and suddenly your lights are doing a loose
impersonation of a jump rope. People who live in windier areas usually end up adding attachment points closer together than they plannedespecially on the
outside edge of the deck where the gusts have a clear runway. The funny part is that you rarely notice the extra clips once it’s lit up, but you definitely
notice sagging.
Third, adhesive hooks can be amazing… in the right conditions. The “right conditions” often include “not freezing.” If you stick hooks to a cold railing in
cold air, they might hold for an hour, then let go in dramatic slow motion. Many homeowners switch to clips or zip ties for winter installs simply because
mechanical fasteners don’t care about temperature. Adhesive is best when you can clean the surface well, apply it within the recommended temperature range,
and let it cure properlymeaning you’re not trying to hang the whole strand two minutes later because your fingers are cold and your patience is on life
support.
Fourth, zip ties are the unsung herountil you cut them. A rushed cut leaves sharp tails that can scratch hands, snag sweaters, or poke unsuspecting family
members who are just trying to admire the lights. The upgrade here is simple: trim tails flush with scissors or cutters, and place ties on the inside edge
of the railing so the finished look is clean. It’s a tiny move that makes the installation look more “professionally decorated” and less “I fought a bag of
plastic straps and barely won.”
Finally, the most common “I didn’t think of that” moment is plug protection. Decks collect moisture, even when it isn’t raining. Keeping connections off
the ground and protected with a weather-rated cover can prevent annoying GFCI trips and extend the life of your lights. In practice, this means planning
where the extension cord connection will sitoften tucked near a post, lifted slightly, and routed so water doesn’t drip into it. It’s not the most festive
sentence you’ll read today, but it’s the difference between a display that runs all season and one that quits the first time the weather gets moody.
The good news? Once you do it once, next year is easy. You’ll know your measurements, your best attachment method, and the exact number of clips or ties
you need. And you’ll also know the true meaning of holiday wisdom: test the lights before you install them. Always. Every time.


