Table of Contents >> Show >> Hide
- Quick Reality Check: iTunes vs. the Music App (Mac)
- What You Need Before You Start
- Pick the Right Disc Type (This Choice Matters)
- How to Burn a CD with iTunes on Windows (Step-by-Step)
- How to Burn a CD on Mac (Music App or iTunes)
- Best iTunes/Music Burn Settings (So Your CD Plays Nicely Everywhere)
- Need an MP3 CD? Here’s How to Convert Tracks to MP3 (Safely)
- Common Problems (and Quick Fixes That Actually Work)
- FAQ
- Real-World Experiences: What Burning CDs Is Actually Like (and Why People Still Do It)
- Conclusion
Yes, people still burn CDs. And no, you don’t have to wear cargo shorts or own a lava lamp to do it.
Maybe your car stereo is living in 2006. Maybe you’re gifting a mix CD like it’s a romantic comedy montage.
Or maybe you just want a “physical backup” that can’t be ruined by a Wi-Fi outage and a bad mood.
Whatever the reason, iTunes (and its modern Mac cousin, the Music app) can still turn a playlist into a disc
you can pop into a CD player and instantly feel like a DJ with a part-time job at the mall.
This guide walks you through burning a CD on Windows using iTunes and on Mac using either
iTunes (older macOS) or the Music app (newer macOS). You’ll learn which disc type to choose, how to set
burn options (like track gaps and CD-Text), and how to fix the most common “why is this button gray?” headaches.
Quick Reality Check: iTunes vs. the Music App (Mac)
On Windows, iTunes is still commonly used for managing local music libraries and (depending on your setup)
burning discs. On Mac, Apple replaced iTunes with separate apps; for music, that’s the Music app.
The good news: the workflow is basically the samecreate a playlist, then burn it.
What You Need Before You Start
- A CD/DVD burner drive (internal or external USB). Many modern laptops don’t include one.
- Blank discs (usually CD-R is the safest choice for compatibility).
- A playlist of songs stored locally on your computer (not just streaming-only files).
- A little patience (burning at max speed is like sprinting in flip-flopspossible, but not always wise).
Pick the Right Disc Type (This Choice Matters)
iTunes/Music can burn different kinds of discs. Picking the right one upfront saves you from the classic
“It works on my computer but not in my car” tragedy.
Audio CD (Most Compatible)
Choose Audio CD if you want the disc to play in standard CD players (car stereos, boomboxes, older home systems).
The trade-off: it’s limited by time (often around 74–80 minutes), not file size. Your MP3s get converted
into the CD audio format, which is why the “minutes” limit exists.
MP3 CD (More Songs, Less Compatibility)
Choose MP3 CD if your target device supports MP3 discs (many newer-ish car stereos do, many older ones don’t).
This disc works more like a folder of MP3 files, so you can fit way more musicup to the disc’s storage limit.
One key catch: iTunes/Music typically expects the tracks on an MP3 CD to be in MP3 format. If your songs are
AAC, Apple Lossless, or something else, you may need to convert them first.
Data CD/DVD (Backups and File Storage)
Choose Data CD or DVD if your goal is storage or transferring files (music, documents, photos).
This is not the best choice if you want the disc to play in a standard CD player.
How to Burn a CD with iTunes on Windows (Step-by-Step)
Step 1: Build a Playlist (You Can’t Burn “Random Songs” Directly)
- Open iTunes on your PC.
- Go to your Library and find the songs you want.
- Create a playlist:
- Click File > New > Playlist (or use the “+” playlist option, depending on your layout).
- Name it something recognizable (e.g., Road Trip 2026 (No Skips)).
- Drag songs into the playlist, then drag them up/down to set the order.
Step 2: Double-Check the Playlist View
Switch to a song list view if needed so you can easily see what’s included. Also confirm the songs are available locally.
If you see cloud icons or playback restrictions, burning may fail.
Step 3: Insert a Blank Disc
Insert a blank CD-R (recommended for best compatibility). If Windows pops up an autoplay window, you can close it.
Step 4: Start the Burn
- Click your playlist to highlight it.
- Choose File > Burn Playlist to Disc.
- If you don’t see that option:
- Right-click the playlist name in the sidebar and look for Burn Playlist to Disc.
- Also check whether the playlist contains restricted tracks (more on that in troubleshooting).
Step 5: Choose Burn Settings (Audio CD vs MP3 CD)
You’ll be prompted to pick a disc format and options. Common settings include:
- Disc Format: Audio CD, MP3 CD, or Data CD/DVD
- Preferred Speed: Slower speeds can improve reliability (especially with older drives/discs)
- Gap Between Songs: Great for live albums or DJ-style mixes (0 seconds) vs. standard spacing (2 seconds)
- Sound Check / Volume Leveling: Helps avoid “why is track 7 whispering?” moments
- Include CD-Text: Adds track/artist names on players that support it
Step 6: Click Burn and Let It Finish
Click Burn and don’t run heavy tasks while it’s writing (video rendering + disc burning = chaos).
When finished, iTunes usually ejects the disc automatically.
Step 7: Test the Disc
Test it in at least two places: your computer and the actual device you care about (car stereo, boombox, etc.).
If it fails in a standalone player, you probably burned an MP3/Data disc when you needed an Audio CDor the player doesn’t support CD-R.
How to Burn a CD on Mac (Music App or iTunes)
If You’re on Newer macOS: Use the Music App
- Open the Music app.
- Create a playlist and add songs (same idea as iTunes): make it local, order it, and confirm it plays.
- Insert a blank disc into your CD/DVD drive.
- Select the playlist, then choose File > Burn Playlist to Disc.
- Pick Audio CD, MP3 CD, or Data, adjust burn options, then click Burn.
If You’re on Older macOS (Where iTunes Still Exists)
The steps are essentially identical to Windows: create a playlist, insert a blank disc, then go to
File > Burn Playlist to Disc and choose your settings.
Best iTunes/Music Burn Settings (So Your CD Plays Nicely Everywhere)
Use Audio CD for Maximum Compatibility
If your goal is “plays in the car,” choose Audio CD. MP3 CDs are great, but only when you know your player supports them.
Choose a Moderate Burn Speed
Burning at the highest speed sounds cool until you’re re-burning the same playlist for the third time while questioning every life choice.
A moderate speed can reduce write errors, especially with cheaper discs or older drives.
Gap Between Songs: 0 Seconds vs. 2 Seconds
For continuous mixes, live albums, or DJ-style playlists, set the gap to 0 seconds. For normal albums,
2 seconds is the classic default feel.
Sound Check / Volume Leveling
If your playlist includes tracks from different eras, sources, or mastering styles, enabling volume leveling can make playback feel
more consistentso you’re not turning the knob up for one song and down for the next.
Include CD-Text (If Available)
CD-Text can embed track names and artist info for players that support it. It’s not universal, but when it works, it’s a nice upgrade
from “Track 01” forever.
Need an MP3 CD? Here’s How to Convert Tracks to MP3 (Safely)
If you want an MP3 CD, your files may need to be MP3. Converting creates a new copy (it doesn’t delete the original),
so you can keep your higher-quality files and still make an MP3-friendly disc.
On Windows (iTunes)
- Go to Edit > Preferences > General > Import Settings.
- Set Import Using to MP3 Encoder (choose quality settings as desired).
- Select the song(s) you want to convert.
- Choose File > Convert > Create MP3 Version.
On Mac (Music App)
- Go to Music > Settings > Files > Import Settings.
- Select MP3 Encoder and choose a quality setting.
- Select tracks, then choose File > Convert > Create MP3 Version.
Tip: After converting, you may see duplicates. Sort by “Kind” or “Date Added” to identify the new MP3 copies and add those to your MP3 CD playlist.
Common Problems (and Quick Fixes That Actually Work)
“Burn Playlist to Disc” Is Missing or Grayed Out
- Check the playlist: You can only burn a playlist, not random library selections.
- Look for restricted tracks: If the playlist contains items with usage restrictions, burning may be blocked.
- Try right-click burning: If the File menu option is acting weird, right-click the playlist and choose the burn option.
It Says Some Songs Can’t Be Burned
Streaming subscription tracks are a frequent culprit. Music downloaded from a subscription catalog generally can’t be burned to disc.
Older purchases with restrictions, or songs your computer isn’t authorized to play, can also stop the burn.
Burning Stops Midway or Errors Out
- Lower the burn speed and try again.
- Switch to a different brand of disc (yes, seriously).
- Try a different blank disc type (CD-R is usually more compatible than CD-RW).
- Close heavy apps while burning.
- If it always fails on the same track, remove that track and try againthen re-add it after you verify it plays locally.
My Disc Plays on the Computer but Not in the Car
- You probably burned an MP3 CD or Data disc instead of an Audio CD.
- Your car stereo may not like CD-RW discs; try CD-R.
- Some older players are picky about burn qualityuse a slower speed.
FAQ
How many songs fit on a CD?
For an Audio CD, think in minutes: typically up to around 80 minutes total. For an MP3 CD, think in megabytes:
you can usually fit hundreds of songs depending on their file size and bitrate.
Can I burn Apple Music streaming songs?
Generally, nosubscription catalog downloads are restricted from being burned. Use music you own (purchases without restrictions, ripped CDs, or your own files).
What’s the best disc to buy?
If compatibility matters, choose CD-R from a reputable brand. CD-RW is convenient for rewriting, but many standalone players won’t read it reliably.
Do I need an external drive for a modern laptop?
If your computer has no disc slot, yesan external USB CD/DVD burner is the easiest path. Once connected, iTunes/Music should detect it as the burner option.
Real-World Experiences: What Burning CDs Is Actually Like (and Why People Still Do It)
Burning a CD sounds simpleand it isbut the “real life” part shows up fast. For example, the first time someone tries to make a car CD,
they often assume they can just drag MP3 files onto a disc and call it a day. That does create a disc, but not necessarily one that plays in a
standard CD player. Cars can be surprisingly judgmental about formats. If your stereo is older or basic, it’s usually expecting an Audio CD,
not a data disc full of files. That’s when iTunes (or the Music app) becomes the friendly translator between modern files and old-school playback.
Another common “welcome back to 2004” moment is realizing that Audio CDs are measured in time. You might have a folder that’s only
200MB and still be told the playlist won’t fitbecause the disc doesn’t care about file size in Audio CD mode. It cares about minutes.
This is where playlist trimming becomes an art form: do you cut the long intro track, or do you sacrifice the guilty-pleasure bonus song you secretly love?
(Spoiler: everyone cuts the long intro track and regrets it later.)
People also rediscover how important song order feels on a CD. Streaming playlists can be shuffled forever, but a burned disc is a fixed sequence,
like a tiny musical time capsule. That makes transitions matter. You’ll notice when two songs clash in volume, or when a random two-second gap ruins a smooth fade.
Turning on volume leveling and choosing a gap setting that matches your style makes the disc feel intentionalless “dumped these files on a coaster,” more
“curated soundtrack.”
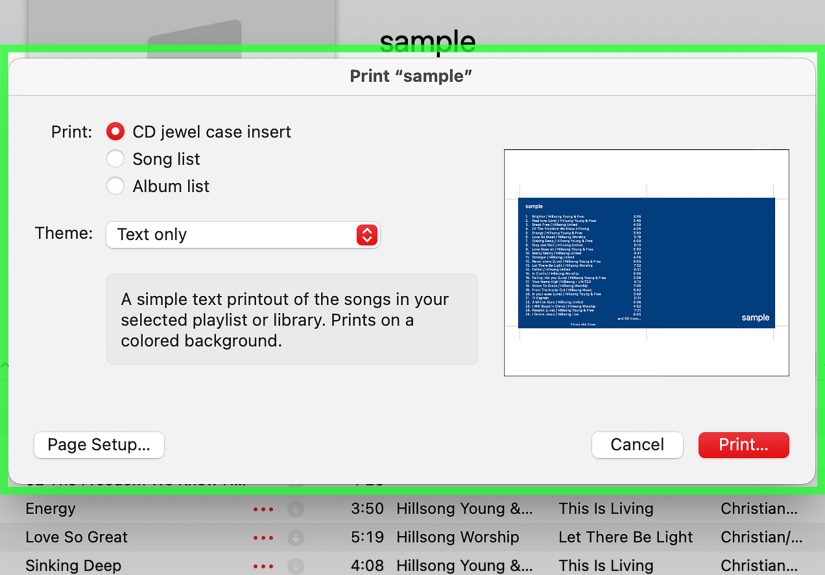
Gift CDs are a whole separate adventure. Making a mix for a friend (or a significant other who collects discs) can be surprisingly satisfying.
You’ll probably end up doing the full production: naming the playlist, choosing a “Side A” vibe, and maybe printing a track list for the jewel case.
And yes, at some point you will write on the disc with a marker and wonder if your handwriting has always looked like a pharmacist’s prescription note.
Pro tip from the trenches: write gently and avoid labels that can peel or unbalance the disc in some players.
The most relatable experience might be troubleshooting. If a burn fails once, you assume it was a fluke. If it fails twice, you start bargaining with the universe.
By the third attempt, you’re swapping discs, lowering burn speed, removing one suspicious track, and staring at the progress bar like it owes you money.
The upside is that once you learn the typical culpritsunsupported disc type, restricted tracks, too-fast burn speed, or a drive that’s feeling dramaticyou can
fix issues quickly. And when the disc finally plays perfectly in the car? That first clean track start feels absurdly victorious for something invented decades ago.
Burning CDs today is less about nostalgia and more about solving practical problems: older vehicles, offline listening, physical collections, or gifting something
tangible. It’s also a fun reminder that technology doesn’t always move in a straight line. Sometimes the “old” method is still the best one for the moment
especially when you just want your music to play without an app update asking you to agree to seventeen new terms.
Conclusion
Burning a CD with iTunes (Windows) or the Music app (Mac) is still one of the easiest ways to turn a playlist into a physical disc that plays in traditional CD players.
The key is choosing the right formatAudio CD for maximum compatibility, MP3 CD for more songs on compatible playersand using smart
burn settings like reasonable speed, correct track gaps, and volume leveling. If something breaks, it’s usually a restricted track, the wrong disc type, or a picky drive.
Fix those, and you’ll be back to handing out mix CDs like it’s your personal brand.


