Table of Contents >> Show >> Hide
- Why Install Bifold Doors?
- Tools and Materials You Will Need
- Before You Start: Measure the Opening Carefully
- How to Install Bifold Doors in 8 Simple to Follow Steps
- Step 1: Prepare the Door Opening
- Step 2: Finish the Doors Before Hanging Them
- Step 3: Attach Hinges, Pivot Pins, and Guide Hardware
- Step 4: Install the Top Track
- Step 5: Position the Bottom Pivot Bracket
- Step 6: Hang the Bifold Door Panels
- Step 7: Adjust the Height, Side Clearance, and Alignment
- Step 8: Install the Door Pulls and Final Hardware
- Common Bifold Door Installation Mistakes to Avoid
- Troubleshooting: Why Your Bifold Doors Are Not Working Smoothly
- Maintenance Tips for Bifold Doors
- Real-World Experience: What Installing Bifold Doors Actually Teaches You
- Conclusion
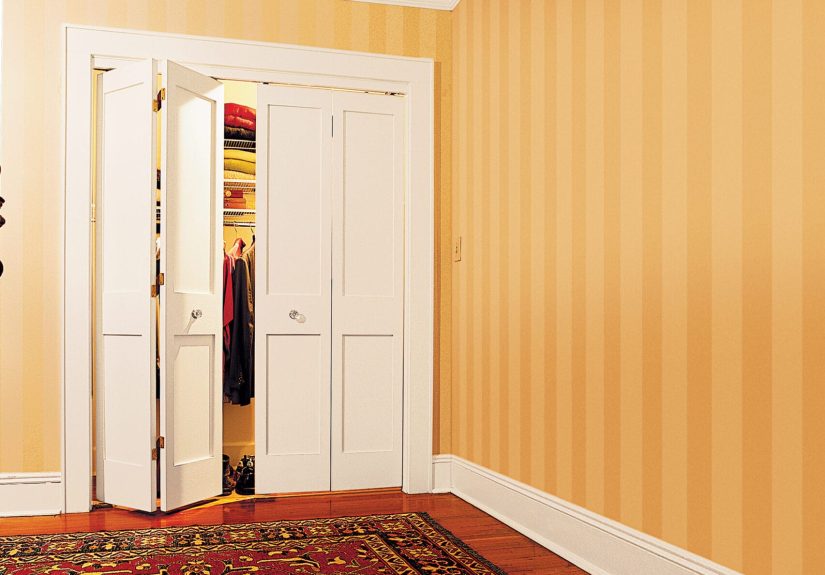
Bifold doors are the quiet overachievers of home improvement. They do not demand a huge swing radius, they do not eat up hallway space, and they can turn a tired closet, pantry, laundry nook, or storage opening into something that looks neat, intentional, and much less like “we meant to fix that last year.” Even better, learning how to install bifold doors is a very realistic DIY project for a careful beginner with basic tools, patience, and a willingness to measure twice before drilling once.
This guide walks you through the full bifold door installation process in eight simple steps, from measuring the opening to making final adjustments so the panels fold smoothly. The method below focuses on common interior bifold closet doors, which typically use a top track, pivot brackets, guide pins, hinges, and a knob or pull. Always read the instructions that come with your specific door kit because hardware details vary by brand, door weight, panel thickness, and opening size.
Ready to give that closet a glow-up? Grab your tape measure, your drill, and possibly a second cup of coffee. Let’s get those folding doors installed without turning your hallway into a carpentry crime scene.
Why Install Bifold Doors?
Bifold doors are popular because they solve a simple problem: limited space. A standard hinged door needs room to swing open. Sliding doors save space but only reveal half the opening at a time. Bifold doors fold in the middle, giving you wider access while keeping the door footprint compact.
They work especially well for closets, pantries, laundry areas, utility rooms, linen storage, and small rooms where every inch matters. They can also be painted, stained, trimmed, or upgraded with stylish hardware, making them a budget-friendly design improvement as well as a practical one.
Tools and Materials You Will Need
Before you begin, gather everything in one place. Nothing slows a DIY project like discovering your drill bit is missing after you are already kneeling in a closet doorway questioning your life choices.
Tools
- Tape measure
- Pencil
- Level
- Drill and drill bits
- Screwdriver or driver bit
- Hammer or rubber mallet
- Fine-tooth hacksaw, if the track must be trimmed
- Utility knife
- Safety glasses
- Sawhorses, if painting or staining before installation
Materials
- Bifold door kit
- Top track
- Top pivot bracket
- Bottom pivot bracket or jamb bracket
- Pivot pins and guide roller
- Hinges, if not preinstalled
- Door pull or knob
- Screws included with the kit
- Paint, stain, or sealer, if finishing the doors
- Shims, if the opening is slightly uneven
Before You Start: Measure the Opening Carefully
The most important part of bifold door installation happens before the first screw goes in. Measure the finished opening, not the rough framing hidden behind drywall or trim. The finished opening is the visible space where the door will actually sit after trim, flooring, and jambs are in place.
Measure the width at the top, middle, and bottom. Then measure the height on the left, center, and right. Use the smallest measurement when choosing your door size. Most interior bifold doors need a little clearance at the sides, top, and bottom so the panels can fold without scraping. Many standard kits are designed so the combined door width is slightly less than the finished opening width, leaving room for pivots, brackets, and adjustment.
Also check whether the head jamb is level and the side jambs are plumb. If the frame is badly out of square, the doors may rub, pop out of the track, or close with a gap that looks like it was designed by a sleepy raccoon. Small imperfections can often be corrected with hardware adjustment, but large framing problems should be fixed before installing the doors.
How to Install Bifold Doors in 8 Simple to Follow Steps
Step 1: Prepare the Door Opening
Start by clearing the area. Remove any old closet doors, sliding tracks, loose screws, damaged trim, or leftover hardware. Vacuum the floor and wipe down the jambs so you are not installing new hardware over dust, paint chips, or mystery debris from 1998.
Inspect the head jamb where the top track will be mounted. It should be solid enough to hold the screws securely. For lightweight interior bifold closet doors, the top track guides the door and carries part of the operating load. For heavier door systems, the header may carry much more weight, so manufacturer requirements become especially important.
If the door opening has fresh paint, let it cure before installation. Sticky paint can make adjustment harder and may peel when brackets are moved. If the floor has thick carpet, confirm whether the bottom bracket should sit on the floor, on the carpet, or against the jamb according to the hardware instructions.
Step 2: Finish the Doors Before Hanging Them
If your bifold doors are unfinished wood or primed panels, paint or stain them before installation. This is much easier when the doors are lying flat on sawhorses than when they are swinging from a track like a pair of awkward wooden elbows.
Seal all sides of the door, including the top and bottom edges. Those edges are easy to ignore, but they help protect the door from humidity changes that can cause warping. For laundry rooms, bathrooms, basements, or humid climates, this step matters even more.
Let the finish dry fully before attaching hardware. If you rush this step, you can leave fingerprints, smudges, or hardware marks in the paint. A smooth finish makes the entire installation look more professional, even if your “workshop” is just two chairs and a drop cloth in the living room.
Step 3: Attach Hinges, Pivot Pins, and Guide Hardware
Many bifold doors come with hinges already installed, but some kits require you to attach them. Lay the door panels face down on a protected surface. Make sure the panels are arranged correctly: the pivot panel is the side that attaches near the jamb, and the guide panel is the side that moves along the track.
If hinges are included separately, position them according to the kit instructions. They are usually installed along the meeting edge of the two panels. Keep hinge spacing consistent so the panels fold evenly. Predrill screw holes when needed to avoid splitting the wood.
Next, install the pivot pins and guide roller. A typical setup includes a top pivot pin at the top of the pivot-side panel, a bottom pivot pin at the bottom of the same panel, and a spring-loaded guide pin or roller at the top of the guide-side panel. Some pins tap into predrilled holes with a hammer or rubber mallet. Tap gently. This is not the time to audition for a demolition show.
Step 4: Install the Top Track
Hold the top track against the head jamb of the opening. Most interior bifold tracks are centered front-to-back or positioned slightly toward the front of the opening, depending on the trim style and manufacturer instructions. Use a pencil to mark the screw holes.
If the track is too long, cut it carefully with a fine-tooth hacksaw. Remove burrs from the cut end so the guide roller can travel smoothly. A rough track edge can make the door catch, click, or drag.
Secure the top track with the screws provided in the kit. Do not overtighten so aggressively that the track bends. A bent track can make even a brand-new door behave like it has a personal grudge against you. Use a level to confirm the track is straight before fully tightening the screws.
Many systems have a movable top pivot bracket inside the track. Set it near the jamb side of the opening. Some instructions call for the pivot bracket to sit slightly away from the jamb, often around a quarter inch, but the exact spacing depends on the hardware.
Step 5: Position the Bottom Pivot Bracket
The bottom pivot bracket is what keeps the pivot side of the door aligned at floor level. Depending on the kit, it may fasten to the floor, the side jamb, or both. The key is alignment: the bottom pivot bracket should sit directly below the top pivot point.
Use a level, plumb line, or careful measuring to align the bottom bracket with the top pivot bracket. If the bottom bracket is too far forward, back, left, or right, the door will twist, rub, or refuse to close neatly. The door is not being dramatic; it is simply obeying geometry.
Mark the bracket holes, predrill if necessary, and fasten the bracket securely. If you are installing over tile, masonry, or concrete, use appropriate anchors and bits. If you are installing over carpet, make sure the bracket sits firmly and does not wobble.
Step 6: Hang the Bifold Door Panels
Now comes the moment when the project starts to look like an actual door. Fold the bifold panels slightly so they are easier to handle. Insert the top pivot pin into the top pivot bracket. Then lift the door slightly and place the bottom pivot pin into the bottom bracket.
Next, depress the spring-loaded guide pin or roller and slip it into the top track. Once released, it should ride inside the track smoothly. Open and close the door slowly to test the movement. Do not force it. If the door binds, remove it and check whether the pins are fully seated and the brackets are aligned.
For a four-panel bifold setup, repeat the process on the opposite side. The two pairs should meet evenly in the center. If the middle gap is uneven, do not panic. Final adjustments are coming, and they are basically the “seasoning” of bifold door installation.
Step 7: Adjust the Height, Side Clearance, and Alignment
Most bifold door kits are adjustable at both the top and bottom pivots. To adjust height, lift the door slightly and turn the bottom pivot pin or adjustment mechanism. Raising or lowering the pivot side can fix rubbing at the floor or uneven gaps at the top.
To adjust side clearance, loosen the top pivot bracket and slide it slightly within the track. Some bottom brackets also allow side-to-side adjustment. Aim for an even gap between the pivot door and the jamb, and make sure the guide side does not scrape the opposite jamb.
Open and close the door several times after each adjustment. Tiny changes can make a big difference. A well-adjusted bifold door should fold smoothly, sit straight, and close without needing a shoulder check.
If the door keeps popping out of the track, check three things: the guide roller is fully engaged, the top track is straight, and the bottom pivot bracket is aligned directly under the top pivot. Most problems come back to one of those culprits.
Step 8: Install the Door Pulls and Final Hardware
Once the doors operate smoothly, install the door pull or knob. For many bifold closet doors, the pull is placed on the guide panel, usually around comfortable hand height and near the center of that panel. Some raised-panel designs may look better with the knob placed on a flat rail or stile rather than directly in the center of a decorative panel.
Mark the location, drill a clean hole, and attach the pull. If you are installing a four-panel setup, you may also need aligners on the back of the guide doors. Aligners help the two door pairs meet evenly when closed.
Give the doors one final test. Open them fully, close them gently, and check the gaps. Tighten any loose screws. Wipe off pencil marks. Step back and admire your work. Congratulations: your closet now looks less like a storage cave and more like part of a finished home.
Common Bifold Door Installation Mistakes to Avoid
Choosing the Wrong Door Size
A bifold door that is too wide will scrape and bind. One that is too narrow may leave awkward gaps. Always choose based on the finished opening and the clearance requirements of the door kit.
Skipping the Level and Plumb Check
Bifold doors depend on alignment. If the top track and bottom bracket are not lined up, the panels will not fold correctly. Use a level before you drill permanent holes.
Overtightening Track Screws
Screws should hold the track securely, but they should not distort it. A warped track can cause rough movement and premature wear.
Installing Hardware Before the Finish Dries
Paint that feels dry to the touch may still be soft underneath. Let doors cure properly before hanging them, especially if you used enamel, oil-based paint, or multiple coats.
Troubleshooting: Why Your Bifold Doors Are Not Working Smoothly
The Door Rubs at the Floor
Raise the bottom pivot slightly if your hardware allows it. Also check whether the floor is uneven or whether carpet is pushing against the door.
The Door Hits the Jamb
Adjust the top pivot bracket and bottom pivot bracket to move the door slightly away from the jamb. Make small adjustments and test often.
The Door Will Not Stay Closed
Check the alignment of the track, pivot brackets, and guide roller. If the panels are twisted or the opening is out of square, the door may spring open.
The Door Pops Out of the Track
Make sure the guide pin or roller is properly seated in the track. If the spring mechanism is worn or damaged, replace the guide hardware.
Maintenance Tips for Bifold Doors
Once installed, bifold doors need only light maintenance. Keep the top track clean and free of dust. Tighten loose screws when you notice wobbling. If the guide roller squeaks, use a small amount of lubricant recommended for the hardware. Avoid heavy oil that attracts dirt.
Every few months, open and close the doors slowly and watch the gaps. If one side begins to sag, adjust the bottom pivot before the problem gets worse. A two-minute tweak can prevent a future wrestling match with a crooked closet door.
Real-World Experience: What Installing Bifold Doors Actually Teaches You
On paper, bifold door installation looks almost too easy: install the track, set the brackets, pop in the pins, and enjoy your new doors. In real life, the project teaches you that houses are rarely perfectly square, floors have opinions, and “standard size” is sometimes more of a friendly suggestion than a promise.
The biggest lesson is that measuring is not a quick formality. It is the foundation of the entire project. Many DIYers measure the opening once across the middle and assume that number tells the whole story. Then they discover the top of the opening is slightly narrower, the floor slopes, or one jamb leans just enough to make the door rub. Measuring width and height in multiple places helps you spot these issues before the door is halfway installed.
Another useful experience is learning to respect small adjustments. Bifold doors are surprisingly sensitive. Moving a pivot bracket a fraction of an inch can change the side gap, improve the fold, or stop the door from scraping. This is why it helps to leave screws slightly loose during early positioning, test the door, and tighten everything only after the movement feels right.
Painting before installation is another hard-earned tip. It may feel faster to hang the doors first and paint them later, but painting installed bifold doors means working around hinges, pins, tracks, and narrow gaps. You also risk sealing moving parts with paint. Finishing the panels on sawhorses gives you cleaner edges and a smoother result. The door looks better, and your patience survives with fewer dents.
One of the most common surprises is how much the bottom bracket matters. Because bifold doors hang and pivot from specific points, the bottom bracket must line up with the top pivot. If it is off, the door may still hang, but it will not behave. It might drift, bind, or close at a strange angle. A level or plumb reference is your best friend here.
It also helps to have a second person nearby, especially for wider or heavier panels. Interior bifold doors are not usually massive, but they can be awkward. One person can hold the folded panels while the other guides the pins into the brackets. This makes the process safer and prevents accidental scratches on fresh paint.
Finally, the project teaches patience. The first test close may not be perfect. That does not mean you failed. It means the door is asking for adjustment. Make one change at a time, test the movement, and keep going until the panels fold smoothly. When the doors finally glide into place and sit evenly in the opening, the payoff is immediate. The room looks cleaner, the storage space works better, and you get the quiet satisfaction of knowing you installed the doors yourself.
Conclusion
Installing bifold doors is one of those DIY projects that delivers a visible upgrade without requiring advanced carpentry skills. The keys are careful measuring, solid track placement, accurate pivot bracket alignment, and patient final adjustments. Whether you are replacing old closet doors, finishing a pantry, or giving a laundry nook a cleaner look, bifold doors can make a space feel more organized and polished.
Follow the eight steps carefully, use the hardware instructions that came with your specific kit, and do not rush the adjustment stage. A smooth bifold door is not magic; it is the result of good alignment, secure hardware, and a few thoughtful tweaks. And yes, once it opens and closes perfectly, you are allowed to test it three extra times just for the satisfaction.
Note: This guide is intended for standard interior bifold door installation. For heavy exterior bifold systems, structural openings, load-bearing headers, or unusual hardware, follow the manufacturer’s instructions and consult a qualified professional when needed.


