Table of Contents >> Show >> Hide
- Know Your Enemy: Brick Type, Paint Type, and Why It Matters
- Safety First (Yes, Even for the “Just One Little Spot” Crowd)
- The Golden Rule: Always Test a Small Area First
- The Best Methods to Remove Paint from Brick (Without Ruining It)
- Method 1: Gel or Paste Paint Stripper (The Go-To for Most DIYers)
- Method 2: Peel-Away / Encapsulation Systems (Best for Thick Layers and “I Want This Done Right” Jobs)
- Method 3: Low-Pressure Rinsing (Yes, Water HelpsBut Pressure Is Not a Personality Trait)
- Method 4: Controlled Heat or Steam (For Small Areas and Stubborn Spots)
- What Not to Do (Unless You Enjoy Regret)
- A Simple, Brick-Safe Workflow You Can Follow
- Troubleshooting: Common Problems (and Fixes That Don’t Wreck Brick)
- When You Should Call a Pro (No ShameJust Smart)
- How to Keep Brick Looking Good After Paint Removal
- FAQ
- Conclusion
- Extra Field Notes: Real-World Experiences Removing Paint from Brick (500+ Words)
- Experience 1: The “Latex Overspray on a Backyard Wall” Situation
- Experience 2: The “Painted Brick Fireplace That Looked Cute on Pinterest” Undo
- Experience 3: Historic Brick and the “Please Don’t Turn My House into Sandpaper” Concern
- Experience 4: The “I Used a Pressure Washer and Now My Mortar Is Missing” Lesson
Paint on brick is like glitter at a kindergarten craft table: it seemed like a good idea at the time, and now it’s everywhere. The tricky part is that brick isn’t a smooth, polite surface like drywall. It’s porous, pitted, and proud of itso paint can sink in, bond hard, and refuse to leave without taking a few crumbs of masonry with it.
The goal of this guide is simple: remove paint from brick while keeping the brick’s face and mortar intact. That means working with the “gentlest effective method,” testing first, and resisting the urge to go full action-movie on your wall with a grinder. (Brick does not appreciate drama.)
Know Your Enemy: Brick Type, Paint Type, and Why It Matters
1) Is the brick “soft” or historic?
Not all brick is created equal. Older, softer, or historic brick often has a more delicate fired surface and mortar that’s easier to erode. Aggressive methods can remove the brick’s protective outer layer and leave it more vulnerable to moisture, cracking, and future damage. If your home is older, treat the wall like a museum piece that happens to be holding up your house.
2) What kind of paint is it?
- Latex/acrylic paint: often removable with modern gel strippers and patience.
- Oil-based paint: typically tougher; may require stronger remover chemistry and multiple passes.
- Elastomeric “masonry paint”: thick, flexible, and stubborngreat at sticking, not great at leaving.
- Graffiti-style aerosol: can penetrate quickly; fast action matters more.
3) How long has it been there?
Fresh paint is usually easier. Old, sun-baked layers can crosslink and embed deeper into pores. Translation: expect more cycles, more dwell time, and more “why did I start this” momentsespecially on rough, deeply textured brick.
Safety First (Yes, Even for the “Just One Little Spot” Crowd)
Check for lead paint if the building is older
If your home (or the painted brick surface) dates to before 1978, assume lead paint is possible until you confirm otherwise. Lead dust is a serious hazardespecially for children and pregnant peopleso do the boring safety steps now to avoid the expensive regrets later.
- Test paint if you can (professional testing is the most reliable).
- Contain the work area with plastic sheeting; keep kids and pets away.
- Use wet methods to minimize dust and a HEPA vacuum for cleanup.
- If using heat tools, keep temperatures controlled and avoid scorching.
Gear that’s actually worth wearing
- Gloves rated for chemicals (not the thin “I’m cutting onions” kind)
- Eye protection
- A respirator appropriate for dust/chemicals (especially if lead is suspected)
- Old clothes you don’t love (paint stripper has no respect for fashion)
The Golden Rule: Always Test a Small Area First
Before you commit to stripping the whole wall, pick an inconspicuous spot and run a full mini-version of your plan: apply remover, wait the recommended time, scrape/brush gently, and rinse. This tells you:
- Whether the remover works on your paint
- How long it needs to dwell
- Whether it discolors the brick or softens mortar
- How many passes you’ll likely need
The Best Methods to Remove Paint from Brick (Without Ruining It)
Method 1: Gel or Paste Paint Stripper (The Go-To for Most DIYers)
For many painted brick situations, a masonry-safe gel paint stripper is your best balance of effective and gentle. Thick gels cling to vertical surfaces and give the chemistry time to work, rather than evaporating instantly and leaving you with a sad, slightly sticky wall.
How to do it (step-by-step):
- Protect nearby surfaces (plastic sheeting, painter’s tape, drop cloths).
- Dry brush loose flakes with a nylon brush (no wire wheels, no metal brushes).
- Apply stripper thickly with a cheap brush or rollerthink “frosting a cake,” not “wiping sunscreen.”
- Optional but powerful: cover with plastic film to slow drying and increase dwell time.
- Wait per the label (often several hours; sometimes up to a day for heavy layers).
- Lift softened paint with a plastic scraper, then a nylon brush to get into pits.
- Rinse gently (more on water pressure in a minute).
- Repeat if neededbrick often takes multiple passes.
Pro tip: If the stripper starts drying before it finishes working, it can redeposit softened paint into the brick pores. Keeping it moist (via plastic cover) often improves results and reduces “ghosting.”
Method 2: Peel-Away / Encapsulation Systems (Best for Thick Layers and “I Want This Done Right” Jobs)
Peel-away systems are essentially “paint removal lasagna”: a thick paste remover plus a special fabric or paper that bonds to the softened layers. When you peel the sheet off, a lot of paint comes with itespecially helpful on brick with multiple coats.
Why it’s brick-friendly:
- Less aggressive scrubbing needed
- Reduced chance of smearing softened paint deeper into pores
- Often more controlled cleanup (paint stays with the peel layer)
This approach is slower and usually costs more than basic gel strippers, but it shines on large areas and stubborn buildup especially when the brick is older or you’re trying to preserve a cleaner, more uniform look.
Method 3: Low-Pressure Rinsing (Yes, Water HelpsBut Pressure Is Not a Personality Trait)
Rinsing is part of most paint-removal workflows, but here’s the part many people get wrong: more PSI is not automatically better. High pressure can erode mortar joints, gouge brick faces, and drive water into the wall where it doesn’t belong.
A safer approach is to use the lowest pressure that removes the softened paint and residue. For sensitive masonry, think in “gentle rinse” terms rather than “strip the deck in 30 seconds” terms. Use a wide fan tip, keep distance, and never aim directly into mortar joints like you’re trying to power-wash the grout out of existence.
Good habits:
- Start with a garden hose and stiff (but nonmetal) bristle brush
- If you must use a pressure washer: fan tip, keep moving, test first
- Protect mortar: it’s usually the first thing to surrender
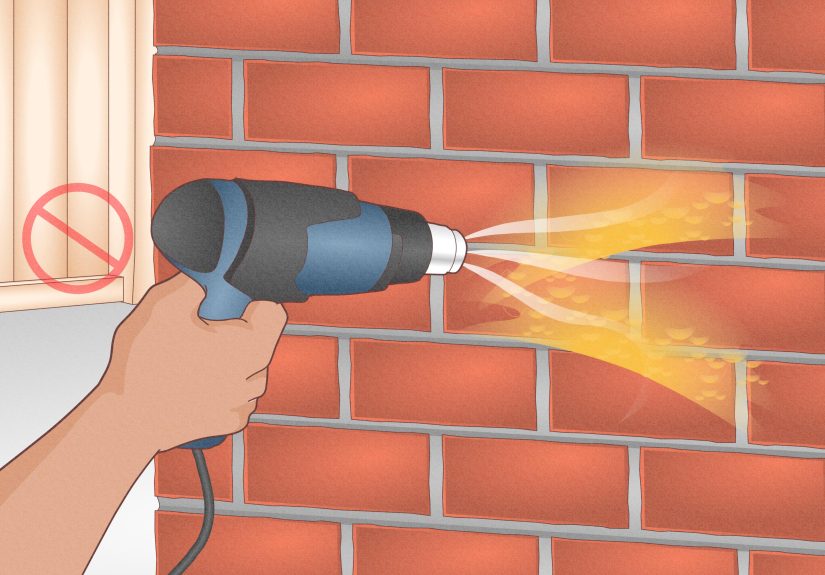
Method 4: Controlled Heat or Steam (For Small Areas and Stubborn Spots)
Heat can soften paint so it releases more easily, but brick is uneven and paint can be deep in poresso heat works best for spot treatment, not usually whole-house stripping.
- Heat gun / infrared: keep the tool moving; don’t cook the brick or scorch the paint into a permanent badge.
- Steam: can be useful on masonry, but it’s slower and still requires care with moisture and cleanup.
Important: If lead paint is suspected, heat tools can increase exposure risk. Use lead-safe practices and consider a pro for anything beyond minor work.
What Not to Do (Unless You Enjoy Regret)
Abrasive blasting / sandblasting
Abrasive methods can remove the brick’s fired face, roughen the surface, and accelerate moisture-related deterioration. They may “work” in the sense that paint disappears… along with the brick’s dignity.
Grinders, aggressive sanding, wire wheels
These can permanently scar brick, widen pores, and shred mortar joints. Also, they generate dustexactly what you don’t want if lead is possible.
Harsh acids as a “paint remover” shortcut
Brick and mortar chemistry can react badly to strong acids. You can etch surfaces, discolor brick, or create staining that’s harder to fix than the paint. If you do any chemical cleaning, it should be designed for masonry and used exactly as directed.
A Simple, Brick-Safe Workflow You Can Follow
If you want a practical plan that works for most painted brick (interior or exterior), here’s a smart default:
Step 1: Prep and protect
- Cover floors, landscaping, and nearby surfaces
- Mask windows/trim
- Set up a containment zone if indoors
Step 2: Dry-clean gently
Remove loose flakes with a nylon brush. Avoid metal brushes that can scratch and shed rust stains.
Step 3: Apply a masonry-safe gel stripper
Apply thickly. Cover with plastic if recommended or if drying is an issue. Let it dwell.
Step 4: Remove softened paint with the right tools
- Plastic scraper for flat-ish areas
- Nylon brush for pits and texture
- Wooden tools for delicate mortar edges (gentler than metal)
Step 5: Rinse carefully
Rinse with low pressure. If residue remains, reapply stripper rather than escalating force.
Step 6: Neutralize only if the product requires it
Some alkaline strippers require neutralization to stop the chemistry and prevent residue issues. Others are designed to rinse away cleanly. Follow the manufacturer’s instructionsthis is not the moment to freestyle.
Step 7: Let the brick dry fully, then reassess
Brick darkens when wet, and leftover “paint shadow” may only show once everything dries. Give it time, then decide whether another pass is needed.
Troubleshooting: Common Problems (and Fixes That Don’t Wreck Brick)
“The paint is gone, but there’s a faint tint.”
That’s ghostingpigment left in pores. Often improved by a second stripper pass and gentle brushing. Sometimes it’s permanent, especially with older paints. If the brick is historic or very porous, a perfectly “brand new” look may be unrealistic without damage.
“The mortar is getting sandy.”
Stop and reassess. Mortar is usually softer than brick. Reduce scrubbing force, lower rinse pressure, and consider a peel-away system. If mortar has deteriorated, you may need repointing after paint removal.
“It’s taking forever.”
Welcome to brick. Increase dwell time (plastic cover helps), work in smaller sections, and accept that multiple applications are normal. If you’re dealing with thick elastomeric coatings, consider calling a specialist for evaluation.
When You Should Call a Pro (No ShameJust Smart)
- Lead paint is likely and the job is more than a tiny patch
- Historic or soft brick where the wrong method can cause permanent damage
- Large exterior areas that require scaffolding, containment, and controlled rinsing
- Multiple thick layers where peel-away systems or specialty removers are more efficient
A qualified masonry restoration contractor can test methods, manage runoff and residue, and choose products suited to your brick and paint type. In older homes, this can be cheaper than “DIY twice and then pay a pro anyway.”
How to Keep Brick Looking Good After Paint Removal
Once the paint is off (or mostly off), your next step is preventing the “now what?” spiral. Options include:
- Leave it bare: the classic look, minimal maintenance, maximum brick bragging rights.
- Use breathable mineral coatings: if you must recolor, avoid trapping moisture with heavy film-forming paints.
- Address moisture issues: peeling paint often happens because water is trying to escape through the wall.
FAQ
Can you pressure wash paint off brick?
Sometimes, especially if paint is already failing and you’re using the correct technique. But pressure alone is risky: it can erode mortar and damage brick. It’s usually safer as a rinse step after a chemical stripper has softened the paint.
Will paint stripper damage brick?
A masonry-appropriate stripper used correctly is far less likely to damage brick than abrasive methods. The big risk is using the wrong chemistry, letting it dry out, scrubbing too aggressively, or rinsing with excessive pressure.
What about “natural” DIY tricks?
Mild home remedies may help with tiny drips on smoother masonry, but for real painted brick surfaces they’re usually too weak. Trying to compensate with harder scrubbing is where brick gets hurt. For anything beyond a small spill, use a product designed for masonry.
Conclusion
Getting paint off brick without damaging it is a patience game. The safest path is usually: test first → use a masonry-safe gel or peel-away system → remove gently → rinse with low pressure. Avoid abrasive blasting and aggressive grinding unless your goal is “permanent texture upgrade” (for the brick, not for you).
If you’re working on older or historic brickor anything that might involve lead painttake the safety guidance seriously and consider hiring a pro. Brick can last for generations, but only if we don’t treat it like disposable siding.
Extra Field Notes: Real-World Experiences Removing Paint from Brick (500+ Words)
Here are a few real-world patterns that show up again and again when people try to remove paint from brickplus what actually helps. Think of this as the part of the movie where the hero learns they can’t win by punching the problem harder.
Experience 1: The “Latex Overspray on a Backyard Wall” Situation
A homeowner sprays a fence, the wind gets involved, and suddenly the brick has a fashionable mist of white freckles. The instinct is to grab a stiff brush and “just scrub it off.” On brick, that often drives pigment deeper into the pores, especially if you scrub dry. What works better is counterintuitive: you slow down.
The best outcome usually comes from lightly rinsing first (garden hose), then using a gel stripper on the affected area and covering it with plastic so it stays active. After a decent dwell time, the overspray softens and releases with a nylon brush. You may still see a faint “shadow” when the brick driesespecially on very porous brickbut a second pass typically improves it. The biggest success factor here is dwell time. Ten minutes rarely beats ten hours on brick.
Experience 2: The “Painted Brick Fireplace That Looked Cute on Pinterest” Undo
Interior brick brings a special twist: you can’t just blast it with water, and ventilation matters. The most effective approach tends to be a peel-away or low-odor gel stripper applied in small sections. People who do best with this project treat it like a series of mini-jobs: one 3-by-3-foot section at a time, scraper and nylon brush, wipe residue, repeat.
One common surprise: soot and fireplace residue can interfere with paint removal. If the brick is greasy or sooty, your stripper may struggle to penetrate evenly. A careful pre-clean (appropriate for interior brick) improves consistency. Also, expect the mortar joints to hold paint longer than the brick face. That’s not you failing; that’s physics. Sometimes the last traces in joints are better handled with a second gentle application rather than aggressive tools.
Experience 3: Historic Brick and the “Please Don’t Turn My House into Sandpaper” Concern
On older homes, the temptation to sandblast is strongestand the consequences are often worst. Owners who consult preservation guidance early typically avoid the biggest mistakes: abrasive blasting, high pressure washing, and harsh shortcuts that remove the fired face of the brick.
The method that often wins here is a peel-away system, because it minimizes mechanical abrasion and lets chemistry do the work. Even then, it’s rarely one-and-done. The process is more like careful gardening than demolition: apply, wait, peel, gently brush, rinse lightly, evaluate after drying, then repeat only where necessary. When people keep the mindset of “gentlest effective method,” the brick comes out with its character intactrather than looking fuzzier, softer, and oddly new in the worst way.
Experience 4: The “I Used a Pressure Washer and Now My Mortar Is Missing” Lesson
This happens when someone jumps straight to high PSI and a narrow tip. Paint flakes off, surebut mortar erodes faster, and water gets driven into joints. Even newer brick can suffer if the nozzle is too close or the stream too concentrated. The fix is usually repointing, which is not a fun weekend hobby unless you genuinely love dust.
The better pattern is: stripper first, then rinse. If you rinse with pressure at all, keep it low, wide, and moving. Think “remove residue,” not “carve initials into the wall.”
Bottom line from the field: successful paint removal from brick isn’t about finding a magic product. It’s about stacking small advantagestesting, dwell time, gentle tools, controlled rinsing, and knowing when to stop before you damage the masonry you were trying to reveal.


