Table of Contents >> Show >> Hide
- What is a Face Pull?
- Step-by-Step Guide to Performing Face Pulls
- Step 1: Set Up Your Equipment
- Step 2: Stand in Front of the Machine
- Step 3: Grab the Rope Attachment
- Step 4: Step Back and Set Your Stance
- Step 5: Begin the Pull
- Step 6: Squeeze Your Shoulder Blades
- Step 7: Return to the Starting Position
- Step 8: Focus on Posture and Form
- Step 9: Breathe Properly
- Step 10: Perform the Correct Number of Reps
- Step 11: Adjust Your Grip (Optional)
- Step 12: Cool Down and Stretch
- Why Face Pulls Are Important for Your Health
- Common Mistakes to Avoid
- Conclusion
- Personal Experiences with Face Pulls
Introduction
If you’re looking to enhance your posture, build shoulder strength, and improve your upper back muscles, then face pulling is a must-try exercise. This simple yet effective movement targets your rear delts, traps, and rotator cuffsmuscles that are often neglected in traditional strength training routines. Face pulls are particularly great for those who spend a lot of time sitting at desks or working on computers, as they counteract the negative effects of poor posture.
In this article, we’ll walk you through 12 simple steps to properly perform a face pull, ensuring you do it with precision and maximize the benefits of this essential exercise. Whether you’re a beginner or a seasoned gym-goer, mastering the face pull will elevate your fitness game and help you develop a more balanced and healthy physique. Ready? Let’s dive in!
What is a Face Pull?
A face pull is a cable machine exercise that involves pulling a rope attachment towards your face while keeping your elbows high and your core engaged. This movement targets several key muscles in the upper back, including the rear deltoids, rhomboids, and trapezius, while also engaging the rotator cuff muscles that support shoulder stability. It’s an excellent movement for improving posture, reducing shoulder pain, and increasing upper body strength.
Step-by-Step Guide to Performing Face Pulls
Step 1: Set Up Your Equipment
To perform the face pull, you’ll need a cable machine with a rope attachment. Set the pulley at about face height or slightly higher. Attach the rope to the machine and adjust the weight to a level that challenges you but allows for proper form throughout the movement.
Step 2: Stand in Front of the Machine
Position yourself about 2-3 feet away from the machine with your feet shoulder-width apart. Stand tall with a slight bend in your knees. Keep your chest up, shoulders back, and core engaged to maintain stability during the exercise.
Step 3: Grab the Rope Attachment
Reach up and grab the rope attachment with both hands, using an overhand grip (palms facing down). Hold the rope with your hands at shoulder width or slightly wider. Keep your elbows slightly bent as you prepare for the pull.
Step 4: Step Back and Set Your Stance
Take a small step back to create tension in the cable. You should feel a slight pull on the rope when your arms are extended in front of you. Keep your body stable and your chest lifted. Make sure the rope is hanging freely and that there’s no slack in the cable.
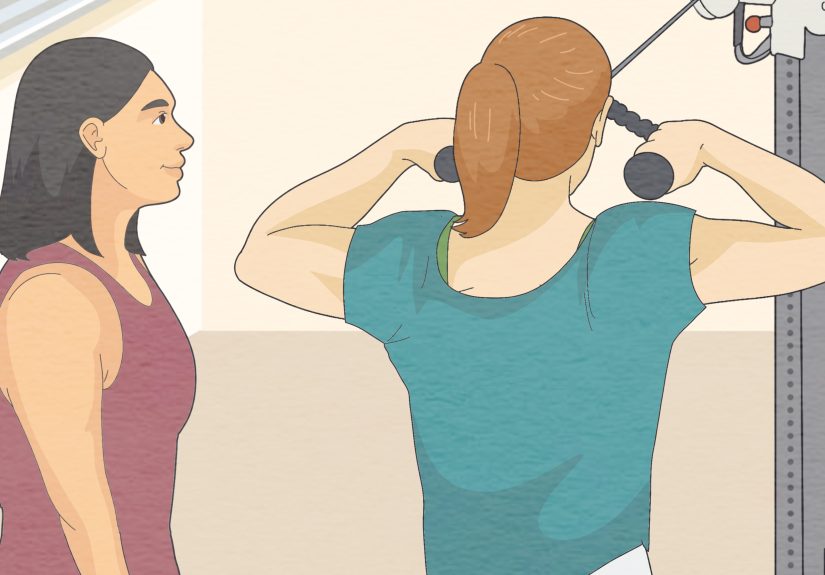
Step 5: Begin the Pull
Initiate the movement by pulling the rope towards your face. Focus on pulling with your upper back muscles, rather than your arms. As you pull the rope towards you, keep your elbows high and spread them out to the sides. Your upper arms should be parallel to the ground at the peak of the movement.
Step 6: Squeeze Your Shoulder Blades
At the end of the pull, squeeze your shoulder blades together. This will engage your rhomboids and traps. Keep your chest up and focus on contracting your upper back muscles. Hold this position for a brief moment to maximize the engagement.
Step 7: Return to the Starting Position
Slowly release the rope and return your arms to the starting position. Resist the urge to let the rope snap back quickly; control the movement to get the most out of each rep. The return should take about 2-3 seconds, ensuring constant tension in the cable throughout.
Step 8: Focus on Posture and Form
While performing face pulls, be mindful of your posture. Keep your spine neutral and avoid arching your back. Engage your core to stabilize your body and prevent excessive swaying during the movement. If your form starts to slip, it’s a sign that the weight may be too heavy.
Step 9: Breathe Properly
Inhale as you extend your arms in front of you, and exhale as you pull the rope towards your face. Proper breathing ensures that your body remains stable and supports the effective execution of the exercise.
Step 10: Perform the Correct Number of Reps
For optimal results, aim for 3-4 sets of 12-15 repetitions. Face pulls are an accessory exercise, so focus on controlled, high-rep sets to promote muscle endurance and shoulder health. Keep the weight light to moderate to ensure proper form throughout the movement.
Step 11: Adjust Your Grip (Optional)
If you feel like you’re not engaging the right muscles, try adjusting your grip. Instead of using an overhand grip, you can use a neutral grip (palms facing each other) to activate your rear delts even more. Experiment with hand positions until you find the one that works best for you.
Step 12: Cool Down and Stretch
After finishing your sets, take a moment to cool down and stretch your shoulders. The rear deltoids, traps, and rhomboids can become tight after a face pull workout, so stretching will help prevent injury and improve flexibility.
Why Face Pulls Are Important for Your Health
Face pulls are incredibly important for improving posture, particularly for those who spend long hours sitting at a desk or looking down at a screen. These actions can cause the shoulders to round forward, leading to poor posture and discomfort. By regularly incorporating face pulls into your workout, you strengthen the muscles responsible for pulling the shoulders back, which counteracts these imbalances.
Additionally, face pulls help reduce the risk of shoulder injuries. Strengthening the rotator cuffs, which are responsible for stabilizing the shoulder joint, plays a crucial role in injury prevention, especially in overhead athletes and weightlifters.
Common Mistakes to Avoid
1. Pulling with Your Arms
A common mistake is using your arms to pull the rope instead of focusing on your upper back muscles. To avoid this, think of the movement as a “row” and consciously engage your rear delts and upper back rather than relying on your arms.
2. Rounding the Back
Another mistake is rounding the back or arching the spine during the movement. Keep your chest up and your core engaged to avoid straining your lower back.
3. Using Too Much Weight
Using too much weight can compromise your form and lead to injury. Start with a lighter weight and focus on mastering the movement before increasing resistance.
Conclusion
Incorporating face pulls into your workout routine is an excellent way to improve shoulder health, posture, and upper back strength. By following the 12 simple steps outlined above, you can perform this exercise effectively and safely. Whether you’re looking to enhance your posture, prevent injury, or just build a strong upper back, face pulls are a must-do exercise that will pay off in the long run.
sapo: Master the face pull with our step-by-step guide. Strengthen your rear delts, improve posture, and prevent shoulder injuries with this simple exercise. Read on for the 12 essential steps.
Personal Experiences with Face Pulls
As someone who spends long hours working in front of a computer, I started incorporating face pulls into my workout routine to counteract the effects of poor posture. Initially, I was a bit skeptical about how effective they would be, but after just a few weeks of consistent training, I noticed significant improvements. My shoulders felt more stable, and my posture became noticeably better. I no longer experience the nagging discomfort that used to accompany long hours of sitting, and I also feel more confident in my overall upper body strength.
One of the best parts of face pulls is their versatility. I often incorporate them into my warm-up routine or finish my workouts with a few sets. Over time, I’ve found that they also help with other exercises, such as bench pressing and overhead presses, by strengthening the muscles that provide shoulder stability. It’s truly a game-changer for anyone looking to stay healthy and injury-free while building upper body strength.


