Table of Contents >> Show >> Hide
- Before You Start: What Beet Dye Can and Cannot Do
- What You’ll Need
- How to Dye Fabric with Beets: 14 Steps
- Step 1: Choose the right fabric
- Step 2: Prewash the fabric
- Step 3: Cut and test a small sample first
- Step 4: Prepare your mordant or color-assist bath
- Step 5: Mordant the fabric
- Step 6: Chop the beets
- Step 7: Add the beets to water
- Step 8: Heat slowly and simmer gently
- Step 9: Strain the dye bath
- Step 10: Add the damp fabric
- Step 11: Simmer and stir for even color
- Step 12: Let it soak as the dye cools
- Step 13: Rinse in cool water
- Step 14: Dry, cure, and admire your work
- How to Get Better Results with Beet Fabric Dye
- How to Care for Beet-Dyed Fabric
- Common Mistakes to Avoid
- Conclusion
- Real-Life Experiences and Lessons from Dyeing Fabric with Beets
- SEO Tags
Note: Based on real information synthesized from reputable U.S. educational, museum, and textile-care sources. Source links intentionally omitted for web publishing.
If you have ever looked at a beet and thought, “You know what? This root vegetable has main-character energy,” you were absolutely right. Beets can create a soft, earthy, rosy dye that looks charming on natural fabrics, napkins, ribbon, cotton muslin, linen scraps, and craft projects. They will not usually give you a neon-magenta masterpiece that survives the apocalypse, but they can give you a beautifully organic color with a handmade feel that synthetic dye just cannot fake.
This guide walks you through exactly how to dye fabric with beets in 14 practical steps, from choosing the right material to rinsing and drying your finished piece. Along the way, you will also learn what kind of color to expect, how to improve your results, and why your fabric may come out dusty rose instead of “dramatic lipstick red.” In other words, this is the beet-dye reality check your craft table deserves.
Before You Start: What Beet Dye Can and Cannot Do
Let’s set expectations before we start boiling root vegetables like enthusiastic textile witches. Beet dye is a natural dye, which means the results depend on several variables: the type of fabric, whether you prewash it, whether you use a mordant, how concentrated your dye bath is, and how long the fabric stays in the liquid. Beet dye often lands in the range of blush, mauve, antique rose, dusty pink, or muted salmon rather than a bright true red.
Natural fibers work best. If you try this on polyester, acrylic, or a mystery fabric with a suspiciously shiny attitude, the results may be weak or patchy. Cotton, linen, silk, and wool are much better choices. Also, natural dye is usually less colorfast than commercial dye, so this method is best for decorative pieces, craft fabrics, or items you can wash gently and infrequently.
What You’ll Need
- 2 to 4 large beets, or several cups of chopped beet scraps
- White or light-colored natural fabric
- A stainless steel or enamel pot
- Water
- Strainer or cheesecloth
- Tongs or a wooden spoon
- Rubber gloves
- Mild detergent
- Alum, or a simple salt/vinegar assist depending on your fabric
- A bowl or bucket for rinsing
Use a pot and tools you do not mind dedicating to dyeing. This is not the moment to turn your favorite soup pot into a craft casualty.
How to Dye Fabric with Beets: 14 Steps
Step 1: Choose the right fabric
Start with natural fibers. Cotton and linen are beginner-friendly and easy to find, while silk and wool often grab natural dye more readily and can produce richer tones. The lighter the fabric, the easier it is to see the beet color. White, ivory, and pale cream are ideal. If the fabric is dark, heavily printed, or synthetic, your beet bath may barely make a dent.
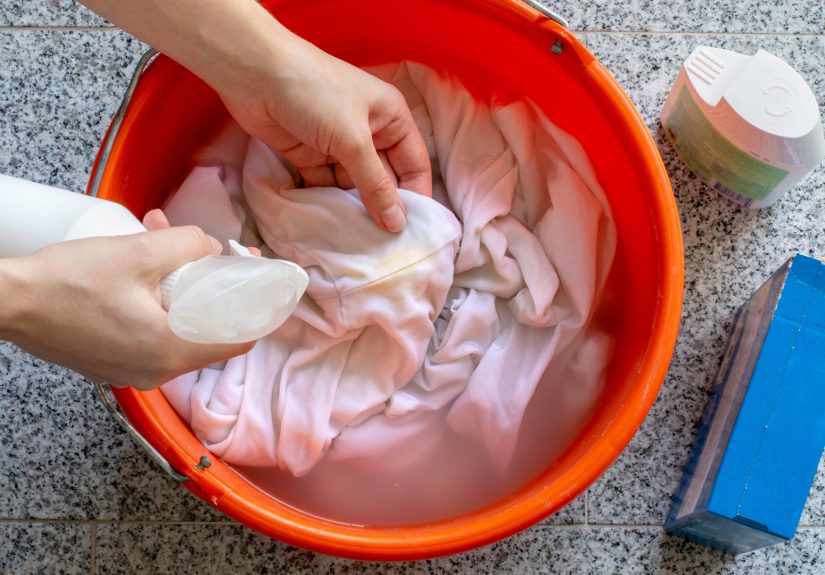
Step 2: Prewash the fabric
Wash the fabric with mild detergent before dyeing. This removes finishes, oils, starches, or mystery residue from manufacturing that can block the dye from soaking in evenly. Do not use fabric softener. Your goal is clean, plain, damp fabric that is ready to cooperate, not fabric that smells like mountain breeze and resists all meaningful change.
Step 3: Cut and test a small sample first
If you are dyeing yardage, ribbon, napkins, or clothing pieces, cut a small swatch first. Natural dyeing is wonderfully charming and occasionally rude. A test piece lets you see how the fabric reacts before you commit the whole project. This is especially helpful if you are working with a fabric blend or trying to match a specific soft-pink tone.
Step 4: Prepare your mordant or color-assist bath
A mordant helps the dye attach to the fiber more effectively. Alum is a common choice for natural dyeing because it is approachable for beginners and tends to preserve color well. Some home dyeing methods also use salt for plant-based fibers like cotton and linen, or vinegar as an assist for protein fibers like wool and silk. If you want the most reliable beginner result, alum is usually the safer bet.
Step 5: Mordant the fabric
Follow the instructions for your mordant, then soak or simmer the fabric as directed. Keep the heat gentle rather than aggressively boiling the life out of your textile. After mordanting, rinse lightly if needed and keep the fabric damp. Damp fabric enters the dye bath more evenly than bone-dry fabric, which tends to act dramatic and absorb color in blotches.
Step 6: Chop the beets
Roughly chop the beets into small chunks. You can use whole beets, beet peels, or scraps left from cooking, as long as they are fresh enough to still contain strong color. The more plant material you use, the more concentrated your dye bath can become. If you want a deeper tone, do not be stingy here. This is one of the rare moments in life when “more beets” is genuinely useful advice.
Step 7: Add the beets to water
Place the chopped beets in your pot and cover them with water. A common natural-dye approach is to use enough water to fully submerge the plant material and allow room for simmering. If you want a stronger dye, do not flood the pot like you are making a vegetable swimming pool. A more concentrated bath usually gives better color.
Step 8: Heat slowly and simmer gently
Bring the pot up slowly to a low simmer. With beet dye, gentler heating is smart. You want the color to release into the water without turning the whole process into a violent root-vegetable breakdown. Let the beets simmer for about 30 to 60 minutes, stirring occasionally. As the water deepens in color, you are building your dye bath.
Step 9: Strain the dye bath
Once the liquid looks richly colored, strain out the beet solids using a strainer or cheesecloth. Return the liquid to the pot. This step helps prevent uneven marks caused by fabric touching beet chunks directly. Unless you are aiming for “abstract salad-core couture,” a smooth dye bath is the better choice.
Step 10: Add the damp fabric
Lower your prewashed, mordanted, still-damp fabric into the strained beet dye. Make sure it is fully submerged and able to move around freely. Crowding causes uneven dyeing, so give the fabric some room. If needed, use tongs or a spoon to unfold corners and press out trapped air bubbles.
Step 11: Simmer and stir for even color
Keep the fabric in the dye bath at a gentle simmer for 30 to 60 minutes. Stir occasionally so no area sits folded or pressed against the pot for too long. If you want a lighter blush tone, pull it out sooner. If you want a stronger earthy pink, leave it in longer. Remember that wet fabric almost always looks darker than dry fabric, so do not panic if it appears too intense at first.
Step 12: Let it soak as the dye cools
For deeper color, turn off the heat and let the fabric sit in the dye bath as it cools. Some dyers leave fabric in for several hours or even overnight. This extra soaking time often helps build a fuller tone, especially on cotton and linen. If you are chasing a moodier rose shade rather than a whisper of pink, patience is your friend here.
Step 13: Rinse in cool water
Remove the fabric and rinse it under cool running water until the water runs mostly clear. Be gentle. This is not a wrestle match. Rinsing removes excess dye while preserving the color that has bonded to the fiber. Avoid hot water at this stage, because heat can encourage fading and make the fresh dye more likely to drift away like it has better plans.
Step 14: Dry, cure, and admire your work
Hang the fabric to air-dry out of direct harsh sunlight. Sun can fade many natural dyes, and beet dye is not exactly famous for stubborn permanence. Once dry, let the fabric rest for a day before washing or using it heavily. Then stand back and enjoy your handmade, naturally dyed fabric like the domestic genius you are.
How to Get Better Results with Beet Fabric Dye
Use the right fabric
If your first attempt looks faint, the fabric may be the issue. Tight synthetic blends often resist natural color. A plain cotton napkin, cotton muslin, linen tea towel, silk scarf, or wool yarn generally performs much better.
Increase the dye concentration
More beet material and less extra water can help you create a stronger dye bath. You can also simmer the dye longer before straining to reduce the liquid slightly and intensify the color.
Do not skip prep
Prewashing and mordanting are not glamorous, but they matter. Many disappointing natural-dye projects can be traced back to fabric that went into the pot coated in factory finish and wishful thinking.
Expect variation
That is not a flaw. It is part of the look. Natural dyeing tends to produce soft variation, especially on woven fabrics and handmade textiles. If you wanted robotic uniformity, a commercial bottle dye would have gladly taken your money. Beet dye is for people who like character.
How to Care for Beet-Dyed Fabric
Wash beet-dyed items gently in cool water with a mild detergent. Hand-washing is ideal. Avoid bleach, harsh stain removers, and long sun exposure. Dry flat or hang to dry in the shade. For decorative projects such as table runners, fabric gift wrap, banners, ribbon, or wall art, the color may last beautifully with minimal handling. For frequently washed garments, expect fading over time. That is normal with many natural dyes.
Common Mistakes to Avoid
- Using synthetic fabric: The color may barely show up.
- Skipping the prewash: Residue can cause blotches and weak color.
- Boiling too aggressively: Gentle heat is usually better for both fabric and dye quality.
- Overcrowding the pot: Fabric needs room to move.
- Expecting cherry-red perfection: Beet dye is usually softer and moodier than bright red.
- Washing too roughly afterward: Natural dye likes a gentle life.
Conclusion
Learning how to dye fabric with beets is equal parts craft, kitchen experiment, and color adventure. The beauty of this method is not that it produces rigidly identical results every single time. The beauty is that it creates a soft, natural look that feels handmade in the best possible way. With the right fabric, a proper prep routine, a concentrated dye bath, and a little patience, you can turn ordinary cloth into something warm, romantic, and quietly unique.
So yes, beets can stain your cutting board, your fingers, and your sense of confidence. But they can also create lovely fabric with a gentle blush tone that feels earthy, artistic, and refreshingly imperfect. Honestly, that is a pretty solid résumé for a root vegetable.
Real-Life Experiences and Lessons from Dyeing Fabric with Beets
The first time many people try beet dye, they assume the result will be bold ruby red because the cutting board looks like a tiny crime scene. Then the fabric comes out a muted pinkish rose, and there is a brief moment of betrayal. This is a normal stage in the beet-dye journey. One of the biggest lessons from real-world experience is that beet color on fabric is usually much softer than beet juice on your hands, your apron, or literally anything porous in a five-foot radius.
Another common discovery is that fabric type changes everything. A cotton square may come out pale and dusty, while a silk ribbon from the same dye bath looks richer and more elegant. That does not mean you did anything wrong. It just means natural fibers react differently. People who get the best results usually stop treating all fabric like it is one category and start testing small swatches first. That little test piece can save a lot of heartbreak, especially if you are dyeing something you actually care about.
Many crafters also learn that prewashing is not optional if they want even color. Fabric fresh off the bolt can hold finishes that make dye absorb oddly. At first, skipping the wash step feels like a clever time-saver. Later, when the fabric comes out patchy and weird, it feels more like a character-building exercise. The same goes for mordanting. It can sound technical, but in practice it is often the difference between “soft handmade beauty” and “did someone accidentally spill pink tea on this?”
There is also the patience factor. Beginners often pull the fabric too early because the process looks done. Then the piece dries lighter than expected, and disappointment arrives right on schedule. Experienced dyers know that letting the fabric soak as the dye cools can make a real difference. Time matters. Beet dye is not usually dramatic in the first ten minutes. It likes a slow reveal.
One especially useful lesson is to separate “pretty project” expectations from “heavy-duty laundry” expectations. Beet-dyed napkins for a dinner party, ribbon for gift wrapping, fabric for embroidery, or a wall hanging can be gorgeous. A constantly washed tote bag or daily-use kitchen towel may fade faster than you hoped. People tend to love beet dye most when they use it for items where subtle color and handmade charm matter more than industrial durability.
And then there is the emotional truth no one puts on the supply list: natural dyeing is part science, part intuition, part surrender. You measure, stir, strain, and rinse, but you also adapt. Maybe your bath needs more beets. Maybe your fabric needs more soaking time. Maybe your “failure” turns out to be a beautifully uneven vintage-looking blush you could never have planned on purpose. That is one reason people keep coming back to natural dyeing. It is tactile, slow, slightly unpredictable, and oddly satisfying in a world that loves instant results.
If you approach beet dyeing with realistic expectations, curiosity, and a willingness to test and adjust, the process becomes much more fun. You stop chasing perfection and start noticing texture, tone, and variation. In other words, you stop asking, “Why is this not store-bought pink?” and start saying, “Wait, this actually looks amazing.” That shift is where the good stuff lives.