Table of Contents >> Show >> Hide
- Why End Grain Boards Are Worth the Extra Effort
- Plan Your Board (So It Fits Your Kitchen and Your Patience)
- Tools and Materials
- Build Overview: The Safe, Clear Process
- Step 1: Let the wood acclimate and check for stability
- Step 2: Mill and cut strips for the first glue-up
- Step 3: First glue-up (long grain panel)
- Step 4: Flatten and square the long-grain panel
- Step 5: Slice the panel into equal blocks
- Step 6: Flip blocks so end grain faces upand lay out your pattern
- Step 7: Second glue-up (the “slippery puzzle” stage)
- Step 8: Flatten the end grain safely
- Step 9: Shape the edges and optional features
- Step 10: Sanding (where “good enough” becomes “wow”)
- Finishing Your Board: Food-Safe and Maintainable
- Care and Cleaning (So It Lasts for Years)
- Troubleshooting: Common Problems and Fixes
- Extra: 500+ Words of Real-World “Lessons Learned” From This Build
- Conclusion
End grain butcher block cutting boards are the heavyweights of the kitchen world: thick, durable, and oddly satisfying to chop on. They’re also a classic woodworking project because you get to combine “pretty” (that checkerboard pattern) with “practical” (a board that can take daily abuse). The catch? This build involves sharp blades, fast-spinning cutters, and enough clamping pressure to make your average handshake look shy. If you’re new to woodworkingor under 18treat this like learning to drive: do it with a trained adult, in a supervised shop, or through a proper class. You’ll still get the glory. You’ll just keep all your fingers for the photos.
Why End Grain Boards Are Worth the Extra Effort
“End grain” means the wood fibers point up toward the cutting surfacelike a tight bundle of drinking straws standing on end. When a knife hits the board, the fibers tend to separate and rebound instead of getting sliced across. That’s why end grain boards are often described as more “knife-friendly,” and why they can look fresher longer than edge grain boards when maintained well.
End Grain vs. Edge Grain (Quick Reality Check)
- End grain: More durable feel, often gentler on knife edges, and makes bold patternsbut it takes more steps and careful flattening.
- Edge grain: Faster build, fewer glue-ups, easier flatteningstill a fantastic board for most kitchens.
Plan Your Board (So It Fits Your Kitchen and Your Patience)
Pick a practical size
A common “daily driver” size is around 12–15 inches wide, 16–20 inches long, and 1.5–2 inches thick. Bigger is impressive, but it’s also heavier to wash and harder to store. (A board that lives in a cabinet is basically kitchen decor in hiding.)
Choose wood species that belong in a cutting board
The safest bets are closed-grain hardwoods that balance durability with knife-friendlinessmost commonly hard maple, walnut, and cherry. As a rule of thumb, you want wood that’s not too soft (gets chewed up) and not so hard it dulls knives quickly.
- Great choices: hard maple (sugar maple), walnut, cherry, beech.
- Use caution: very oily or silica-heavy woods (can be tricky to glue and may dull blades faster).
- Usually avoid: very soft woods (dent easily), and very open-pored woods when you’re aiming for easy cleaning and a smooth finish.
Design your pattern before you cut anything
End grain boards are basically woodworking math with snacks as the final exam. Sketch your pattern: checkerboard, “brick” layout, basket weave, or a simple two-wood grid. If this is your first build, simpler is smarter. Fancy patterns are funright up until you realize you’re gluing 120 tiny blocks that all want to slide like they’re auditioning for an ice show.
Tools and Materials
There are many ways to build this, but most methods boil down to: mill the wood, glue it once, slice it, flip it, glue it again, flatten it, then finish it. If you don’t have a fully equipped shop, consider: (1) buying pre-milled lumber, (2) using a cutting-board kit, or (3) having a local shop do the milling/cutting steps.
Materials
- Hardwood lumber (pre-milled is easiest)
- Water-resistant wood glue rated for indirect food contact (many builders choose Titebond III or an equivalent)
- Clamps (you can never have “too many,” only “not enough”)
- Painter’s tape or clamp pads (to reduce glue mess and clamp marks)
- Food-grade mineral oil
- Optional: beeswax/mineral-oil board cream (“board butter”)
- Sandpaper (80 through 220 grit, sometimes higher if you want a glassy feel)
Tool options (choose your adventure)
- Cutting: table saw or miter saw; a track saw is a great “clean and controlled” alternative.
- Flattening: router sled, drum sander, wide-belt sander (ideal), or careful hand-planing/scraping.
- Shaping: router with round-over bit for edges; optional juice groove bit/jig.
- Sanding: random orbital sander helps; hand sanding still works with patience.
Build Overview: The Safe, Clear Process
The classic end grain method is a “two glue-up” workflow. You first glue long-grain strips into a panel, then slice that panel into blocks, rotate the blocks so the end grain faces up, and glue again. You’ll end up with a thick butcher block pattern. Below is the process in a step-by-step format that focuses on what to dowithout teaching unsafe power-tool operation. Always follow your tool’s manual and use appropriate supervision and safety gear.
Step 1: Let the wood acclimate and check for stability
Bring your lumber into the shop area and let it acclimate so it’s less likely to warp after you build. If boards are visibly twisted or cupped, mill them flat (or have a shop mill them) before you start cutting pattern pieces.
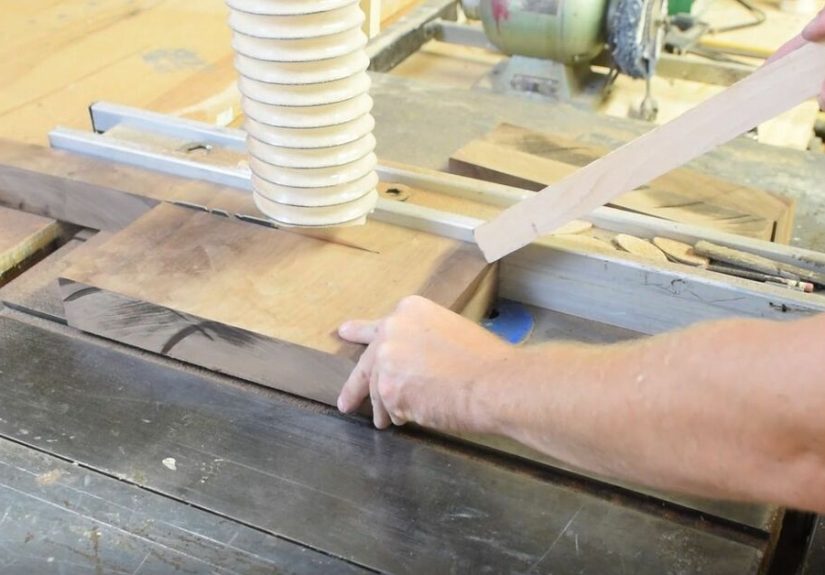
Step 2: Mill and cut strips for the first glue-up
The goal is a set of strips that are straight, square, and the same thickness. Uniform strips make a flatter panel and cleaner glue linesboth of which matter a lot when you later flip to end grain. Arrange the strips to balance color and grain, and consider alternating growth-ring orientation from strip to strip to help reduce warping over time.
Step 3: First glue-up (long grain panel)
Apply glue evenly and clamp the strips into a single panel. Use clamp pads or tape to limit staining and dents. Don’t overtighten to the point you squeeze out all the glue (a “glue-starved” joint is a heartbreak waiting to happen). Wipe or scrape squeeze-out once it becomes rubberyless mess later.
Step 4: Flatten and square the long-grain panel
Once cured, remove glue ridges and flatten the panel. This is typically the easiest flattening stage because it’s still long-grain. Square at least one edge so your later slices are consistent.
Step 5: Slice the panel into equal blocks
Crosscut the panel into evenly sized pieces. The thickness of these slices becomes the “tile size” in your end grain pattern. Consistency here makes the final glue-up dramatically easier (and reduces the amount of flattening you’ll have to do later).
Step 6: Flip blocks so end grain faces upand lay out your pattern
Rotate each block so the end grain is now the cutting surface. Arrange the blocks into your pattern. This is the fun part: it looks like woodworking, but it feels like assembling a delicious wooden mosaic. Dry-fit everything before gluing so you know your final dimensions and can adjust the layout.
Step 7: Second glue-up (the “slippery puzzle” stage)
Glue and clamp the blocks into the final board. Work in manageable sections if needed. Blocks may slide under clamp pressure, so take time to align surfaces and keep the top as even as possible. Anything you fix now is something you won’t have to sand into next week.
Step 8: Flatten the end grain safely
End grain is tougher on tools and trickier to flatten cleanly. A router sled or sanding method is often the safest, most controllable approach for many DIYers. Scrapers can also help remove high spots efficiently before sanding. However you do it, the goal is a stable, flat surface on both sides so the board doesn’t “rock” on the counter.
Step 9: Shape the edges and optional features
- Round-over edges: makes the board more comfortable to lift and less prone to chipping.
- Finger grips: side handholds help because end grain boards can be heavy.
- Juice groove: great for carving boards, optional for everyday chopping boards (grooves reduce usable flat surface).
- Feet: rubber feet can improve stability and airflow, but they make the board less reversible.
Step 10: Sanding (where “good enough” becomes “wow”)
Sanding end grain takes longer than you expect. Start coarser than you think you needoften around 80 gritthen work up gradually. Don’t skip grits; the scratches you ignore at 80 will haunt you at 220. Many builders stop at 180 or 220 for a cutting surface that holds oil well without becoming overly polished.
Finishing Your Board: Food-Safe and Maintainable
Oil first (penetration), then wax (protection)
A classic cutting board finish is food-grade mineral oil because it’s stable and doesn’t go rancid like many cooking oils can. Flood the surface, let it soak in, wipe off excess, and repeat until the board stops drinking oil like it’s been crawling through a desert. After oiling, a beeswax-and-oil board cream adds a soft protective layer and a nicer feel.
Optional finishes (know the tradeoffs)
Some woodworkers use film finishes on serving boards (not heavy chopping boards) because knives can cut through a film layer. For most working cutting boards, oil/wax is popular because it’s easy to refresh: clean, dry, re-oil.
Care and Cleaning (So It Lasts for Years)
- Wash by hand with mild soap and warm water. Dry promptly and store upright so both sides dry evenly.
- Never soak or run through the dishwasherheat and water exposure can cause warping or cracking.
- Use separate boards for raw meats and ready-to-eat foods to reduce cross-contamination risk.
- Disinfect when needed: many food-safety guidelines recommend a diluted bleach solution (and then thorough rinsing and drying).
- Re-oil regularly: when the board looks dry, dull, or feels rough, it’s time for another coat.
Troubleshooting: Common Problems and Fixes
“My board is rocking on the counter.”
One face is not flat. Re-flatten the bottom (often easier than the top if you’ve already added grooves/handles), then re-oil because flattening removes the protective layer.
“I see tiny gaps in glue lines.”
Small cosmetic gaps sometimes happen if surfaces weren’t perfectly square or clamp pressure shifted blocks. For food-prep boards, avoid filling gaps with mystery compounds. If gaps are significant, the safest fix is to re-mill and re-glue the affected area.
“It feels fuzzy after the first wash.”
That’s raised grain. Lightly sand with a fine grit (like 220), wipe clean, and re-oil.
“It cracked after a week.”
Cracks can come from wood that wasn’t acclimated, uneven drying (only washing one side), or a board that wasn’t oiled enough. Keep boards clean, dry evenly, store upright, and oil consistently.
Extra: 500+ Words of Real-World “Lessons Learned” From This Build
People love end grain boards because they look like you bought them from a boutique shop where everything costs “one paycheck and a compliment.” But almost everyone who builds one learns the same set of lessonsusually in the exact order below.
Lesson #1: Your first design will be too complicated. You’ll start with a “simple” checkerboard. Then you’ll see a basket weave pattern. Then you’ll see a 3D cube illusion. Next thing you know, your board layout looks like it belongs in a museum gift shop, and you’ve created a glue-up that requires the patience of a saint and the clamp collection of a small hardware store. The happiest first builds are the ones that stay simple: two or three species, clean lines, and a pattern you can dry-fit in under five minutes.
Lesson #2: End grain is thirsty… and also kind of dramatic. Builders are often surprised how much longer end grain sanding takes, and how quickly end grain drinks finish. If you oil the surface once and call it done, the board will look dry again by the time you’ve bragged about it in a group chat. A better approach is to oil repeatedly until absorption slows down, then finish with wax cream for that smooth “buttery” feel. Maintenance becomes easy after that: quick wash, dry upright, and re-oil whenever it starts looking dull.
Lesson #3: “Flat enough” is a trap phrase. A board can look flat and still rock like a wobbly café table. And nothing ruins the vibe faster than chopping onions on a board that clacks on the counter. The fix is boring but effective: flatten both faces properly, check on a known-flat surface, and don’t rush the process. If you add rubber feet, you can “cheat” a littlebut then the board is no longer reversible, and cleaning around feet becomes a thing.
Lesson #4: Glue-ups are less about strength and more about organization. Most modern wood glues are plenty strong for a cutting board when used correctly. The real enemy is chaos: pieces sliding out of alignment, glue drying before you clamp, or discovering halfway through that you forgot a block. The best builders treat glue-up day like meal prep: everything staged, clamps ready, surfaces clean, and a calm plan. Working in smaller sub-assemblies can make the final glue-up far more manageable.
Lesson #5: Your board will teach you kitchen habits, too. Once you’ve built one, you’ll notice how people treat cutting boardsand you’ll become that person who gently says, “Hey, maybe don’t soak it,” like a friendly wood-bothering fairy. You’ll also start separating tasks: one board for raw meats, one for produce and bread, and a serving board that stays pretty. That separation isn’t just fussyit’s a practical food-safety habit that helps prevent cross-contamination.
Finally, the best “experience” takeaway is this: an end grain butcher block board isn’t a one-and-done object. It’s more like cast ironcare improves it. A few minutes of oiling now and then keeps it stable, good-looking, and ready for years of chopping. And when someone says, “Wow, where did you buy this?” you get to say, “I didn’t.” (Pause for dramatic effect.) “I made it.”
Conclusion
Building an end grain butcher block cutting board is a classic DIY woodworking project because it rewards careful planning and good fundamentals. Choose the right hardwoods, keep your glue-ups organized, flatten safely, sand patiently, and finish with a food-safe oil and wax routine. The result is a durable board that’s comfortable to use, easier on knives, and good-looking enough to earn permanent counter space. Just remember: the real “secret ingredient” is ongoing carewash, dry, oil, repeat.


