Table of Contents >> Show >> Hide
- The 3-Step Method (Quick Overview)
- Step 1: Set Up for Success (Pot, Water, Eggs, and One Tiny Secret)
- Step 2: Time the Cook (Choose Soft, Jammy, or Hard)
- Step 3: Ice Bath, Peel Like a Pro, and Store Safely
- Troubleshooting: Fix the Usual Egg Problems Fast
- Specific Examples: Pick the Perfect Egg for What You’re Making
- Mini FAQ: Quick Answers to Common “Egg Thoughts”
- Real-Kitchen Experiences: What Boiling Eggs Actually Feels Like (and How to Win)
- Conclusion
Boiling eggs should be a low-stress life skill. And yetsomehoweggs have a talent for turning a calm kitchen into a tiny soap opera:
shells crack, whites leak, yolks get that mysterious green-ish ring, and peeling becomes a rage hobby.
Here’s the good news: perfect boiled eggs aren’t luck. They’re temperature + timing + a quick cooldown. That’s it.
Below is a simple, repeatable method that works whether you want soft, jammy, or hard-boiled eggs
with a time chart, peeling tricks, and real-world fixes for the usual egg drama.
The 3-Step Method (Quick Overview)
- Boil the water (then calm it down). Use enough water to cover eggs by about an inch.
- Lower in the eggs and time precisely. Pick your doneness and set a timerno vibes-based cooking.
- Ice bath, peel, and store smart. Stop carryover cooking and make peeling less like an escape room.
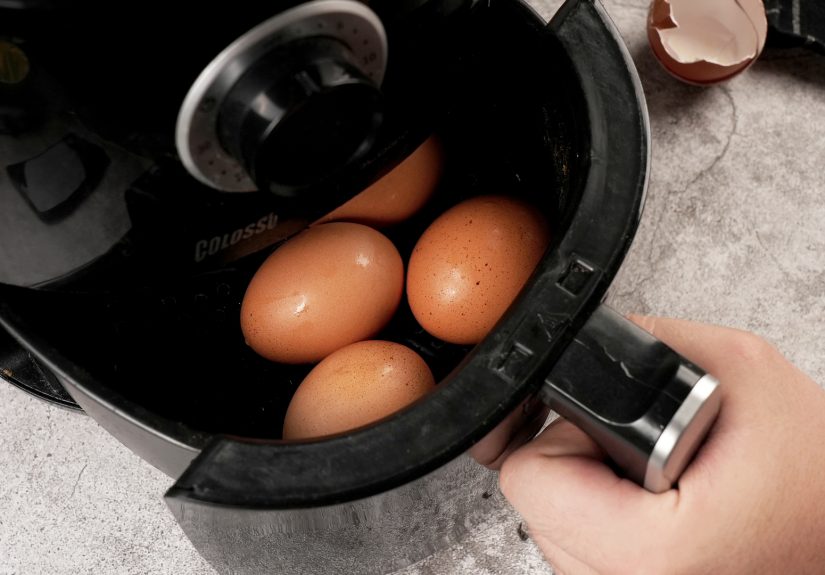
Step 1: Set Up for Success (Pot, Water, Eggs, and One Tiny Secret)
What you need
- Eggs (as many as you want, but keep them in a single layer if possible)
- A saucepan with a lid
- Water
- A bowl of ice + cold water (for later, but prep it now)
- A slotted spoon or spider strainer (nice for gentle lowering)
The tiny secret: start with steady heat, not chaos
Most “my eggs cracked!” problems come from rough handling, hard boiling, or sudden temperature shock.
You want the water to be hot enough to cook efficientlybut not so aggressive it treats your eggs like pinballs.
How to set up the pot
- Put eggs in a saucepan (single layer is ideal). Add enough water to cover by about 1 inch.
- Bring the water to a full boil over high heat.
- Once boiling, reduce heat to maintain a gentle, steady boil or lively simmer (bubbles, not a tidal wave).
Egg selection (yes, it matters a little)
If your #1 goal is “easy-to-peel,” slightly older eggs usually cooperate more than eggs that are extremely fresh.
That said, you can get clean peels with fresh eggs tooyou’ll just want to be extra faithful to the ice bath and peeling technique.
If your eggs are straight from the fridge, that’s fine. If they’ve been sitting out briefly while you prep, also fine.
The real game-changer isn’t egg temperatureit’s your timing and your cooldown.
Step 2: Time the Cook (Choose Soft, Jammy, or Hard)
Once your water is gently boiling, you’re ready. Use a slotted spoon to lower eggs in carefully.
When the last egg goes in, start your timer.
Egg boiling time chart (large eggs)
These times are designed for eggs cooked in gently boiling water. If you’re using extra-large eggs, add a bit of time.
If you’re cooking very small eggs, subtract a bit. (More on size tweaks below.)
| Doneness | Timer | Yolk Description | Best For |
|---|---|---|---|
| Soft-boiled | 6–7 minutes | Warm, runny center | Ramen, toast soldiers, fancy breakfast energy |
| Jammy (medium) | 8–9 minutes | Custardy, slightly set center | Salads, grain bowls, snack plates |
| Hard-boiled | 10–12 minutes | Fully set, bright yellow | Deviled eggs, egg salad, meal prep |
What about the “cover and rest” method?
Some classic methods bring water to a boil, turn off heat, cover the pot, and let eggs stand in the hot water.
That approach can work very well (especially for hard-cooked eggs), and many cooks like it because it feels forgiving.
If you prefer that style, a common target for large eggs is roughly about 12 minutes of standing time for a firm result,
with longer standing for extra-large eggs.
This article’s main method uses active timing (gentle boil + timer) because it gives you clearer control over soft and jammy yolks.
But if you’re a “set it and forget it” person, you can absolutely use the covered-stand approach for hard-boiled eggs.
Size adjustments (quick and painless)
- Medium eggs: subtract about 1 minute.
- Extra-large or jumbo eggs: add about 1–2 minutes.
- Very cold eggs + crowded pot: add about 30–60 seconds.
Pro tip: don’t “rage boil” your eggs
A roaring boil can make eggs knock into each other, crack, and leak whites.
A gentle boil or strong simmer cooks just as wellwithout turning your pot into an egg mosh pit.
Step 3: Ice Bath, Peel Like a Pro, and Store Safely
Why the ice bath matters (beyond just being dramatic)
The moment eggs come out of hot water, they keep cooking from residual heat (carryover cooking).
That’s how you end up aiming for jammy and landing on “chalky.” A cold plunge stops the cooking fast.
It also helps reduce the chance of that gray-green ring around the yolk, which is usually a sign of overcooking and slow cooling.
How long should eggs chill?
- Soft or jammy eggs: 2–4 minutes (enough to handle and peel; keep the center warm).
- Hard-boiled eggs: 10–15 minutes (fully cool for easiest peeling and best texture).
Peeling tricks that actually help
- Crack all over: Tap the egg gently on the counter, then roll it under your palm to create lots of tiny cracks.
- Start at the wide end: There’s often a small air pocket therenature’s little “peel here” sticker.
- Peel under running water: Water can slip between shell and egg, helping lift stubborn bits.
- Use a spoon for clean peels: Slide a spoon under the membrane and rotate around the egg for a smooth finish.
How to store boiled eggs (so they don’t become science experiments)
Once eggs are cooked, cool them promptly and refrigerate them.
As a general food-safety rule, don’t leave cooked eggs out at room temperature for more than about two hours
(less time if it’s very hot).
- Unpeeled hard-boiled eggs: store in the fridge and aim to use within about a week.
- Peeled eggs: store in an airtight container. If you’re meal-prepping, add a slightly damp paper towel to help prevent drying.
- Tip: If you’re making deviled eggs or egg salad, store the finished dish in the fridge and use within a few days for best quality.
Troubleshooting: Fix the Usual Egg Problems Fast
Problem: green/gray ring around the yolk
This usually comes from overcooking or slow cooling.
The egg is still safe to eat, but the texture can lean dry and the color can look a little… haunted.
- Fix: shorten the cook time by 1 minute and always use an ice bath.
Problem: shells crack and whites leak out
- Fix: lower eggs in gently, use a gentler boil, and avoid overcrowding.
- Tip: A tiny crack isn’t the end of the worldegg whites usually seal up quickly in hot water.
Problem: eggs won’t peel (aka “why do I have hobbies like this?”)
- Fix: cool longer in ice water, peel under running water, and start at the wide end.
- Bonus: if you can plan ahead, buy eggs a week before your big deviled-egg moment.
Problem: yolk is too runny or too firm
- Fix: adjust by 30–60 seconds next time. Eggs are small, so small time changes matter.
- Tip: keep notes like a calm egg scientist. “8:30 = jammy perfection” is the kind of diary entry we support.
Specific Examples: Pick the Perfect Egg for What You’re Making
For ramen or noodle bowls
Go 6–7 minutes for a soft egg, then ice-bath 2–3 minutes. Peel carefully and slice with a thin, sharp knife.
(If you want Instagram-level slices, wipe the blade between cuts.)
For salads and grain bowls
Aim for 8–9 minutes for a jammy center that acts like its own rich dressing.
Add a pinch of salt and black pepper and pretend you meant to be this fancy all along.
For deviled eggs and egg salad
Choose 10–12 minutes so the yolks are fully set. Cool completely in an ice bath so peeling is easier and the texture stays tender.
Mini FAQ: Quick Answers to Common “Egg Thoughts”
Should I add salt, vinegar, or baking soda to the water?
You’ll hear all kinds of tips here. Some people swear by additives; others see no consistent difference.
The most reliably helpful tools are still: gentle boiling, precise timing, and a proper ice bath.
Do boiled eggs smell “sulfur-y” sometimes?
A mild sulfur smell can happen, especially with hard-boiled eggs. It’s often more noticeable if eggs are overcooked.
Better timing and quick cooling usually help.
How can I tell if an egg is already boiled?
Try the “spin test.” A hard-boiled egg spins smoothly; a raw egg tends to wobble because the inside is still liquid.
Real-Kitchen Experiences: What Boiling Eggs Actually Feels Like (and How to Win)
The first time someone tries to “boil eggs perfectly,” it often starts with optimism and ends with a countertop covered in tiny shell confetti.
That’s normal. Eggs are simple, but they’re also extremely honest: they reflect your timing choices immediately, like a culinary mood ring.
One common experience is realizing how much 30 seconds matters. With chicken thighs, you can wing it. With eggs, you cannot.
A home cook might try 8 minutes expecting jammy goodness, then peel the egg and find the yolk a little too soft for slicing.
Next attempt: 8 minutes and 45 seconds. Suddenly, it’s perfectlike the egg finally understood the assignment.
That’s the magic of eggs: once you find your number, you can repeat it forever.
Another very real moment: the pot goes from “quiet simmer” to “angry volcano” the second you look away.
People often learn the hard way that hard boiling isn’t a flexit’s a shell-cracking invitation.
When the water is kept at a steady simmer, eggs cook more gently, crack less, and peel more cleanly.
It feels almost too easy, and that’s usually when someone says, “Wait… that’s it?”
Yes. That’s it. Your eggs weren’t difficult; your boil was.
Then there’s the ice bath conversion story. Plenty of cooks skip it once and think, “My eggs are fine.”
But “fine” often means overcooked edges and peeling that removes half the white like it’s trying to take souvenirs.
When someone finally commits to a real ice bathice plus cold water, not just a sad splash from the tapthe difference is obvious:
the egg cools quickly, the yolk stays the texture you wanted, and the shell starts to feel like it’s loosening on purpose.
Peeling itself becomes its own little skill. Many people discover that peeling under a trickle of water feels like cheating (in the best way).
The water slips under the membrane and helps lift it. Others fall in love with the spoon method because it turns peeling from “scrape and pray”
into “slide and succeed.” Over time, cooks develop preferences: some start at the wide end for the air pocket,
some crack the whole egg first, and some roll it like a tiny, fragile bowling ball.
The key experience is realizing peeling is not about strengthit’s about technique.
Finally, there’s the meal-prep experience: boiling a batch on Sunday and feeling oddly powerful on Monday.
Jammy eggs make salads feel restaurant-level. Hard-boiled eggs become grab-and-go protein.
Deviled eggs suddenly feel less like a holiday-only project and more like a “Tuesday snack that makes you popular.”
Once you’ve nailed your timing, eggs stop being a gamble and start being a dependable kitchen tool
the kind that makes you think, “Why didn’t I do this sooner?”
The best part is that “perfect” is personal. Some people want a yolk that runs like lava. Others want it firm and bright yellow.
The three-step method doesn’t force a single outcomeit gives you control. And once you’ve tasted an egg that hits your exact preference,
you’ll never go back to random boiling again. Your timer is now your best friend. Your ice bath is your assistant.
And your eggs? They’re finally behaving.


