Table of Contents >> Show >> Hide
If your wall looks like it has survived a minor argument with furniture, a few angry picture hooks, and at least one mystery dent no one will confess to, wall putty can save the day. Or, to use the language most American DIYers hear at the hardware store, you may be working with spackle, patching compound, or joint compound. Different names, same mission: make the wall smooth enough that paint does not shout, “Hey, there used to be damage here!”
Learning how to apply putty on walls is one of those home improvement skills that seems simple until your “small repair” turns into a raised pancake on the wall. The good news is that it is not difficult once you understand the basics. The secret is not brute force, fancy tools, or a heroic amount of filler. It is patience, thin layers, and knowing when to stop messing with it.
This guide walks you through the entire process, from choosing the right material to sanding, priming, and painting. Whether you are fixing nail holes, smoothing hairline cracks, repairing dents, or preparing a wall for a fresh coat of paint, this article will help you get a clean, professional-looking finish without turning your living room into a drywall snowstorm.
What “Putty” Means for Walls
Before diving in, let’s clear up one useful detail. In many places, people casually say “wall putty” for any filler used on interior walls. In the United States, though, wall repairs are usually done with one of these materials:
Spackle
Best for small holes, tiny dents, and light cosmetic fixes. If you removed a nail, a screw, or a wall hook, spackle is usually the simplest choice. It dries relatively quickly and is easy to sand.
Joint Compound
Best for larger repairs, taped seams, wider cracks, and skim coating. This is the go-to material when a wall needs more than a quick dab and a prayer.
Patching Compound
A broad category that can include fast-drying repair products for drywall and plaster. Some are lightweight, some are harder and denser, and some are designed to shrink less during drying.
So if your project title is “how to apply putty on walls,” that is perfectly fine. Just know that the actual product in your hand may say spackle or joint compound instead of putty. The label matters less than choosing the right product for the size and depth of the repair.
Tools and Materials You’ll Need
- Wall putty, spackle, or joint compound
- Putty knife or drywall knife
- Sanding sponge or fine-grit sandpaper
- Utility knife
- Clean rag or sponge
- Dust brush or vacuum
- Painter’s tape and drop cloth
- Primer
- Paint for the final finish
- Drywall tape or mesh tape for wider cracks
- Self-adhesive wall patch for larger holes, if needed
You do not need a garage full of pro gear for this job. A flexible putty knife, a decent sanding sponge, and enough restraint to avoid slapping on half the tub at once will take you far.
How to Apply Putty on Walls Step by Step
1. Inspect the Wall and Match the Repair to the Damage
Start by figuring out what you are actually repairing. Tiny nail holes and shallow dents need very little filler. Hairline cracks may need only a light fill. Wider cracks often need tape plus compound. A rough, uneven wall may need a skim coat over a broader area.
Here is a practical rule: the bigger and deeper the problem, the less likely a quick swipe of lightweight putty will solve it by itself. Small damage is a fill job. Larger damage is a repair system.
2. Prep the Surface Properly
This is the part many people rush, then later wonder why the patch peeled, flashed through the paint, or looked like a speed bump in afternoon sunlight.
Remove loose paint, crumbling drywall, dust, and debris. If the area has a crack, use a utility knife to lightly open it up and remove weak material. That may feel wrong, like you are making it worse, but it actually gives the filler a better surface to grip. Wipe the area clean and let it dry fully.
If there is glossy paint, rough edges, or lifted material around the damage, lightly sand the area first. The goal is a clean, stable surface with no flaky surprises waiting under the patch.
3. Stir the Product and Load the Knife Lightly
If the putty or compound has separated in the container, stir it until smooth. You want a creamy, workable consistency. Scoop a small amount onto your putty knife. Small is the key word here. Your wall is not a cupcake, and this is not frosting season.
Loading too much product makes the repair messier, thicker, and harder to feather. It also increases shrinkage and drying time.
4. Apply the First Coat
Press the putty firmly into the hole, crack, or dent. Use the knife to spread the material across the damaged area, then scrape away the excess. Hold the knife at a slight angle and drag it smoothly so the filler stays in the defect but does not pile up around it.
For a smooth repair, feather the edges beyond the damaged spot. In simple terms, that means thinning the compound as it reaches the surrounding wall so there is no obvious ridge. If the area is deep, do not try to fill it all at once. Build it in thin layers.
One thick coat tends to shrink, crack, dry unevenly, and generally behave like it has personal issues. Thin coats dry better and produce a flatter result.
5. Let It Dry Completely
This sounds obvious, yet it is where many wall repairs go off the rails. Touch-dry is not always fully dry. Follow the product directions and give it enough time. Some small spackle repairs dry in a couple of hours, while deeper repairs can take much longer.
If you rush into sanding or recoating while the center is still damp, the patch may tear, roll, or sink later. Waiting is not glamorous, but it is cheaper than redoing the wall.
6. Sand and Recoat if Needed
Once the first coat is completely dry, sand it lightly with a fine-grit sanding sponge or sandpaper. Your mission is to flatten ridges and blend the patch with the wall, not to sand through the repair like you are excavating for fossils.
Run your hand over the area. Your fingertips are surprisingly good at finding flaws your eyes miss. If the patch still dips inward, shows an edge, or feels rough, apply a second thin coat. Let that coat dry completely, then sand again.
It is normal to need two or even three coats on deeper imperfections. That does not mean you failed. It means you are doing it correctly.
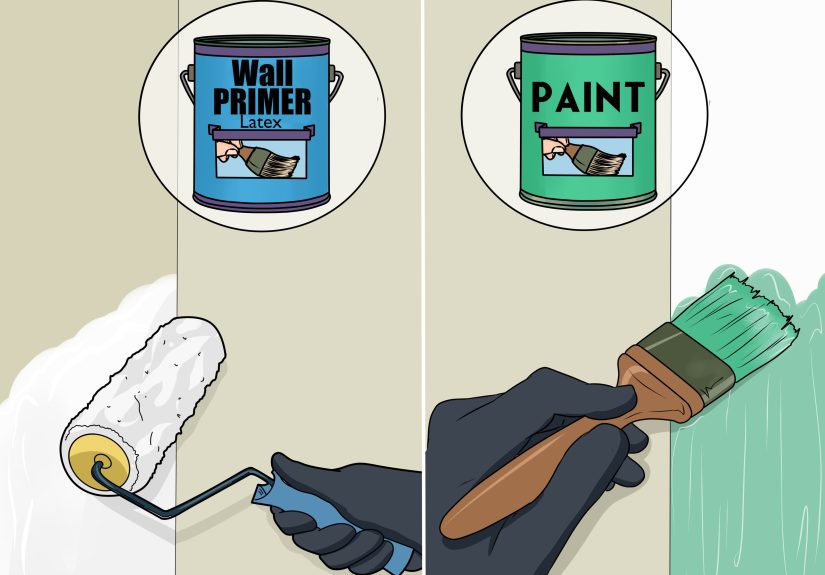
7. Remove Dust and Prime the Patch
After sanding, wipe away all dust with a damp cloth or microfiber rag. Dust left behind can interfere with paint adhesion and leave a gritty finish.
Then prime the patched area. This step matters more than many beginners realize. Fresh filler absorbs paint differently than the surrounding wall. If you skip primer, the patched spot can flash through as dull, shiny, or oddly obvious even after painting. Primer evens out absorption so the final paint coat looks consistent.
8. Paint for a Seamless Finish
Once the primer dries, paint the wall. If you are only touching up a small area, matching the sheen can be just as important as matching the color. On older walls, a full wall repaint often gives the best visual result, especially if the original paint has faded or changed over time.
How to Handle Common Wall Repair Situations
Nail Holes and Tiny Screw Holes
These are the easiest repairs. Use a small amount of spackle, press it into the hole, scrape it flush, let it dry, and sand lightly. Often one coat is enough.
Hairline Cracks
Clean out the crack, apply a thin layer of compound, and feather it outward. For very fine cosmetic cracks, this may be all you need. For cracks that reopen or move, investigate the cause before repeatedly patching the symptom.
Wider Cracks
If the crack is more substantial, use drywall tape or mesh tape and cover it with joint compound. This gives the repair more strength and helps reduce the chance of the crack telegraphing right back through the paint later.
Dents and Gouges
Fill in layers. Deep dents often shrink after the first coat dries, so expect to reapply. The goal is to build the surface level with the surrounding wall, not leave a proud little hill in the middle of the room.
Larger Holes
For holes bigger than a nail or screw mark, use a self-adhesive patch or a proper drywall patch repair before applying compound. Putty alone is not a miracle bridge. It needs backing for bigger openings.
Uneven Walls Before Painting
If the whole wall is rough, scarred, or patchy from old paint, previous repairs, or wallpaper removal, you may need a skim coat. That means applying a thin, broad layer of joint compound over a wider surface to create a smoother finish. It takes more time and sanding, but it can transform a tired wall into a paint-ready surface.
Mistakes to Avoid
- Using one thick coat: Thick applications dry slowly, shrink more, and leave humps.
- Skipping prep: Dust, loose paint, and crumbling edges make repairs fail faster.
- Not feathering the edges: The patch may be filled, but the outline will still show.
- Sanding too aggressively: You can gouge the patch or scratch the surrounding wall.
- Painting without primer: The repair may flash through and ruin the finish.
- Using the wrong product: Small fixes call for spackle; broader wall smoothing often needs joint compound.
- Ignoring wall texture: A perfectly smooth patch on a textured wall can stand out just as much as the original damage.
Tips for a Smoother, More Professional Finish
Use the widest knife that still feels comfortable for the repair. A wider blade helps feather the patch more naturally. Keep the knife clean while you work, because dried chunks on the blade create drag lines. Check your repair from the side with a work light or natural window light, since flat-on viewing can hide ridges. And whenever possible, repair more area than you think you need. A slightly wider, flatter patch usually disappears better than a tiny patch with a sharp edge.
Also, remember that walls are judged harshly by sunlight. A repair that looks flawless at 9 p.m. can suddenly look suspicious at 9 a.m. when sunlight hits from the side. If you want the finish to look truly smooth, inspect it under the kind of lighting the room gets during the day.
Experience and Real-World Lessons from Applying Putty on Walls
After enough wall repairs, you start to notice a pattern: the patch itself is rarely the real problem. The problem is usually impatience. Most messy results come from trying to finish too much in one pass. The first time many people repair a wall, they tend to overfill the hole because it feels safer. More material must mean more strength, right? On a wall, not really. More often it means more sanding, more dust, more shrinkage, and a repair that ends up larger than the original damage.
One of the most useful lessons is that a wall repair should be approached almost like editing writing. The first pass handles the obvious issue. The second pass refines it. The third pass, if needed, makes it disappear. That mindset helps you stay patient. Instead of trying to make the wall perfect immediately, you build toward a better surface in stages.
Another real-world lesson is that putty behaves differently depending on the room. In a dry, warm room, it can seem to firm up quickly. In a humid space, the same material may take much longer to dry than expected. That matters because sanding too early makes the repair gummy and frustrating. If the patch feels cool or soft in the center, it usually needs more time.
Lighting also teaches hard truths. A wall patch may look fine straight on, then look completely obvious when viewed from an angle. That is why experienced DIYers often crouch, step sideways, and inspect the wall like they are investigating a crime scene. Angled light reveals ridges, dips, knife marks, and edges that overhead room lighting politely hides.
There is also the matter of cleanup, which no one finds exciting until dust is everywhere. Sanding even a small repair can create more mess than expected. Using a sanding sponge instead of going wild with rough paper helps keep things more controlled. Wiping dust thoroughly before priming makes a huge difference too. Paint over dusty filler can look dull, rough, or uneven, which is a painful way to learn that two extra minutes of cleanup were worth it.
People often discover that the final paint result depends just as much on primer as on the patch itself. A repair might feel smooth and look flat, but if it is not primed, it can soak up paint differently than the surrounding wall. Then you get that dreaded flashing effect, where the patch is visible even though the surface is technically repaired. It is one of the most annoying outcomes because the wall is smooth, but still tattles on you.
There is also a confidence curve with putty knives. At first, it can feel awkward to spread compound evenly. The blade chatters. The filler drags. The patch looks worse before it looks better. That is normal. With a little practice, your hand learns the pressure and angle needed to leave behind filler where it is needed and scrape away what is not. Once that clicks, wall repair gets much easier.
Perhaps the biggest lesson is that neat wall repair is less about perfectionism and more about restraint. Use less product. Make smoother passes. Let it dry. Sand lightly. Prime properly. It is a calm process, not a dramatic one. And when it is done right, nobody notices the repair at all, which is the highest compliment a patched wall can receive.
Final Thoughts
If you want a paint-ready wall that looks smooth, clean, and professionally finished, learning how to apply putty on walls is absolutely worth it. The process is simple once you break it down: prep the surface, choose the right filler, apply thin coats, feather the edges, allow full drying time, sand carefully, then prime and paint.
The real magic is in the details. A rushed patch announces itself. A patient patch disappears. So take your time, trust thin layers, and remember that the goal is not just to fill a hole. The goal is to make the wall look like nothing ever happened there in the first place.


