Table of Contents >> Show >> Hide
- What Is Ghee?
- Ghee vs. Clarified Butter: What Is the Difference?
- Why Make Homemade Ghee?
- Ingredients for Homemade Ghee
- Equipment You Need
- How to Make Ghee: Step-by-Step Recipe
- Homemade Ghee Recipe Card
- How to Know When Ghee Is Done
- Common Mistakes to Avoid
- How to Store Ghee
- Can You Can Ghee at Home?
- How to Use Ghee in Everyday Cooking
- Is Ghee Healthy?
- Recipe Variations
- Troubleshooting Homemade Ghee
- Helpful Experience Notes from the Kitchen
- Conclusion
If butter had a glow-up montage, ghee would be the final scene: golden, aromatic, shelf-friendly, and ready to make vegetables, eggs, rice, popcorn, and flatbreads taste like they went to culinary finishing school. A good ghee clarified butter recipe is not complicated, but it does reward patience, a heavy-bottomed pan, and the self-control not to wander off “for just one minute” while milk solids are browning.
Ghee is made by gently simmering butter until the water evaporates and the milk solids separate from the butterfat. Keep cooking a little longer and those milk solids turn lightly brown, giving ghee its signature nutty aroma. Clarified butter stops a bit earlier, when the butterfat is clear and the solids are removed before deep browning. Ghee takes the process one delicious step further.
This guide walks you through how to make ghee at home, how to know when it is done, how to store it safely, and how to use it without turning every meal into a butter-themed parade. Tempting? Absolutely. Necessary? Only sometimes. Delicious? Very.
What Is Ghee?
Ghee is clarified butter that has been cooked until the milk solids brown slightly and the liquid butterfat becomes clear, golden, and fragrant. It is widely used in Indian, Middle Eastern, and South Asian cooking, but it has also become popular in American home kitchens because it tastes rich, handles heat well, and lasts longer than regular butter when stored properly.
Regular butter contains butterfat, water, and milk solids. When you simmer it slowly, the water cooks off, foam rises to the top, and milk solids settle at the bottom of the pan. Once strained, what remains is almost pure butterfat: glossy, golden, and deeply flavorful.
Ghee vs. Clarified Butter: What Is the Difference?
The terms are often used together, and for everyday cooking they are close cousins. Both are made by removing water and milk solids from butter. The main difference is flavor and cooking time.
Clarified Butter
Clarified butter is usually cooked only until the butterfat separates from the foam and milk solids. It has a clean, buttery taste and is often used in French cooking, seafood dishes, sauces, and sautéing.
Ghee
Ghee is simmered longer, allowing the milk solids at the bottom to turn golden brown. That browning creates a toasted, nutty flavor. Think of clarified butter as the polite cousin who writes thank-you notes. Ghee is the cousin who brings spiced potatoes and somehow becomes everyone’s favorite guest.
Why Make Homemade Ghee?
Store-bought ghee is convenient, but homemade ghee has a few serious advantages. First, it is often cheaper. A pound of butter can turn into a jar of fragrant ghee for less than many specialty brands charge. Second, you control the butter quality. Third, homemade ghee tastes fresh, warm, and deeply aromatic in a way that can make toast feel like a five-star breakfast.
Ghee also has a higher smoke point than regular butter because the water and milk solids are removed. That makes it useful for sautéing, roasting, pan-frying, blooming spices, and cooking eggs. It is not magic oil from a wizard pantry, but it is extremely practical.
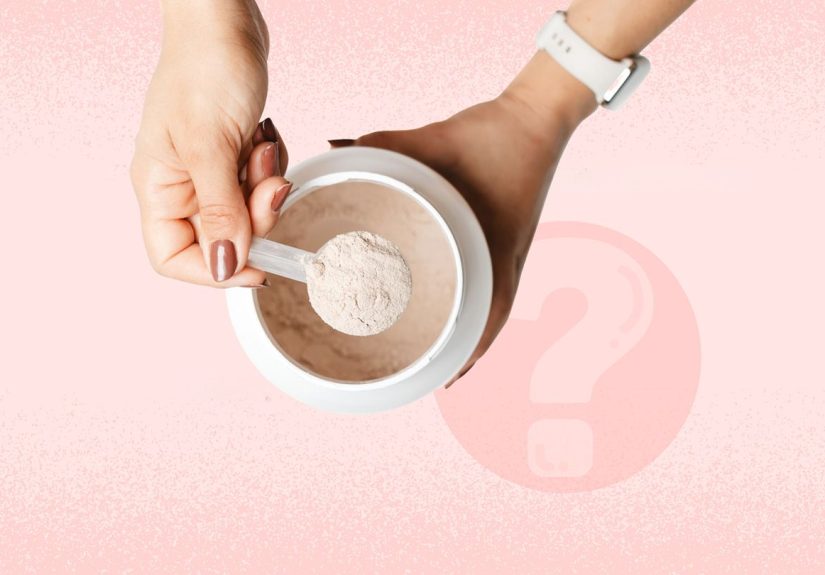
Ingredients for Homemade Ghee
- 1 pound unsalted butter, preferably high-quality butter
That is it. One ingredient. No stabilizers, no secret powders, no tiny culinary dragon required.
Should You Use Salted or Unsalted Butter?
Use unsalted butter for the cleanest flavor and most predictable result. Salted butter can work in a pinch, but the salt may concentrate during cooking and leave you with a final product that is less versatile. Unsalted ghee can go into sweet dishes, savory dishes, sauces, rice, pancakes, and roasted vegetables without bossing the recipe around.
Does European-Style Butter Make Better Ghee?
European-style butter usually contains a higher percentage of butterfat and less water than standard American butter. That can mean a slightly higher yield and richer flavor. However, regular unsalted butter works beautifully. The best butter for ghee is the one you will actually use before it turns into a forgotten dairy brick in the back of the fridge.
Equipment You Need
- A heavy-bottomed saucepan
- A spoon or silicone spatula
- A fine-mesh strainer
- Cheesecloth, coffee filter, or a very fine straining cloth
- A clean, dry glass jar with a tight lid
A heavy pan matters because it spreads heat evenly and helps prevent the milk solids from burning. Thin pans are dramatic. They scorch easily, then act surprised.
How to Make Ghee: Step-by-Step Recipe
Step 1: Melt the Butter Slowly
Place 1 pound of unsalted butter in a heavy-bottomed saucepan over medium-low heat. Let it melt gently. Do not rush this stage. If the heat is too high, the milk solids can burn before the water has fully evaporated.
Step 2: Let It Simmer
Once melted, the butter will begin to bubble and foam. This is the water cooking off. Keep the heat low enough that the butter simmers steadily but does not boil aggressively. You want calm bubbling, not a butter volcano auditioning for a disaster movie.
Step 3: Watch the Layers Form
As the butter cooks, foam will rise to the surface, clear golden fat will appear in the middle, and milk solids will sink to the bottom. You may gently skim some foam if you like, but it is not required. Many cooks leave it alone and strain everything at the end.
Step 4: Cook Until Golden and Nutty
Continue cooking for about 15 to 25 minutes, depending on your pan, stove, and amount of butter. The ghee is ready when the bubbling quiets, the liquid looks clear and golden, and the milk solids at the bottom turn light brown. It should smell nutty and toasted, not sharp or burnt.
Step 5: Strain Carefully
Remove the pan from the heat. Let it sit for a few minutes so the solids settle. Pour the liquid through a fine-mesh strainer lined with cheesecloth into a clean, dry glass jar. Avoid scraping the browned solids into the jar unless you want a more rustic flavor and do not mind a cloudy finish.
Step 6: Cool and Store
Let the ghee cool completely before sealing the jar. It may remain liquid when warm and turn semi-solid as it cools. Store it in an airtight container away from moisture, direct sunlight, and dirty utensils.
Homemade Ghee Recipe Card
Ingredients
- 1 pound unsalted butter
Instructions
- Add butter to a heavy-bottomed saucepan.
- Melt over medium-low heat.
- Simmer gently as foam rises and water evaporates.
- Continue cooking until the butterfat is clear and golden and the milk solids are lightly browned.
- Remove from heat and cool for 3 to 5 minutes.
- Strain through cheesecloth or a fine filter into a clean, dry jar.
- Cool completely before sealing.
Yield
One pound of butter usually yields about 1 1/2 to 1 3/4 cups of ghee, depending on the butter’s water content and how thoroughly it is strained.
Time
Prep time: 2 minutes. Cook time: 15 to 25 minutes. Total time: about 30 minutes.
How to Know When Ghee Is Done
The best clues are sound, sight, and smell. At first, the butter bubbles loudly because water is evaporating. As the water disappears, the bubbling becomes quieter. The liquid turns clear and golden. The milk solids at the bottom shift from pale to tan to light brown. Finally, the aroma changes from melted butter to toasted nuts.
If the milk solids are pale, the ghee will taste mild. If they are deep brown, the ghee will taste more roasted. If they are black, congratulations, you have made regret. Start over with lower heat.
Common Mistakes to Avoid
Using Heat That Is Too High
High heat is the number-one reason homemade ghee burns. Keep the flame or burner low enough for a gentle simmer. Ghee is simple, but it is not a microwave popcorn situation. You cannot press a button and hope for the best.
Walking Away Near the End
The final few minutes matter most. Milk solids can go from golden to burnt quickly. Once the bubbling slows and the liquid turns clear, stay nearby.
Straining Into a Wet Jar
Moisture is the enemy of good storage. Make sure your jar is completely clean and dry before adding ghee. Even a little water can shorten shelf life and affect quality.
Using Dirty Spoons
Always scoop ghee with a clean, dry spoon. A crumb-covered breakfast knife does not belong in the jar. It has one job, and it failed before it arrived.
How to Store Ghee
Homemade ghee should be stored in a clean, airtight jar. Many cooks keep ghee in a cool, dark pantry for short-term use, while refrigeration can help preserve quality for longer storage. The most important rule is to keep moisture and food particles out of the jar.
If your kitchen is hot, humid, or sunny, the refrigerator is the safer quality choice. Ghee may harden when chilled, but it softens quickly at room temperature. If it smells sour, rancid, cheesy, or unpleasant, discard it. Good ghee should smell buttery, nutty, and clean.
Can You Can Ghee at Home?
For home kitchens, avoid home-canning butter or dairy products unless you are following a tested, science-based process from a reliable food-preservation authority. Many online “canned butter” methods are not considered safe. Homemade ghee is best treated as a cooking fat to store carefully in clean jars, not as a doomsday pantry experiment with a decorative label.
How to Use Ghee in Everyday Cooking
1. Cook Eggs
Ghee makes fried eggs taste rich and slightly nutty. Use a teaspoon in a skillet, let it melt, then add eggs. The edges crisp beautifully without the milk solids in regular butter burning too fast.
2. Roast Vegetables
Toss carrots, sweet potatoes, cauliflower, or Brussels sprouts with melted ghee, salt, pepper, and spices. Roast until caramelized. The result tastes cozy, golden, and suspiciously restaurant-like.
3. Bloom Spices
Ghee is excellent for blooming spices such as cumin, mustard seeds, coriander, turmeric, chili flakes, and garam masala. Warm the ghee, add spices, and cook briefly until fragrant before stirring into lentils, rice, soups, or vegetables.
4. Upgrade Rice and Grains
Stir a spoonful of ghee into steamed rice, quinoa, millet, or couscous. Add herbs and a squeeze of lemon for a simple side dish that tastes like you planned dinner more carefully than you did.
5. Make Better Popcorn
Melt ghee and drizzle it over popcorn. Because ghee has less water than whole butter, it coats popcorn without making it soggy. Add salt, smoked paprika, nutritional yeast, or a pinch of curry powder.
Is Ghee Healthy?
Ghee is flavorful, useful, and naturally low in lactose because the milk solids are removed during cooking. However, it is still a concentrated fat and is high in saturated fat. That means it is best used as an accent, not as the main personality of your diet.
A teaspoon or two can add big flavor to vegetables, grains, and proteins. A half-cup poured over everything because “it is traditional” is probably your taste buds negotiating against your long-term interests. Enjoy it, respect it, and let moderation do its quiet little job.
Recipe Variations
Light Golden Ghee
Cook just until the milk solids turn pale golden. This version tastes mild and clean, making it great for everyday cooking.
Deep Toasted Ghee
Cook a little longer until the solids are medium brown and the aroma is deeply nutty. This is excellent for rice, roasted vegetables, and drizzling over lentils.
Spiced Ghee
After straining, infuse warm ghee with spices such as cinnamon, cardamom, bay leaf, black pepper, or cumin. Remove the spices before storing. Use spiced ghee quickly and store it in the refrigerator for best quality.
Troubleshooting Homemade Ghee
Why Is My Ghee Grainy?
Grainy texture is usually normal. As ghee cools, fats crystallize at different rates, creating a slightly grainy or sandy texture. It melts smoothly when heated.
Why Is My Ghee Cloudy?
Cloudiness can happen if tiny milk solids pass through the strainer or if the ghee has not fully settled. Use a finer filter next time. Cloudy ghee can still be usable if it smells fresh and was stored properly.
Why Does My Ghee Taste Burnt?
The heat was too high or the milk solids cooked too long. Next time, lower the heat once the butter melts and remove the pan when the solids are light to medium brown.
Why Did My Ghee Mold?
Mold usually means moisture or food particles entered the jar. Use clean, dry jars and utensils. When in doubt, throw it out.
Helpful Experience Notes from the Kitchen
After making ghee a few times, you start to understand that the recipe is less about the clock and more about paying attention. The first batch can feel mysterious because butter goes through several stages: melting, foaming, sputtering, clearing, browning, and suddenly smelling like toasted hazelnuts. By the third batch, you may find yourself standing over the stove like a butter detective, nodding wisely at bubbles.
One practical lesson is to use a light-colored pan interior if you have one. Stainless steel makes it easier to see the milk solids browning at the bottom. A dark nonstick pan can hide the color change, which is rude behavior from cookware. If all you have is a dark pan, rely more on smell and sound. When the loud bubbling quiets and the aroma turns nutty, you are close.
Another experience-based tip: do not double the recipe until you are comfortable with the process. A pound of butter is manageable. Four pounds of butter can turn into a golden lake that demands attention, counter space, and emotional maturity. Small batches are easier to control and strain cleanly.
Filtering also matters more than beginners expect. A basic fine-mesh strainer catches larger solids, but cheesecloth or a coffee filter gives a cleaner, clearer ghee. Coffee filters strain slowly, so be patient. Do not squeeze the filter aggressively unless you want tiny browned bits pushed into the jar. Those bits may taste good at first, but they can affect storage quality.
For flavor, the sweet spot is usually light brown milk solids, not dark brown. Light brown gives ghee that warm, nutty character without bitterness. If your kitchen smells like browned butter cookies, excellent. If it smells like burnt toast and sadness, the heat went too far.
When using ghee, start small. A teaspoon can transform scrambled eggs, sautéed greens, or plain rice. It is especially good with garlic, cumin, ginger, turmeric, potatoes, carrots, lentils, and chicken. It also loves bread. Warm flatbread brushed with ghee and a pinch of salt is proof that simple food can still make people stop talking for a moment.
One final real-life note: label the jar with the date. Homemade ghee looks timeless, like something discovered in a golden temple, but your pantry is not a museum. A simple date label helps you rotate batches and avoid the classic kitchen mystery: “Did I make this last month or during a different era of my personality?”
Conclusion
Making ghee at home is one of those small kitchen skills that feels fancy but is surprisingly simple. With one ingredient and a little patience, you can turn ordinary unsalted butter into a golden cooking fat with rich flavor, high-heat versatility, and a beautiful nutty aroma. The key is gentle heat, careful watching near the end, clean straining, and dry storage.
Use homemade ghee for eggs, rice, roasted vegetables, lentils, popcorn, and spice-based cooking. Keep it clean, keep it dry, and let it bring buttery confidence to your meals without taking over the whole plate. Butter may be great, but ghee walks in wearing sunglasses.