Table of Contents >> Show >> Hide
- Before You Start: Choose the Right Method
- Method 1: Use iCloud Photos for Automatic Syncing
- Method 2: Use AirDrop to Transfer Photos Instantly
- Method 3: Transfer Photos to iPad with a Wired Import (Direct, Offline-Friendly)
- Bonus: Cloud App Alternatives (Google Photos, Dropbox, OneDrive)
- Common Mistakes to Avoid When Moving Photos
- Which Method Should You Use?
- Real-World Experiences and Scenarios (Extended Guide)
- Conclusion
If your iPhone is packed with photos and your iPad is sitting there with a gorgeous bigger screen just begging to show them off, you are absolutely not alone. This is one of those “sounds easy, why is this weirdly confusing?” Apple tasks. The good news: it is easy once you pick the right method for your situation.
In this guide, you’ll learn 3 reliable ways to transfer photos from iPhone to iPadwhether you want automatic syncing, fast one-time sharing, or an offline option that doesn’t depend on cloud storage. We’ll also cover common mistakes (like why your photos seem to “disappear”), practical troubleshooting tips, and real-world scenarios so you can choose the best method without trial-and-error chaos.
Let’s get your photos moving.
Before You Start: Choose the Right Method
Here’s the quick version:
- Method 1: iCloud Photos Best for automatic syncing across your Apple devices.
- Method 2: AirDrop Best for sending selected photos quickly (especially one-time transfers).
- Method 3: Wired Import to iPad Best when you want a direct transfer, have limited internet, or prefer offline control.
All three methods work well. The “best” one depends on whether you want always in sync, send just a few, or transfer without cloud storage.
Method 1: Use iCloud Photos for Automatic Syncing
Why iCloud Photos Is the Easiest Long-Term Option
If you use the same Apple Account on your iPhone and iPad, iCloud Photos is usually the smoothest way to keep photos synced. Once it’s turned on, your photos and videos can appear across both devices automatically. That means you don’t need to manually “send” anything every time you take a picture.
This is the best choice if you:
- Use both devices regularly
- Want your entire library available on both devices
- Don’t want to repeat the transfer process again and again
How to Turn On iCloud Photos on iPhone and iPad
On iPhone:
- Open Settings.
- Tap your name (Apple Account).
- Tap iCloud > Photos.
- Turn on Sync this iPhone.
On iPad:
- Open Settings.
- Tap your name.
- Tap iCloud > Photos.
- Turn on Sync this iPad.
After that, your photo library starts syncing. If you already have lots of pictures and videos, give it some timeespecially if your Wi-Fi is doing its best but not exactly winning any awards.
Important iCloud Photos Tips
- Use the same Apple Account on both devices. If your iPhone and iPad are signed into different accounts, your photos won’t sync.
- Check iCloud storage. The free storage fills up quickly if you take a lot of photos or videos.
- Know that changes sync too. If you delete a photo on one device, it can also disappear from the other synced device.
- Leave both devices on Wi-Fi and power for large libraries, especially during the first sync.
When iCloud Photos Is Not the Best Fit
iCloud Photos is amazing for convenience, but it’s not ideal if you only want to send a few pictures without syncing everything. It also isn’t great if your iCloud storage is full or you’re trying to avoid cloud-based syncing altogether. In those cases, AirDrop or a wired transfer is usually better.
Method 2: Use AirDrop to Transfer Photos Instantly
Why AirDrop Is Great for Quick Photo Transfers
Need to move 10 vacation photos from your iPhone to your iPad right now? AirDrop is your friend. It’s fast, wireless, and perfect for one-time transfers. No cable, no app installation, no cloud waiting room.
AirDrop is especially useful when:
- You only want to transfer selected photos
- You want the photos on your iPad immediately
- You don’t want to sync your entire library
What AirDrop Needs to Work
Before you start, make sure:
- Wi-Fi and Bluetooth are turned on on both devices
- The iPhone and iPad are near each other
- Personal Hotspot is off (this can interfere)
- The receiving device (your iPad) is set to receive AirDrop requests
You can control who can find you in AirDrop settings. For privacy, many people prefer Contacts Only. If that doesn’t work, try Everyone for 10 Minutes and switch it back afterward.
How to Transfer Photos from iPhone to iPad with AirDrop
- On your iPhone, open the Photos app.
- Select the photo(s) you want to transfer.
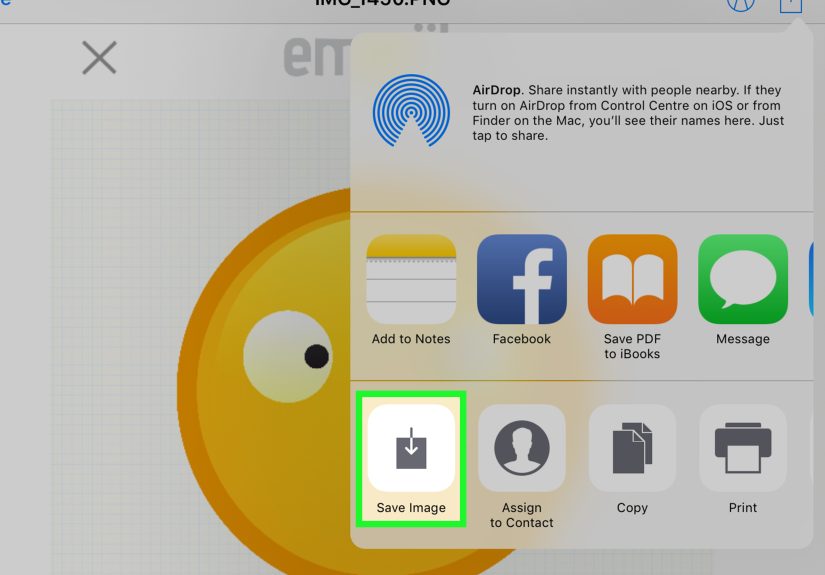
- Tap the Share button.
- Tap AirDrop.
- Tap your iPad when it appears in the list (it may show under My Devices if it’s the same Apple Account).
- Accept the transfer on your iPad if prompted.
That’s it. The photos should land in the Photos app on your iPad. AirDrop is usually very fast, even for multiple images, as long as both devices are awake and nearby.
AirDrop Troubleshooting (Because Technology Loves Drama)
- iPad not showing up? Unlock the iPad and keep the screen on.
- Still not showing? Toggle Wi-Fi and Bluetooth off/on on both devices.
- Transfer stuck? Move devices closer together and try again.
- Can’t receive? Check AirDrop receiving settings and turn off Personal Hotspot.
AirDrop is incredibly convenient, but it can be a little moody. A quick settings reset usually gets it back on track.
Method 3: Transfer Photos to iPad with a Wired Import (Direct, Offline-Friendly)
Why a Wired Transfer Is Still a Smart Option
If you want a more direct, offline-friendly method, a wired import can be a great choice. Apple’s iPad Photos app supports importing photos and videos from other devices, including an iPhone, using the right cable/adapter setup.
This method is useful when:
- Your Wi-Fi is slow or unreliable
- You don’t want to use iCloud
- You’re transferring a lot of photos while traveling
- You prefer manual control over what gets copied
What You Need for a Wired Import
The exact accessories depend on your iPad model and iPhone connection type, but the main idea is simple: connect the iPhone to the iPad (often using an adapter/hub if needed), then import through the Photos app on the iPad.
Apple’s guidance for iPad photo import uses a camera adapter or compatible connection path, and then the iPad handles the import inside the Photos app.
How to Import Photos from iPhone to iPad (Wired)
- Connect your iPhone to your iPad using a compatible cable/adapter setup.
- Unlock your iPhone (and tap Trust if prompted).
- Open the Photos app on your iPad.
- Tap Import.
- Select the photos or videos you want to transfer.
- Tap Import Selected (or import all, if that option appears).
Once imported, the images are stored on your iPad. This is a handy method for photographers, travelers, and anyone who wants a no-cloud workflow.
When Wired Import Beats the Other Methods
Wired transfer wins when you are in places with weak internet (airports, hotels, road trips, spotty rural connections) or when you just don’t want your entire photo library syncing. It’s also a good backup plan if AirDrop is being stubborn and iCloud storage is full.
Bonus: Cloud App Alternatives (Google Photos, Dropbox, OneDrive)
This article focuses on 3 main methods, but there’s also a practical fallback: cloud storage apps. If you already use Google Photos, Dropbox, or OneDrive, you can upload photos from your iPhone and open or download them on your iPad using the same app.
These options are useful if:
- You use mixed devices (Apple + Windows + Android)
- You want a second backup besides iCloud
- You need to share photos across work and personal devices
Many users turn on features like backup or camera uploads so photos upload automatically from the iPhone, then access them on the iPad later. It’s not as “Apple-native” as iCloud Photos, but it works wellespecially if you’re already living in those apps.
Common Mistakes to Avoid When Moving Photos
1) Confusing “Sync” with “Copy”
With iCloud Photos, you’re syncing a librarynot making a one-time copy. That means edits and deletions can sync too. If you want a separate copy, AirDrop or wired import is usually safer.
2) Forgetting Storage Limits
Photos and videos (especially 4K video) eat storage fast. If iCloud Photos isn’t syncing, check storage on both your device and iCloud account before assuming the feature is broken.
3) Sending Huge Batches Over AirDrop All at Once
AirDrop is fast, but sending thousands of photos in one go can be messy. For giant transfers, use iCloud Photos or wired import instead. Your future self will thank you.
4) Not Unlocking the Receiving Device
If your iPad is asleep or locked, AirDrop and wired import may not behave properly. Keep both devices awake during the transfer.
Which Method Should You Use?
- Use iCloud Photos if you want your iPhone and iPad photo libraries to stay in sync automatically.
- Use AirDrop if you want to transfer specific photos quickly without syncing everything.
- Use Wired Import if you want an offline method or more manual control.
There isn’t one “perfect” method for everyone. The best method is the one that matches how you use your devices. If you take photos daily and edit on iPad, iCloud Photos is king. If you just want to move a few pictures for a presentation, AirDrop is lightning fast. If you’re on the go with bad internet, wired import is the hero nobody talks about enough.
Real-World Experiences and Scenarios (Extended Guide)
People usually search for “how to transfer photos from iPhone to iPad” when something specific is happeningnot because they randomly woke up and decided to organize their digital life (although if you did, respect). In real use, the best transfer method often depends on the moment.
Scenario 1: The family trip situation. Someone takes 200 photos on an iPhone during a weekend trip, and later everyone wants to look at them on the iPad because the screen is bigger. This is where AirDrop is often the fastest fix if the goal is “show me the photos now.” You can select the best pictures, tap Share, and send them over in a minute or two. No account changes, no settings deep dive, and no waiting for a full cloud sync. If it’s just a highlights reelsunset shots, group photos, and that one accidental photo of your shoeAirDrop is perfect.
Scenario 2: The everyday creator workflow. A lot of users take photos on an iPhone but edit them on an iPad using apps for retouching, drawing, or social posts. In this case, iCloud Photos is the long-term winner. The key advantage is consistency. You shoot on iPhone, open iPad, and your photos are already there (or syncing in). No repeated transfers. No “Did I send that one?” confusion. The experience feels automatic, which is exactly what most people want after the first week of manually moving photos around.
Scenario 3: The low-storage panic. This one happens all the time. A user turns on iCloud Photos and expects everything to sync immediately, but nothing happensor only some photos appear. Usually, the issue is storage. Either the iPhone is low on device storage, or iCloud storage is full. The experience feels like the feature is broken, but it’s often just a storage bottleneck. The practical move is to check storage first, then keep devices on Wi-Fi and power for a while. Large libraries don’t always move instantly, especially if there are lots of videos.
Scenario 4: Travel, hotels, and unreliable Wi-Fi. This is where wired import shines. Travelers often discover that hotel Wi-Fi is fine for scrolling but terrible for large photo syncs. AirDrop can still work for a handful of pictures, but for a steady workflow (especially if you’re moving many files), a wired setup can be more reliable. It feels old-school, but in a good way: plug in, import, done. No wondering whether the cloud caught up overnight.
Scenario 5: “I only want these photos on the iPad.” Some users don’t want full syncing at all. They want a separate set of images on the iPad for a school project, a portfolio, a recipe collection, or a presentation. This is a common reason people get frustrated with iCloud Photosbecause syncing is designed to mirror your library, not create a separate copy for one task. In these situations, AirDrop or wired import is the better experience because you are making a deliberate copy, not linking two libraries.
Scenario 6: Mixed-device households. In many homes, there’s an iPhone, an iPad, a Windows laptop, and maybe another phone in the mix. That’s where apps like Google Photos, Dropbox, or OneDrive become practical. They’re not the main methods in this article, but the experience can be smoother if your family already uses one of those platforms. Upload from iPhone, open the same app on iPad, and grab the photo there. It’s less “Apple magic” and more “works everywhere,” which is sometimes exactly what you need.
The big takeaway from real-world use is simple: the best photo transfer method depends on your goal. If your goal is convenience, use iCloud Photos. If it’s speed, use AirDrop. If it’s control or offline reliability, use wired import. Once you match the method to the moment, photo transfers become easyand way less annoying.
Conclusion
Transferring photos from iPhone to iPad doesn’t have to be complicated. The fastest way for one-time sharing is AirDrop, the most convenient long-term option is iCloud Photos, and the most dependable offline choice is wired import through the iPad Photos app. Pick the method that matches your workflow, and you’ll spend less time troubleshootingand more time actually enjoying your photos on the bigger screen.


