Table of Contents >> Show >> Hide
- Before You Change Nipple Jewelry: Make Sure It Is Actually Healed
- Way 1: Let a Professional Piercer Change It
- Way 2: Change a Straight Barbell at Home
- Way 3: Use an Insertion Taper or Guide Pin
- Choosing the Right Nipple Jewelry
- Aftercare After Changing Nipple Piercings
- Real Experiences: What People Learn When Changing Nipple Piercings
- Conclusion: Change Nipple Piercings Slowly, Cleanly, and Smartly
- SEO Tags
Changing nipple piercings can be simple, stylish, and surprisingly low-dramawhen your piercing is fully healed, your jewelry fits correctly, and your hands are cleaner than a surgeon’s playlist.
Nipple piercings are tiny pieces of body jewelry with big personality. They can look elegant, bold, minimal, sparkly, industrial, or “I definitely know where my black T-shirt drawer is.” But when it is time to change the jewelry, many people suddenly freeze. What if the hole closes? What if the barbell gets stuck? What if the new jewelry refuses to go in and you end up negotiating with your own nipple in the bathroom mirror?
Good news: learning how to change nipple piercings does not have to be scary. The secret is not brute force, fancy tools, or watching one blurry video at 2 a.m. The secret is patience, hygiene, correct jewelry, and knowing when to let a professional piercer take the wheel. A healed nipple piercing can usually be changed safely, but a healing, irritated, infected, or painful piercing is not the place for a DIY adventure.
This guide covers three easy ways to change nipple piercings: visiting a professional piercer, changing a straight barbell at home, and using a sterile insertion taper or guide pin for a smoother jewelry swap. We will also talk about what jewelry to choose, what warning signs to watch for, and what real-life experience teaches people after the excitement of the first piercing appointment wears off.
Before You Change Nipple Jewelry: Make Sure It Is Actually Healed
The most important rule is also the least glamorous: do not change nipple jewelry too early. Nipple piercings can take many months to heal, and some take close to a year or longer depending on anatomy, jewelry fit, aftercare, friction, snagging, immune response, and daily habits. A piercing can look calm on the outside while still being fragile inside. That is the sneaky part. It may look ready for a jewelry fashion show, while the inner channel is still saying, “Please do not redecorate yet.”
Signs your nipple piercing may be ready
A healed nipple piercing usually feels stable. There should be no ongoing tenderness, swelling, heat, bleeding, sharp pain, or repeated crusting. The jewelry should move slightly without discomfort, but you should not twist, spin, or force it. The piercing channel should feel settled, not tight or angry. If the piercing still flares up after sleeping on it, wearing certain bras, exercising, or bumping it with clothing, it may not be ready for an at-home change.
When not to change it yourself
Do not change nipple jewelry at home if you notice increasing redness, swelling, warmth, pus-like discharge, strong odor, spreading pain, fever, chills, or jewelry that seems embedded. Do not remove jewelry from a suspected infection without professional advice because the surface can close and trap drainage inside. If anything looks infected or unusually painful, contact a reputable piercer and, when symptoms are medical, a healthcare professional.
Also avoid DIY changes if the piercing is new, the jewelry is stuck, the threading is damaged, the piercing is migrating, the skin looks thin, or you are unsure about the gauge and length. Guessing jewelry size is like guessing pasta portions: technically possible, but often regrettable.
Way 1: Let a Professional Piercer Change It
The easiest and safest way to change nipple piercingsespecially the first timeis to visit a professional piercer. This is the “no panic, no bathroom floor jewelry hunt” method. A good piercer can check whether the piercing is healed, confirm the correct gauge and length, select jewelry that matches your anatomy, and change it with clean technique and proper tools.
Why this method is best for the first jewelry change
The first jewelry change is not just about swapping one shiny thing for another shiny thing. It is also a fit check. Initial nipple jewelry is often longer to allow for swelling. Once the piercing settles, that extra length can become annoying because it may snag, shift, or press forward. A professional piercer can determine whether you need a shorter barbell, different end size, or a different style entirely.
Many healed nipple piercings do well with straight barbells. Rings and decorative shields can look fantastic, but they may not be ideal for every anatomy or every stage of healing. A piercer can help you avoid jewelry that is too tight, too long, too heavy, or made from materials that might irritate your skin.
What to expect at the studio
At the appointment, the piercer will usually inspect the piercing, wash or sanitize, use gloves, clean the area, and remove the existing jewelry carefully. They may use a taper or guide tool to keep the channel open while inserting the new jewelry. The process is usually quick. If the piercing is truly healed and the jewelry fits correctly, it should feel more like pressure than pain.
Bring the jewelry you want to wear, but be prepared for the piercer to say no if it is not suitable. That is not them being dramatic. That is them saving you from a tiny metal problem with a surprisingly loud attitude. Jewelry should be body-safe, smooth, correctly sized, and appropriate for nipple tissue.
Best for
This method is best for first changes, downsizing, stubborn jewelry, sensitive piercings, expensive jewelry, decorative pieces, and anyone who gets nervous doing it alone. It is also the right choice if you are not sure whether your piercing is fully healed.
Way 2: Change a Straight Barbell at Home
If your nipple piercing is fully healed, calm, and already fitted with a standard straight barbell, you may be able to change it at home. The goal is simple: keep everything clean, move slowly, and never force jewelry through the piercing channel.
What you need
Prepare the new jewelry, sterile saline, clean paper towels or sterile gauze, mild soap for handwashing, and good lighting. Do not use alcohol, hydrogen peroxide, random oils, harsh antiseptics, or mystery bathroom products on the piercing. Your nipple does not need a chemistry experiment. It needs gentle handling.
Choose high-quality jewelry such as implant-grade titanium, niobium, or solid 14k to 18k gold that is appropriate for body jewelry. Avoid cheap plated jewelry, nickel-heavy metal, rough finishes, acrylic, and anything with questionable coating. The jewelry should be the same gauge as your current piece unless a professional piercer has advised otherwise. The length should allow the tissue to sit comfortably without squeezing or leaving a long bar that catches on clothing.
Step-by-step: straight barbell change
- Wash your hands thoroughly. Use soap and running water, cleaning between fingers and under nails. Dry with a clean paper towel.
- Clean the jewelry and area gently. Use sterile saline to soften any debris around the jewelry. Pat dry with clean gauze or paper towel.
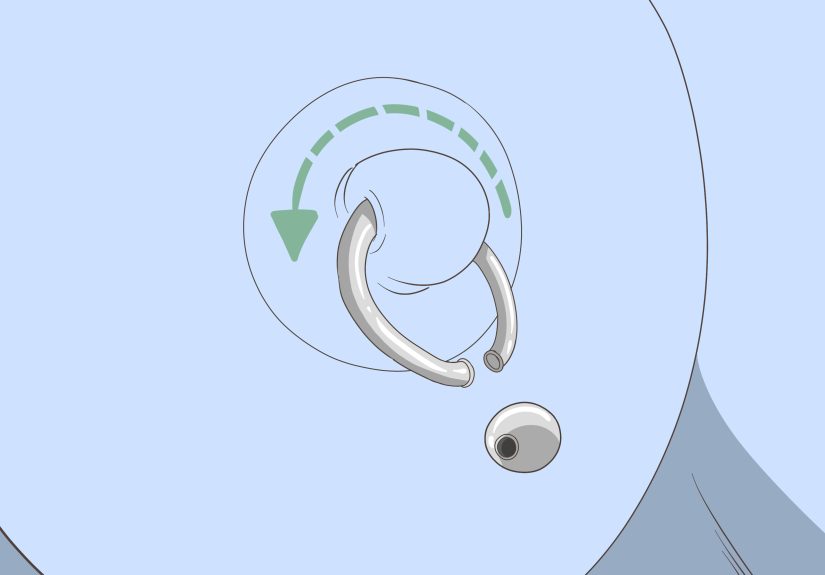
- Check the ends. Most threaded balls loosen counterclockwise and tighten clockwise. Hold one end steady while unscrewing the other.
- Remove slowly. Once one ball is off, gently slide the barbell out in the direction that feels smoothest. Do not yank.
- Insert the new barbell immediately. Line it up with the channel and guide it in gently. If it resists, stop and try adjusting the angle slightly.
- Secure the end. Screw on the ball or decorative end until snug. Do not overtighten, because tiny jewelry threads can strip.
- Clean once more. Rinse with sterile saline and pat dry. Then leave it alone.
Common mistakes to avoid
Do not leave the jewelry out “for a few minutes” while you look for the new ball that rolled under the sink. Nipple piercings can shrink quickly, even when healed. Do not use force if the new jewelry does not glide in. Do not change jewelry right after trauma, heavy irritation, or a snag. And please, do not attempt a jewelry change while rushed, tired, tipsy, or standing over an open drain. That drain has eaten enough jewelry.
Way 3: Use an Insertion Taper or Guide Pin
An insertion taper or guide pin can make changing nipple jewelry easier because it helps guide the new jewelry through the piercing channel. This is especially useful if the piercing is healed but the channel feels tight, the jewelry is internally threaded, or you are switching between similar barbells.
How this method works
A taper is a slim tool that connects to or follows the jewelry so the piercing channel does not collapse during the change. Professional piercers use tapers and guide tools often, but some experienced people use them at home for healed piercings. The key word is healed. A taper should not be used to force open an irritated, shrinking, or unhealed nipple piercing.
Step-by-step: taper-assisted change
- Confirm the size. The taper must match the gauge of your jewelry. A wrong size can irritate or stretch the piercing.
- Wash your hands and clean the area. Use soap for hands and sterile saline for the piercing area.
- Attach or align the taper. Depending on the jewelry style, the taper may thread into the barbell or sit against it.
- Guide the old jewelry out. As the old jewelry exits, the taper follows through the channel.
- Guide the new jewelry in. Attach or align the new barbell to the taper, then gently push it through.
- Secure the jewelry. Tighten the end carefully and clean the area with saline.
When to skip this method
Skip the taper if you feel sharp pain, if the channel seems closed, if there is bleeding, or if the taper is not sterile or properly sized. A taper is a guide, not a crowbar. If the piercing does not cooperate, book a piercer. A five-minute studio visit is better than a week of irritation.
Choosing the Right Nipple Jewelry
The jewelry you choose matters as much as the way you change it. Poor-quality jewelry can cause irritation, allergic reactions, pressure, or delayed healing. Good jewelry should be smooth, polished, body-safe, and correctly fitted.
Best materials
Common body-safe options include implant-grade titanium, niobium, and solid gold that is nickel-free and appropriate for body jewelry. Titanium is popular because it is lightweight, strong, and often well tolerated. Niobium is another respected option. Solid gold can be beautiful, but it should not be plated, low quality, or full of irritating alloys.
Barbell length and end size
A barbell should not pinch the nipple tissue. If the ends press into the skin, the bar is too short. If the bar sticks out too much, it can snag and move around. Decorative ends should be balanced: tiny ends may pull into the piercing, while oversized ends can create pressure. A professional fitting is the easiest way to get this right.
Threaded vs. threadless jewelry
Internally threaded jewelry means the threading is inside the bar, which creates a smoother surface passing through the piercing. Threadless jewelry uses tension to hold the decorative end in place. Both can work well when high quality and properly fitted. Externally threaded jewelry, especially low-quality versions, may scrape the piercing channel and is usually not ideal.
Aftercare After Changing Nipple Piercings
Even healed piercings can feel a little sensitive after a jewelry change. Mild tenderness for a short time may happen, especially if the jewelry was tight or difficult to remove. Treat the area gently for a few days.
Clean with sterile saline if needed, pat dry, and avoid unnecessary touching. Wear comfortable clothing that does not snag. Skip heavy decorative jewelry if the piercing feels irritated. Avoid twisting or spinning the jewelry. If irritation develops, return to simple, well-fitted jewelry and contact a piercer for help.
Warning signs after a jewelry change
Pay attention to pain that gets worse, spreading redness, swelling, warmth, green or yellow pus, bad odor, bleeding that does not stop, fever, chills, or jewelry that starts sinking into the tissue. These signs may need professional care. Piercings are fashionable, but infections are not accessories.
Real Experiences: What People Learn When Changing Nipple Piercings
The first thing many people learn is that confidence matters, but overconfidence is where problems begin. A person may think, “I changed my ear jewelry in thirty seconds, so this will be easy.” Then they discover nipple piercings are less forgiving than earlobes. The tissue is more sensitive, the angle can be trickier, and the jewelry parts are small enough to vanish into another dimension if dropped.
A common experience is realizing that the first change feels easier with a professional. Many people walk into a studio nervous and walk out wondering why they spent two weeks worrying. The piercer checks the fit, changes the jewelry quickly, and explains what size was used. That information becomes gold later. Knowing your gauge and ideal bar length makes future shopping less confusing and prevents the classic mistake of buying jewelry that looks cute online but fits like a tiny medieval trap.
Another real lesson is that healed does not always mean invincible. Someone may have a nipple piercing for a year, change jewelry successfully, and then irritate it with a heavy decorative shield at a concert, gym session, or long travel day. The piercing may become tender not because the jewelry change was wrong, but because the new piece moved too much or caught on fabric. Comfort should win over drama for daily wear. Save heavier or more decorative pieces for shorter periods if your body prefers simpler jewelry.
People also learn to respect handwashing and setup. The best at-home changes usually happen when everything is ready before the old jewelry comes out: new barbell opened, ends checked, towel placed over the sink, mirror positioned, saline nearby, and hands washed. The worst changes happen when someone removes the jewelry first and then starts searching for the replacement. That is when panic enters wearing tap shoes.
Another experience many people share is that jewelry quality changes everything. Cheap jewelry may look fine at first, but rough threading, mystery metal, or poor plating can cause itching, redness, or a stubborn irritation bump. Upgrading to polished implant-grade titanium or another body-safe material often makes a noticeable difference. The piercing feels calmer, the jewelry sits better, and the person stops blaming their body for reacting to low-quality metal.
Finally, people learn that asking for help is not failure. If the ball will not unscrew, if the channel feels tight, if the new bar will not line up, or if the piercing suddenly hurts, stopping is smart. A reputable piercer has tools, lighting, gloves, experience, and the emotional calm of someone who has seen every jewelry situation imaginable. There is no trophy for forcing a painful jewelry change at home. The real win is a healthy piercing that looks good, feels comfortable, and does not ruin your morning.
Conclusion: Change Nipple Piercings Slowly, Cleanly, and Smartly
Changing nipple piercings can be easy when you follow the right order: wait until fully healed, choose body-safe jewelry, wash your hands, move slowly, and stop if something feels wrong. The three easiest methods are having a professional piercer change the jewelry, swapping a healed straight barbell at home, or using a correctly sized insertion taper for a smoother transition.
The best method depends on your experience, your anatomy, your jewelry style, and how calm the piercing is. When in doubt, visit a professional piercer. It is quick, safer, and often less stressful than trying to solve a jewelry puzzle in bad bathroom lighting. Your nipple piercing deserves style, but it also deserves respect. Treat it kindly, and it will keep doing its tiny shiny job without causing unnecessary drama.


