Table of Contents >> Show >> Hide
- First: Why Bird Droppings Are a Bigger Deal Than They Look
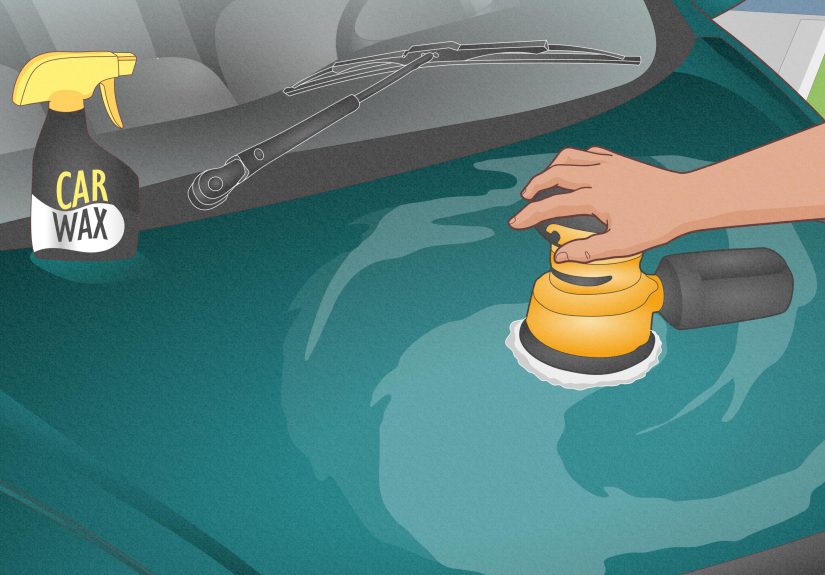
- What You’ll Want on Hand (A.K.A. Your “Bird Poop Emergency Kit”)
- 11 Quick & Effective Ways to Remove Bird Poop From Your Car
- 1) The “Soak & Lift” Method (Fastest, Safest for Most Situations)
- 2) Quick Detailer Spray + Plush Microfiber (The “Keep-It-In-The-Trunk” Move)
- 3) Waterless Wash Spray (When You Need More Cleaning Power Than Detailer)
- 4) DIY Rinseless Wash Spray (Cheap, Effective, Paint-Friendly)
- 5) Warm Soapy Water Compress (For Dried, Crusty “Bird Cement”)
- 6) Dedicated Bug & Tar Remover (For Stubborn Residue Without Going Nuclear)
- 7) Clay Bar or Synthetic Clay Mitt (When the Paint Feels Rough After Cleanup)
- 8) Spot Polish (For “Ghost Stains” or Light Etching)
- 9) Compound (When Polish Isn’t EnoughStill DIY-Friendly if You’re Careful)
- 10) Emergency Wipes (When You’re Out and About)
- 11) When to Call a Pro (Because Sometimes the Bird Chose Violence)
- What NOT to Do (Even If You’re Angry at the Bird)
- How to Reduce Repeat Attacks (Birds Love a Clean Car, Apparently)
- of Real-World Experience: My Ongoing Feud With Birds (And the Lessons They Forced Me to Learn)
- Conclusion
Bird poop on your car is like an unsolicited “art installation” you didn’t ask for, don’t want, and definitely shouldn’t ignore. It’s not just grossbird droppings can mess with your clear coat and leave behind dull, etched-looking marks if they bake in the sun.
The good news: you don’t need a PhD in car detailing (or a pressure washer that sounds like a small jet engine) to fix this. You just need the right approachgentle, fast, and paint-safe. Below are 11 quick ways to remove bird droppings from car paint, with specific steps, product types to look for, and what to do if the dreaded “ghost stain” sticks around.
First: Why Bird Droppings Are a Bigger Deal Than They Look
Bird droppings are a weird combo of waste, grit, and chemical compounds (including uric acid). When they sit on your paintespecially in heat or direct sunlightthey can dry into a crust that’s harder to remove and more likely to leave behind etching in the clear coat. Translation: the longer it sits, the more it can cost you in time, effort, or paint correction.
The two rules that save your paint
- Don’t wipe it dry. Dry wiping can drag grit across your clear coat and create fine scratches.
- Soften first, then lift. Your goal is to loosen the mess and pick it upno aggressive scrubbing.
What You’ll Want on Hand (A.K.A. Your “Bird Poop Emergency Kit”)
- A bottle of water (or a small spray bottle)
- Quick detailer spray or waterless wash spray
- 2–3 clean, soft microfiber towels (plush is best)
- Optional: rinseless wash concentrate (for DIY spray solution)
- Optional: clay bar or synthetic clay mitt for stuck residue
- Optional: mild polish for etching
11 Quick & Effective Ways to Remove Bird Poop From Your Car
1) The “Soak & Lift” Method (Fastest, Safest for Most Situations)
If you have nothing but water and a microfiber towel, you can still do this the right way.
- Move the car into shade if possible, and let the paint cool if it’s hot to the touch.
- Spray the droppings with water until the surface is visibly wet.
- Lay a folded microfiber towel over the spot and re-wet it (like a mini compress).
- Wait 30–90 seconds.
- Lift the towel straight up and gently dab any remaining residueno hard wiping.
- Finish by lightly wiping with a clean, damp section of towel, then dry.
Why it works: Softening reduces the chance you’ll grind grit into the paint.
2) Quick Detailer Spray + Plush Microfiber (The “Keep-It-In-The-Trunk” Move)
A quick detailer is basically “water with benefits.” It adds lubrication so the mess slides off more safely.
- Spray the droppings generously with detailer.
- Let it dwell 30–60 seconds.
- Use a plush microfiber towel to blot and lift, then gently wipe in one direction.
- Flip to a clean side of the towel and do a final light pass.
Pro tip: Fold your towel into quarters so you always have a clean surface to switch to.
3) Waterless Wash Spray (When You Need More Cleaning Power Than Detailer)
Waterless wash products are designed for spot cleaning with more surfactants than a typical detail spray. They’re great for fresh droppings and light grime.
- Spray until the area looks thoroughly wet.
- Let dwell for a minute.
- Wipe gently with a microfiber towel, using straight strokes.
- Buff lightly with a second clean towel.
Best for: Urban parking lots, road trips, and anyone who doesn’t want to keep a garden hose in the passenger seat.
4) DIY Rinseless Wash Spray (Cheap, Effective, Paint-Friendly)
If you use a rinseless wash concentrate, you can mix a small spray bottle for safe spot cleaning. It’s like making your own “detailer-plus.”
- Mix per product directions for a quick-detailer strength solution in a spray bottle.
- Spray the droppings and let dwell.
- Blot/lift with microfiber, then wipe gently.
Why people love this: It’s cost-effective and slick (in the good way).
5) Warm Soapy Water Compress (For Dried, Crusty “Bird Cement”)
If the droppings have dried into a crunchy pancake, your job is to rehydrate it. Warm water helps.
- Mix car wash soap with warm water (not boiling).
- Soak a microfiber towel and place it over the spot for 2–5 minutes.
- Lift the towel and gently wipe away loosened residue.
- Rinse the area with clean water and dry.
Important: Use a proper car wash soap if you can. Dish soap can strip wax and protection faster than you can say, “Why is my paint suddenly sad?”
6) Dedicated Bug & Tar Remover (For Stubborn Residue Without Going Nuclear)
Some droppings contain extra grit or stickiness. A paint-safe bug/tar remover or citrus-based cleaner can help dissolve residue without aggressive scrubbing.
- Test on a small, hidden area first (always).
- Apply product to the residue (not the entire panel).
- Let it dwell briefly per directions.
- Wipe gently with microfiber, then wash that spot with car soap and water.
Finish strong: Reapply wax or sealant afterward to restore protection.
7) Clay Bar or Synthetic Clay Mitt (When the Paint Feels Rough After Cleanup)
If you’ve removed the poop but the area still feels gritty or “grabby,” contaminants may be bonded to the clear coat. Clay can safely pull them outwhen used correctly.
- Wash the area first, or at least use a lubricating spray.
- Spray clay lubricant generously.
- Glide clay lightly over the spot with minimal pressure.
- Wipe residue and inspect.
Don’t do this: Never clay a dry surface. Clay needs lubrication or it can mar paint.
8) Spot Polish (For “Ghost Stains” or Light Etching)
Sometimes bird droppings leave a dull outline even after cleaning. That can be light etching or surface staining in the clear coat. A mild polish can often improve it.
- Clean and dry the panel.
- Apply a small amount of mild polish to a soft foam applicator or microfiber applicator.
- Work the spot gently in small circles, then finish with straight strokes.
- Wipe off residue and inspect under good lighting.
- Protect with wax/sealant after polishing.
Start gentle: Use the least aggressive polish first. You can always step up, but you can’t un-sand clear coat.
9) Compound (When Polish Isn’t EnoughStill DIY-Friendly if You’re Careful)
If etching is deeper, a light compound might be needed. This is still a “doable at home” step for many people, but go slow.
- Use a clear-coat-safe compound.
- Work a small area at a time.
- Stop and inspect frequently.
- Follow with a finishing polish if needed, then wax/seal.
Reality check: If you’re not comfortable, skip to method #11 (professional help). No shame in protecting your paint budget.
10) Emergency Wipes (When You’re Out and About)
Dedicated car-detailing wipes (including “bird dropping wipes”) can work well in a pinch, especially when you’re nowhere near a hose.
- Use the wipe to wet the droppings thoroughly.
- Let it soften for 30–60 seconds.
- Wipe gently, then finish with a microfiber towel if you have one.
Tip: Keep wipes sealed and don’t let them bake in your trunk foreverdried-out wipes are basically just sad paper towels with dreams.
11) When to Call a Pro (Because Sometimes the Bird Chose Violence)
If you see a noticeable crater, rough texture, or etched ring that won’t improve with mild polishing, it may need machine polishingor, in severe cases, refinishing. Pros can measure paint thickness and choose the safest correction approach.
Go pro if:
- The etching is large or on a highly visible panel (hood, roof, trunk).
- You’ve tried gentle polishing and it’s not improving.
- The car has specialty finishes (matte/satin) and you’re unsure what products are safe.
- You have paint protection film (PPF) with stainingsome films can be treated differently than paint.
What NOT to Do (Even If You’re Angry at the Bird)
- No dry wiping. It’s the #1 shortcut to fine scratches.
- No scraping with a credit card. That’s not “resourceful,” that’s “micro-sanding.”
- No harsh solvents by default. Strong chemicals can damage trim, plastics, and paint protection.
- No aggressive scrubbing. If it’s stuck, it needs softeningnot a grudge match.
How to Reduce Repeat Attacks (Birds Love a Clean Car, Apparently)
You can’t negotiate with birds, but you can make cleanup easier:
- Wax or paint sealant: Adds a sacrificial layer so contaminants don’t bond as easily.
- Spray sealants / ceramic sprays: Quick to apply and can boost resistance between major details.
- Ceramic coating or PPF: Higher upfront cost, but often makes washing off droppings much simpler.
- Parking strategy: Shade is nice… until it’s “shade under a tree with a bird conference above it.” Choose wisely.
of Real-World Experience: My Ongoing Feud With Birds (And the Lessons They Forced Me to Learn)
Let me paint you a picture: it’s a Saturday morning, the car is freshly washed, and I’m feeling like a responsible adult who has their life together. Then I walk outside and see itone perfect, chalky-white bird splatter right in the middle of the hood, like the bird aimed for the emotional damage. Not near the edge. Not on the windshield where it’s at least practical. Dead center. A bullseye.
My first instinct used to be the classic bad idea: grab whatever napkin is nearby and wipe it off before anyone sees. That’s how you earn tiny scratches you won’t notice until the sun hits the paint at the exact angle that makes you regret all your choices. The biggest lesson I learned (the hard way) is that bird poop isn’t just “dirt.” It’s a gritty, sticky, chemically active mess that needs lubrication. Once I switched from panic-wiping to soak-and-lift, the problem stopped turning into a paint-correction project.
The second lesson came during a road trip. I parked at a scenic overlookgreat view, terrible birds. By the time I got back, the droppings had already started to crust over in the heat. I didn’t have a hose, but I did have a small bottle of detail spray and a microfiber towel in the trunk (because experience is a harsh teacher). I sprayed the spot until it looked almost comically wet, waited a minute, then lifted the mess off with gentle passes. No scrubbing. No drama. I felt like I’d just defused a tiny paint-damaging bomb.
The third lesson: “clean” doesn’t automatically mean “protected.” After a few months, I noticed the same areas (hood and roofthanks, gravity) were getting more stubborn stains. That’s when I realized my wax protection had faded. Once I started topping up with a spray sealant after washes, droppings were easier to remove and less likely to leave that faint outline. It didn’t make me immune to birds, but it made me more resilient. Like an emotional support barrier for my clear coat.
The final lesson is the simplest: speed matters. If you can remove bird droppings within hours instead of daysespecially before they bake in the sun you massively reduce the odds of etching. That’s why my “bird poop kit” lives in the trunk now. Water, detail spray, microfiber. Three items. One less reason to mutter “Seriously?” in a parking lot like you’re starring in your own automotive sitcom.
Conclusion
Getting bird poop off your car doesn’t require heroicsjust a little strategy. Soften first, lift gently, and use a lubricating product like a quick detailer or waterless wash to avoid scratching the clear coat. If a stain lingers, step up to clay or a mild polish, and then protect the area with wax or sealant so future cleanups take seconds instead of stress.


