Table of Contents >> Show >> Hide
- Start With Safety: The “Before You Get Artsy” Checklist
- Tools & Supplies: What You’ll Actually Use (No Fancy Workshop Required)
- Fix the Chair First (Because Cute Doesn’t Matter If It Wobbles)
- Prep Like a Pro: The Secret to a Finish That Won’t Peel
- Pick Your Paint: Kid-Friendly, Durable, and Actually Cute
- Painting Steps: Clean Lines, Smooth Finish, Minimal Drama
- Add Flair: Easy Style Upgrades That Make the Chair Feel Custom
- Quick Upholstery: Re-covering a Chair Seat in Plain English
- Seal and Protect: The “This Will Survive Snack Time” Layer
- 3 Makeover Examples (Steal These Ideas)
- Common Mistakes (So You Don’t Learn the Hard Way)
- Conclusion: A Small Chair With Big Personality
- Experiences: What DIYers Commonly Run Into When Updating a Child’s Chair (And How to Enjoy It)
Kids’ chairs live a hard life. They get dragged like tiny furniture sleds, climbed like mini mountains, and fed an
endless buffet of cracker crumbs. So if you’re staring at a worn-out child’s chair and thinking, “You could be cuter,”
you’re in the right place.
This guide walks you through a smart, safe, and seriously fun makeoverfrom tightening wobbly legs to adding
personality that makes the chair feel like it belongs to your kid. We’ll keep it practical, sprinkle in style ideas,
and make sure the finished chair can handle real-life use (a.k.a. sticky fingers and surprise drum solos).
Start With Safety: The “Before You Get Artsy” Checklist
1) Check stability, pinch points, and splinters
Before you pick a color, make sure the chair is structurally sound. Give it a gentle shake on a flat surface:
if it rocks, wobbles, or squeaks like it’s auditioning for a haunted house, it needs fixing first.
- Wobble test: Press down on each corner. If a leg lifts easily, check for loose joints or uneven feet.
- Splinter scan: Run your hand along edges and the seat underside. Sand or repair any rough areas.
- Hardware check: Tighten screws and confirm nothing sharp is exposed.
- Climb-proofing mindset: Kids climb. Make sure the chair won’t fold, collapse, or snag clothing.
2) If the chair is older, treat paint like it could contain lead
If you’re refinishing a vintage or secondhand chair and you don’t know the paint history, take lead safety seriously.
Lead-based paint was banned for residential use in 1978, and disturbing older paint (especially sanding and scraping)
can create hazardous lead dust. Keep children and pregnant women away from the workspace, and follow lead-safe
practices if the chair could have older coatings.
- Assume risk if the chair is older or the finish is unknownespecially if it’s chipping.
- Avoid dry sanding old paint until you’ve considered lead testing and containment steps.
- Work outdoors or in a well-isolated area, and clean up dust carefully.
3) Choose finishes with kid life in mind
“Non-toxic” is a helpful label, but durability matters too. Children’s furniture gets handled constantly, so plan on:
a paint suitable for furniture, and a protective topcoat if needed. Also remember: dry is not the same as
cured. A finish can feel dry quickly but still needs time to harden before it’s ready for heavy use.
Tools & Supplies: What You’ll Actually Use (No Fancy Workshop Required)
You can keep this project simple. Here’s a realistic supply list that covers most chair makeovers:
- Microfiber cloths + mild cleaner (or degreaser for grimy chairs)
- Sandpaper (120/150 for shaping, 220 for smoothing) or sanding sponges
- Wood glue + clamps (helpful for loose joints)
- Wood filler (for dents and dings)
- Primer (especially if the chair is glossy, stained, or previously painted)
- Paint: durable water-based enamel, furniture paint, or chalk-style paint
- Topcoat (water-based polyurethane/polycrylic or a furniture-safe protective finish)
- Painter’s tape, small brush for corners, foam roller for flat areas
- Drop cloth and a way to elevate the chair (blocks, pyramids, or scrap wood)
- Optional flair tools: stencils, decals, decoupage supplies, upholstery stapler
Fix the Chair First (Because Cute Doesn’t Matter If It Wobbles)
Tighten and reglue loose joints
If joints are loose, tightening screws may not be enough. Wood chairs often loosen where legs meet rungs or where
the seat frame joins the legs. If the chair has wiggle you can’t ignore:
- Remove the seat (if possible) so you can access the joints.
- Apply wood glue into loose joints (a small brush helps).
- Clamp until fully dry (follow glue directions).
Fill dents, chips, and scratches
Wood filler is your best friend for small cosmetic damage. Press it in, let it dry, then sand smooth. For deeper
gouges, do two thin layers rather than one thick blob (thick filler can shrink or crack).
Prep Like a Pro: The Secret to a Finish That Won’t Peel
Prep is the difference between “wow, this looks amazing” and “why is it bubbling like a science fair volcano?”
The goal is a clean, lightly abraded surface that primer and paint can grip.
Step 1: Clean it (really)
Chairs collect oils, grime, and mysterious stickiness. Wash the chair and let it dry fully. If it lived in a kitchen,
playroom, or near little snack enthusiasts, consider a grease-cutting cleaner (then rinse).
Step 2: Sand or degloss to help adhesion
You don’t always need to sand down to bare wood, but you do want to remove shine and smooth rough spots.
Use 120–150 grit where you’re shaping or smoothing damage, then finish with 220 grit for a paint-ready surface.
On glossy surfaces, scuff sanding to a dull finish helps paint and primer bond better. Wipe away dust afterward so
you’re not painting over powder.
Step 3: Remove dust like your paint depends on it (because it does)
Vacuum the chair if you can, then wipe down with a slightly damp microfiber cloth or a tack cloth to capture fine dust.
Dust left behind can create a gritty finish and weaken adhesion.
Step 4: Prime strategically
Primer is insurance. It helps paint stick, blocks stains, and evens out color. It’s especially helpful if the chair is:
stained, knotty, glossy, or you’re making a dramatic color change (like going from dark wood to creamy white).
Pick Your Paint: Kid-Friendly, Durable, and Actually Cute
For a child’s chair, durability and cleanability matter more than fancy labels. In general:
- Water-based enamel or trim paint: Tough, easy to clean, great for chairs that get wiped down often.
- Chalk-style paint: Great for a matte, vintage look and easy distressingoften needs a topcoat for durability.
- Milk paint: Beautiful, authentic chippy texture if that’s your vibe; usually sealed after.
If this chair is for a toddler who may chew on edges (because toddlers), make sure your finish is fully cured before use
and consider a durable water-based protective topcoat.
Painting Steps: Clean Lines, Smooth Finish, Minimal Drama
1) Paint the “hard parts” first
Start with corners, spindles, rungs, and any carved details. Then use a foam roller on broad, flat areas to reduce brush marks.
Thin coats beat thick coats every timeless drips, smoother finish, better durability.
2) Let coats dry properly
Follow the paint can for recoat times. Rushing is how you get fingerprints permanently fossilized into your finish.
If humidity is high, give it more time.
3) Lightly sand between coats (optional but magical)
For a smoother finish, lightly sand between coats with 220 grit once fully dry, then remove dust. This helps reduce texture
and creates a more “store-bought” look.
Add Flair: Easy Style Upgrades That Make the Chair Feel Custom
Here’s where the chair stops being “just painted” and starts being adorable. Mix and match ideas below.
Color-blocking (high impact, low effort)
Paint the legs one color and the seat/back another. A classic combo: warm white frame + sunny yellow seat.
Or go modern: soft gray + muted sage.
Ombre legs (a little fancy, still doable)
Pick one color and fade it down the legs: darkest near the seat, lighter toward the feet. Use a barely damp brush to blend
while paint is still wet. The result looks like you tried very hard (even if you didn’t).
Stencils: stars, dinos, flowers, initials
Stencil the chair back or seat front. Pro tip: use a stencil brush with a nearly dry amount of paint and dab lightly.
Heavy paint causes bleeding under the stencil and emotional damage to your confidence.
Chalkboard panel (great for older kids)
Paint a section of the chair back with chalkboard paint so kids can draw their “chair sign”name, doodles, daily menu,
or a dramatic proclamation like “NO BROCCOLI.”
Decoupage accents (pattern without perfect painting)
Add patterned paper to the seat or back panel and seal it. This is perfect for themes: rainbows, trains, outer space,
or a subtle grown-up print that still feels playful.
Upgrade the seat with a removable cushion
If the chair has a removable seat, reupholstery is one of the easiest “wow” upgrades you can do. You can go bold
(striped canvas!) or practical (wipeable fabric!).
Quick Upholstery: Re-covering a Chair Seat in Plain English
Reupholstering a simple chair seat is beginner-friendly. Here’s the basic method:
- Unscrew the seat from the chair frame.
- Remove old fabric and use it as a template for the new fabric.
- If padding is sad or flattened, replace foam and add batting for a softer look.
- Center the fabric pattern, pull taut, and staple on the undersidealternating sides like tightening lug nuts.
- Fold corners neatly, trim excess fabric, then reattach the seat.
A tight, smooth pull matters more than perfection. Small wrinkles on the underside won’t show, but loose fabric on top will.
Seal and Protect: The “This Will Survive Snack Time” Layer
Many paints benefit from a protective topcoatespecially matte finishes or chairs that will be cleaned often.
Water-based polyurethane or polycrylic can add durability without a strong odor, and it’s easier to clean up with soap and water.
Dry vs. cure: the waiting game that pays off
A finish can feel dry quickly but still be soft underneath. Plan for a real cure period before you treat the chair like a daily driver.
Many water-based finishes reach full cure over several weeks; oil-based finishes often take longer.
- Light use: often possible after about a week (be gentle).
- Full cure: commonly around 21 days for many water-based finishesfollow your product guidance.
Add felt pads (tiny step, huge benefit)
Stick felt pads under chair legs to protect floors and reduce scraping. Bonus: it makes the chair feel smoother and quieter,
which is helpful if your child likes to “redecorate” by dragging it across the room.
3 Makeover Examples (Steal These Ideas)
Example 1: The “Storytime Throne”
Paint the chair frame a warm, creamy white. Add a gold star stencil on the chair back. Upholster the seat in a cozy
textured fabric (think durable canvas or a soft upholstery weave). Seal the painted areas with a clear topcoat so it survives
bedtime rituals and last-minute snack negotiations.
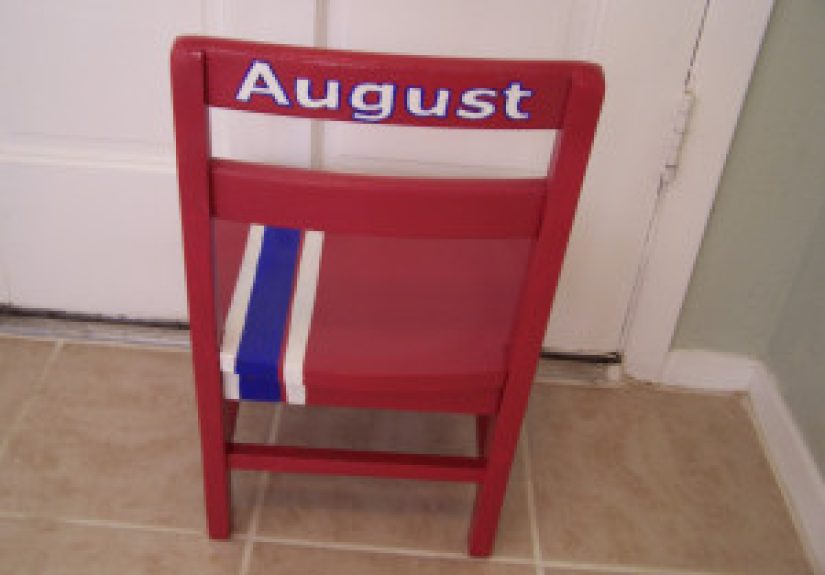
Example 2: The “Mini Art Studio Chair”
Choose a bright, wipeable enamel paint in a cheerful color (aqua, red, or sunny orange). Add a chalkboard strip on the back.
Label it with your child’s name using a stencil. Finish with felt pads so it glides around the art zone without scraping.
Example 3: The “Tiny Bistro Chair”
Paint the chair black, then distress edges lightly for a classic café feel. Add a simple striped seat cover.
If you want extra flair, stencil a small fork-and-spoon icon on the chair back. It’s perfect for a kitchen helper chair
or a play-kitchen setup.
Common Mistakes (So You Don’t Learn the Hard Way)
- Skipping cleaning: Paint hates grease. Clean first, always.
- Painting over dust: Dust creates texture and reduces adhesion. Remove it thoroughly.
- Thick coats: Thick paint drips, takes longer to dry, and can stay soft longer.
- Not priming when needed: Stains bleed and glossy finishes repel paint without proper prep.
- Using the chair too soon: Cure time matters. Let it harden before heavy use and cleaning.
- Ignoring safety concerns on older finishes: If lead is possible, take proper precautions.
Conclusion: A Small Chair With Big Personality
Updating a child’s chair with flair is one of those satisfying projects that delivers daily joy. You’re not just painting a piece
of furnitureyou’re creating a tiny, functional “spot” that belongs to your child. With solid prep, a durable finish, and a
style detail or two, you’ll end up with a chair that’s cute enough for photos and tough enough for real life.
Take your time on prep, let the finish cure, and don’t be afraid to add a little whimsy. Childhood is short. The chair should be fun.
Experiences: What DIYers Commonly Run Into When Updating a Child’s Chair (And How to Enjoy It)
People often start this project with pure optimism: “It’s a small chair. This will take, like, an hour.” Then reality shows up
carrying a tack cloth, a surprise sticky spot, and a mystery screw that refuses to come out. The good news? The process is
usually more satisfying than expectedand the bumps in the road are predictable enough to plan around.
One common experience is the “prep shock.” DIYers report that cleaning and sanding take longer than painting,
especially with chairs that have rungs, spindles, and corners that collect grime. The chair might look clean until you wipe it
down and your cloth comes away a suspicious shade of gray. The takeaway: prep is not punishmentit’s the step that
makes your paint job look smooth and last longer. Many people end up feeling oddly proud when they finally run a hand
over a sanded edge and it feels silky instead of scratchy.
Another classic moment is choosing the color. Adults often pick the “reasonable” shade firstsoft white, light gray, gentle
sagethen a child wanders in and requests something like “UNICORN BLUE” or “THE COLOR OF A DRAGON.” A smart compromise
that DIYers love is using a calm base color for the frame and letting the child choose one bold accent: a painted seat, a stencil,
or a bright chair-back panel. It’s an easy way to give kids ownership without turning your living room into a neon carnival
(unless that’s the goalno judgment).
Many people also discover the difference between “dry” and “ready.” The chair feels dry to the touch, so it gets brought back
inside… and within minutes it has a tiny fingerprint, a smudge, or the imprint of a toy that sat on the seat too soon.
This is so common it’s practically a rite of passage. DIYers who enjoy the best results usually treat cure time like a finishing
step: they set the chair somewhere safe, mark a “do not touch” boundary (sometimes with painter’s tape like police scene
tape), and plan a fun reveal day when it’s fully hardened.
Upholstery upgrades come with their own mini-adventure. Beginners often worry about getting the fabric perfectly centered
and the corners neatly folded. The reassuring experience many share: once the seat is screwed back on and the chair is upright,
nobody notices the underside staples. What they do notice is the pop of pattern and the “custom” look. A tip DIYers love is
choosing a forgiving fabricsmall prints hide tiny imperfections, and textured fabric can be more forgiving than ultra-smooth cloth.
Finally, there’s the emotional payoff. People often describe the best moment as seeing the chair in use: a child sitting proudly,
calling it “my chair,” or dragging it to a new spot like they’re rearranging a tiny studio apartment. Even when the process includes
a little mess, a little sanding fatigue, and a few extra coats, the finished chair tends to feel personallike a practical object that
now carries a bit of family story. That’s the real flair: not just the paint color, but the fact that you made something small feel special.


