Table of Contents >> Show >> Hide
- Before You Touch Anything: Safety, Tests, and “Surprise” Planning
- Step 0: Choose the Right Strategy
- Tools and Materials Checklist
- Step-by-Step: Full Ceiling Replacement in an Old Home
- Step 1) Clear the room and shut off power
- Step 2) Remove fixtures, vents, trim, and anything attached to the ceiling
- Step 3) Cut a “reconnaissance hole” (small, controlled, informative)
- Step 4) Demo the old ceiling in manageable sections
- Step 5) Inspect framing and fix what actually caused the ceiling to fail
- Step 6) Flatten the ceiling plane with furring strips or shims
- Step 7) Update electrical, air sealing, and insulation (the “do it now or regret it later” phase)
- Step 8) Hang the new drywall (this is where a drywall lift earns its keep)
- Step 9) Tape and mud: three coats, minimal drama
- Step 10) Prime and paint (don’t skip primer unless you love patchy sheen)
- Alternative Method: Drywall Over Existing Plaster (Less Demo, More Strategy)
- Troubleshooting: Common Problems (and How to Avoid Them)
- Cost, Time, and Mess: A Reality Check
- Conclusion
- Ceiling Replacement Experiences and Lessons Learned (The 500-Word Reality Add-On)
Old houses have personality. Old ceilings have… opinions. One day they’re charming plaster with a few “character”
cracks; the next, they’re shedding little crumbs onto your coffee like a historic parmesan shaker.
If you’re planning on replacing a ceiling in an older home, the goal is simple: get a flat, solid, safe surface
without accidentally releasing a museum-grade collection of dust, mystery fibers, and regret.
This guide walks you through smart decisions (repair vs. overlay vs. full replacement), the safety reality of
asbestos and lead-era homes, and a practical, step-by-step process for demolition, framing fixes, drywall hanging,
and finishingwritten in standard American English and powered by real-world best practices from U.S. building and
manufacturer guidance.
Before You Touch Anything: Safety, Tests, and “Surprise” Planning
1) Date the house (and the ceiling) like a detective, not a romantic
In old homes, the ceiling you see might not be the ceiling you’re dealing with. You could have:
plaster over wood lath, plaster over metal lath, drywall installed later over plaster, ceiling tiles, or textured
“popcorn” finishes. Each one changes your planand your safety steps.
-
Asbestos risk: Some older ceiling textures, tiles, insulation, and patch materials may contain asbestos.
If you’ll disturb suspect materials, testing through a qualified lab/pro is the safest route. If asbestos is confirmed
(or strongly suspected), professional abatement is typically the right move. -
Lead risk: Homes built before 1978 often have lead-based paint somewhere in the layers. Demolition and sanding
can create hazardous lead dust. Even if you’re DIY-ing, use lead-safe containment and cleaning habits like they’re non-negotiable
(because for kids and pregnant people, they basically are).
2) Know when to call a pro (it’s not “giving up,” it’s “having lungs”)
Consider hiring licensed pros when the project includes confirmed/suspected asbestos, extensive mold,
major structural sagging, or complicated electrical upgrades. Also: if your ceiling is part of a fire-rated assembly
(common in multi-family buildings or garages), local code requirements matter.
3) Permits and inspections: boring, useful, occasionally required
Many cities require permits when you alter electrical, modify framing, or do significant demolition.
Some areas also have rules around waste disposal for old construction materials. A quick check with your local building department
can save you from a surprise inspection cameo halfway through hanging drywall.
Step 0: Choose the Right Strategy
“Replacing ceilings” can mean three different projects. Choose the one that matches the condition of the old ceiling
and your tolerance for dust storms.
Option A: Repair the existing ceiling
Best when the ceiling is mostly intact and damage is localized (hairline cracks, minor sag, small water stains that are fully resolved).
Traditional plaster repairs can preserve historic character, but they require patience and the right materials.
Option B: Overlay (drywall over plaster)
Best when plaster is cracked or ugly but still reasonably stable. You fasten furring strips or attach drywall through to framing,
creating a new flat surface without the mess of full demolition. This is a popular compromise in older homes.
Option C: Full replacement (demo to joists, rebuild)
Best when the ceiling is failing (significant sagging, widespread delamination, major water damage, crumbling keys),
or when you need access for rewiring, leveling, insulation fixes, or structural repairs.
It’s messierbut it gives you a clean slate and a chance to fix hidden problems properly.
Tools and Materials Checklist
Safety and containment
- Proper respirator (commonly a P100 for heavy dust) and eye protection
- Disposable coveralls or old long-sleeve clothes you can wash immediately
- Plastic sheeting, painter’s tape, zip-wall or doorway containment
- HEPA vacuum and damp-wipe supplies
- Work lights (you will discover that “good enough” lighting is a lie)
Demolition and prep
- Utility knife, pry bars, hammer, oscillating multi-tool
- Reciprocating saw (sometimes), flat shovel/scraper, heavy-duty contractor bags
- Stud finder, chalk line, tape measure, 4–6 ft level or laser level
- Step ladders and/or scaffold; a helper who enjoys drama
Rebuild and finish
- Drywall sheets (often 1/2″ or 5/8″; consider sag-resistant ceiling board where appropriate)
- Drywall lift (highly recommended), screw gun, drywall screws
- Joint tape (paper or fiberglass), joint compound (all-purpose + topping)
- Corner bead (if needed), sanding pole, vacuum sanding attachments if you’re fancy
- Primer (PVA drywall primer is common) and ceiling paint
Step-by-Step: Full Ceiling Replacement in an Old Home
Step 1) Clear the room and shut off power
Remove furniture if possible. If not, pile everything in the center and wrap it like you’re preparing it for a spaceship launch.
Cover floors with protective paper or drop cloths, then plastic if dust control is critical. Turn off power to all ceiling circuits
at the breakernot just the switchbecause old wiring has a sense of humor and it’s usually dark.
Step 2) Remove fixtures, vents, trim, and anything attached to the ceiling
Take down lights, fans, smoke detectors, HVAC grilles, and curtain hardware that touches the ceiling plane.
Label wires and take photos before disconnecting anything. In older homes, you may find junction boxes buried under plaster
or splices that are… creatively located. Plan to correct that during the rebuild.
Step 3) Cut a “reconnaissance hole” (small, controlled, informative)
Before you go full demolition derby, open a small test area near the edge:
find the ceiling layers, confirm joist direction and spacing, and look for insulation, old knob-and-tube remnants, or mechanical runs.
This is also when you decide if overlay is smarter than full demo.
Step 4) Demo the old ceiling in manageable sections
If you’re removing plaster, work in small areas. Score sections with a utility knife and pry down pieces carefully.
Plaster is heavy; gravity is helpful but not gentle. For drywall ceilings, remove screws/nails and lower sheets with help.
Bag debris as you go to reduce dust migration.
If you discover suspect asbestos-containing material (like old ceiling tiles or unknown texture), stop and reassess.
Disturbing it without proper procedures can create serious health risks.
Step 5) Inspect framing and fix what actually caused the ceiling to fail
Ceiling damage often isn’t the “problem”it’s the symptom. Look for:
- Water leaks: stains, rot, mold, rusted nails, damp insulation. Fix the source first.
- Sagging joists: crown issues, undersized members, old notching, or previous remodel mistakes.
- Loose lath or broken plaster keys: common in century homesonce keys fail, plaster can drop.
- Electrical issues: outdated wiring, overloaded boxes, missing junction covers, loose fixtures.
If joists are sagging, you may need to sister joists, add blocking, or install strapping/furring to create a flat plane.
Don’t “mud your way” out of a structural wave. Joint compound is not a structural engineering materialno matter how much you apply.
Step 6) Flatten the ceiling plane with furring strips or shims
Old framing can be uneven. The cleanest ceiling finish starts with a flat substrate:
-
Furring strips (strapping): Fasten 1×3 or similar strips perpendicular to joists, shimmed as needed to level.
This also gives you consistent fastening and helps when joists aren’t perfectly straight. - Shimming joists: If you’re attaching directly to joists, shim low spots so your drywall doesn’t “telegraph” every dip.
Step 7) Update electrical, air sealing, and insulation (the “do it now or regret it later” phase)
With the ceiling open, this is your best chance to:
- Add or reroute lighting (recessed fixtures, fan-rated boxes, better layout)
- Improve bathroom ventilation ducting
- Air-seal top plates and penetrations to reduce drafts
- Add insulation where appropriate (and keep it clear of recessed fixtures unless rated for contact)
Be especially cautious with older wiring and mixed-era renovations. If you’re not comfortable with electrical work,
hire a licensed electricianceiling work is already enough of an adventure without adding sparks to the plot.
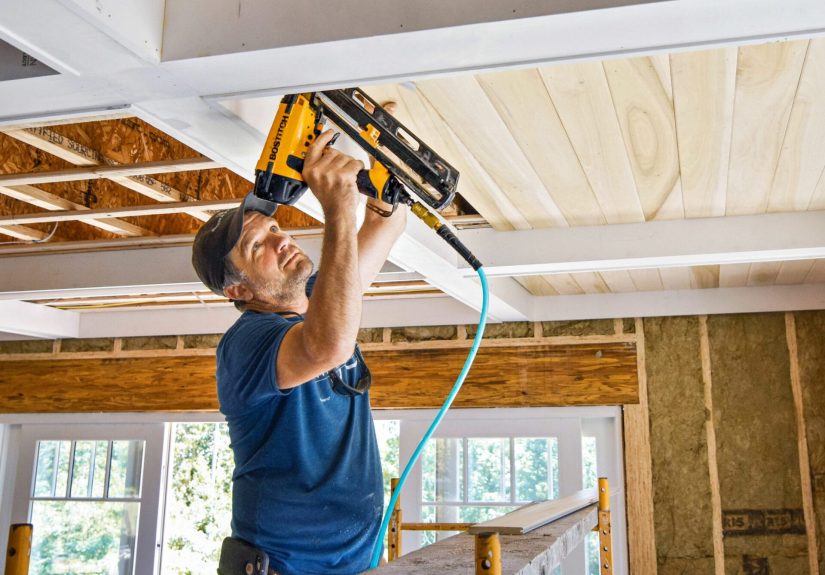
Step 8) Hang the new drywall (this is where a drywall lift earns its keep)
For ceilings, drywall handling is awkward. Use a lift if possible. A few key principles:
-
Board choice: Many pros prefer 5/8″ drywall for ceilings because it’s stiffer; in some situations,
a sag-resistant 1/2″ ceiling board may also be appropriate. Match the product to your framing spacing and the finish you want. - Orientation: Hang sheets perpendicular to framing (or to strapping) when possible for strength and fewer seam issues.
-
Fastener spacing: Follow manufacturer guidance and local code. A common guideline is tighter spacing on ceilings than walls,
with screws closer at edges/perimeter and in the field. - Screw depth: Dimple the paperdon’t tear through it. Torn paper = weak fastener = future nail pop comedy show.
Stagger end joints between rows. Leave a small gap at walls if recommended by your system (many finishers prefer a tiny gap to reduce edge
damage), then cover with tape/compound and trim.
Step 9) Tape and mud: three coats, minimal drama
Finishing is where ceilings go from “construction site” to “I swear this was always here.”
A basic, reliable approach:
- Bed coat: Apply compound, embed tape, wipe smooth.
- Fill coat: Build out the joint, feather wider than you think you need.
- Finish coat: Final skim to reduce ridges and tool marks.
Sand lightly between coats. Use a pole sander and dust control if you value your future relationship with the room.
For super critical lighting (big windows, raking light), consider a skim coat over the entire ceiling for a uniform surface.
Step 10) Prime and paint (don’t skip primer unless you love patchy sheen)
New joint compound is thirsty. Prime firstespecially on ceilingsthen paint.
Flat or matte ceiling paint hides minor flaws better than eggshell. If you’re matching an existing texture,
practice on scrap drywall first. Texture is like cooking: it’s easy to add more, emotionally exhausting to remove.
Alternative Method: Drywall Over Existing Plaster (Less Demo, More Strategy)
If the plaster ceiling is cracked but not actively falling apart, overlaying can be a great solution:
you get a clean surface, avoid removing mountains of debris, and reduce the chance of disturbing questionable materials.
How it typically works
- Locate joists carefully (old framing is not always perfectly spaced).
-
Add furring strips (often 3/4″ thick) to create a flat plane and a reliable fastening base.
This can also create a shallow cavity for updated wiring and properly mounted ceiling boxes. - Hang drywall on the furring, then finish normally.
Overlay trade-offs to watch
- Ceiling height drops slightly (usually acceptable; sometimes noticeable in low-ceiling rooms).
- Trim may need adjustment: crown molding, door/window casings, and ceiling medallions can be affected.
- If the plaster is truly failing, overlay can be like putting a nice shirt over a crumbling sandwich.
Troubleshooting: Common Problems (and How to Avoid Them)
“My ceiling looks wavy.”
Usually a leveling issue. Fix it at the framing stage with shims/furring/strapping. Joint compound should be the final refinement,
not the foundation.
“Seams show in certain light.”
Raking light is ruthless. Widen your feathering, use a skim coat in critical rooms, and choose a flatter paint sheen.
Also check that you didn’t under-sand ridges or leave tool marks that telegraph through paint.
“I’m getting nail pops… but I used screws.”
“Nail pop” is a catch-all. Causes include overdriven screws (torn paper), movement in framing, or insufficient fastening.
Set screws properly and follow consistent spacing. If framing is moving (seasonal or structural), address that too.
“There’s a stain again.”
Stains that return usually mean moisture still existsroof flashing, plumbing vent leaks, bath fan duct issues, or condensation.
Fix the source, then use stain-blocking primer before repainting.
Cost, Time, and Mess: A Reality Check
Replacing ceilings in old homes ranges from “weekend project” to “mini-renovation.”
Your biggest cost drivers are demolition complexity (plaster is labor-intensive), disposal, leveling work,
electrical upgrades, and the finish level you want.
- DIY overlay: Often faster and cleaner, but still demands careful fastening and finishing.
- Full replacement: More demolition and cleanup, but best for major failures and full access upgrades.
- Hiring out: Pros can move faster, especially on finishingoften the slowest part for DIYers.
Conclusion
A good ceiling replacement isn’t just “new drywall.” It’s a sequence: identify hazards, contain dust, fix the underlying causes,
flatten the plane, hang the right board correctly, and finish with patience.
Do that, and your old house gets to keep its charmwithout dropping crumbs on your dinner like it’s auditioning for a cooking show.
Ceiling Replacement Experiences and Lessons Learned (The 500-Word Reality Add-On)
People who replace ceilings in old homes tend to share the same “I wish someone told me” momentsso here are the greatest hits,
served with empathy and a hard hat.
Experience #1: The insulation avalanche. The first time a ceiling comes down in a house with an attic above,
many DIYers learn that insulation does not “sit politely.” It leaps. The usual lesson: contain the room better than you think you need to.
Seal doorways with plastic, cover HVAC returns, and keep a shop vacuum (ideally HEPA) nearby. Also: plan for multiple trash runs.
Old plaster is heavy, and the bags get heavy fastyour back will send you a strongly worded letter if you ignore this.
Experience #2: Nothing is where you expect it to be. Joist spacing in older homes can be inconsistent.
A stud finder might swear there’s framing in one spot, then you hit empty air. The fix: verify joists with small test holes,
use a strong magnet to locate fasteners in existing plaster/drywall, and mark framing lines clearly before you hang new board.
If you plan recessed lighting or a ceiling fan, confirm that framing and boxes can support the load.
Experience #3: Old wiring can turn a drywall day into an electrician day. Once ceilings open up, people often discover
junction boxes buried under plaster, odd splices, or wiring that doesn’t match modern expectations. The lesson here isn’t “panic”
it’s “pause.” Make the electrical safe and code-compliant before you close everything up. It’s dramatically cheaper (and less heartbreaking)
to fix wiring now than after you’ve finished, primed, and painted.
Experience #4: Finishing takes longer than demolition. Demo feels productive because things fall down and you can see progress.
Finishing is the opposite: you do careful work, walk away, wait for drying, sand, repeat. Many homeowners report that the psychological trick
is to break finishing into small winsone seam, one coat, one room edge at a time. Good lighting during finishing is not optional.
Without it, you’ll “discover” ridges after painting, which is a special kind of betrayal.
Experience #5: Texture regret is real. Some people remove a textured ceiling and vow never to texture again.
Others choose a light texture to hide imperfections and later decide they miss the clean look. If you’re on the fence, test samples on scrap
drywall and view them at different times of day. Ceilings look different under morning light, afternoon glare, and night-time fixtures.
Your future self will thank you for doing the awkward test board now.
The big takeaway from these shared experiences is simple: the best ceiling jobs are won before the first sheet goes up.
When you take time to plan containment, verify structure, and respect old-house hazards, the install and finish become
straightforwardand your ceiling goes back to being what it always should have been: quietly above you, not actively participating in your life.