Table of Contents >> Show >> Hide
- Why Refinish and Paint a Kitchen Table Instead of Replacing It?
- First, Decide What Kind of Finish You Want
- What You Will Need
- Step 1: Clean the Table Like You Mean It
- Step 2: Inspect for Damage and Make Repairs
- Step 3: Decide Whether to Strip or Just Sand
- Step 4: Sand for Adhesion and Smoothness
- Step 5: Prime Before You Paint
- Step 6: Paint in Thin, Even Coats
- Step 7: Protect the Surface
- Step 8: Let It Cure Before Heavy Use
- Best Color and Finish Ideas for a Kitchen Table
- Common Mistakes to Avoid
- How to Know the Project Was a Success
- Final Thoughts
- Real-Life Experience: What Re-Finishing and Painting a Kitchen Table Actually Feels Like
A tired kitchen table has a special talent: it can make an entire room look like it gave up sometime around the second Obama administration. Scratches, sticky mystery spots, fading, water rings, and chipped paint all add up fast. The good news? You do not need to drag that table to the curb and whisper, “We had some good meals together.” With the right prep, the right paint, and a little patience, you can refinish and paint a kitchen table so it looks fresh, durable, and ready for everything from pancake Saturdays to late-night homework battles.
This is one of those DIY projects that sounds simple, then humbles you the second you rush the sanding. A kitchen table is not a decorative side piece that just sits there looking cute. It gets bumped, wiped, leaned on, scraped by plates, and attacked by hot coffee mugs and enthusiastic elbows. That means your finish has to be more than pretty. It has to be practical.
In this guide, we will walk through how to refinish and paint a kitchen table from start to finish, including how to decide between paint and stain, how to prep the surface properly, what mistakes to avoid, and how to get a finish that survives real life. Spoiler: most furniture makeovers are won or lost before the first coat of paint ever touches the wood.
Why Refinish and Paint a Kitchen Table Instead of Replacing It?
There are a few solid reasons to revive a table instead of buying a new one. First, older tables are often made from sturdier wood than many budget pieces sold today. Second, refinishing is usually cheaper than replacement, especially if the table is structurally sound. Third, painting or refinishing lets you customize the look to match your kitchen, whether you want modern farmhouse, classic cottage, clean contemporary, or “I found this on the side of the road and somehow made it fabulous.”
Refinishing also gives you control over the final surface. You can keep the wood grain visible with stain, cover everything with paint, or combine both for a two-tone look. That is especially useful in kitchens where the table acts as both a workhorse and a centerpiece.
First, Decide What Kind of Finish You Want
Before you grab a sander like an action hero in a home-improvement montage, figure out your end goal. This choice will shape the entire project.
1. Full Paint Finish
This works well when the tabletop has lots of discoloration, mismatched repairs, or wood species that are not especially exciting to show off. A painted finish can make an older table feel clean, bright, and updated. White, black, navy, sage green, charcoal, and warm beige are popular choices because they play nicely with most kitchens.
2. Refinished Natural Wood Look
If the table has attractive wood grain and only moderate wear, sanding it down and staining or clear-coating it can be the best option. This look feels warm, timeless, and forgiving. It also hides crumbs in a very emotionally supportive way.
3. Two-Tone Finish
This is a smart compromise. Many homeowners stain or seal the tabletop for maximum durability and paint the base for style. The result looks designer-ish without designer prices, and it is especially practical if you want a durable top with a softer, decorative base color.
What You Will Need
- Drop cloths or plastic sheeting
- Screwdriver for removing legs or hardware if possible
- Degreasing cleaner or mild soap and water
- Clean rags or tack cloths
- Wood filler for dents, gouges, or old screw holes
- Putty knife
- Sandpaper in medium and fine grits
- Orbital sander for flat surfaces, if available
- Primer suitable for furniture or bonding to slick surfaces
- Furniture paint, enamel paint, or high-quality latex/alkyd paint
- Good brushes and a small foam or microfiber roller
- Protective topcoat such as polyurethane or polycrylic, if appropriate
- Painter’s tape if doing a two-tone design
- Dust mask and eye protection
If your table may be very old and has existing paint layers, slow down and think safety. If the piece came from a pre-1978 home or has old paint of unknown age, lead-safe practices matter. That is not the glamorous part of DIY, but it is definitely the part that keeps you from turning a makeover into a hazardous dust festival.
Step 1: Clean the Table Like You Mean It
Kitchen tables collect more than crumbs. They collect cooking residue, furniture polish, body oils, old wax, and enough mystery stickiness to qualify for its own zip code. Paint and finish do not stick well to grime, so start by washing the table thoroughly. A grease-cutting cleaner works well, especially around edges and aprons where hands grab the table over time.
Let the surface dry completely before moving on. Painting over a damp table is like putting lipstick on a raincloud. Nothing good happens next.
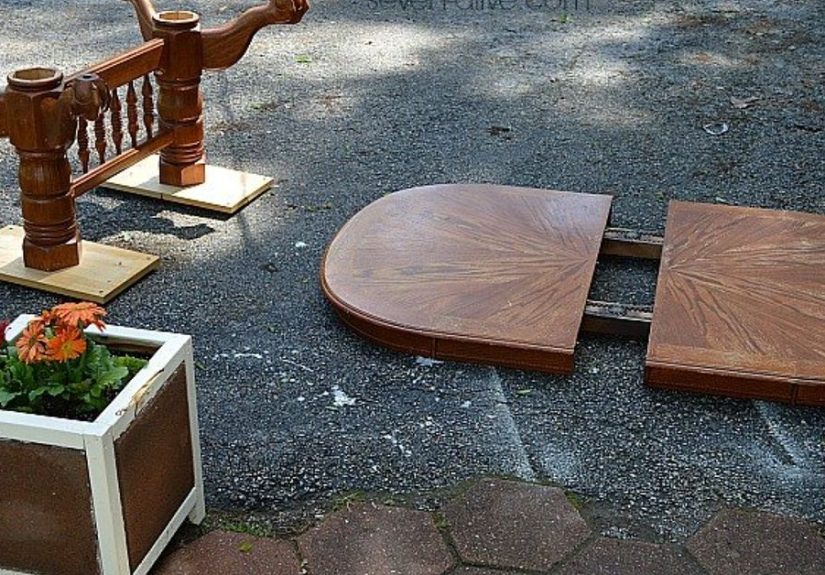
Step 2: Inspect for Damage and Make Repairs
Check for loose joints, wobbly legs, missing screws, deep scratches, water damage, veneer problems, and dents. Tighten anything loose before you start the finish work. Fill small gouges or old holes with wood filler and let it dry fully. If the table rocks when you press on it, fix that now. A beautiful finish on a wobbly table is still a wobbly table.
If the tabletop has veneer, be careful when sanding. Veneer is thin, and aggressive sanding can burn right through it. That is the furniture equivalent of giving yourself bangs at 11:30 p.m. You can do it, but the outcome may become emotional.
Step 3: Decide Whether to Strip or Just Sand
You do not always need to strip a table to bare wood. If the old finish is mostly sound and you plan to paint, a thorough scuff sanding is often enough to create tooth for primer and paint. If the current finish is peeling, alligatored, heavily built up, or incompatible with your new plan, stripping may be the better route.
For staining, you usually need to get much closer to bare wood so the color goes on evenly. For painting, you can often get away with less drama. That is excellent news for anyone who prefers “weekend project” over “ongoing lifestyle choice.”
Step 4: Sand for Adhesion and Smoothness
Sanding is where the magic starts, and also where impatience tries to sabotage you. On most tables, begin with a medium grit to remove shine, smooth rough patches, and level repaired areas. Then move to a finer grit for a smoother surface. Always sand with the grain when finishing wood. On painted projects, the goal is not to obliterate the table’s life story. It is to create a clean, dull, even surface that paint can grip.
After sanding, remove every speck of dust. Vacuum first, then wipe with a slightly damp cloth or tack cloth. If you skip dust removal, your beautiful finish can end up with little grit bumps that feel like your table was painted during a windstorm.
Step 5: Prime Before You Paint
If you are painting the table, primer is your friend. Yes, even if the paint can sounds extremely confident. Primer helps with adhesion, blocks stains or tannin bleed, and gives you a more uniform base so the color looks even. This is especially important on glossy wood, laminate, darker surfaces, or tables with mixed repairs.
Use a bonding or stain-blocking primer when needed. Apply a thin, even coat with a brush for detail areas and a small roller for broad flat sections. Let it dry fully, then sand lightly if the surface feels rough. Wipe away dust before painting.
Step 6: Paint in Thin, Even Coats
When painting a kitchen table, thin coats beat thick coats every single time. Thick paint likes to pool on edges, show drips, stay tacky longer, and announce every brushstroke like it is proud of them. Thin, even coats dry better, level better, and create a more professional finish.
Use your brush for turned legs, corners, and trim. Use a roller for the top and broad aprons if you want a smoother finish. Let each coat dry according to the label before applying the next. Not “dry-ish.” Not “feels kind of okay.” Dry.
Most tables need at least two coats, sometimes three for full coverage, especially with lighter colors. If you notice roughness between coats, lightly sand with a fine grit, then wipe away the dust. This extra step is boring, but so is flossing, and yet both improve the outcome dramatically.
Step 7: Protect the Surface
A kitchen table needs protection, especially on the top. This is where many DIY projects go wrong. People paint a table beautifully, admire it for six minutes, then start using it before the finish is ready or skip the protective topcoat entirely. A dining or kitchen table gets too much traffic for that gamble.
If you stained the tabletop, a clear finish is essential. If you painted the entire table, a topcoat may still be smart depending on the paint used and the amount of wear expected. Water-based polycrylic is popular for lighter colors because it stays clear. Polyurethane is a classic choice for durability and is especially common on wood tops. Follow the label for recoat times, sanding between coats if required, and final dry time before normal use.
Choose the sheen based on both style and practicality. Satin and semi-gloss are often strong choices for kitchen tables because they are easier to wipe down than flatter finishes and usually do a better job of balancing durability with appearance. High gloss can look striking, but it also likes to spotlight every scratch, fingerprint, and existential crumb.
Step 8: Let It Cure Before Heavy Use
This step is cruel because your table looks done and your brain says, “Excellent, let us immediately stack cereal bowls on it.” Resist. Dry time and cure time are not the same thing. Paint may feel dry to the touch long before it reaches full hardness. If you place heavy objects on the surface too soon, you can leave dents, rings, sticking marks, or texture impressions from placemats.
Give the table the full cure time recommended for your products. That might mean handling lightly after a day but waiting much longer before full use. It is annoying. It is also the difference between a finish that lasts and a finish that makes you say words your primer would not approve of.
Best Color and Finish Ideas for a Kitchen Table
Classic White Base with Wood Top
This style feels bright, clean, and timeless. It works beautifully in farmhouse, cottage, and transitional kitchens.
Deep Charcoal or Black
These colors hide wear surprisingly well and bring drama in a good way. Pair with warm wood tones to keep the look grounded.
Muted Green or Blue
Sage, olive, slate blue, and soft navy can make a kitchen feel calm without becoming boring. These shades often work well with brass, matte black, or natural oak accents.
Natural Wood with Clear Finish
If the grain is attractive, let it be the star. A clean stained or clear-coated top can feel warm, durable, and high-end.
Common Mistakes to Avoid
- Skipping the cleaning step and painting over grease
- Rushing sanding or using the wrong grit
- Using thick coats that sag or stay soft
- Ignoring cure time and using the table too early
- Choosing the wrong product for a high-traffic surface
- Forgetting to protect a painted tabletop
- Sanding too aggressively on veneer
- Overworking the brush and creating streaks
How to Know the Project Was a Success
A successful table makeover is not just one that looks good from six feet away in flattering daylight. It is one that feels smooth, wipes clean easily, and does not panic when someone sets down a plate. The color looks even. The finish feels intentional. The joints are tight. The top is durable. And most importantly, the table fits your kitchen again instead of looking like it wandered in from another decade carrying emotional baggage.
Final Thoughts
Re-finishing and painting a kitchen table is one of the most satisfying furniture projects you can do because the transformation is dramatic and the result is useful every single day. This is not art for a shelf. It is a real-life upgrade for a real-life space. When done well, a refinished table can anchor your kitchen for years, handling everyday messes while looking far better than it did before.
The secret is not fancy technique. It is careful prep, thin coats, enough drying time, and the humility to admit that sanding dust gets everywhere no matter how optimistic you were at the beginning. Take your time, choose durable products, and build the finish in layers. Your future self, eating takeout at a table that no longer looks defeated, will be very grateful.
Real-Life Experience: What Re-Finishing and Painting a Kitchen Table Actually Feels Like
The first time I refinished a kitchen table, I assumed it would be a quick Saturday project. Clean it, sand it, paint it, admire it, done. Reader, that table taught me patience the way a strict middle-school math teacher teaches fractions: firmly and without concern for my feelings. What looked like a simple wood surface turned out to be a layered history of old finish, greasy fingerprints, tiny dents, and one suspicious ring mark that may have been caused by a plant, a pizza box, or a tiny domestic tragedy.
The biggest surprise was how much the prep affected everything. Before sanding, the table looked merely old. Once I started cleaning it properly, I realized it was old and sticky, which is a very different personality. After sanding, it finally looked like something I could work with. That stage is messy, loud, and not particularly glamorous, but it is also where the table stops looking doomed and starts looking redeemable.
I also learned that kitchen tables are emotional furniture. You do not just see scratches; you see where people sat, where kids did crafts, where groceries landed, where coffee mugs lived for too long without coasters. Re-finishing a table can feel oddly personal because you are not simply changing furniture. You are refreshing a piece of daily life.
Painting brought its own lessons. Thin coats felt painfully slow at first, especially when I wanted that instant makeover moment. But every time I tried to rush, the table reminded me who was in charge. A heavier coat looked streaky. An impatient second coat felt tacky. A spot I thought was dry absolutely was not. By the end, I understood why experienced painters keep repeating the same advice: prep well, paint lightly, and wait longer than your impatient little heart prefers.
The most satisfying moment came after the final protective coat cured and the table moved back into the kitchen. It did not just look cleaner. The whole room felt more put together. Suddenly the chairs made sense, the rug looked better, and even the light coming through the window seemed to approve. That is the sneaky power of a kitchen table makeover. It can shift the mood of the entire space without requiring a full renovation.
What I appreciate most now is the mix of beauty and practicality. A refinished and painted kitchen table is not precious. You still use it. You still wipe spaghetti sauce off it. You still stack mail on one corner when life gets chaotic. But there is something deeply nice about using a piece you saved with your own hands. It feels sturdier, more personal, and a little more meaningful than something delivered in a cardboard box with forty-seven mystery screws.
So yes, the process takes effort. Yes, you will probably find sanding dust in weird places. And yes, you may spend an unreasonable amount of time staring at paint swatches that all somehow look gray and blue at once. But the experience is worth it. Re-finishing and painting a kitchen table is one of those projects that gives back every day, one breakfast, coffee break, and weeknight dinner at a time.


