Table of Contents >> Show >> Hide
- What Is an “Industrial Whimsy” Spring Rustic Wreath?
- Supplies You’ll Need for an Industrial Whimsy Rustic Wreath
- Step-by-Step: How to Make an Industrial Whimsy Spring Rustic Wreath
- Where to Display Your Spring Rustic Wreath
- Customization Ideas for Different Styles
- Practical Tips: Durability, Storage, and Safety
- Industrial Whimsy vs. Traditional Rustic Farmhouse Wreaths
- Real-Life Experiences with Industrial Whimsy Spring Wreaths
- Conclusion: Bringing Industrial Whimsy Home
If you’ve ever walked past a rusty metal spool, tire rim, or wire wheel and thought,
“Wow, that would make a cute Easter wreath,” congratulationsyour brain is already
wired for industrial whimsy. The original “Industrial Whimsy Equals Spring Rustic Wreath”
project, shared through a Hometalk-sponsored DIY spring blog hop, took an $8 metal
wire spool and turned it into a playful, family-friendly centerpiece packed with carrots,
bunnies, ribbon, and farmhouse charm. That’s the magic we’re channeling here.
In this guide, you’ll learn how to create your own industrial-meets-rustic spring wreath,
even if you don’t happen to have an antique wire spool sitting in the garage.
We’ll walk through supplies, step-by-step instructions, styling ideas, and practical tips
so you can confidently build a unique wreath that feels both “found object” and fresh.
What Is an “Industrial Whimsy” Spring Rustic Wreath?
An industrial whimsy spring wreath is all about contrast. Think:
- A weathered metal base paired with soft greenery and pastel florals.
- Clean lines of steel or wire softened by burlap, ribbon, and faux nests.
- Playful spring icons (like bunnies and carrots) layered over rugged, vintage hardware.
Where a traditional spring wreath might rely on grapevine or foam, an industrial whimsy
version starts with something unexpectedlike a wire spool, metal tire rim, open ring,
or even a steel hoop. From there, you build in familiar rustic elements: faux greenery,
moss, ribbon, berries, and seasonal accents. The result feels like a farmhouse vignette
perched on a piece of old machinery…in the best possible way.
Why This Look Works So Well for Spring
Spring décor is about fresh beginnings, but it’s also about personality.
By pairing industrial elements with rustic textures, you get:
- Visual contrast – Metal plus moss or greenery is instantly eye-catching.
- Texture and depth – Layers of ribbon, florals, and hardware add dimension.
- Versatility – Swap out a few pieces and your wreath jumps from Easter to general spring to early summer.
This is a look that plays beautifully with modern farmhouse, rustic industrial, cottagecore,
and even eclectic interiors. It’s quirky, but not chaotic; playful, but still curated.
Supplies You’ll Need for an Industrial Whimsy Rustic Wreath
You can follow the spirit of the original Hometalk-inspired project while adapting it to
what you actually have on hand. Here’s a solid starting list.
1. The Industrial Base
Look for something sturdy, circular, and a little bit imperfect:
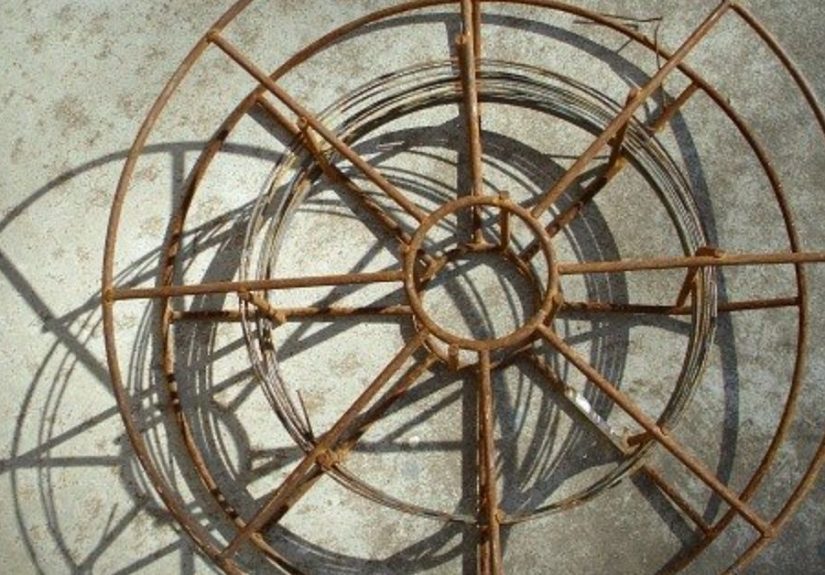
- Old metal wire spool or cable spool ring.
- Vintage metal wheel, tire rim, or gear-like frame.
- Large metal embroidery hoop or industrial-style metal ring.
Thrift stores, salvage yards, flea markets, and antique shops are ideal hunting grounds.
Don’t worry about rust or discolorationthat patina is part of the charm. Just make sure
there are no sharp edges that could snag clothing or fingers.
2. Rustic & Spring Elements
To soften the tough metal, you’ll layer in cozy, organic textures:
- Faux greenery (eucalyptus, ferns, boxwood, or mixed leaves).
- Faux florals in spring colors: tulips, daisies, hydrangeas, or wildflowers.
- Seasonal accents such as grapevine carrots, mini nests, speckled eggs, or tiny birds.
- Rustic ribbonburlap, ticking stripe, or polka dots in a cheerful spring shade.
- A metal bunny silhouette, wooden cutout, or seasonal sign.
- Optional monogram letter for a personalized touch.
3. Tools & Fasteners
- Floral wire (green or brown blends in nicely).
- Wire cutters and scissors.
- Hot glue gun and glue sticks for securing smaller pieces.
- Hanging hardware: jute twine, ribbon, or a sturdy wreath hanger.
If you’re on a budget, prioritize the base and one or two strong focal pieces
(like a bunny and a bold ribbon), then use inexpensive greenery and filler
to make everything look lush.
Step-by-Step: How to Make an Industrial Whimsy Spring Rustic Wreath
Step 1: Prep and Clean Your Metal Base
Start by wiping down the metal with a dry cloth to remove dust and loose rust.
If there are sharp edges, file or sand them slightly. Don’t overcleanyou want
those authentic imperfections, just without the tetanus risk.
If the metal is extremely rough, you can seal it with a clear matte spray
to lock in the patina without adding shine. Let it dry completely before decorating.
Step 2: Plan Your Layout Before You Glue
Lay the metal base flat on a table and roughly “audition” your elements:
- Decide where your main focal piece will go (often slightly off-center).
- Group greenery and florals around that focal point.
- Place your ribbon bow and monogram where they balance the composition.
Take a quick photo with your phone. That snapshot becomes your map once
you start wiring and gluing things in place.
Step 3: Add a Greenery Foundation
Use floral wire to attach greenery stems to the outer or inner edge of the metal base.
Work in small clusters, overlapping stems to hide mechanics and create a natural flow.
You don’t need to cover the entire ringleaving some of the metal exposed
keeps the industrial vibe front and center.
A popular approach is to cover about half to two-thirds of the base with greenery,
allowing the remaining portion to show off the raw metal.
Step 4: Layer Florals and Seasonal Accents
Once your greenery layer feels balanced, tuck in faux flowers and seasonal items:
- Cluster carrots or mini nests near the bottom or side of the wreath.
- Use small pops of color (like yellow, orange, or pink) to draw the eye.
- Work in odd numbersgroups of 3 or 5 usually look more natural.
Attach these pieces with either floral wire or hot glue, depending on weight.
Heavier items should be wired to the metal; lighter items can be glued
onto greenery or ribbon.
Step 5: Add Ribbon, Bows, and a Monogram
The ribbon is where the “whimsy” really comes out. A wide, polka-dot or striped
ribbon in a cheerful spring color can make the entire wreath feel more playful.
- Create a large bow and position it near your main cluster of carrots or flowers.
- Let the tails of the ribbon drape down or curl around the metal frame.
- Attach a magnetic or wired wooden letter for a family initial or the letter “S” for “spring.”
If your base is metal, a magnetic letter can sometimes cling directly to a metal accent
an easy trick that makes the monogram feel like it belongs there.
Step 6: Finish, Fluff, and Hang
Step back and assess the wreath from a few feet away:
- Are there any bare spots that feel unintentional?
- Do the colors feel balanced, or is one side too heavy?
- Can you still see enough of the industrial base?
Adjust, fluff, and add small bits of greenery or ribbon as needed. When you’re happy with
the result, attach jute twine or a loop of ribbon at the top for easy hanging.
Where to Display Your Spring Rustic Wreath
One of the perks of an industrial-style wreath is that it looks good in places where
a traditional grapevine wreath might feel a little ordinary.
Front Door or Porch
The obvious choiceand for good reason. On a painted front door, a metal-and-greenery
wreath instantly adds curb appeal. Pair it with:
- A coir doormat with a spring greeting.
- Potted tulips or ferns on either side of the entrance.
- Lanterns or string lights for cozy evening vibes.
Indoor Display
If you’ve put a lot of work into the details and want to protect them from weather,
hang your wreath indoors. Great spots include:
- Above a console table styled with vintage books and a small bunny figurine.
- Over the mantel with coordinating spring garlands.
- On an interior door, like a pantry or mudroom door, to surprise guests.
Customization Ideas for Different Styles
The “Industrial Whimsy Equals Spring Rustic Wreath” concept is incredibly flexible.
Here are ways to tweak it to match your décor:
Minimal Modern Industrial
- Use a sleek black metal ring as your base.
- Keep greenery simple: eucalyptus and white florals only.
- Skip the carrots and bunnies; use a clean “hello” sign instead.
Cottage-Farmhouse Spring
- Choose softer colors: blush pink, cream, soft green.
- Use a burlap-and-lace bow for texture.
- Add a tiny birdhouse or nest for a storybook touch.
Kid-Friendly Easter Version
- Use brighter accents: yellow, aqua, lavender.
- Incorporate pastel eggs, felt bunnies, or mini carrots.
- Let kids help place the eggs or choose the ribbon.
Practical Tips: Durability, Storage, and Safety
A beautiful wreath should survive more than one season, especially if you’ve invested
time and materials. Keep these practical points in mind:
- Weight: Metal bases can be heavy; use a strong hanger rated for more than your wreath’s estimated weight.
- Weather: If hanging outdoors, choose UV-resistant florals and ribbon to minimize fading.
- Storage: Store in a wreath box or large plastic bin with the wreath hanging or lying flat, with tissue around delicate pieces.
- Pets & kids: Avoid tiny loose pieces or real dried plants that might shed or become choking hazards.
Industrial Whimsy vs. Traditional Rustic Farmhouse Wreaths
Rustic farmhouse wreaths usually start with a grapevine or foam base. They’re beautiful,
but they don’t always stand out in a neighborhood of similar doors. An industrial base,
by contrast, instantly signals that this wreath is differentmore sculptural, more
unexpected, and a little bit edgy.
The industrial element also makes the wreath feel grounded and substantial. Rather than
looking like a mass-produced floral ring, it reads like a curated piece of wall art
or a conversation-starting salvage find.
Real-Life Experiences with Industrial Whimsy Spring Wreaths
The most memorable part of an industrial whimsy wreath isn’t actually the finished product.
It’s the story behind the piece you used for the base. Maybe you found a rusty wire spool
in a small-town antique shop, maybe you dragged a metal wheel out of your grandparents’
barn, or maybe you rescued a discarded rim from a curbside pile on trash day.
Imagine this scene: you’re out treasure-hunting with a friend or sibling, wandering through
an antique mall or flea market. Amid the vintage dishes and old signs, you spot a metal
spool leaning against a wall. It’s rusty, a little dented, and absolutely not what the
average person would call “beautiful.” But you see the circular shape, the built-in
negative space, and suddenly your brain fills in greenery, ribbon, and bunnies.
That’s the moment industrial whimsy is born. It’s the creative leap from “old hardware”
to “seasonal décor.” When you bring that piece home, the real fun starts. You lay everything
out on the dining table, pick up ribbon after ribbon in the craft store aisle, and debate
whether your carrots should be front and center or peeking out from behind greenery.
Many DIYers discover that the hardest part isn’t wiring the flowers or making the bowit’s
choosing the components. Walking through the craft store, you’re bombarded with options:
moss bunnies, ceramic birds, mini signs, carrot bundles, eggs in every color. The
temptation to buy everything is real. But the most successful wreaths usually come down
to a strong focal point, a simple color palette, and a thoughtful mix of textures
rather than an overload of “cute stuff.”
Over time, an industrial whimsy wreath can become a seasonal tradition. One year you lean
into carrots and a big orange bow. The next year you swap the bunny for a metal bird and
add lavender stems. Because the metal base is so sturdy, you can rebuild and refresh
the design without starting from scratch. That makes it eco-friendly, budget-friendly,
and emotionally meaningfulyou’re not just hanging a wreath, you’re layering in years
of small changes and memories.
There’s also something deeply satisfying about seeing your wreath through other people’s
eyes. A neighbor might ask, “Wait, is that an old spool?” Guests may stand on your porch
longer than usual, taking in the details. Kids might point out the little bunny or nest.
Your everyday entrance suddenly becomes a tiny gallery wall, and the wreath is the star.
And when spring is over? That metal base is ready to be reimagined for summer or fall.
Swap in sunflowers and navy ribbon for late summer, or layer in small pumpkins, wheat,
and plaid ribbon for autumn. Once you’ve embraced the industrial whimsy mindset,
you’ll never look at old hardware the same way again. Every rusty circle starts to look
like an opportunity waiting for florals, ribbon, and a story.
Conclusion: Bringing Industrial Whimsy Home
The charm of the “Industrial Whimsy Equals Spring Rustic Wreath | Hometalk” idea
is that it celebrates both creativity and reuse. You’re not just buying a wreathyou’re
building one from unexpected pieces, layering your personal style, and giving new life
to something that might have been forgotten in a corner of an antique shop or garage.
Whether you’re a seasoned DIY decorator or a first-time wreath maker, an industrial whimsy
spring rustic wreath is a fun, approachable project. Start with an interesting metal base,
add greenery and florals, top it off with a whimsical focal point, and let the contrast
between rough and refined do the rest. When your front door (or mantel, or kitchen wall)
feels a little dull after winter, this is exactly the kind of statement piece that says:
spring is hereand this house has personality.


