Table of Contents >> Show >> Hide
- Start With a Reality Check: Is Your Shed a Good Candidate?
- Permits, Zoning, and HOA Rules: The Unsexy Step That Saves You Later
- Design Your Shed Office Like a Tiny House: Comfort Comes From the “Envelope”
- Insulation: The Make-or-Break Upgrade for Year-Round Use
- Electrical: Power Your Office Safely (and With Enough Outlets)
- Internet That Doesn’t Rage-Quit Mid-Meeting
- Heating, Cooling, and Ventilation: Your Comfort Triad
- Lighting: Make It Bright Without Feeling Like an Interrogation Room
- Interior Finishes: Durable, Comfortable, and Low-Regret
- Layout and Ergonomics: Make Small Feel Big
- Safety and Security: Plan for Real-World Use
- Budget: Where the Money Actually Goes
- Optional: Can a Shed Office Qualify for a Home Office Tax Deduction?
- A Simple Step-by-Step Checklist
- Experiences From Real Shed Offices: What People Wish They Knew First
- 1) The first “office day” is a trial run, not a grand opening
- 2) Condensation is sneakyand it loves unprepared sheds
- 3) You will never say, “Wow, I added too many outlets”
- 4) Temperature swings affect your mood more than you expect
- 5) The path to the shed mattersespecially when it’s raining
- 6) You’ll want one “joy” feature that makes the space feel special
- Conclusion
If your home office currently shares square footage with a kitchen table, a laundry pile, and a pet who believes your laptop is a heated throne,
it may be time to relocate your “corporate headquarters.” Good news: the answer might be sitting in your backyard, quietly minding its own business,
holding rakes, and wondering why it never got invited inside.
Turning a shed into a home office can be surprisingly doableand surprisingly life-changing. Done right, a shed office gives you real separation
between “work” and “home,” reduces noise, and upgrades your focus without the cost (or drama) of a full addition. Done wrong… well, let’s just say
“seasonal workspace” is a polite way to describe a room that’s too hot in July and too cold in January.
This guide walks you through the smart, safe, and comfort-first way to convert a shed into a home office: permits, insulation, electrical, HVAC,
lighting, layout, and the small details that make the space feel like an actual office instead of “a shed with a chair.”
Start With a Reality Check: Is Your Shed a Good Candidate?
Not every shed is ready for a career change. Before you buy a desk and start naming the room “The Garden Annex,” verify these basics:
1) Structure and size
Look for a solid roof (no active leaks), walls that are straight, and a floor that feels firm underfoot. Size matters less than you think,
but a comfortable minimum is often around 8×10 or 10×12, especially if you need storage, a printer station, or space for video calls.
If your elbows hit the wall when you stretch, the shed is basically forcing you into productivity through discomfort. That’s not a strategy.
2) Placement and access
Consider distance from the house (power and internet runs get pricier with distance), sunlight (natural light helps, direct afternoon sun can roast you),
drainage (avoid low spots), and your daily route (walking through mud in slippers is not the vibe).
3) Conditioned space vs. “three-season” space
If you want year-round use, assume you’ll need insulation, air sealing, safe electrical, and heating/cooling. If you only need a spring/fall writing nook,
you can simplifybut most people end up wanting “real office comfort” once they experience the joy of uninterrupted concentration.
Permits, Zoning, and HOA Rules: The Unsexy Step That Saves You Later
Converting a shed into a home office often changes how the structure is usedespecially if you add electricity, HVAC, plumbing, or finish the interior.
That can trigger local requirements, even if the shed originally didn’t need a permit.
Many jurisdictions use building codes where small accessory structures may be permit-exempt under certain conditions (often tied to size and use),
but “permit-exempt” doesn’t mean “anything goes,” and finished/conditioned space may be treated differently than a simple storage shed.
Your safest move is to contact your local building department and ask what’s required for an accessory structure used as a home office.
Also check:
- Zoning setbacks: How close the shed can be to property lines, easements, or other structures.
- HOA rules: Exterior appearance, height, materials, and visible utilities.
- Electrical permits: Adding a new circuit, trenching power, or installing a subpanel often requires permitting and inspection.
This step is like flossing: you can ignore it, but it tends to come back and introduce itself at the worst possible time.
Design Your Shed Office Like a Tiny House: Comfort Comes From the “Envelope”
The “building envelope” is the shell that keeps outside weather outside and inside comfort inside. In shed conversions, the envelope is the difference
between “cozy work pod” and “I can see my breath while emailing.”
Weatherproof first
- Roof: Fix leaks, check flashing, and replace damaged shingles or panels.
- Siding: Repair gaps, rotten boards, and places where wind and water sneak in.
- Windows/doors: Add weatherstripping and make sure the door actually seals. If daylight is visible around the frame, so is your heating bill.
- Ground moisture: Make sure water drains away from the shed. Consider gutters and downspout extensions if runoff lands near the foundation.
Moisture control is not optional
Sheds often sit close to the ground and can collect moisture. When you insulate and seal a space, moisture management becomes even more important.
Plan for bulk water control (drainage and leaks), air control (air sealing), and vapor control (appropriate materials for your climate and assembly).
This reduces the chance of moldy surprises and helps protect electronics and furniture.
Insulation: The Make-or-Break Upgrade for Year-Round Use
If your goal is a true home officenot a seasonal hideoutinsulation is the headline act. It improves comfort, reduces HVAC load, and helps with noise.
Common insulation options for shed offices
- Fiberglass batts: Affordable and common, typically installed between studs. Works best when paired with good air sealing.
- Rigid foam board: Useful for continuous insulation and reducing drafts, especially on walls and floors.
- Spray foam: Can air-seal and insulate at once, often used where space is tight or air leakage is severe (typically best installed by pros).
- Mineral wool: Great for sound control and fire resistance, and it holds up well in many wall assemblies.
Don’t forget the floor and ceiling
People obsess over walls and then wonder why their feet are freezing. Insulate the floor if possible (especially if the shed is elevated or drafty),
and treat the ceiling/roof as a priority because heat loves to exit upward like it’s late for a meeting.
Air sealing: the secret sidekick
Insulation works best when air leaks are controlled. Seal obvious gaps around doors, windows, corners, and any utility penetrations.
The goal is fewer drafts and more stable temperaturenot turning your shed into a vacuum-sealed sandwich.
Electrical: Power Your Office Safely (and With Enough Outlets)
A shed office needs more than a single extension cord snaking across the yard like a tripping hazard auditioning for a stunt show.
Plan electrical early, because it affects walls, insulation, lighting, and your entire layout.
What to plan before wiring
- Your load: Laptop + monitor? Add printer, mini fridge, space heater, or a mini-split and you’ll need real capacity.
- Outlet placement: Put outlets where you’ll actually work: desk wall, printer/storage corner, and potentially one near the door for cleaning gear.
- Lighting circuits: Good overhead light plus task lighting beats working in a cave lit by one dramatic lamp.
Hire a licensed electrician when needed
Local codes vary, and safe installation matters. Many shed offices require proper burial/conduit methods for underground runs, correct grounding,
and protective devices (commonly GFCI and/or AFCI depending on location and code adoption). An electrician can also advise whether a small subpanel
makes sense if you’re running multiple circuits.
Internet That Doesn’t Rage-Quit Mid-Meeting
Your shed can be beautiful, quiet, and perfectly organizedand still fail as an office if your Wi-Fi drops every time you open a spreadsheet.
Choose the best option for your yard and your budget:
- Mesh Wi-Fi: Often the easiest solution. Add a node near the backyard-facing wall of the house, then place another in the shed.
- Outdoor-rated Ethernet: Fast and stable, but requires trenching and proper conduit/weatherproofing.
- Point-to-point wireless bridge: Great for longer distances where mesh struggles.
Pro tip: test signal strength in the shed before committing. Stand where your desk will go, open a video call, and see if the connection behaves.
If your camera freezes in a heroic expression, the internet needs reinforcement.
Heating, Cooling, and Ventilation: Your Comfort Triad
If you only do one thing for livability, do insulation. If you do two things, add HVAC. Comfort is productivity’s best friend.
Popular HVAC options for shed offices
- Ductless mini-split: Efficient heating and cooling, great for year-round use.
- Portable AC + electric heat: Works in mild climates or part-time use, though less efficient and can be noisy.
- Electric baseboard or wall heater: Simple heat option, but plan electrical capacity carefully.
Ventilation matters more than you think
A tightly sealed shed office can trap humidity and stale air. Aim for operable windows (or vents) and consider a small exhaust fan if the space feels stuffy.
Balanced comfort also helps protect office gear from condensation and helps finishes (like paint) behave better over time.
Lighting: Make It Bright Without Feeling Like an Interrogation Room
Good lighting supports focus, reduces eye strain, and makes video calls look less like a witness statement.
Combine layers:
- Natural light: If adding windows is feasible, prioritize daylight without direct glare on your monitor.
- Ambient overhead lighting: A flush-mount or simple ceiling fixture provides even coverage.
- Task lighting: A desk lamp for reading, writing, or detailed work.
If you take frequent video calls, position your desk so light hits your face from the front or sidenot from behind (unless you want to appear as a mysterious silhouette).
Interior Finishes: Durable, Comfortable, and Low-Regret
Walls and ceiling
Drywall creates a finished, professional feel. Plywood or tongue-and-groove panels can look great too and make it easier to mount shelves.
Choose materials that match your skill level and your desired vibe (modern, cozy cabin, minimalist studio, etc.).
Flooring
A floating vinyl plank floor is popular because it’s durable and easy to clean. If moisture is a concern, choose flooring and underlayment designed for that environment,
and address the underlying moisture issue first.
Sound control
If your yard includes barking, leaf blowers, or a neighbor who believes 7 a.m. is “prime chainsaw hour,” add sound control:
insulation helps, weatherstripping helps, and soft surfaces (rugs, curtains, acoustic panels) absorb echo.
Layout and Ergonomics: Make Small Feel Big
In a shed office, every square foot needs a job. Use a simple layout strategy:
- Desk first: Place your desk where you’ll have comfortable light and a clean video-call background.
- Storage vertical: Shelves and wall cabinets keep the floor open.
- Cable management: A few clips and a power strip mounted under the desk prevent “tech spaghetti.”
- One “flex” spot: A small chair, stool, or wall-mounted fold-down surface for reading, brainstorming, or a second monitor day.
Example setup: In a 10×12 shed, place the desk on the long wall facing a window (side light), put shallow shelves behind you for a tidy background,
and reserve the corner near the door for a printer cabinet and supplies.
Safety and Security: Plan for Real-World Use
- Weather protection: Use outdoor-rated fixtures where appropriate and seal exterior penetrations.
- Fire safety: Consider a small fire extinguisher and smoke alarm where applicable.
- Locks and lighting: A solid lock and a motion-sensor exterior light help protect equipment.
- Pathway: Add a stable walkway so you’re not tiptoeing through mud like you’re sneaking into your own job.
Budget: Where the Money Actually Goes
Shed offices can be budget-friendly, but the cost depends on how “finished” you go. The most common cost drivers are:
insulation and interior finish work, electrical (especially trenching), HVAC, windows/doors, and permitting.
A smart approach is to budget in phases:
- Phase 1: Weatherproofing, basic electrical, and a functional workspace.
- Phase 2: Insulation, full interior finish, and HVAC for year-round comfort.
- Phase 3: Built-ins, landscaping, upgraded lighting, and aesthetic polish.
Optional: Can a Shed Office Qualify for a Home Office Tax Deduction?
If you’re self-employed, a shed office may qualify as a “separate structure” used for businessif it meets the IRS rules (commonly regular and exclusive use).
This is a details-heavy topic, so consider a tax professional if you’re planning to claim it. But conceptually, the key is that the space must truly be a business space,
not a part-time office/part-time yoga shrine/part-time “where the kids build forts” zone.
A Simple Step-by-Step Checklist
- Confirm the shed is structurally sound and sized for your needs.
- Check zoning, HOA rules, and permit requirements (especially for electrical/HVAC).
- Fix water issues: roof leaks, drainage, and gaps in siding/trim.
- Plan layout, outlets, lighting, and internet before closing up walls.
- Insulate walls/ceiling (and floor if possible) and air-seal key leaks.
- Install safe electrical and reliable connectivity.
- Add heating/cooling and basic ventilation for comfort and moisture control.
- Finish interior surfaces, flooring, and storage.
- Dial in lighting, ergonomics, and sound control.
- Secure the space and build a comfortable path to the door.
Experiences From Real Shed Offices: What People Wish They Knew First
Most shed-office stories start with the same sentence: “I thought it would be a quick weekend project.” And then reality shows up wearing work boots.
Here are the lessons that come up again and againshared in the spirit of saving you time, money, and at least one mild existential crisis.
1) The first “office day” is a trial run, not a grand opening
People often finish the space, move in, and immediately schedule a big video callonly to discover the chair is the wrong height, the desk faces direct glare,
and the Wi-Fi drops right when someone says, “So what’s your recommendation?” A smarter move is to do a practice workday first.
Spend two to four hours inside doing your normal tasks. You’ll quickly notice what needs adjusting: outlet placement, lighting, screen glare, and whether your
“quiet space” is directly under a tree full of very chatty birds.
2) Condensation is sneakyand it loves unprepared sheds
A common surprise is moisture. Someone insulates the walls, seals things up, and then wonders why a corner feels damp or why the space smells “earthy.”
The fix is rarely one magic product; it’s a system: good drainage outside, air sealing, appropriate insulation, and enough ventilation to keep humidity under control.
Many shed-office owners say the best purchase they made wasn’t decorit was a small dehumidifier or a properly sized HVAC solution that kept the space stable.
3) You will never say, “Wow, I added too many outlets”
Shed offices need more outlets than you think. Laptop, monitor, phone charger, task light, printer, router/mesh node, maybe a fan, maybe a heater, maybe a standing desk.
People who planned outlets early tend to love their spaces. People who didn’t plan outlets own an impressive collection of power strips and a growing resentment toward cords.
If you’re already opening walls, it’s the easiest time to do it right.
4) Temperature swings affect your mood more than you expect
Several shed-office converts describe the “mystery slump” that happened daily at 2 p.m.and it turned out to be heat buildup, poor airflow, or stale air.
Once they improved ventilation or added better cooling, their focus improved dramatically. Comfort isn’t a luxury; it’s an actual performance tool.
If you want to feel energetic and sharp, your body needs a stable environment.
5) The path to the shed mattersespecially when it’s raining
This sounds minor until you’re carrying coffee, a laptop bag, and optimism across wet grass. Shed-office veterans frequently recommend making the walk easy:
pavers, gravel, stepping stones, a small porch landing, and lighting for early mornings. It upgrades the “commute” and reduces dirt, slips, and frustration.
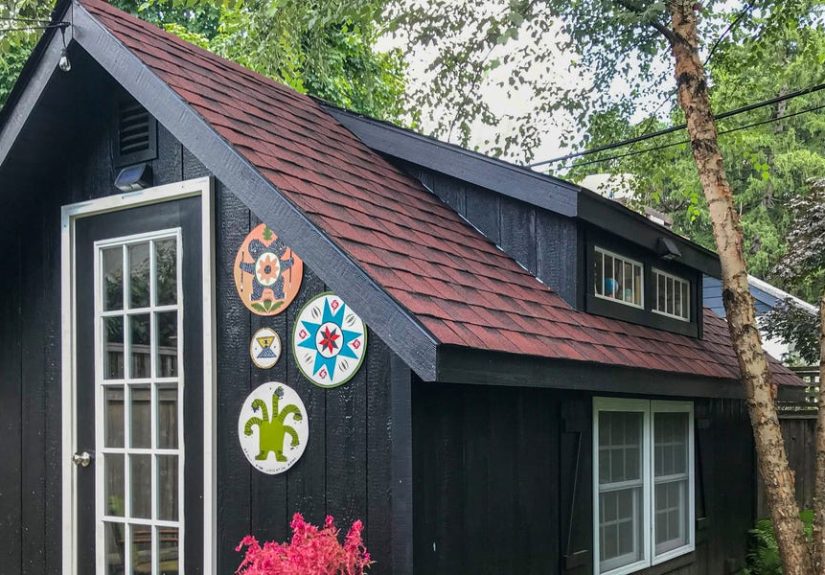
6) You’ll want one “joy” feature that makes the space feel special
The best shed offices aren’t just functionalthey have one feature that makes you happy to be there. It might be a window seat, a pegboard wall for tools,
a plant shelf, a bold paint color, a tiny speaker setup, or a framed print that makes you laugh. One owner described it as “a studio energy,” not “a spare room energy.”
That emotional shift is part of why shed offices work: they feel intentional.
The big takeaway from these experiences is simple: the shed office isn’t just a room. It’s a system. When the envelope is tight, the air is comfortable,
the power is safe, and the layout is planned, the space becomes shockingly professional. And when you finish, you get the best commute in America:
a short walk, a deep breath, and the satisfying click of a door that closes on distractions.
Conclusion
Turning a shed into a home office is one of the most practical ways to gain space without a full remodelespecially if you plan for comfort, safety,
and local requirements upfront. Start with a solid shed, handle permits and utilities early, prioritize insulation and moisture control, and design the layout
around how you actually work. Do those things, and you’ll end up with a backyard office that feels like a serious upgradenot a seasonal experiment.