Table of Contents >> Show >> Hide
- Before You Start: Cactus Rescue Kit (No Cape Required)
- Step 1: Diagnose the Problem Like a Plant Detective
- Step 2: If the Soil Is Wet or the Base Is Soft, Act Fast (Root Rot Protocol)
- Step 3: If It’s Thirsty, Rehydrate Correctly (Without Overcorrecting)
- Step 4: Fix the Environment (Light, Soil, Pot, and Seasons)
- Step 5: Check for Pests and Disease (Because Bugs Love a Stressed Plant)
- Step 6: When Rescue Means Propagation (AKA “Plan B Is Still a Win”)
- Recovery Timeline: What to Expect (So You Don’t Panic-Water)
- Common “Dying Cactus” Scenarios (With Quick Fixes)
- Experiences: What Cactus Rescues Usually Look Like in Real Homes (500-ish Words)
- The Takeaway: Cactus CPR in One Sentence
Your cactus is supposed to be the “low-maintenance roommate” of the plant world. So when it starts sagging, wrinkling,
or turning suspicious shades of yellow-brown-black, it feels… personal. Don’t panic. Most “dying” cacti aren’t being dramatic
they’re sending very specific distress signals. The trick is reading them correctly, then fixing the one (or two) things
that are actually wrong.
This guide walks you through cactus triage: how to diagnose the problem (overwatered vs. underwatered vs. light issues),
how to treat root rot, how to repot the right way, and how to set up a recovery plan that doesn’t accidentally finish the job.
Let’s get your spiky friend back on speaking terms with life.
Before You Start: Cactus Rescue Kit (No Cape Required)
- Thick gloves (leather or heavy garden gloves)
- Kitchen tongs or folded newspaper/cardboard (for safe gripping)
- Sterilized cutting tool (pruners or a sharp knife)
- Fresh cactus/succulent potting mix (or a gritty DIY blend)
- A pot with drainage holes (non-negotiable)
- Optional: perlite/pumice, a chopstick, rubbing alcohol (for pests), insecticidal soap
Quick safety note: Cactus spines are tiny harpoons with ambition. Use tongs/newspaper to handle the plant and
keep your cactus at a respectful distance from bare forearms (and curious pets).
Step 1: Diagnose the Problem Like a Plant Detective
The fastest way to save a dying cactus is to stop guessing. Most cactus decline comes from the same handful of culprits:
too much water, not enough light, poor drainage, or pests. Start with a two-minute check:
- Touch test: Is it firm, slightly pliable, or mushy?
- Soil test: Is the soil wet, damp, dry, or bone dry?
- Light test: Is it stretching/leaning toward light, or getting scorched?
- Base check: Any black/brown soft spots at the soil line?
- Pest check: Any cottony fluff, sticky residue, or tiny bumps?
Overwatered vs. Underwatered: The Classic Cactus Mix-Up
Here’s the annoying truth: an overwatered cactus can look wrinklybecause rotting roots can’t absorb water, so the plant
“thirsts” even while sitting in wet soil. That’s why you always check the soil and roots, not just the skin.
| What You See | Most Likely Cause | What It Usually Feels Like |
|---|---|---|
| Soft, mushy spots; yellowing; dark base | Overwatering / rot | Mushy or squishy near soil line |
| Wrinkled, shriveled, dull skin; slow growth | Underwatering (or inactive roots) | Firmer, “deflated” feel (not slimy) |
| Tall, skinny, pale, leaning (“stretching”) | Not enough light (etiolation) | Firm but misshapen |
| Bleached patches, tan/brown scarring | Sunburn / sudden light change | Firm, dry, papery scar |
If the cactus is mushy or the base is browning/blackening, treat it like a plant emergency.
If it’s wrinkled but firm and the soil is bone dry, it might simply need a proper drink.
Either way, the next step is about making the root zone behave.
Step 2: If the Soil Is Wet or the Base Is Soft, Act Fast (Root Rot Protocol)
Root rot happens when roots sit in soggy, oxygen-poor soil. In pots, overwatering + poor drainage is basically a root
sauna nobody asked for. Extensions and horticulture sources consistently point to wet soil and drainage issues as a
common root-rot trigger in potted plants and cacti.
2A) Stop Watering (Immediately)
Put the watering can down. Back away slowly. Overwater recovery starts with drying things out and, when needed,
getting the plant into fresh, well-draining media.
2B) Unpot the Cactus and Inspect the Roots
- Wear gloves, use tongs/newspaper, and gently slide the cactus out of the pot.
- Brush away loose soil so you can actually see the roots.
- Healthy roots are generally light-colored and firm. Rotted roots look dark and feel mushy.
If you smell a musty “swamp” odor or find black, slimy roots, you’re not imagining ityour cactus is auditioning for a horror movie.
Let’s rewrite the script.
2C) Trim the Rot and Sterilize Your Cuts
- Use a sterilized knife/pruners.
- Cut away all mushy, black, or obviously rotting roots.
- If rot has moved into the base/stem, cut back to clean, firm tissue.
Be brave here: leaving “a little rot” is like leaving “a little fire.” It spreads.
2D) Let the Plant Dry (Yes, On Purpose)
After trimming, let the cactus sit in a dry, shaded, well-ventilated spot so cut surfaces can dry and callus.
This reduces the chance of fresh cuts rotting when replanted. For cuttings and many succulents/cacti, letting wounds
callus for several days is a widely recommended best practice.
- Minor root trimming: allow several hours to a day of drying.
- Stem/base cuts: allow multiple days until the cut is dry/callused.
2E) Repot into Dry, Gritty Mix (And a Pot That Drains)
- Choose a pot with drainage holes. If it doesn’t drain, it’s a decorative cup, not a cactus home.
- Use cactus/succulent mix, or add perlite/pumice to increase airflow and drainage.
- Plant the cactus at the same depth as before (don’t bury the stem deeper).
- Do not water right away. Give it time to settle and heal.
Many care guides recommend waiting about a week after repotting/rot trimming before watering, so the root zone can recover
and wounds can fully dry. Your cactus does not need a “welcome drink.” It needs a “welcome back to breathable soil.”
Step 3: If It’s Thirsty, Rehydrate Correctly (Without Overcorrecting)
If the cactus is wrinkled but firm, and the soil is completely dry, it may be underwatered. The best approach is
soak-and-dry, not tiny daily sips. In active growth seasons (often spring/summer), cacti generally want
a thorough watering only when the potting mix has dried out.
The Right Way to Water a Cactus
- Water slowly until it runs out the drainage holes.
- Let the pot drain completely (no standing water in the saucer).
- Do not water again until the soil is dry.
If your cactus plumps up within a week or two, congratulationsyou performed hydration therapy without turning your plant into soup.
If it stays wrinkly and the soil was often wet, circle back to root health.
Step 4: Fix the Environment (Light, Soil, Pot, and Seasons)
Saving a dying cactus isn’t just about emergency care. Once it’s stable, you need to stop the original problem from coming back.
Most healthy cactus care boils down to: bright light, fast drainage, and watering based on dryness, not the calendar.
Light: Bright, But Don’t Roast It Overnight
Many cacti thrive with strong light indoors (often a sunny window). But going from “dim corner” to “full blazing sun”
instantly can cause sunburnthink of it as your cactus getting a sunbathing session with zero sunscreen.
- If it’s stretching (tall, skinny, pale): move it to brighter light gradually over 1–2 weeks.
- If it’s scorched: provide bright light with some protection while it recovers (sheer curtain, or a step back from glass).
- Rotate the pot occasionally so growth stays balanced.
Soil: The “Well-Draining” Part Is Not Optional
Cacti and succulents typically do best in a coarse, gritty mix that drains quickly and lets roots breathe. If your “cactus soil”
stays wet for days, it’s not cactus soilit’s a slow-motion root rot starter kit. Choose a cactus/succulent blend and amend
with grit (perlite, pumice) if needed.
Pot Choice: Drainage Holes + Material Matters
- Drainage holes: required. Always.
- Terracotta/clay: can help the mix dry faster (useful if you tend to overwater).
- Oversized pots: hold too much wet soil; size up only slightly when repotting.
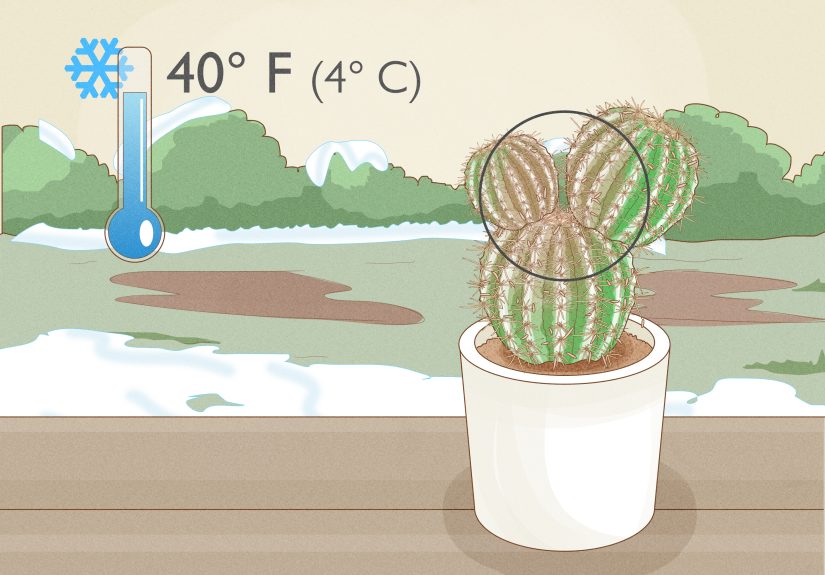
Seasonal Watering: Your Cactus Has a Calendar, Even If You Don’t
Many indoor cacti slow down in winter. That means they often need less watersometimes dramatically less. Several care guides
recommend watering more during active growth (spring/summer) and reducing watering during dormancy, using shriveling as a cue
rather than a strict schedule.
- Spring/Summer: water when soil is dry; growth and blooming are more likely now.
- Fall/Winter: water sparingly, only when truly needed (soil dry + visible shrivel).
Bottom line: check the soil. Don’t “just water every Saturday.” Your cactus does not recognize weekends.
Step 5: Check for Pests and Disease (Because Bugs Love a Stressed Plant)
Mealybugs (The Tiny Cotton Monsters)
If you see white, cottony clusters in crevices, that’s likely mealybugs. For small infestations, many extension and IPM
resources recommend dabbing mealybugs with a cotton swab dipped in rubbing alcohol (around 70% or less),
and testing on a small area first for plant sensitivity.
- Isolate the cactus.
- Dab visible mealybugs with a cotton swab and rubbing alcohol.
- Repeat weekly (or as needed) until you stop seeing new pests.
- For larger infestations, consider insecticidal soap or other labeled controls.
Scale (The “Bumps” That Don’t Look Like Bugs)
Scale insects can look like small brown/tan bumps stuck to the plant. They’re sap-suckers and can weaken a cactus over time.
Spot treatments (like alcohol swabbing) and repeated monitoring are often recommended for light infestations.
Rot and Other Diseases
If you’re dealing with recurring soft spots or spreading discoloration, moisture and airflow are usually the first levers to pull:
reduce watering, improve drainage, and increase ventilation. Some cactus “scab” issues can be linked to overwatering and
environmental conditions, and fungal rots are associated with persistently wet conditions.
Step 6: When Rescue Means Propagation (AKA “Plan B Is Still a Win”)
If the base is rotting but the top is healthy, you can often save the cactus by taking a clean cutting and rerooting it.
This is especially useful when rot has climbed up the stem.
How to Propagate a Healthy Section
- Cut above the rot into clean, firm tissue.
- Let the cutting callus in a dry, shaded spot for several days (often around 4–7 days is recommended for many succulent/cactus cuttings).
- Place the callused end into dry cactus mix (don’t bury it too deep).
- Wait before watering; then water lightly once roots begin forming (timing varies by conditions and plant type).
Propagation can feel like admitting defeat, but it’s actually cactus-level resilience: “Fine. I’ll just start over.”
Honestly, that’s inspirational.
Recovery Timeline: What to Expect (So You Don’t Panic-Water)
- Days 1–3: After repotting/rot trimming, cactus may look the same. That’s normal. Don’t water.
- Week 1–2: You may see improved firmness and less wrinkling (if roots are recovering). Resume careful watering only when dry.
- Weeks 3–6: New growth may appear in active season. If nothing changes, re-check roots and light.
- 2–3 months: Many cacti stabilize slowly. Progress is often boringand boring is good.
Common “Dying Cactus” Scenarios (With Quick Fixes)
1) “It’s wrinkled, so I watered more… and now it’s worse.”
Classic. Wrinkling can happen from underwatering or root failure due to rot. Check soil moisture and roots.
If soil is wet and roots are dark/mushy, treat for rot and repot.
2) “It’s leaning and getting skinny.”
That’s usually insufficient light. Move it to a brighter spot gradually (to avoid sunburn) and rotate the pot occasionally.
3) “The base is brownam I doomed?”
Not necessarily. If it’s firm and looks like a dry, woody band, it might be normal aging (“corking”).
If it’s soft or dark and spreading, treat for rot immediately.
4) “It’s a Christmas/holiday cactus and I treated it like a desert cactus.”
Holiday cacti (like Schlumbergera) are different: they prefer brighter indirect light and different moisture patterns than desert cacti.
If yours is a holiday cactus, adjust care accordingly (well-drained mix, but not the same extreme dry-out routine year-round).
Experiences: What Cactus Rescues Usually Look Like in Real Homes (500-ish Words)
Below are common, real-world cactus rescue “storylines” plant owners run intocomposites of what tends to happen when cacti decline indoors.
If any of these feel uncomfortably familiar, congratulations: you’re normal, your cactus is normal, and this is fixable.
The Over-Loved Cactus (a.k.a. “I Watered It Because I Care”)
This rescue usually starts with good intentions: a new cactus looks a little dull, so it gets watered “just to be safe.”
Then it gets watered again because “the top looks dry,” even though the bottom half of the pot is still wet. A week later,
the cactus feels softer than expected, maybe yellowing, maybe a dark patch near the base. Panic sets inand so does more watering.
That’s the moment things tip from “recoverable” to “rot party.”
The turnaround is almost always the same: unpot, inspect, cut away mushy roots, let it dry, and repot into gritty soil in a pot that drains.
The hardest part isn’t the cuttingit’s the waiting. A cactus recovery plan looks boring from the outside: it sits in fresh soil,
you do almost nothing, and you only water when it’s truly dry. But within a couple of weeks, firmness improves and the plant stops looking
like it’s melting.
The Underwatered “Survivor” (a.k.a. “It’s a Cactus, It’ll Be Fine”)
This one is the opposite: the cactus is placed in a bright window and then… forgotten. Months pass. The cactus slowly wrinkles,
the skin looks deflated, and growth stalls. The plant isn’t rotting; it’s running on fumes.
The fix isn’t daily sips. Most of the time, the cactus needs one deep watering (until water drains), then a full dry-out period,
then another deep watering when dry again. The plant often plumps back up surprisingly fastlike it just remembered it has a job to do.
If it doesn’t improve, that’s when you suspect root issues (compact soil, dead roots, or an old peat-heavy mix that became hydrophobic).
The Low-Light Stretch (a.k.a. “My Cactus Is Cosplaying as a Noodle”)
Lots of “dying cactus” photos are actually light-starved cacti. They’re alive; they’re just reaching desperately for sun.
You’ll see thin, pale new growth and leaning toward the nearest window. People often respond by watering or fertilizing,
which doesn’t solve the core issue. The rescue here is about light management: move it to a brighter spot gradually,
rotate the pot, and consider a grow light if your home doesn’t get strong sun. The stretched shape won’t magically revert,
but new growth can come in healthier and sturdier once the plant gets enough light.
The Pest Surprise (a.k.a. “Why Is My Cactus Wearing Cotton?”)
Mealybugs tend to show up when a cactus is already stressedlike after inconsistent watering or poor airflow. The good news:
for small infestations, hands-on control works. A few minutes with a cotton swab and rubbing alcohol, plus repeat checks,
can make a big difference. The key “experience lesson” is consistency: pests rarely disappear after one treatment.
Plan on follow-ups, isolate the plant, and keep the cactus in conditions that support recovery (bright light, good drainage,
appropriate watering). When the plant is healthier, pests have a harder time taking over.
The Takeaway: Cactus CPR in One Sentence
To save a dying cactus, diagnose first, then fix the root zone: bright light, fast drainage, and watering only when dry.
Most cactus problems aren’t mysteriousthey’re moisture and light problems wearing a disguise.


