Table of Contents >> Show >> Hide
If you’ve ever balanced on a wobbly step stool, stretching with a flashlight in your teeth to peek into the mysterious void above your ceiling, you already know why a proper attic access is worth the effort. Opening up an attic access gives you safer, easier entry for storage, inspections, insulation upgrades, or even future remodeling projects.
But cutting a hole in your ceiling and messing with joists is not a “let’s wing it on Saturday afternoon” kind of DIY. Done right, you’ll meet building code requirements, keep your home’s structure intact, and avoid turning your hallway into a wind tunnel every winter. This guide walks you through how to plan, frame, and finish an attic access (with or without a pull-down ladder), plus tips to insulate and air-seal it like a pro.
Before You Cut: Safety, Codes, and Planning
Know when an attic access is required
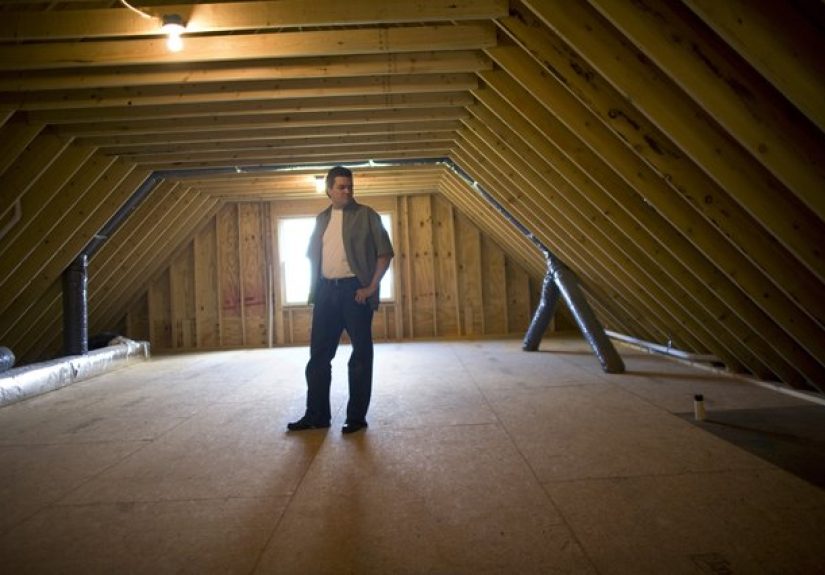
In most U.S. homes with combustible roof or ceiling framing, building codes require an attic access opening if the attic is at least about 30 square feet and at least 30 inches high. The minimum clear opening is commonly 22 inches by 30 inches, with at least 30 inches of headroom above the opening so a human can actually get through it without learning advanced yoga poses.
The access must be in a “readily accessible” location. Translation: you shouldn’t have to unload a closet full of holiday decorations just to pop the hatch. A hallway, main closet with simple access, or even a laundry room ceiling often works well.
Pick the right location
Once you know you’re allowed (or required) to have attic access, the next step is picking a spot that makes sense structurally and practically:
- Look for clear floor space below. You need room for a step ladder or for a pull-down ladder to open fully without hitting walls, doors, or your favorite bookcase.
- Avoid HVAC ducts, big bundles of wiring, or plumbing. You don’t want to cut into anything expensive, dangerous, or full of water.
- Check the framing direction. Ideally, your opening fits between joists so you don’t have to cut structural members. If you do need to cut, you’ll have to add framing headers to carry the load safely.
- Watch out for trusses. If your attic is framed with factory-built roof trusses (those repetitive triangle assemblies), do not cut their bottom chords without a structural engineer or qualified contractor guiding you. Trusses are engineered systems, and random cuts can cause sagging or even structural failure.
Decide when to call a pro
This project lives in the gray zone between experienced DIY and “maybe I should get someone with a license.” Consider hiring a carpenter or contractor if:
- Your ceiling framing is trussed and there’s no opening space between members.
- You’re uncomfortable with structural framing or are unsure what you’re looking at.
- The attic contains major mechanicals (furnace, air handler, big junction boxes), and you’re worried about clearances.
- Your local jurisdiction requires a permit for modifying structural members or installing an attic ladder.
Choose Your Attic Access Style
There’s more than one way to open up the attic. The right choice depends on how often you’ll use it and how much headroom and floor space you have below.
1. Simple attic hatch
A basic attic hatch is just a framed opening with a removable or hinged panel. You use a separate ladder or step stool to get in. This is the easiest, least expensive option and works well for attics used mostly for inspections, occasional storage, or accessing wiring.
2. Pull-down attic ladder
A pull-down ladder unit combines a framed hatch with an integrated folding or telescoping ladder. You tug a cord, unfold the ladder, and climb up. This is perfect if you’re accessing the attic frequently for storage or maintenance. It does, however, require a longer opening and more floor clearance below, so measure carefully before you buy.
3. Oversized access for future projects
If you’re dreaming about finishing the attic someday, consider going a bit larger or locating the opening in a place where a future staircase could go. You don’t have to build the full stair now, but planning ahead can save you from reworking everything later.
Tools and Materials You’ll Typically Need
- Stud/joist finder and measuring tape
- Pencil, straightedge, and chalk line
- Drywall saw or oscillating multi-tool
- Reciprocating saw or circular saw (for framing members, if necessary)
- 2x lumber for headers and framing
- Deck screws or structural screws
- Pull-down attic ladder unit (if using) or plywood for hatch panel
- Weatherstripping (foam tape or gasket)
- Rigid foam board or fiberglass insulation for the hatch
- Finish trim, caulk, and paint
- Safety gear: eye protection, dust mask or respirator, gloves, and a stable ladder
Always follow the manufacturer’s instructions if you’re installing a ladder kit. Those dimensions and clearances are not suggestionsthey’re the difference between a solid installation and a terrifying slide.
Step-by-Step: How to Open Up an Attic Access
Step 1: Locate joists and mark your opening
- Find the joists. Use a stud finder to locate joists in the ceiling and mark their direction. Attic joists usually run parallel and evenly spaced.
- Lay out the opening size. For a simple hatch, 22 x 30 inches is a common minimum. For a pull-down ladder, use the manufacturer’s rough opening dimensions (for example, 22.5 x 54 inches).
- Confirm from the attic side. If you already have some form of access, peek from above to make sure there are no hidden wires, ducts, or pipes where you plan to cut. Move the layout if needed.
- Check clearances below. Make sure doors can still open and people can walk under or around the ladder when it’s deployed.
Step 2: Cut a test hole and inspect
Before committing to a full cutout, start small:
- Cut a small inspection hole inside your layout lines using a drywall saw.
- Look inside with a flashlight for wiring, plumbing, or surprises like old knob-and-tube electrical or abandoned framing.
- If everything looks clear, you’re good to continue. If not, adjust your location before making bigger cuts.
Step 3: Cut the full ceiling opening
- Score along your layout lines with a utility knife to reduce ceiling paper tear-out.
- Use a drywall saw or oscillating tool to cut along the lines. Work slowly and keep the blade shallow so you’re not stabbing blindly into anything above.
- Support the drywall piece with one hand (or a helper) as you finish cutting to prevent it from crashing down.
At this point, you’ve got a rough opening through the drywallbut the framing may still need modification to support the new access.
Step 4: Frame the opening and add headers
Framing is what keeps your ceiling from sagging around the hatch. The exact method depends on whether the opening fits between joists or requires cutting one or more joists.
If the opening fits between joists
This is the easy version:
- Use 2x lumber to form a rectangular frame inside the opening, attaching directly to the existing joists with screws or nails.
- Make sure the frame is square and level; shim as needed.
- The inside dimensions of this frame should match either your hatch size or the ladder kit’s rough opening.
If you must cut a joist
Cutting a joist can be done safely, but only if you properly transfer the load:
- Install headers first. Before cutting the joist, add doubled 2x headers between the neighboring full-length joists at each end of the planned cut.
- Connect the cut joist ends. Once the headers are in place and securely fastened, cut the joist in the middle of the opening and attach each cut end to the headers.
- Use structural fasteners. Deck or structural screws, joist hangers, or nail patterns meeting local code should be useddon’t rely on a couple of random drywall screws.
If your ceiling is framed with trusses, do not cut the bottom chords or web members without professional guidance. The safest move in that case is usually to locate the opening between trusses instead of through them.
Step 5: Install the hatch or ladder unit
Installing a simple hatch panel
- Cut a piece of 1/2- or 3/4-inch plywood slightly smaller than the framed opening (so it can lift in and out easily) or hinge it on one side.
- Finish the underside with drywall or paint to match the ceiling if you want a cleaner look.
- Add a small handle or pull ring so the hatch is easy to open.
Installing a pull-down attic ladder
Follow the manufacturer’s instructions closely, but the general process looks like this:
- With helpers, lift the folded ladder assembly into the opening from below or above.
- Rest the unit on temporary supports or shims so its frame sits flush with the finished ceiling.
- Square the frame, then fasten it to the surrounding framing using the recommended screws or lag bolts.
- Unfold the ladder, trim the bottom section to match your floor height if required, and add non-skid feet.
- Test it several times, making sure it opens smoothly, locks securely, and doesn’t flex or shift.
Step 6: Insulate and air-seal the attic access
Left untreated, an attic hatch is basically a built-in energy leak. Warm air in winter and cool air in summer love to escape through that opening. To fix that:
- Add insulation to the hatch. Attach rigid foam board or batt insulation to the top of the hatch or ladder door. Aim for an R-value similar to your attic’s ceiling insulation.
- Install weatherstripping. Apply adhesive foam gasket or weatherstripping around the frame so the hatch or ladder door compresses slightly when closed. That helps block air leaks and dust.
- Use latches if needed. For hinged doors or lightweight panels, simple hook-and-eye latches or cam clamps can pull the hatch tight against the gasket.
- Contain loose-fill insulation. If your attic has blown-in insulation, build a low “insulation dam” (a raised frame) around the opening to keep it from spilling into the house every time you open the hatch.
Good air-sealing and insulation around the access can dramatically reduce drafts and help your HVAC system work less hard, especially in extreme climates.
Common Mistakes to Avoid
- Cutting structural members without proper framing. Never cut joists or truss members and just “hope the ceiling is fine.” Always install headers and supports or consult a pro.
- Ignoring building codes. Minimum opening sizes, headroom clearances, and insulation requirements exist for a reasonsafety and comfort. Skipping them can cause inspection headaches later.
- Leaving the hatch uninsulated. A bare sheet of drywall or plywood over your attic is like an open window for heat loss.
- Forgetting about clearances. A pull-down ladder that hits a wall, cabinet, or door makes the whole project pointless (and a little comedic).
- Using an underrated ladder. Make sure the ladder’s weight rating is high enough for the heaviest person plus the stuff they’re carrying.
Maintenance and Safety Tips
Once your attic access is in place, a little maintenance keeps it safe and efficient:
- Inspect the ladder hardware annually for loose bolts, worn springs, or cracked treads.
- Re-check weatherstripping every year or two; replace it if it’s crushed, brittle, or peeling.
- Touch up paint or caulk to keep the opening neat and draft-free.
- Remind kids that the ladder is not a toy. (Yes, it’s tempting. No, it’s not a playground feature.)
- When climbing, always face the ladder, keep three points of contact, and avoid carrying overly bulky items that block your view.
Real-World Experience: What It’s Really Like to Open Up an Attic Access
On paper, opening up an attic access looks like a tidy checklist of steps. In real homes, it feels more like a mini adventurea mix of detective work, carpentry, and a surprising amount of dust.
Expect surprises above the ceiling. Homeowners often discover “vintage” wiring, abandoned plumbing vents, or extra-creative framing decisions made by past builders. That’s why the inspection hole step is so important. One homeowner planned a ladder right in the hallway, only to find a huge bundle of low-voltage wires sitting exactly where the opening needed to go. Moving the layout by just a foot saved hours of rewiring.
Measure three times, then measure again with the ladder box. A common rookie mistake is trusting the numbers on paper and forgetting about trim, casing, or nearby doors. People who have done this a few times always bring the actual ladder unit into the space, mark out its footprint on the floor, and swing an imaginary ladder down to check clearances. It looks a little silly, but it beats returning a ladder or patching drywall.
Framing takes longer than cutting. Most DIYers think the dramatic part is slicing through the ceiling, but the real time goes into careful framing. Getting headers tight and square, shimming the opening so the ladder box sits perfectly level, and driving what feels like 10,000 screws is where the hours disappear. It’s also the part that determines whether your finished access feels solid or “kind of bouncy.”
Two extra hands are worth their weight in gold. Technically, a very determined person can hoist a ladder unit into place solo. Practically, it’s a lot safer and simpler with at least one helper. Experienced installers often rig temporary supportslike 2x scraps screwed across the openingto hold the ladder box from below while they fine-tune the position. That simple trick turns a wrestling match into a controlled installation.
Air sealing is the “quiet hero” of the project. People tend to obsess over the ladder brand or the style of trim and then treat weatherstripping as an afterthought. But homeowners who’ve upgraded a leaky hatch usually notice the difference right away: fewer drafts in the hallway, more consistent temperatures, and sometimes even lower energy bills. A thick foam gasket, a snug fit, and decent insulation on the hatch often matter more day-to-day than the ladder style itself.
There’s a comfort factor you don’t appreciate until it’s done. Once the new access is in, chores that used to feel annoyinglike checking for roof leaks after a storm or storing holiday decorationssuddenly become routine. Instead of balancing on a rickety ladder in a cramped closet, you just pull the cord, drop the ladder, and climb up. Many homeowners say that after adding a good attic access, they feel more “in control” of their house. The attic stops being a mysterious void and becomes just another manageable part of the home.
Finally, don’t rush the finishing details. Caulk the trim, paint the hatch to match the ceiling, and tidy up any scuffs. Those last 5–10% of the project are what make the access look like it’s always been there instead of a recent hack. When friends ask, “Did the builder put that in?” you’ll know you did it right.
Done thoughtfully, opening up an attic access is a one-time project that pays you back for years in convenience, safety, and energy savings. Take your time planning, lean on local codes and manufacturer instructions, and don’t be afraid to call in a pro for the structural parts. Your future selfwith both feet on a sturdy ladder instead of on a wobbly chairwill be thankful.


