Table of Contents >> Show >> Hide
- What Is Breastmilk Soap?
- Is Breastmilk Soap Safe?
- Supplies You Will Need
- Recipe 1: Easy Melt-and-Pour Breastmilk Soap
- Recipe 2: Cold-Process Breastmilk Soap Bars
- Should You Add Essential Oils?
- Can You Use Expired Breastmilk?
- Common Mistakes to Avoid
- How to Use Breastmilk Soap
- Troubleshooting Breastmilk Soap
- Real-Life Experience: What Making Breastmilk Soap Is Actually Like
- Conclusion
Breastmilk soap sounds like something invented by a tired parent at 2:17 a.m. while holding a baby, a bottle, and a dream. But it is real, surprisingly charming, and a practical way to use extra expressed milk that you do not want to waste. For many families, breastmilk feels too precious to pour down the sink, even when it is past the point of feeding. Turning it into soap can feel like giving that “liquid gold” one more useful life.
This guide explains how to make breastmilk soap at home with two recipes: a beginner-friendly melt-and-pour version and a more traditional cold-process breastmilk soap recipe. The first is simple and fast, while the second creates a longer-lasting bar through saponification, the chemical reaction that turns oils and lye into real soap. Think of it as the difference between assembling a sandwich and baking bread from scratch. Both can be satisfying, but one asks you to put on safety goggles.
Before we roll up our sleeves, one important note: breastmilk soap is not medicine. It should not be used to treat eczema, diaper rash, infection, acne, or any skin condition without guidance from a pediatrician or dermatologist. It is also not sterile once mixed into soap ingredients. Use clean tools, fresh or properly stored milk, and common sense. If a bar smells sour, grows spots, feels slimy, or looks suspicious, send it directly to the trash. It had a good run.
What Is Breastmilk Soap?
Breastmilk soap is homemade soap that uses expressed human milk as part of the liquid or additive. In cold-process soap, breastmilk replaces some or all of the water used to dissolve sodium hydroxide, also known as lye. During curing, the oils and lye complete the saponification process, creating a firm cleansing bar. In melt-and-pour soap, breastmilk is stirred into a pre-made soap base, which is easier but less shelf-stable because the milk is not being fully transformed in the same way.
Many parents make breastmilk soap for sentimental reasons. A small batch can become a keepsake from the breastfeeding season, a gentle hand soap for adults, or a thoughtful homemade gift for close family. Some people like it because milk soaps can feel creamy on the skin. Breastmilk contains fats, sugars, proteins, and other components, but the soapmaking process changes ingredients, especially in cold-process recipes. So while the idea is sweet, avoid promising miracle skin benefits. The best promise is simple: a handmade bar with a story behind it.
Is Breastmilk Soap Safe?
Breastmilk soap can be safe when made carefully, stored properly, and used only on healthy, unbroken skin. However, there are three big safety points to understand before starting.
1. Use properly handled breastmilk
For soapmaking, start with milk that was expressed and stored cleanly. Freshly expressed milk should be used, refrigerated, or frozen according to safe storage guidelines. If your milk smells rancid, was left out too long, or came from a container you are unsure about, do not use it for soap. Soap is not a magical time machine. It will not turn questionable milk into a spa product.
2. Melt-and-pour soap with fresh milk has a short life
Melt-and-pour soap is popular because it avoids handling lye. The base has already been made; you simply melt it, add extras, and pour it into molds. The catch is that fresh ingredients such as breastmilk can shorten the shelf life. If you choose this method, make a small batch, keep the recipe simple, let the bars dry well, store them in a cool, dry place, and use them quickly. For a longer-lasting bar, cold-process soap is the better choice.
3. Cold-process soap requires serious lye safety
Lye is caustic before it reacts with oils. It can burn skin and eyes, damage surfaces, and create strong fumes when mixed with liquid. Wear goggles, gloves, long sleeves, and work in a well-ventilated area away from children and pets. Always add lye slowly to the frozen milk or liquid, never the other way around. Measure by weight, not by “close enough,” because soapmaking is chemistry wearing an apron.
Supplies You Will Need
Before making either recipe, gather your tools. Having everything ready keeps the process calm and prevents the classic kitchen panic known as “Where did I put the spatula?”
For the Melt-and-Pour Recipe
- Fragrance-free melt-and-pour soap base, preferably a gentle baby-friendly or goat milk style base
- Properly stored breastmilk
- Microwave-safe glass measuring cup or double boiler
- Silicone soap mold
- Clean spoon or silicone spatula
- Colloidal oatmeal or finely ground oats, optional
- Rubbing alcohol in a spray bottle, optional, for reducing bubbles
For the Cold-Process Recipe
- Digital kitchen scale
- Safety goggles, gloves, long sleeves, and mask
- Heat-safe plastic or stainless steel containers
- Stick blender used only for soapmaking
- Silicone spatula
- Soap mold
- Thermometer
- Freezer space for breastmilk cubes
- Distilled white vinegar nearby for surface cleanup only, not for skin exposure
Recipe 1: Easy Melt-and-Pour Breastmilk Soap
This recipe is best for beginners who want a simple breastmilk soap without handling lye. It is quick, cute, and easy to customize. Because fresh milk can reduce shelf life, make a small batch and use the bars soon. This is ideal for a keepsake soap or a gentle adult hand soap, not a product to sell or store for months.
Ingredients
- 8 ounces fragrance-free melt-and-pour soap base
- 1 tablespoon fresh or thawed breastmilk
- 1 teaspoon colloidal oatmeal or finely ground oats, optional
- 1/2 teaspoon coconut oil, olive oil, or sweet almond oil, optional
Instructions
- Clean your workspace. Wash your hands, wipe the counter, and make sure your mold and utensils are clean and dry.
- Cut the soap base. Slice the melt-and-pour base into small cubes so it melts evenly.
- Melt gently. Place the cubes in a microwave-safe glass cup and heat in 15- to 20-second bursts, stirring between each round. Do not boil the base. A double boiler also works.
- Cool slightly. Let the melted base cool for a minute or two. If it is extremely hot, it may affect the milk and create an unpleasant smell.
- Add breastmilk. Stir in 1 tablespoon of breastmilk. Keep the amount small so the bar can still set properly.
- Add oatmeal or oil. Stir in optional oatmeal for a soft, creamy texture. If using extra oil, use only a tiny amount; too much can make the bar greasy or soft.
- Pour into molds. Fill silicone molds and tap gently to release air bubbles. Spray the surface with rubbing alcohol if desired.
- Let set. Allow the soap to harden at room temperature for several hours, or place the mold in the refrigerator to firm faster.
- Unmold and dry. Remove the bars and let them dry on a rack for 24 hours before using.
Storage Tips for Melt-and-Pour Breastmilk Soap
Store these bars in a cool, dry place with airflow. Do not leave them sitting in water near the sink or tub. Use within a few weeks, and discard immediately if you notice sour odor, mold-like spots, sweating, slime, or color changes. For a longer-lasting homemade breastmilk soap, use the cold-process recipe below.
Recipe 2: Cold-Process Breastmilk Soap Bars
Cold-process breastmilk soap is the more advanced recipe, but it creates a true soap bar with better longevity. In this method, frozen breastmilk is used as the liquid for the lye solution. Freezing helps keep the milk from overheating and scorching. Milk contains natural sugars, and sugars can heat up quickly when mixed with lye, so slow and cool is the name of the game.
This recipe makes about six small bars. All measurements are by weight. Do not substitute oils or change quantities without running the recipe through a soap calculator, because each oil requires a different amount of lye.
Ingredients
- 10 ounces olive oil
- 6 ounces coconut oil
- 2 ounces shea butter
- 5.1 ounces frozen breastmilk cubes
- 2.55 ounces sodium hydroxide lye
- 1 tablespoon colloidal oatmeal, optional
Safety Setup
Put on goggles, gloves, long sleeves, and closed-toe shoes. Work near an open window or in a well-ventilated area. Keep children, pets, snacks, and curious partners away from the soapmaking zone. Use containers that are safe for lye, such as stainless steel or sturdy heat-safe plastic. Avoid aluminum because lye can react with it.
Instructions
- Freeze the milk. Pour breastmilk into an ice cube tray and freeze overnight. Small cubes melt more evenly when lye is added.
- Measure everything by weight. Weigh the oils, shea butter, frozen milk, and lye separately. Accuracy matters.
- Melt the oils. Warm the coconut oil and shea butter gently until melted, then add olive oil. Let the oils cool to about 85°F to 95°F.
- Prepare an ice bath. Place the container of frozen breastmilk cubes inside a larger bowl filled with ice. This helps prevent scorching.
- Add lye slowly to frozen milk. Sprinkle a small amount of lye over the frozen milk and stir. Wait, then add more. Continue slowly until all lye is dissolved. Do not rush. The mixture may turn yellow or tan, which is normal for milk soap.
- Watch the temperature. Try to keep the milk-lye solution below 90°F. If it gets too hot, pause and let it cool.
- Combine lye solution and oils. Slowly pour the cooled lye solution into the oils.
- Blend to light trace. Use short bursts with a stick blender, alternating with hand stirring, until the batter looks like thin pudding.
- Add oatmeal. Stir in colloidal oatmeal if using.
- Pour into mold. Pour the soap batter into your mold and tap gently to release bubbles.
- Keep it cool. Milk soap can overheat, so do not heavily insulate the mold. You may place it in the refrigerator for 12 to 24 hours.
- Unmold and cut. After 24 to 48 hours, remove the soap from the mold and cut into bars.
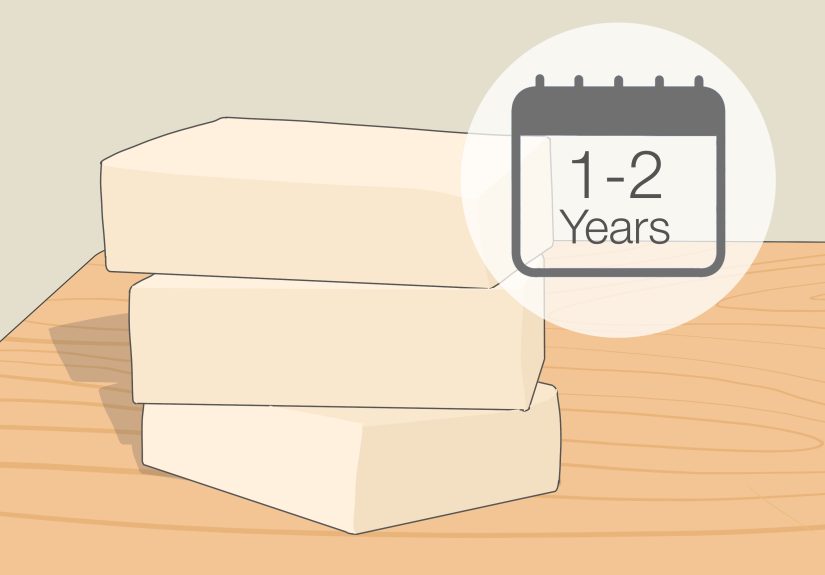
- Cure for 4 to 6 weeks. Place bars on a rack with airflow. Turn them weekly. Curing allows water to evaporate and helps create a harder, milder bar.
How to Know When Cold-Process Soap Is Ready
The bars should feel firm, dry, and mild after curing. They should not zap the tongue if you perform a traditional zap test, but beginners may prefer pH strips or simply waiting the full cure time and following a tested recipe. The soap should not smell rotten or ammonia-like. A light milky or earthy scent is normal, especially if you skip fragrance.
Should You Add Essential Oils?
For baby-related soap, the safest answer is usually: skip them. Essential oils are concentrated plant compounds, and infants have delicate skin and sensitive airways. Fragrance may smell lovely to adults, but your baby does not need lavender-scented elbows to succeed in life. If the soap is for adult use only, choose skin-safe essential oils and follow proper dilution rates. For newborns or babies with sensitive skin, fragrance-free is the better path.
Can You Use Expired Breastmilk?
Many parents wonder whether milk that is no longer ideal for feeding can be used for soap. The answer depends on why it is “expired.” Milk that was frozen longer than preferred but still smells normal may be acceptable for soapmaking. Milk that was left out too long, stored in an unclean container, repeatedly thawed and refrozen, or smells sour should not be used. Soapmaking is creative, but it should not become a science fair project with bacteria as the main character.
Common Mistakes to Avoid
Using too much breastmilk in melt-and-pour soap
Adding a splash more may feel generous, but too much liquid can make melt-and-pour soap soft, sticky, or prone to spoilage. Keep the amount small.
Overheating milk soap
Milk contains sugars, and sugars can heat up during soapmaking. If cold-process breastmilk soap overheats, it may darken, crack, smell odd, or develop a rough texture. Freeze the milk first and keep the mold cool.
Skipping the cure
Cold-process soap needs time. Four to six weeks may feel like forever when you are excited, but curing improves hardness, longevity, and mildness. Put the bars somewhere safe and pretend you are aging tiny cheese blocks, except please do not eat them.
Making medical claims
Breastmilk soap may feel gentle, but it is still soap. It cleanses; it does not diagnose, treat, or cure skin conditions. If your baby has a rash, open skin, infection, severe dryness, or eczema flare, ask a healthcare professional before trying homemade products.
How to Use Breastmilk Soap
Use breastmilk soap like any mild handmade soap. Wet the bar, lather briefly, wash, and rinse well. Avoid the eyes, mouth, and broken skin. For babies, use soap sparingly and focus on areas that actually need cleaning, such as neck folds, hands, feet, and diaper-area creases. Babies are small, adorable, and somehow able to collect lint in places adults do not even have places, but they do not need aggressive scrubbing.
After use, place the bar on a draining soap dish. Handmade soap lasts much longer when it can dry between uses. Leaving it in a puddle will turn your beautiful bar into a sad little soap swamp.
Troubleshooting Breastmilk Soap
Why did my soap turn brown?
Milk sugars can darken when heated, especially in cold-process soap. A cream, tan, or caramel color is common. To keep bars lighter, freeze the milk, add lye slowly, use an ice bath, and refrigerate the mold after pouring.
Why does my soap smell strange?
A mild cooked-milk scent can happen during cold-process soapmaking. However, a sour, rotten, or sharp unpleasant odor may mean the milk was not fresh enough, the melt-and-pour soap spoiled, or the batch overheated. When in doubt, throw it out.
Why is my melt-and-pour soap sweating?
Melt-and-pour bases contain humectants that attract moisture from the air. Added milk can make this more noticeable. Wrap fully hardened bars in breathable paper for short-term storage, keep them cool and dry, and use them quickly.
Why is my cold-process soap soft?
Soft soap may need more curing time, or the recipe may contain too much liquid or too many soft oils. Let it cure longer in a dry place with good airflow. If it remains mushy or develops an off smell, discard it.
Real-Life Experience: What Making Breastmilk Soap Is Actually Like
Making breastmilk soap at home is part craft project, part memory capsule, and part “how did I get soap batter on the cabinet handle?” adventure. The first thing many parents notice is how emotional the process can feel. Breastmilk often represents late nights, early mornings, pumping sessions in awkward places, freezer bags labeled with sleepy handwriting, and the quiet pride of feeding a baby. Using leftover milk in soap can feel less like a recipe and more like closing a chapter with a useful little keepsake.
The melt-and-pour version is usually the best place to start. It is forgiving, fast, and does not require special chemistry confidence. You can make a few bars during nap time, assuming nap time lasts longer than seven minutes, which is never guaranteed. The biggest lesson from this method is restraint. It is tempting to add extra milk, extra oil, flowers, glitter, and enough oatmeal to make breakfast jealous. Do not. Simple bars set better, smell fresher, and are less likely to become weird later. A plain, fragrance-free bar with a little breastmilk and finely ground oatmeal is often the most pleasant result.
Cold-process breastmilk soap feels more serious. It asks for preparation, patience, and respect for safety. Freezing the milk into cubes is the first smart move. When lye touches liquid, it heats quickly, and frozen cubes help slow everything down. The mixture may change color, and that can surprise beginners. Creamy milk can become yellow, tan, or even orange-brown depending on temperature. This does not automatically mean the batch failed. Milk soap is simply dramatic. It likes to make an entrance.
The most satisfying moment is cutting the cured loaf into bars. After weeks of waiting, the soap feels firm and real, like something you might find at a farmers market, except you know exactly what went into it. Many parents like to keep one bar as a memento and use the others for handwashing. Some wrap a bar in kraft paper, add a handwritten label, and tuck it into a memory box with hospital bracelets, baby photos, or the tiny socks that somehow fit for only three business days.
There are also practical lessons. First, label everything. Soapmaking tools should not return to food use, especially anything that touched lye or raw soap batter. Second, do not make huge batches until you know you like the result. Third, fragrance-free is underrated. A clean, simple breastmilk soap feels more appropriate for sensitive skin than a bar scented like a botanical thunderstorm. Finally, manage expectations. Homemade breastmilk soap can be beautiful, but it is still handmade. It may have uneven color, tiny bubbles, imperfect edges, or a rustic finish. That is part of the charm. Babies are not airbrushed either, and everyone seems fine with that.
The best experience comes from treating breastmilk soap as a thoughtful DIY project rather than a miracle product. Make it cleanly, store it wisely, use it gently, and enjoy the story behind it. Whether you choose the quick melt-and-pour method or the slow cold-process recipe, the result is a small bar with a lot of meaning. It turns extra milk into something useful, personal, and oddly satisfying. And honestly, any project that transforms freezer clutter into a handmade soap bar deserves a tiny round of applause.
Conclusion
Learning how to make breastmilk soap is a creative way to use extra expressed milk while making something personal and practical. The melt-and-pour recipe is the easiest choice for beginners, but it should be made in small batches and used quickly. The cold-process recipe takes more time and requires careful lye safety, but it creates a longer-lasting handmade soap bar after a proper cure.
For best results, use clean tools, properly stored milk, simple ingredients, and fragrance-free formulas. Avoid using homemade soap on broken skin, irritated rashes, or medical skin conditions. When made with care, breastmilk soap can be a sweet keepsake from the breastfeeding journey and a gentle reminder that parenting turns even leftovers into something meaningful.


