Table of Contents >> Show >> Hide
- What Is a Simple Electrical Circuit?
- Safety First: Important Rules Before You Start
- Tools and Materials You’ll Need
- How to Make a Simple Electrical Circuit: 14 Steps
- Fun Variations and STEM Project Ideas
- Common Mistakes When Building a Simple Electrical Circuit
- Real-World Experiences and Practical Tips (Extra )
- Wrapping Up
Want to understand how the lights in your room, your phone charger, and your game console all magically come to life? Start small: build a simple electrical circuit. It’s one of the easiest and most satisfying science projects you can do at home or in the classroom.
In this guide, you’ll learn what an electric circuit is, how it works, and how to build a basic circuit with a battery, wires, a light bulb or LED, and a simple switch. We’ll break everything into 14 clear steps, include ideas for what each picture could show, and finish with real-world tips and “lessons learned” from beginners who try this for the first time.
We’ll stay with safe, low-voltage battery power only. No wall outlets, no extension cords, no wild experiments involving your toaster. Just science, curiosity, and a tiny bit of electrical magic.
What Is a Simple Electrical Circuit?
A basic electrical circuit is a closed loop that lets electric current flow from a power source, through a path, to something that uses the energy, and back again. If the loop is broken, the current stops and nothing works.
Most simple circuits include four main parts:
- Power source: Usually a battery (AA, AAA, 9-volt, or a battery pack).
- Conductive path: Wires or metal strips that allow current to travel.
- Load (device): Something that uses electricity, such as a light bulb, LED, buzzer, or small motor.
- Control element: A switch that opens (off) or closes (on) the circuit.
If all of these are connected correctly, you get a working circuit. If one connection is loose or reversed, you get a very scientific result called “nothing happens.”
Picture idea: A simple diagram showing a battery, two wires, a bulb, and a switch in a loop with arrows showing the direction of current flow.
Safety First: Important Rules Before You Start
Even with small batteries, good habits matter. Many electronics and safety organizations recommend a few basic rules when working with circuits:
- Use only batteries for this project. Do not use wall outlets or mains electricity.
- Make sure your battery voltage is appropriate for your components (for example, a small LED usually works well between 3 and 9 volts with a resistor).
- Never connect the two ends of a battery directly together with just a wire (that’s a short circuit and can make wires hot or damage the battery).
- Keep metal jewelry and other metal objects away from bare wires and battery terminals.
- Always disconnect the battery before changing your circuit.
- If kids are building the circuit, an adult should help with stripping wires and checking connections.
Picture idea: A photo of a clean workspace: battery, wires, bulb holder, and switch laid out neatly, with safety glasses nearby.
Tools and Materials You’ll Need
You don’t need a full electronics lab. A simple circuit can be built with items often used in classroom science projects or starter electronics kits:
- 1 battery (AA, AAA, C, D, or a 9-volt battery)
- 2–3 insulated wires with the ends stripped (about 1/2 inch or 1–2 cm of copper exposed)
- 1 small light bulb in a bulb holder or a low-voltage LED plus a suitable resistor
- 1 switch (toggle switch, push-button, or a homemade “paperclip” switch)
- Electrical tape or masking tape
- Optional: a small breadboard (the plastic board with lots of tiny holes) to make neat, tool-free connections
If you are using an LED, you should also use a resistor to prevent too much current from flowing and burning out the LED. A common choice is around 220–470 ohms for a small battery-powered circuit.
Picture idea: Overhead shot of all the materials labeled: battery, wires, bulb, LED, resistor, switch, tape.
How to Make a Simple Electrical Circuit: 14 Steps
Ready to build? Here is a step-by-step walkthrough. You can use a small bulb in a holder or an LED with a resistor. The idea is the same: battery → wire → load → wire → back to battery.
-
Step 1: Clear your workspace
Pick a flat, dry surface like a table or desk. Remove drinks, metal clutter, and anything that could get in the way. Good lighting helps you see tiny details on wires and battery markings.
Picture idea: A student clearing a desk and placing only the project materials on it.
-
Step 2: Inspect your battery
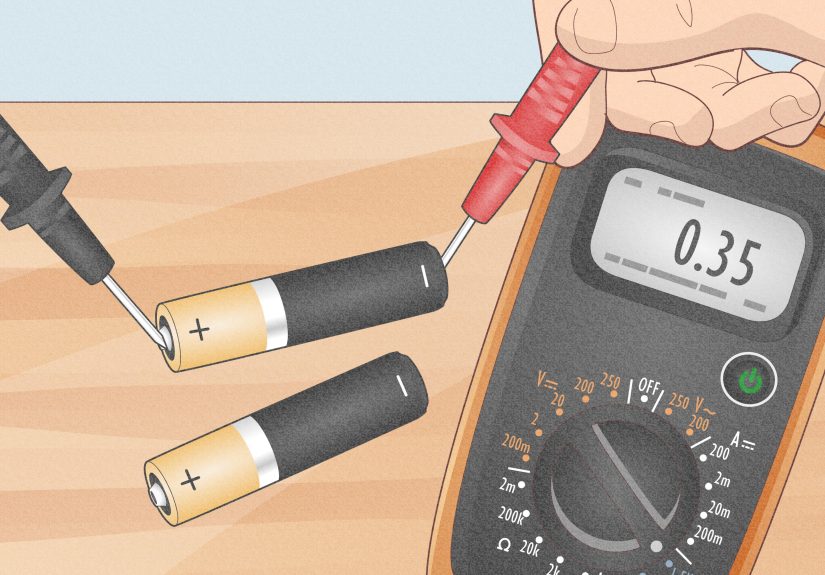
Find the positive (+) and negative (–) ends of the battery. These markings are usually printed on the casing. If you’re using a 9-volt battery, the smaller terminal is typically positive and the larger one is negative.
Picture idea: Close-up of a battery with the + and – symbols highlighted.
-
Step 3: Prepare your wires
If your wires are insulated, strip about 1/2 inch (1–2 cm) of plastic off each end so the copper is exposed. Twist the copper strands so they don’t fray. If you bought pre-stripped jumper wires, you can skip this.
Picture idea: Hands using a wire stripper to remove insulation from the end of a wire.
-
Step 4: Connect the first wire to the battery
Take one wire and connect it to the negative (–) terminal of the battery. You can hold it in place with a battery snap connector, tape, or a battery holder. Make sure the copper touches the metal terminal firmly.
Picture idea: Wire taped securely to the negative side of a battery.
-
Step 5: Connect the load (bulb or LED)
Attach the free end of that same wire to one side of your load:
- If it’s a bulb, connect the wire to one screw terminal or contact on the bulb holder.
- If it’s an LED with a resistor, connect the wire to one leg of the resistor, and the other leg of the resistor to the shorter leg of the LED (the negative side).
Picture idea: Diagram showing a wire from the battery’s negative terminal going to a bulb holder or resistor–LED combination.
-
Step 6: Add the second wire to the load
Now connect a second wire to the remaining terminal of the bulb holder or the longer leg of the LED (the positive side). This wire will go toward the battery’s positive terminal, but we’ll put a switch in between.
Picture idea: Close-up of the second wire connected to the other side of the bulb or LED.
-
Step 7: Prepare your switch
If you have a commercial switch, identify its two terminals. If you’re making a homemade switch, you can:
- Attach two paper fasteners (brads) to a piece of cardboard.
- Use a metal paperclip that can touch both brads when pushed down (closed) and move away when lifted (open).
Picture idea: A simple DIY paperclip switch mounted on a cardboard strip.
-
Step 8: Connect the switch into the circuit
Attach the free end of the second wire (from the load) to one terminal of the switch. Tape or screw it down securely so it doesn’t wobble or fall off.
Picture idea: Wire attached to one side of a toggle switch or one brad of the paperclip switch.
-
Step 9: Run the final wire back to the battery
Take a third wire. Connect one end to the other terminal of the switch. Connect the other end of that wire to the positive (+) terminal of the battery. Double-check that all connections are tight.
Picture idea: A complete loop now visible: battery → wire → load → wire → switch → wire → back to battery.
-
Step 10: Close the switch and test
Now the exciting part. Turn your switch to the “on” position or press your homemade paperclip down so it touches both connectors. If everything is wired correctly, the bulb should light up or the LED should glow.
Picture idea: A glowing bulb or LED with a smiling student in the background.
-
Step 11: Troubleshoot if nothing happens
If your bulb does not light:
- Check that the battery is fresh.
- Make sure every wire has solid metal-to-metal contact.
- Verify the LED direction: the longer leg should be toward the battery’s positive side.
- Inspect wires for breaks or loose tape.
Picture idea: A “troubleshooting” collage: checking connections, flipping LED direction, swapping batteries.
-
Step 12: Draw a simple circuit diagram
Once the circuit works, sketch a simple diagram using standard symbols: a cell or battery symbol, a resistor (if using an LED), a lamp symbol, and a switch. Draw them in a loop and label the direction of current.
Picture idea: Hand-drawn circuit diagram next to the actual built circuit.
-
Step 13: Try different loads and positions
Swap your bulb for a buzzer or a tiny motor (rated for the same voltage). You can also move the switch to a different part of the loop. As long as the loop remains closed, the circuit will still work.
Picture idea: A buzzer or small motor connected instead of the original bulb.
-
Step 14: Explore series and parallel ideas
When you are comfortable with one load, add a second bulb:
- Series: Bulbs are placed one after another in the loop. They may be dimmer because they share the battery voltage.
- Parallel: Each bulb has its own branch connected across the battery. They are usually brighter and independentif one fails, the other can stay on.
Picture idea: Two drawings side by side: bulbs in series vs. bulbs in parallel, with brightness indicated.
Fun Variations and STEM Project Ideas
Once you can build a basic circuit with your eyes almost closed (please don’t actually close them), you can turn the same idea into creative STEM projects:
- Flashlight tube: Build a small “flashlight” using a cardboard tube, a battery, a bulb or LED, and a switch.
- Quiz board: Put questions and answers on cardboard. When you connect the correct pair with wires, a light turns on.
- Potato or lemon battery: Use fruits or vegetables as part of the power source and connect them to your simple circuit.
- Light-up greeting card: Hide a flat battery and an LED inside a birthday or holiday card so it glows when opened.
All of these projects still rely on the same basic idea: a closed loop, a safe power source, and a load that uses electrical energy.
Common Mistakes When Building a Simple Electrical Circuit
Beginners often bump into the same issues. Knowing them now can save you time later:
- Short circuiting the battery: Connecting the positive and negative terminals directly with a wire and no load. Avoid this; always include a bulb, LED, or resistor.
- Loose connections: Wires just barely touching a terminal can break contact easily. Twist, clamp, or tape them firmly.
- Reversed LED: Unlike a bulb, an LED is directional. If it does not light, flip it around.
- Using the wrong voltage: A tiny bulb rated for 1.5 volts might burn out on a 9-volt battery. Check component ratings when possible.
- Forgetting to turn power off when adjusting: Make a habit of disconnecting the battery before rearranging wires.
These mistakes aren’t failures; they’re part of learning how real circuits behave.
Real-World Experiences and Practical Tips (Extra )
People who build their first simple electrical circuit usually walk away with more than a glowing bulb. They gain confidence with hands-on problem-solving and a better feel for how everyday gadgets work. A common pattern goes like this: at first, everything seems mysterious. After following a clear step-by-step process, suddenly one tiny light flicks onand the “aha!” moment kicks in.
One practical insight beginners often discover is just how important physical connection quality is. On paper, a circuit diagram looks clean and perfect. In real life, wires bend, tape loosens, and metal surfaces may be slightly dirty or oxidized. Many first-time builders assume their diagram is wrong when, in fact, all they need is a better twist on a wire or a firmer press on a battery terminal. This teaches a valuable lesson: theory matters, but execution matters just as much.
Another common experience involves troubleshooting mindset. When a light does not turn on, some people feel frustrated, while others treat it like a puzzle. The most successful approach is systematic: change only one thing at a time. For example, first check the battery by trying a different one. Then check the LED direction. Then inspect each connection. This step-by-step debugging process is the same approach used by professional electricians and engineers when they diagnose problems in much more complex systems.
Beginners also quickly realize why safety rules are emphasized even with small batteries. While low-voltage circuits are generally safe, accidentally shorting a battery can make wires warm, drain the battery quickly, or damage components. People who develop a habit of disconnecting power before making changes are later better prepared if they advance to higher-voltage projects. Good safety habits formed now can stick for a lifetime.
In classroom or group settings, building a simple circuit becomes a social learning experience. Some learners naturally gravitate toward reading the diagram, others are happiest holding parts, and a few love testing switches and exploring “what happens if we move this here?” This division of roles mirrors real engineering teams, where people specialize in planning, building, testing, and documenting. Teachers and group leaders often notice that even students who are not usually excited about science open up when they see a bulb light up because of their own hands-on work.
Another experience many people share is the surprise that the same basic circuit idea appears everywhere. After building a simple loop with a battery and a bulb, it becomes easier to imagine what might be inside a flashlight, a string of holiday lights, or a basic toy. Once someone learns about series and parallel circuits, they start to guess how multiple bulbs are wired in real devices. That curiosity can lead them to explore more advanced topics like resistors, capacitors, and microcontrollers later on.
Finally, building a simple circuit is often a first step into the broader world of DIY electronics. After this project, many beginners want to add sound with buzzers, motion with motors, or logic with small boards like microcontrollers. The key experience that carries forward is the feeling of control: they are no longer just pressing a button on a finished device, but understanding and shaping how electricity moves. That shiftfrom passive user to active creatoris one of the biggest long-term benefits of learning how to make a simple electrical circuit.
Wrapping Up
Making a simple electrical circuit is more than a one-time science project. It is a doorway into understanding how modern life is powered. With a battery, a few wires, a load, and a switch, you can see the invisible flow of electrons turn into light, sound, or motion.
Follow the 14 steps, use the picture ideas to guide your setup, and do not worry if it does not work perfectly on the first try. Every adjustment teaches you something new about how circuits behave. Today it is one bulb and a batterytomorrow it might be your first robot, custom lamp, or home-built gadget.


