Table of Contents >> Show >> Hide
- What Is Multiflora Rose and Why Is It a Problem?
- How to Identify Multiflora Rose
- Where Multiflora Rose Usually Shows Up
- How to Remove Multiflora Rose
- A Practical Step-by-Step Removal Plan (That Real People Can Actually Follow)
- What Not to Do
- Disposal and Cleanup After Removal
- How to Keep It From Coming Back
- Experience-Based Notes (500+ Words): What Removal Usually Feels Like in Real Life
- Conclusion
If you’ve ever walked into what looked like a harmless shrub patch and walked out feeling like you lost a fencing match, there’s a decent chance you met multiflora rose. This thorny invader can form dense, tangled thickets that crowd out native plants, block trails, and make pastures harder to use. The tricky part? At first glance, it can look like “just another wild rose.”
The good news: once you know what to look for, multiflora rose becomes much easier to spot. The better news: it can be controlled with a smart combination of timing, persistence, and the right removal method. In this guide, you’ll learn how to identify multiflora rose accurately, avoid common mistakes, and remove it using mechanical and chemical strategies that actually work.
What Is Multiflora Rose and Why Is It a Problem?
Multiflora rose (Rosa multiflora) is a thorny, arching shrub introduced to the U.S. for ornamental use, erosion control, wildlife cover, and “living fence” plantings. It later spread aggressively across many states and is now considered invasive in many regions.
Why homeowners, land managers, and gardeners care:
- It forms dense, nearly impenetrable thickets.
- It crowds out native grasses, wildflowers, and young trees.
- It spreads by both seed and by canes that root when they touch soil.
- Birds and mammals spread the hips (fruit), which helps it travel far beyond where it was planted.
- Seeds can remain viable in the soil for years, which is why one-time removal usually isn’t enough.
Translation: this is not a “weekend and done” weed. It’s more of a “let’s make a plan and win by persistence” weed.
How to Identify Multiflora Rose
Correct ID matters because native roses support wildlife and pollinators, while multiflora rose often overwhelms habitats. Here’s how to tell them apart.
1) Look for the Signature Fringed Stipules
This is the best clue and the one many people miss. At the base of each leaf stalk (where the leaf meets the stem), multiflora rose has a pair of fringed or bristly structures called stipules. They look a little like tiny combs or eyelashes.
If you remember only one identification feature, make it this one. Many extension resources note that the fringed stipule is the easiest way to distinguish multiflora rose from many native roses.
2) Check the Leaves
Multiflora rose has compound leaves with 5 to 11 toothed leaflets (often 7 to 9). The upper surface is usually greener and smoother, while the underside may be paler and somewhat hairy.
Quick leaf checklist:
- Alternate leaves on the stem
- Pinnately compound
- Usually 7–9 leaflets
- Toothed edges
- Fringed stipules at the leaf base
3) Notice the Growth Habit
Multiflora rose is typically a multi-stemmed, arching shrub with long canes and lots of stiff, curved thorns. It often looks broader than it is tall, and older canes may bend back to the ground and root at the tips.
In many sites, it forms a tangled “wall” that can be 10 feet or more tall and even wider. If your first thought is “This plant is trying to start a thorn kingdom,” you’re probably in the right neighborhood.
4) Look at Flowers and Fruits (Seasonal Clues)
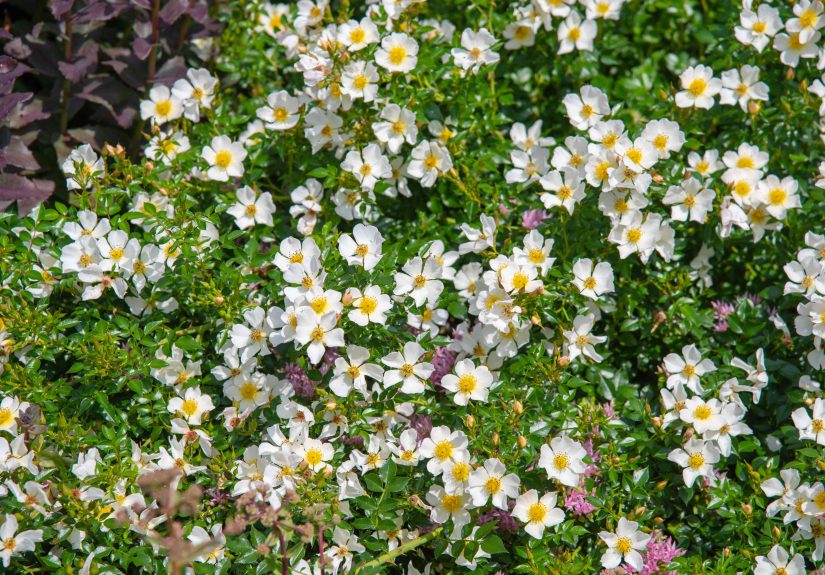
Flowers: In late spring (often May to June), multiflora rose produces clusters of small white to slightly pink, five-petaled flowers. The blooms are showy and fragrant, which is one reason people once planted it so widely.
Fruits (rose hips): After flowering, it produces small red to orange-red hips in clusters. These often persist into fall and winter, which makes winter identification easier when leaves are gone.
5) Compare It to Native Roses
Multiflora rose is often confused with native roses, but there are several useful differences:
- Stipules: Multiflora rose has fringed/bristly stipules; many native roses do not.
- Flowers: Multiflora rose commonly has white flower clusters; many native roses are pink and may be less heavily clustered.
- Thorns: Multiflora rose often has stiff, curved thorns and a more aggressively arching, thicket-forming habit.
- Fruit: Hips are small and clustered, not typically large and showy.
Where Multiflora Rose Usually Shows Up
This plant is not picky. It often appears in:
- Pastures and fence rows
- Roadsides and field edges
- Open woods and woodland edges
- Abandoned lots and disturbed ground
- Hedgerows and old homesteads
It does especially well in sun, but it can survive in partial shade and even under a forest canopy. That means you may first notice it in the open, then later discover it creeping into nearby woods.
How to Remove Multiflora Rose
There isn’t a single “magic” removal method that works everywhere. The best strategy depends on the infestation size, the season, your site (lawn vs. woodland vs. pasture), and whether you want to avoid herbicides. In most cases, integrated management (using more than one method) works best.
Before You Start: Safety and Planning
Multiflora rose removal is a contact sport. Dress accordingly.
- Wear thick gloves (rose gloves or leather gloves)
- Long sleeves and sturdy pants
- Eye protection
- Boots
- Use loppers, a pruning saw, or brush tools carefully
Then make a quick plan:
- Map the patch (small, medium, or large infestation).
- Identify nearby desirable plants you want to protect.
- Decide whether you’ll use mechanical removal only or combine with herbicide.
- Schedule follow-up checks for at least 2–4 growing seasons.
Mechanical Removal (Great for Small Plants and Early Infestations)
Best for: seedlings, young shrubs, scattered plants, and sensitive sites where you want to minimize herbicide use.
Hand pulling seedlings
Young plants can often be hand-pulled when soil is moist. Pull slowly so you remove as much root as possible.
Digging out the root crown
For small to medium plants, digging out the entire root crown is one of the most reliable non-chemical options. If the crown remains, regrowth is common. Many extension recommendations emphasize removing the crown, not just the top growth.
Weed wrench / Extractigator / leverage tools
These tools are useful for larger shrubs and can save your back (and your patience). Cut back some canes first if the plant is too tangled to access safely.
Cutting and mowing
Repeated cutting or mowing can weaken multiflora rose over time, but one cut won’t do much except annoy it. Effective mowing programs typically require multiple cuts during the growing season for multiple years. Expect persistence to beat speed here.
Important: Mechanical-only control works best when started early, repeated consistently, and followed by monitoring for seedlings and resprouts.
Chemical Control (Often Most Effective for Established Thickets)
Best for: larger infestations, mature shrubs, and cases where repeated mowing alone isn’t practical.
Commonly recommended active ingredients for multiflora rose management include glyphosate and triclopyr, though specific products, concentrations, and legal uses vary by state, site type, and label. Always read and follow the label. If you are near wetlands, streams, or ponds, only use products labeled for that use site.
1) Cut-Stump (Cut-Stem) Treatment
This is a favorite for selective control around desirable plants.
- Cut the stem close to the ground.
- Immediately apply herbicide to the freshly cut stump (timing matters).
- Treat all cut stems in the clump.
Why it works: you limit spray drift and target the root system directly through the cut surface.
2) Foliar Spray
Foliar treatment can work well on actively growing plants, especially after regrowth following mowing or cutting. It is often used for patches where individual cut-stump treatment would take forever and a half.
Use a calm day, avoid drift onto desirable plants, and don’t spray when rain is imminent (unless the label specifically allows that timing).
3) Basal Bark Treatment
Some state guidance lists basal bark applications with triclopyr ester products for woody stems. This can be effective on certain stem sizes and is often used on shrubs in non-crop settings. Again, exact product instructions matter.
Timing Tips That Improve Results
- Before flowering: Helpful for reducing seed production if you’re cutting or mowing.
- Mid-to-late growing season: Often a strong window for herbicide movement into roots (varies by product and region).
- Late fall cut-stem/basal treatments: Some agencies note this can work well when nearby understory plants are dormant, making target plants easier to spot.
- After mowing regrowth: Foliar treatments can be more effective when fresh regrowth is present.
If you’re unsure about timing in your region, contact your county extension office or state invasive species program. Local advice can save you from redoing work next year.
A Practical Step-by-Step Removal Plan (That Real People Can Actually Follow)
For a Small Patch (1–10 plants)
- Confirm ID (check the fringed stipules).
- Cut canes back for access.
- Dig out root crowns or pull with a leverage tool.
- Bag or pile canes safely away from traffic paths.
- Monitor monthly during the growing season for regrowth.
- Pull seedlings as they appear.
For a Medium Patch (Backyard Edge or Fence Line)
- Cut or mow first to regain access.
- Treat stumps immediately (or treat regrowth with foliar spray, depending on site).
- Return in 4–8 weeks to inspect misses and resprouts.
- Repeat the following season.
- Replant with competitive native shrubs or grasses where appropriate.
For a Large Thicket (Field Edge, Woodland Margin, Pasture)
- Start with mechanical reduction (mowing/cutting) to open the site.
- Use targeted herbicide follow-up on regrowth or cut stumps.
- Repeat multiple times per season if mowing is your main strategy.
- Coordinate with neighbors if infestations cross property lines.
- Plan a multi-year maintenance schedule (seriously, put it on the calendar).
What Not to Do
- Don’t just cut it once and walk away. It usually resprouts.
- Don’t skip identification. You may remove a beneficial native rose by mistake.
- Don’t ignore fruiting branches. Hips help spread seed.
- Don’t rely on one season of effort. Seed banks and resprouting require follow-up.
- Don’t use unlabeled herbicide methods. The label is the law.
Disposal and Cleanup After Removal
Once you remove or cut multiflora rose, the cleanup matters more than people expect.
- Handle canes carefully: Thorns stay sharp long after cutting.
- Manage fruiting stems: If hips are present, avoid spreading them around the site.
- Pile or dispose responsibly: Follow local yard waste rules. In some cases, burning or designated disposal may be recommended where allowed.
- Watch for rerooting: Arching stems can root if left in contact with soil in favorable conditions.
- Clean tools: Remove plant fragments and mud before moving to uninfested areas.
How to Keep It From Coming Back
The real victory is not just removing the visible thicket. It’s preventing the comeback tour.
1) Monitor Regularly
Check the area several times during the growing season and again the following spring. Small seedlings are much easier to remove than mature canes.
2) Replant the Space
Where appropriate, establish competitive native plants (grasses, shrubs, or woodland species suited to your site). Bare soil is an invitation for reinvasion.
3) Reduce Seed Sources Nearby
If neighboring patches are dropping hips into your area via birds, you may need a broader strategy with adjacent landowners or local groups.
4) Stay Consistent
Multiflora rose control is often a multi-year project. Consistency beats intensity. A few planned follow-ups usually work better than one heroic Saturday and a dramatic sigh.
Experience-Based Notes (500+ Words): What Removal Usually Feels Like in Real Life
Here’s the part many how-to guides skip: multiflora rose control is as much about expectations as it is about technique. In real yards, parks, and field edges, the process rarely looks clean or linear. It looks like progress, setbacks, and then more progress.
A very common experience is this: someone notices one arching rose cane near a fence and assumes it’s a charming wild rose. A year or two later, that “charming” plant has become a thorny pocket universe. The patch starts catching leaves, litter, and every loose soccer ball in the neighborhood. Once they finally try to remove it, they discover the canes are tangled, layered, and rooted in more than one place. That’s usually the moment the project shifts from “quick gardening task” to “planned invasive species management.”
Another typical experience is underestimating how much easier removal is after cutting back access lanes first. People often begin by trying to dig straight into the center of a dense clump, which is a fast way to get scratched, frustrated, and stuck. A better approachused by many successful homeowners and land stewardsis to cut outer canes first, create working room, and then tackle root crowns one by one. The work feels slower at first, but it becomes much more controlled and safer. It’s the difference between wrestling a thorn tornado and actually managing a plant.
Timing also changes the experience dramatically. When people mow or cut in spring and never come back, they often report, “It came back worse.” What usually happened is not that the plant became invincibleit’s that the treatment became incomplete. Repeated mowing, follow-up digging, or a correctly timed herbicide application to regrowth is what turns a rough first pass into real control. The practical lesson is simple: your first treatment is usually the opening move, not checkmate.
Landowners working near woods often describe a second surprise: seedlings appearing far from the original patch. Birds can move seed around, so it’s common to clear one thicket and then notice small new plants along a treeline or under perches. This can feel discouraging, but it’s also where experience pays off. Once you learn the fringed stipules and leaflet pattern, you can catch seedlings early and pull them in minutes. People who build a habit of quick seasonal scouting usually report much better long-term results than those who wait until the thicket is obvious again.
In pastures and larger rural properties, the experience is often about logistics. Thick thickets may require mowing equipment, chain-pulling, or coordinated treatment over multiple seasons. The most successful efforts tend to share a few habits: they map problem areas, work from the edges inward, protect desirable vegetation, and track what was treated (and when). That last step matters a lot. After a few months, most patches look similar, and memory becomes a terrible record-keeping system.
Finally, one of the most encouraging experiences people report is what happens after control begins to work. Once the canopy of canes is reduced and light reaches the ground again, native plants often reboundsometimes from the existing seed bank, sometimes after active replanting. That visible recovery is what keeps people motivated through the less glamorous parts of the job: gloves, scratches, repeated checks, and hauling brush. So yes, multiflora rose removal can be messy and stubborn. But it is absolutely manageable, and the payoff is often a healthier, more usable landscape.
Conclusion
Multiflora rose is a tough invasive shrub, but it’s also a very predictable one once you know its clues: arching thorny canes, clustered white flowers, red hips, compound leaves with 5–11 leaflets, andmost importantlyfringed stipules at the base of the leaf stalk. Start with accurate identification, match your removal method to the size of the infestation, and commit to follow-up for multiple seasons. Whether you choose digging, repeated mowing, cut-stump treatment, or a combination approach, consistency is what gets results.
If you’re dealing with a large infestation, don’t aim for “perfect in one day.” Aim for “controlled this season, reduced next season, gone with monitoring.” That’s how multiflora rose loses.


