Table of Contents >> Show >> Hide
- Why Cooking Oil Stains Are So Annoying
- Before You Start: 4 Fast Rules That Make a Big Difference
- Method 1: Blot and Lift the Excess Oil Immediately
- Method 2: Use Baking Soda or Cornstarch to Absorb the Grease
- Method 3: Pretreat with Dish Soap
- Method 4: Apply Liquid Laundry Detergent or an Enzyme Stain Remover
- Method 5: Wash in the Warmest Water Safe for the Fabric
- Method 6: Air-Dry, Inspect, and Repeat if Needed
- How to Remove Set-In Cooking Oil Stains
- What About Delicate Fabrics?
- Common Mistakes That Make Oil Stains Worse
- Quick Answer: What Is the Best Way to Remove Cooking Oil Stains?
- Real-World Experiences With Cooking Oil Stains on Clothing
- Final Thoughts
Cooking oil stains are the sneaky little villains of laundry day. They do not arrive with drama like red wine or ketchup. No, cooking oil prefers a quieter strategy. It lands on your shirt during dinner, disappears when the fabric is wet, and then pops back up after drying like it owns the place.
The good news is that oil stains are stubborn, not magical. If you use the right method, act quickly, and avoid a few classic mistakes, you can usually rescue your clothes without launching a full emotional crisis over one greasy noodle. Whether the culprit is olive oil, canola oil, sesame oil, or that mysterious shiny splash from last night’s stir-fry, these six easy methods can help you get cooking oil stains out of clothing.
Below, you will find practical, fabric-friendly solutions, plus examples, mistake-proof tips, and real-world advice for fresh stains, dried stains, and those “I already washed it and made it worse” situations.
Why Cooking Oil Stains Are So Annoying
Oil does not dissolve in water the way many food stains do. That is why tossing a greasy shirt straight into the wash often does not solve the problem. Water alone is not enough. You need something that can absorb the oil, break it down, or lift it out of the fibers.
That is also why the dryer can be such a troublemaker. Heat can lock leftover grease into the fabric, turning a minor spill into a long-term relationship you never agreed to. So before you do anything else, remember this golden rule: do not machine-dry the garment until the stain is completely gone.
Before You Start: 4 Fast Rules That Make a Big Difference
- Blot, do not rub. Rubbing pushes oil deeper into the fibers.
- Check the care label. Cotton can usually handle more aggressive treatment than silk, wool, or rayon.
- Test first. If you are using dish soap, vinegar, or stain remover, test a hidden area for color safety.
- Air-dry after treatment. If the stain is still there, repeat the process before using heat.
Method 1: Blot and Lift the Excess Oil Immediately
This is the best first move for a fresh stain. If you just dripped cooking oil on your shirt while flipping vegetables in a pan or reaching for pizza, do not panic. Grab a paper towel, napkin, or clean white cloth and blot the area gently.
How to do it
- Lay the garment flat.
- Place a clean cloth or paper towel over the stain.
- Press gently to absorb as much oil as possible.
- If the stain is thick or slick, blot both sides of the fabric.
The goal is to remove surface oil before it has time to settle in. This step will not finish the job, but it gives every other method a much better chance of success.
Best for: fresh splatters on cotton tees, aprons, table linens, and everyday shirts.
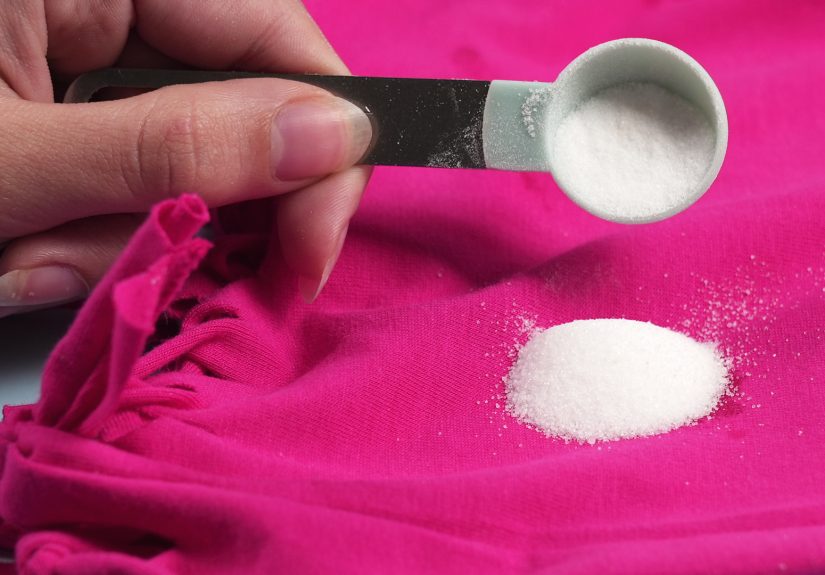
Method 2: Use Baking Soda or Cornstarch to Absorb the Grease
If cooking oil had a natural enemy, it would be absorbent powder. Baking soda and cornstarch are both popular because they pull oily residue upward instead of letting it keep soaking into the fabric.
How to do it
- After blotting, cover the stain fully with baking soda or cornstarch.
- Let it sit for at least 15 to 30 minutes.
- For a heavier stain, leave it longer, even up to a few hours.
- Brush off the powder gently with a soft toothbrush or cloth.
If the stain still looks shiny, repeat the powder step once more before moving on to soap or detergent. This is especially helpful for oily foods like salad dressing, fried chicken, garlic noodles, and buttery popcorn that seems to travel directly from bowl to hoodie.
Best for: fresh to moderately set stains, especially on cotton, linen, denim, and washable blends.
Method 3: Pretreat with Dish Soap
Dish soap is one of the most effective home fixes for cooking oil stains because it is literally designed to cut grease. If it can tackle a frying pan after taco night, it can usually help with your shirt too.
How to do it
- Apply a few drops of plain liquid dish soap directly to the stain.
- Gently work it into the fabric with your fingers or a soft toothbrush.
- Let it sit for 5 to 10 minutes.
- Rinse with warm water if the fabric allows.
Use a clear or mild dish soap if possible, especially on light fabrics. Brightly colored formulas can sometimes leave their own surprise behind, and nobody needs a second stain with better branding.
Example: If olive oil splashes onto a white cotton T-shirt while you are making pasta, blot first, add cornstarch for 20 minutes, then pretreat with dish soap before washing. That combo often works far better than detergent alone.
Best for: fresh oil stains, food grease, butter, salad dressing, and pan splatter.
Method 4: Apply Liquid Laundry Detergent or an Enzyme Stain Remover
When a stain needs backup, heavy-duty liquid laundry detergent or an enzyme-based stain remover is the next level. These products are formulated to break down stubborn residue and are especially useful for stains that are older, bigger, or partly washed in already.
How to do it
- Pour a small amount of liquid detergent directly onto the stain.
- Work it in gently with your fingers or a soft brush.
- Let it sit for around 10 minutes, or according to the product label.
- Wash as directed on the care label.
If the item is washable cotton, polyester, or a sturdy blend, this method is often one of the most reliable. It is also a smart choice for oil stains mixed with food pigment, such as chili oil, pesto, curry oil, or greasy tomato sauce.
Best for: older stains, deeper stains, or anything that already survived one disappointing wash cycle.
Method 5: Wash in the Warmest Water Safe for the Fabric
Once you have absorbed and pretreated the stain, the wash cycle matters. Cooking oil usually responds best to warm or hot water, but only if the garment’s care label says that temperature is safe.
How to do it
- Read the care tag carefully.
- Choose the warmest water setting the fabric can handle.
- Use a quality detergent.
- Wash the item separately or with similar laundry if the stain is large.
Warm water can help loosen oily residue, but fabric rules still win. If the shirt is delicate, do not force a hot wash just because you are feeling ambitious. Cotton and durable synthetics are usually more forgiving. Silk, wool, and embellished fabrics are absolutely not interested in your laundry experiments.
Best for: washable fabrics after pretreatment.
Method 6: Air-Dry, Inspect, and Repeat if Needed
This final method sounds simple, but it saves more clothes than people realize. After washing, let the garment air-dry completely and inspect the stained area in good light. Oil stains often hide when fabric is damp, then reappear after drying.
How to do it
- Hang or lay the item flat to dry.
- Check the stain once the fabric is dry.
- If any dark or shiny mark remains, repeat pretreatment and washing.
- Only use the dryer when the stain is fully gone.
This is the step that separates “problem solved” from “why is this shirt still haunted?” If you dry too soon, the stain may become much harder to remove.
Best for: every oil-stain situation, no exceptions.
How to Remove Set-In Cooking Oil Stains
If the stain has already dried, or worse, gone through the dryer, you still have options. Start with an absorbent powder to pull surface residue out. Then use dish soap or a heavy-duty liquid detergent and let it sit longer than usual. Some stains may need a warm-water soak before washing again.
A useful order for dried stains looks like this:
- Apply baking soda or cornstarch and let it sit.
- Brush it away.
- Pretreat with dish soap or liquid detergent.
- Let the product sit for 10 to 15 minutes.
- Wash in the warmest safe water.
- Air-dry and inspect.
It may take more than one round. That is normal. Oil stains are persistent, but repeated treatment often works better than one aggressive attempt.
What About Delicate Fabrics?
Not every garment wants the same treatment. A cotton apron can handle more than a silk blouse or suede jacket. Here is the quick fabric guide:
Cotton, linen, polyester, and denim
These are the easiest fabrics to treat. Use absorbent powder, dish soap or detergent, then wash on the warmest safe setting.
Silk and wool
Blot gently and use cornstarch or baking soda first. If needed, use only a tiny amount of mild soap and avoid harsh scrubbing. When in doubt, professional cleaning is safer.
Leather and suede
Use absorbent powder first and avoid soaking the material. Specialty cleaners are often a better choice than water-based stain methods.
Dry-clean-only clothing
Blot the stain, avoid aggressive DIY treatment, and take the garment to a cleaner as soon as possible. Point out the stain so it gets proper attention instead of mysterious silent judgment.
Common Mistakes That Make Oil Stains Worse
- Rubbing the stain hard: this spreads the oil.
- Using the dryer too soon: heat can set the stain.
- Skipping pretreatment: water alone usually is not enough.
- Ignoring the care label: hot water can damage delicate fabrics.
- Assuming one wash is enough: many oil stains need a second round.
- Using random internet chemistry: just because something sounds clever does not mean it belongs on your clothes.
Quick Answer: What Is the Best Way to Remove Cooking Oil Stains?
If you want the short version, here it is: blot the stain, cover it with baking soda or cornstarch, pretreat with dish soap or liquid detergent, wash in the warmest water the fabric can safely handle, and air-dry before deciding you are done.
That sequence works because it tackles the problem in stages: first absorption, then grease breakdown, then cleaning, then safe inspection. It is practical, inexpensive, and realistic for busy households.
Real-World Experiences With Cooking Oil Stains on Clothing
In real life, cooking oil stains rarely happen during elegant moments. They happen when someone is eating standing up over the stove, pulling garlic bread out of the oven, or proudly finishing a homemade stir-fry only to discover a glossy spot right in the center of the shirt. That is one reason these stains feel so annoying. They are common, but they still catch people off guard because the stain does not always look serious at first.
One of the most common experiences people describe is the “false victory” problem. The shirt looks fine after pretreatment. It looks fine during the wash. It even looks fine when wet. Then it dries, and suddenly the fabric has a dark shadow that says, “Surprise, I live here now.” That is why air-drying and checking the stain before using the dryer is such a game changer. It sounds like a small step, but it often saves the garment.
Another common pattern is that the simplest methods work best when used early. People often assume they need a fancy stain product immediately, but many cooking oil stains respond well to fast blotting, absorbent powder, and ordinary dish soap. The sooner that routine starts, the easier the cleanup tends to be. A fresh olive oil drip on a cotton T-shirt is far easier to treat than a week-old sesame oil stain that has already been heat-dried and forgotten in a laundry basket.
Fabric type also changes the whole experience. On cotton and polyester, stain removal is often straightforward. On silk, wool, or a structured blazer, the mood changes quickly. Suddenly everyone becomes cautious, and for good reason. Delicate fabrics can react badly to aggressive scrubbing, hot water, or harsh products. In those cases, people usually have the best luck with gentle blotting, absorbent powder, and professional cleaning if the item is valuable.
There is also the cooking-style factor. Light oil splatters from sautéing vegetables are one thing. Chili oil, buttery sauces, fried foods, and greasy pizza toppings are another. Those mixed stains can contain pigment, protein, or dairy in addition to oil, which makes them trickier. A pesto splash, for example, is not just oily. It can also leave green plant color behind. That is why pretreatment with a good detergent can be especially helpful after the dish soap step.
Perhaps the most useful real-world lesson is that repeat treatment is normal. People often think a garment is ruined if the stain does not disappear after one try. Usually, that is not true. Oil stains often fade in stages. The first round lifts the surface grease. The second round cleans what is left in the fibers. Patience wins more laundry battles than force does.
So if your dinner attacked your clothes, do not retire the shirt just yet. Most cooking oil stains are beatable with calm, quick action and a little laundry strategy. The oil may have made a bold entrance, but it does not deserve a permanent address.
Final Thoughts
Knowing how to get cooking oil stains out of clothing is one of those oddly useful life skills that pays off more often than expected. The best methods are not complicated, but they do reward speed and patience. Blot first. Absorb the oil. Pretreat the stain. Wash carefully. Air-dry before celebrating.
In other words, do not let one splash of oil turn your favorite shirt into “house-only clothing.” With the six easy methods above, you have a practical plan for fresh stains, set-in stains, and most fabric-safe laundry emergencies.


