Table of Contents >> Show >> Hide
- Table of Contents
- Why Descaling Matters (Taste + Performance)
- Signs Your Keurig Slim Needs Descaling
- What You’ll Need
- Step-by-Step: Descale a Keurig Slim (Official-Style Method)
- Can You Descale a Keurig Slim With Vinegar?
- How to Deal With the Descale Light (And Why It Won’t Shut Up)
- Easy Cleaning & Maintenance Routine (So You Descale Less Often)
- Troubleshooting: Foam, Sputtering, and “Why Is It Doing That?”
- FAQ
- Conclusion
- Real-World Experiences: What Descaling Is Actually Like (500-ish Words)
- SEO Tags (JSON)
Your Keurig Slim is basically a tiny hot-water wizard. But even wizards get grumpy when they’re full of mineral buildup.
If your coffee is brewing slower, sounding like it’s trying to cough up a Lego, or the descale light is yelling at you
like a smoke alarm with opinions, it’s time to descale.
This guide walks you through how to descale a Keurig Slim (K-Slim) the easy way, plus simple cleaning
habits that keep your brewer tasting fresh and running smoothly. No fluff, no weird “one secret trick” nonsensejust
a clear plan that works.
Table of Contents
- Why descaling matters (taste + performance)
- Signs your Keurig Slim needs descaling
- What you’ll need
- Step-by-step: Descale a Keurig Slim (official-style method)
- Can you use vinegar instead?
- How to deal with the descale light (and why it won’t shut up)
- Easy cleaning & maintenance routine
- Troubleshooting: foam, sputtering, and “why is it doing that?”
- FAQ
- Real-world experiences: what descaling is actually like
- SEO tags (JSON)
Why Descaling Matters (Taste + Performance)
Descaling removes mineral deposits (mostly calcium and lime scale) that build up inside your coffee maker
over timeespecially if your water is hard. That buildup can restrict water flow, mess with brew temperature, and make
your machine work harder than it needs to. Translation: your coffee can taste flatter, your brewer can get noisier, and
brew times can drag.
Think of scale like plaque for appliances. You can ignore it for a while, surebut eventually things get… unpleasant.
Regular descaling helps keep the heating system efficient and the water pathway clear, which means more consistent cups
and a longer-lasting brewer.
Signs Your Keurig Slim Needs Descaling
Any of these are a polite hint (or not-so-polite flashing light) that descaling is due:
- The descale indicator turns on or flashes.
- Brewing slows down, sputters, or stops mid-cycle.
- Coffee comes out cooler than usual or tastes “off.”
- More noise than normal (gurgling, wheezing, tiny machine drama).
- Frequent “Add Water” alerts even when the reservoir looks fine.
What You’ll Need
Must-haves
- A large ceramic mug (skip paper cupshot liquid + paper is a risky combo).
- Fresh water (enough for multiple rinse cycles).
- Access to a sink (you’ll be dumping hot liquid repeatedly).
Descaling option A (recommended)
- Descaling solution made for coffee makers (many Keurig owners use the brand’s descaling solution).
Descaling option B (common alternative)
- Distilled white vinegar (more on this in the vinegar section).
Before you start (quick prep checklist)
- Remove any pod from the brewer (no K-Cup in the holder).
- Empty the water reservoir completely.
- If you use a water filter accessory, remove it before descaling.
- Clear your schedule for about 15–25 minutes (most of it is “push button, dump mug, repeat”).
Step-by-Step: Descale a Keurig Slim (Official-Style Method)
The Keurig Slim (K-Slim) has a straightforward descaling routine. The key detail most people miss:
you start Descale Mode with the brewer powered off, then use the size buttons.
Step 1: Fill the reservoir with descaling mix
- Pour the entire bottle of descaling solution into the empty water reservoir.
- Fill that empty bottle with water, then pour it into the reservoir too.
- Do not insert a pod.
Why this matters: the solution needs to circulate through internal tubing and the heating systemplaces you can’t reach
with a sponge and good intentions.
Step 2: Enter Descale Mode
- Place a large ceramic mug on the drip tray.
- Make sure the brewer is powered off.
- Press and hold the 8 oz and 12 oz buttons together for about 3 seconds.
- Look for the DESCALE light to turn solid (that’s your “mode confirmed” signal).
Step 3: Run the descaling rinse cycles
- When the Brew button starts flashing, press it to begin.
- Let the brewer dispense into the mug.
- Carefully dump the hot liquid into the sink.
- Repeat: press Brew when it flashes, empty the mug, and keep going.
- Continue until the ADD WATER light turns on.
Pro tip: This is the part where people get impatient and try to “speedrun” by using a tiny cup. Don’t.
Use a big mug so you’re not sprinting to the sink like you’re training for the Coffee Olympics.
Step 4: Rinse the reservoir
- Empty the reservoir completely.
- Rinse it out well.
- Refill with fresh water to the MAX line.
Step 5: Run fresh-water rinse cycles (the “goodbye, solution” phase)
- Press the Brew button when it begins flashing.
- Empty the mug as needed.
- Repeat until the ADD WATER light turns on again.
At this point, the brewer should exit Descale Mode and return to normal operation.
If you’re sensitive to taste or smell, run an extra 1–2 water-only cycles for peace of mind.
Can You Descale a Keurig Slim With Vinegar?
Yesmany people do. Vinegar is a common household descaler because it’s acidic enough to dissolve mineral buildup.
That said, manufacturers often prefer a dedicated descaling solution (it’s formulated for appliances and usually less
likely to leave lingering odor). If you choose vinegar, your main job is rinsing thoroughly afterward.
A practical vinegar approach (simple and widely used)
- Mix a 1:1 ratio of distilled white vinegar and water.
- Fill the reservoir (up to the MAX line, or enough for multiple cycles).
- Run brew cycles without a pod, dumping the mug each time, until the reservoir is empty or the brewer prompts you.
- Let the brewer sit for 20–30 minutes (optional, but helpful if buildup is heavy).
- Rinse the reservoir, then run multiple fresh-water cycles until there’s no vinegar smell.
If you’re descaling because your coffee tastes weird, note the irony: vinegar can also make coffee taste weird
if you don’t rinse enough. If you go the vinegar route, plan on extra rinse cycles.
How to Deal With the Descale Light (And Why It Won’t Shut Up)
The descale light is not judging you as a person. It’s judging your water chemistry.
On many brewers, the light stays on until the machine senses it has completed the descaling routine.
If your descale light is still on after you swear you did everything:
- Make sure you actually entered Descale Mode (powered off first, then hold 8 oz + 12 oz).
- Complete the process through the full rinse phase (stopping early often keeps the light angry).
- Run additional fresh-water cyclessome buildup takes longer to clear, especially with very hard water.
Also: if you repeatedly descale but performance is still poor, you may have heavy scale or a clogged needleboth fixable,
but they require a little extra attention (see troubleshooting and maintenance below).
Easy Cleaning & Maintenance Routine (So You Descale Less Often)
Descaling is the “deep clean.” But a few small habits keep your Keurig Slim from turning into a science experiment.
Here’s a realistic maintenance schedule that doesn’t require you to earn a cleaning merit badge.
After each use (30 seconds)
- Remove and discard the used pod promptly (old pods + moisture = funky smells).
- Empty the drip tray if it’s getting full.
- If you’re not brewing again soon, don’t leave the reservoir half-empty for daysstagnant water is not a flavor note.
Weekly (5–10 minutes)
- Wash the drip tray and reservoir with warm, soapy water, then air-dry completely.
- Wipe the exterior with a damp, non-abrasive cloth (no soaking, no dunking the brewer like it’s a bath toy).
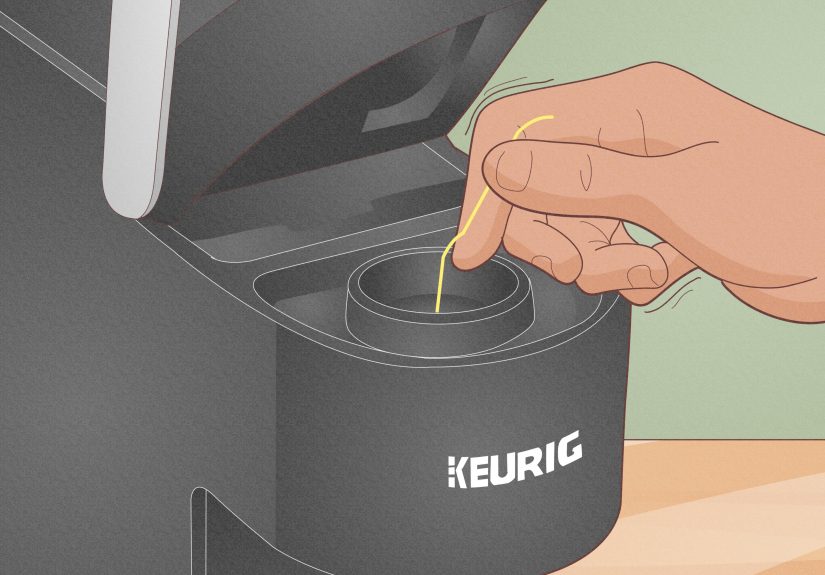
Monthly (10 minutes): Clean the needles
If you ever see grounds in your cup or your brew flow seems inconsistent, the needles might be clogged.
The Slim has sharp puncture needles (top and bottom), so be carefulthis is not the moment to freestyle.
- Remove the pod holder assembly (follow your model’s instructions to lift and release it).
- Detach the funnel.
- Use a straightened paper clip to gently clear the exit needle area on the pod holder.
- Lift the handle and carefully clear the entrance needle holes underneath the lid.
- Run two water-only brew cycles afterward to flush debris.
Every 2–3 months (if you use a water filter accessory)
- Replace the filter cartridge as recommended by the accessory instructions.
- Remember: filters help, but they don’t eliminate the need to descaleespecially with hard water.
Every 3–6 months: Descale
A good rule: descale every 3 months if you have hard water or brew daily; every 6 months if your water is softer and you
don’t use the machine constantly. If the descale light comes on sooner, believe it.
Troubleshooting: Foam, Sputtering, and “Why Is It Doing That?”
“It’s foaming like a tiny coffee volcano.”
That can happen during descaling. The solution is reacting with mineral depositsfoam is a normal byproduct.
Keep using a large mug, and don’t panic. This is one of the few times “bubbly” is a good sign in your machine.
“It barely dispenses anything and sounds like it’s blowing air.”
Heavy scale can prevent the brewer from filling properly during descaling. If you get little-to-no output followed by
an air-blowing sound:
- Turn the brewer off and unplug it.
- Discard the remaining solution, rinse the reservoir well, and refill with water.
- Plug back in and continue with fresh-water rinse cycles.
- If it persists, let the brewer sit unplugged for about 30 minutes, then try again.
“My coffee is still tasting weird after descaling.”
- Run extra water-only cycles (especially if you used vinegar).
- Clean the pod holder and funneloils and residue can cling there.
- Swap out old pods (stale pods taste stale even with a spotless machine).
“It keeps brewing partial cups.”
Partial cups can come from scale buildup or a clogged needle path. If descaling doesn’t fix it, clean the needles and
run a few water-only cycles. If the issue continues even after repeated cleaning, the brewer may need service.
FAQ
How long does it take to descale a Keurig Slim?
Typically around 15–25 minutes, depending on how many rinse cycles you run and how quickly you’re emptying the mug.
If your machine is heavily scaled, it can take longer.
How often should I descale my Keurig Slim?
A common cadence is every 3 months for regular use, or sooner if your water is hard or the machine prompts you.
If you’re in a hard-water area and brew daily, you’ll usually benefit from staying closer to the 3-month mark.
Do I have to use descaling solution?
You don’t have to, but it’s the most straightforward option for many people. Vinegar can work too, but it often requires
extra rinsing to remove the smell and taste.
Can I run descaling solution through a pod?
No. Descaling should be done with no pod inserted. You’re cleaning the water pathwaynot making an aggressively weird cup of coffee.
What water should I use day-to-day to reduce scale?
If your tap water is very hard, consider filtered water (from a pitcher or under-sink filter). It can reduce mineral load,
which may improve taste and slow scale buildup.
Conclusion
Descaling your Keurig Slim isn’t glamorous, but neither is coffee that tastes like regret and lukewarm disappointment.
The good news: once you know the button combo and the rinse rhythm, it’s a quick routine you can knock out while you
answer emails, scroll, or stare into space wondering why appliances can’t just clean themselves.
Stick to a simple schedulewipe and wash removable parts weekly, clean the needles monthly, and descale every few months.
Your brewer will run quieter, brew faster, and your coffee will taste like it actually wants to be in the cup.
Real-World Experiences: What Descaling Is Actually Like (500-ish Words)
Let’s talk about the part most guides skip: the “human experience” of descaling a Keurig Slim. Not the sterile,
lab-coat versionmore like what happens in actual kitchens where people are multitasking, the sink is occupied, and the
mug you grabbed is mysteriously smaller than you remembered.
First, the moment you decide to descale usually starts with a tiny annoyance: the brew seems slower, or your cup is a
couple degrees less hot, or the machine makes a sound that can only be described as “gurgle-adjacent.” You might ignore
it for a week because life is busy and coffee still comes out. Then the descale light turns on and suddenly your brewer
has a personality: persistent, bright, and impossible to negotiate with.
The next common experience is realizing the process is repetitivebut not hard. It’s basically: press a button, watch
water dispense, dump mug, repeat. The only “gotcha” is capacity. People often start with a cute little coffee cup, then
immediately learn why a large ceramic mug is recommended. If you don’t use a bigger mug, you’ll be doing a lot of short
trips to the sink, which turns “easy maintenance” into “light cardio.”
Another real-life moment: foaming. If your Slim hasn’t been descaled in a while, the solution can come out a bit foamy.
It looks alarming the first timelike your coffee maker is auditioning for a middle-school volcano project. In most cases,
it’s just chemistry: the descaler reacting with mineral buildup. This is where patience helps. Keep running cycles until
the machine prompts you to add water, then rinse thoroughly. Foaming is usually a sign the solution is doing its job, not
a sign your brewer is having an existential crisis.
If you use vinegar, the experience shifts to a new theme: “Will my coffee taste like salad dressing forever?” The answer
is no, but you’ll want extra rinse cycles. A lot of people stop rinsing the moment they feel “done,” then regret it the
next morning when their first cup has a faint tang. The best practice is to keep rinsing until you can’t smell vinegar at
the spout or in the reservoir. If you’re sensitive to taste, add one more rinse cycle even after you think it’s fine.
Finally, there’s the satisfaction factor. Descaling doesn’t just silence the warning lightit often makes the machine feel
“new” again. Brew times improve, the flow looks steadier, and the coffee flavor gets cleaner. It’s one of those small home
maintenance wins that feels oddly rewarding, like finally cleaning a sticky drawer and wondering why you waited so long.
The biggest takeaway from most people’s experience is simple: the first descale feels like a chore; the second one feels
like a routine; by the third, you’re basically the responsible adult your coffee maker always believed you could be.


