Table of Contents >> Show >> Hide
- What Counts as a Crochet Stuffed Animal?
- Materials You’ll Need
- The Core Stitches (Your Plushie’s “Alphabet”)
- How the Shaping Works (A Tiny Bit of Crochet Math)
- Step-by-Step: Crochet a Simple Bunny (Beginner-Friendly Pattern)
- Make Your Stuffed Animal Look “Store-Quality”
- Customization Ideas (So Every Plush Isn’t “Bunny #47”)
- Troubleshooting (Common Problems + Quick Fixes)
- of Real-World “Crochet a Stuffed Animal” Experiences
- Conclusion
If you can crochet a circle, you can crochet a critter. Seriously. Most crochet stuffed animals (aka amigurumi)
are just a bunch of friendly tubes and bouncy little spheres pretending to be a bunny, bear, dinosaur, or that one
oddly cute blob you swear is “a sea creature.” This guide walks you through the tools, the must-know stitches, the
“why” behind the shaping, and a beginner-friendly stuffed animal pattern you can actually finishwithout rage-quitting
into a pile of yarn.
What Counts as a Crochet Stuffed Animal?
Most modern crochet stuffed animals use the amigurumi style: tight single crochet stitches worked in the round to
create a firm fabric that holds stuffing. Unlike a scarf (flat and polite), a plushie is 3D and mildly ambitious.
You’ll shape it with increases and decreases, stuff it, then sew on parts like ears and arms. The secret sauce is
tension: tighter stitches = fewer gaps = less stuffing trying to escape like it has plans.
Spiral rounds vs. joined rounds
Many plush patterns are worked in a continuous spiral (no joining at the end of each round). You use a stitch marker
to track the first stitch of each round so you don’t accidentally invent a new shape. Joined rounds can work too,
but spirals are common because they avoid a visible seam line and keep shaping smoother.
Materials You’ll Need
Yarn (pick “forgiving” first)
- Worsted weight acrylic: beginner-friendly, affordable, easy to frog (undo) without drama.
- Cotton: crisp stitch definition (great for details), but can feel less squishy.
- Chenille/plush yarn: super cuddly, but harder to see stitchessave it for your second or third plush.
Pro tip: If you’re learning, choose a light or medium color. Black yarn is gorgeous and also secretly a prank.
Hook size (smaller than the label suggests)
For amigurumi, many crocheters size down a hook so stitches sit tighter and stuffing doesn’t peek through.
If your yarn label suggests a 5.0 mm hook, you might try 4.0 mm (or even 3.5 mm) for a denser fabric. If your hands
complain, listentight stitches shouldn’t require you to arm-wrestle your hook.
Other essentials
- Fiberfill stuffing (polyester fiberfill is common)
- Stitch marker (a locking marker, paper clip, or a contrasting scrap of yarn)
- Yarn needle (tapestry needle) for sewing pieces and weaving in ends
- Scissors
- Optional: safety eyes, embroidery floss, felt, blush/soft pastel for cheeks
A quick safety note (especially for gifts)
If the stuffed animal is for a baby or toddler, avoid small plastic parts like safety eyes. Embroidered or crocheted
eyes are a safer choice because small parts can be a choking hazard for children under 3. If you’re selling or gifting,
it’s smart to label the toy’s intended age range and materials.
The Core Stitches (Your Plushie’s “Alphabet”)
Crochet patterns often look like tiny text messages from a robot. Here’s the translation you’ll use constantly:
- MR = magic ring (adjustable ring)
- ch = chain
- sc = single crochet
- inc = increase (typically 2 sc in the same stitch)
- dec = decrease (turn 2 stitches into 1)
- inv dec = invisible decrease (cleaner look in amigurumi)
- sl st = slip stitch
How the Shaping Works (A Tiny Bit of Crochet Math)
Stuffed animals get their shape from controlled stitch counts. Increases add stitches so the piece widens; decreases
remove stitches so it narrows. A common beginning is 6 single crochets into a magic ring, then increasing evenly:
- Round of 6 stitches → inc in each stitch = 12
- Round of 12 → (sc, inc) repeated = 18
- Round of 18 → (2 sc, inc) repeated = 24
Once you reach the width you want, you crochet even (same stitch count each round) to build height, then decrease to
close. That’s basically the whole amigurumi universe: widen, maintain, narrow, repeat, add ears, celebrate.
Step-by-Step: Crochet a Simple Bunny (Beginner-Friendly Pattern)
This is an original, straightforward bunny-style plush that teaches the classic skills: magic ring, increases,
invisible decreases, stuffing, and assembly. Make it in one color, or add a contrasting belly patch for extra charm.
Pattern notes
- Work in continuous rounds unless stated.
- Use a stitch marker to mark the first stitch of each round.
- Numbers in parentheses are stitch counts at the end of the round.
- For a tighter fabric, keep tension firm but comfortable.
Abbreviations
- MR magic ring
- sc single crochet
- inc 2 sc in same stitch
- inv dec invisible decrease
Head + body (one piece)
- Rnd 1: MR, 6 sc (6)
- Rnd 2: inc x6 (12)
- Rnd 3: (sc, inc) x6 (18)
- Rnd 4: (2 sc, inc) x6 (24)
- Rnd 5: (3 sc, inc) x6 (30)
- Rnd 6: (4 sc, inc) x6 (36)
- Rnd 7–11: sc around (36)
- Rnd 12: (4 sc, inv dec) x6 (30)
- Rnd 13: (3 sc, inv dec) x6 (24)
- Rnd 14: (2 sc, inv dec) x6 (18)
- Rnd 15: (sc, inv dec) x6 (12)
- Rnd 16: sc around (12) (this is the neck)
- Rnd 17: (sc, inc) x6 (18)
- Rnd 18: (2 sc, inc) x6 (24)
- Rnd 19–24: sc around (24)
- Rnd 25: (2 sc, inv dec) x6 (18)
- Rnd 26: (sc, inv dec) x6 (12)
- Rnd 27: inv dec x6 (6)
- Finish: Fasten off, weave tail through the final 6 stitches to close neatly.
When to add eyes: If using safety eyes, many makers place them on the head between the “even” rounds
(often around Rnd 8–10), before stuffing and closing. If embroidering, you can do it before or after stuffingwhichever
feels less like trying to draw on a moving marshmallow.
Stuffing the body
Stuff gradually. Use small tufts (not one giant cotton-ball blob) to avoid lumps. Fill the head firmly so it holds
shape, then stuff the body slightly softer for cuddly squish. If you notice stretching holes, remove a bit of stuffing
or tighten your stitches next time.
Ears (make 2)
- Rnd 1: MR, 6 sc (6)
- Rnd 2: (sc, inc) x3 (9)
- Rnd 3–7: sc around (9)
- Flatten the ear and sc through both layers across the top to close (about 4–5 sc), leaving a long tail for sewing.
Arms (make 2)
- Rnd 1: MR, 6 sc (6)
- Rnd 2: sc around (6)
- Rnd 3: (sc, inc) x3 (9)
- Rnd 4–6: sc around (9)
- Lightly stuff the bottom half only (so the arms stay soft), then flatten and sc closed across the top (about 4–5 sc). Leave a tail.
Legs (make 2)
- Rnd 1: MR, 6 sc (6)
- Rnd 2: inc x6 (12)
- Rnd 3–4: sc around (12)
- Rnd 5: (2 sc, inv dec) x3 (9)
- Rnd 6–8: sc around (9)
- Stuff firmly, flatten, and sc closed across the top (about 4–5 sc). Leave a tail.
Tail (optional puff)
Make a tiny pom-pom, or crochet a mini ball: MR 6 sc, inc x6 (12), sc around (12), then (sc, inv dec) x4 (8), stuff,
inv dec x4 (4), close. Sew it low on the back. Instant bunny energy.
Assembly (aka “Bring the chaos into alignment”)
- Ears: Sew on top of the head, spaced evenly. Slightly forward placement looks extra cute.
- Arms: Attach at the sides near the neck/body transition.
- Legs: Sew to the bottom front of the body so it can sit.
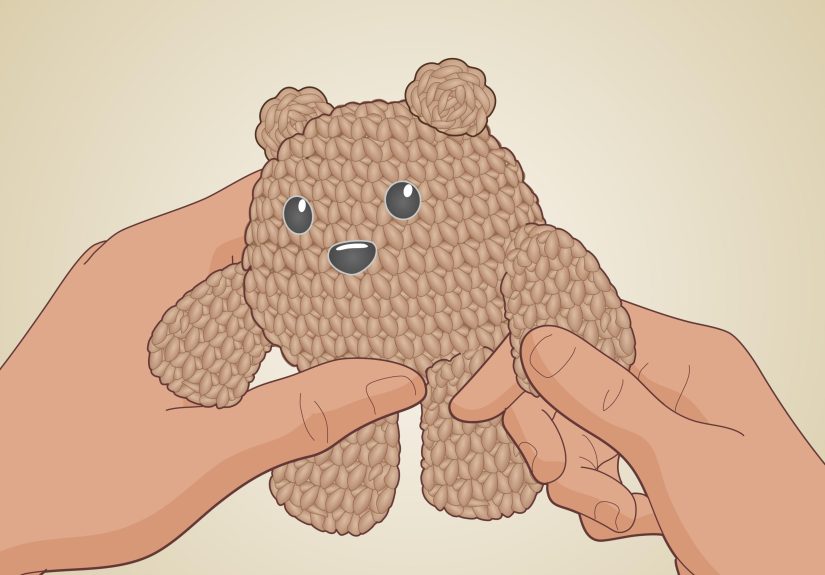
- Face details: Embroider a small nose and mouth with embroidery floss or thin yarn.
Make Your Stuffed Animal Look “Store-Quality”
Use invisible decreases for smoother curves
A regular sc2tog can leave bumps or gaps. Invisible decreases (worked through front loops only) tend to blend into the
fabric, especially when you’re closing a head or shaping cheeks. If your plush has a “dent line,” switching to invisible
decreases often fixes it.
Stuffing tricks that change everything
- Small tufts, layered = smooth surface.
- Stuff as you go before the opening gets tiny.
- Shape with your fingers: push stuffing toward corners (like the muzzle area) for definition.
- Don’t overstuff if you see big holesfabric should be firm, not see-through.
Sewing: the stitch you didn’t know you’d need
A simple whip stitch is a common way to attach pieces: you pass the needle through a stitch on the body and a stitch
on the part, repeating around. Take your time, adjust placement as you go, and tug gently so seams sit snug without
puckering. If a part feels wobbly, add a second pass of stitcheslike a crochet seatbelt.
Customization Ideas (So Every Plush Isn’t “Bunny #47”)
- Change yarn texture: plush yarn makes a jumbo “cuddle creature”; cotton makes crisp details.
- Play with proportions: more “even rounds” = taller body; extra increase round = chubbier head.
- Add colorwork: stripes on the body, contrasting ear tips, or a belly circle applique.
- Swap features: embroidered sleepy eyes, felt blush spots, or a tiny scarf.
Troubleshooting (Common Problems + Quick Fixes)
“Why are there holes?”
Usually: hook too large, tension too loose, or stuffing too aggressive. Size down your hook, tighten tension slightly,
and use smaller stuffing tufts.
“My plush is lopsided.”
Count stitches each round (yes, even when you’re confidentespecially when you’re confident). Also make sure your stitch
marker moves to the first stitch of each new round.
“The head flops around.”
Stuff the neck area more firmly, position the head slightly lower, and sew with a strong yarn tail. For larger plushies,
some makers add extra internal stitching around the neck seam for support.
“The stitches look messy.”
That’s normal at first. Keep tension consistent, try an ergonomic hook, and practice on a small ball first. Your hands
are learning a new languagegive them a minute.
of Real-World “Crochet a Stuffed Animal” Experiences
If you’ve never crocheted a stuffed animal before, here’s what usually happens (and why it’s totally fine). First, you
start with big confidence: “A bunny? I’m basically a yarn wizard.” Then you meet the magic ring. The magic ring is
helpful, yesbut it’s also the crochet equivalent of learning to tie shoes while someone keeps moving the laces. Your
first ring might look like a tiny spaghetti halo, and that’s okay. Most people don’t “get it” instantly; they get it
after doing it wrong twice and then suddenly doing it right once, like unlocking a hidden level.
Next comes the spiral. At some point you’ll look down and think, “This doesn’t look like a head. It looks like a weird
bowl.” That’s normal too. The head usually becomes recognizable right after you hit the even roundswhen it stops
getting wider and starts getting taller. This is often the exact moment people get hooked (pun unavoidable) because the
project finally stops feeling abstract and starts feeling like a creature is forming. It’s also the moment you begin
talking to it like it can hear you: “Okay, buddy, we’re doing decreases now. Don’t panic.”
Stuffing is where real personality shows up. Almost everyone’s first plush gets overstuffed. It’s a rite of passage.
You want it firm, so you keep adding stuffing, and suddenly the stitches open up and your bunny is showing little white
polka dots of fiberfill like it’s wearing the wrong undershirt. The fix is simple: pull some stuffing out, use smaller
tufts, and remember that “firm” and “inflatable beach ball” are different design categories.
Then there’s the face. People stress about placing eyes more than they stress about choosing a phone plan. Too close
together? The plush looks like it’s plotting something. Too far apart? Suddenly it’s surprised by everything. A common
trick is to pin eyes first (or mark with yarn) and step back a few feet. If it looks cute from across the room, it will
look cute in your hands. And if you’re making a toy for a baby or toddler, embroidered eyes feel intimidatinguntil you
do them once. Then you realize embroidery is basically “draw a smile, but with thread,” and it’s strangely satisfying.
The final “experience moment” is assembly. Your pieces will look like a pile of unrelated parts: two ears, two arms,
two legs, one body, and the creeping suspicion that you’ve made a potato with accessories. Sewing changes everything.
Most crocheters learn to do a little “tack, check, adjust” rhythm: stitch a few times, check placement, then continue.
And when you tie that last knot and fluff the ears? That’s the real magic. You go from “yarn homework” to “I made a
creature.” Even the slightly crooked ones feel special, because they look handmadewhich is the whole point. Plus,
they’re the only stuffed animals on Earth that come with a backstory: yours.
Conclusion
Crocheting a stuffed animal is a mix of basic stitches, simple shaping, and a little creative bravery. Start with
smooth yarn, a smaller hook, and a pattern that teaches the essentials: magic ring, single crochet, increases,
invisible decreases, stuffing, and assembly. Once you’ve made one plushie, you can remix that same structure into
almost anythingcats, bears, dinosaurs, or an abstract “marshmallow friend” that still deserves love.


