Table of Contents >> Show >> Hide
- Why Make a DIY Cardboard Fireplace for Christmas?
- Planning Your Faux Cardboard Fireplace
- Step-by-Step: How to Build Your DIY Cardboard Fireplace
- Decorating Your Cardboard Fireplace for Christmas
- Smart Storage and Reuse Tips
- Real-Life DIY Cardboard Fireplace Experiences & Lessons Learned
- Conclusion: A Cozy Fireplace, No Chimney Required
No chimney? No problem. A DIY cardboard fireplace lets you bring that cozy Christmas vibe into any space, even if your landlord thinks “wood-burning” is a dirty word. With a few cardboard boxes, some paint, and a little imagination, you can build a faux fireplace that looks charming in photos, delights the kids, and costs less than a fancy scented candle.
In true Hometalk spirit, this guide walks you through planning, building, and decorating a DIY cardboard fireplace for Christmas. We’ll break it down step by step, share clever tricks from seasoned crafters, and help you avoid the classic “toppled fireplace five minutes before guests arrive” disaster.
Why Make a DIY Cardboard Fireplace for Christmas?
Beyond the obvious “I want my living room to look like a Christmas movie set,” a cardboard box fireplace has a lot going for it:
- Budget-friendly: You can often build the entire faux fireplace from recycled boxes, leftover paint, and a roll of tape.
- Renter-approved: No drilling, no permanent changes, no grumpy landlord. The whole thing is temporary and lightweight.
- Kid- and party-friendly: It’s a safe focal point for stockings and photo ops, and you don’t have to worry about hot embers or soot.
- Customizable: Go classic red brick, snowy white, glam metallic, or whimsical candy-cane stripes. It’s all cardboard, so it’s low risk to try bold ideas.
- Eco-conscious: You’re upcycling cardboard that might otherwise be tossed, then you can recycle most of it once the season’s over.
A DIY cardboard fireplace also works beautifully as a holiday backdrop: for family photos, a classroom winter party, an office cubicle contest, or even a pop-up Christmas corner in a tiny studio apartment.
Planning Your Faux Cardboard Fireplace
Pick the Perfect Spot and Size
Before you grab a box cutter, decide where your cardboard fireplace will live. Common spots include:
- Centered on the main living room wall
- Between two windows or bookcases
- In a dining room corner for a cozy holiday nook
- Behind the tree as a Christmas photo backdrop
Measure the width of the wall and any furniture nearby (like a tree, media console, or sofa). A typical faux fireplace is about 4–5 feet wide and 3–4 feet tall, but you can scale it up or down based on your room. The key is balance: you want it large enough to feel like a real architectural feature, but not so massive that it overwhelms everything else.
Gather Your Materials
Your exact supply list can vary, but here’s a solid starting point for a DIY cardboard fireplace:
- 2–4 large cardboard boxes (appliance or shipping boxes work great)
- Box cutter or craft knife (plus a cutting mat or sacrificial piece of cardboard underneath)
- Packing tape or duct tape for structure
- Hot glue gun and glue sticks for added strength
- Ruler, measuring tape, and pencil
- White craft paint or primer
- Red and brown acrylic paint for bricks (or your preferred color palette)
- Foam brush and small detail brush
- Optional: brick-print wrapping paper or faux brick contact paper
- Optional: LED candles, fairy lights, tissue paper, or logs for the “fire” area
Safety First (Even with Cardboard)
Even though this is a faux fireplace, it’s still important to treat it with care:
- Never use real candles or open flames inside or near the cardboard structure.
- Stick to LED candles, fairy lights, or battery-powered lanterns.
- If you have pets or toddlers, plan a stable, low center of gravity and consider weighting the base with books or small sandbags.
Step-by-Step: How to Build Your DIY Cardboard Fireplace
Step 1: Create the Basic Frame
Start with your largest box. Stand it upright so the largest surface faces forward. This will become the main face of your cardboard box fireplace.
- Reinforce the box: Tape all seams and corners generously with packing tape so the box is solid and doesn’t wobble.
- Mark the fireplace opening: Draw a large rectangle on the front to represent the firebox opening. Leave at least 4–6 inches of border on all sides so the structure stays strong.
- Cut the opening: Use a sharp box cutter to carefully cut out that inner rectangle. Go slowly and work on top of a scrap piece of cardboard to protect your floors.
If your box isn’t deep enough, you can tape an additional box (or flaps) to the back to create more depth. This makes the faux fireplace feel more realistic and gives you space to tuck in lights and decorations.
Step 2: Add Sides and Hearth
To mimic the side pilasters and hearth of a real fireplace, you’ll extend the structure outward.
- Cut two tall rectangles from another box to become side columns. Tape or hot glue them to the front face, flanking the opening.
- For the hearth, cut a wide, shallow rectangle and lay it flat at the bottom front of the fireplace, like a cardboard doorstep.
- Secure the hearth to the fireplace front with tape or hot glue from underneath, then reinforce any wobbly joints with extra cardboard triangles inside.
If you want a curved or arched opening, lightly score the back of a strip of cardboard (cut shallow lines, not all the way through), then bend it into an arch and glue it over the top of the opening.
Step 3: Build a Sturdy Mantel
The mantel is where the magic happens: stockings, garlands, twinkle lights, and maybe a plate of cookies for Santa. You’ll want it strong enough to hold decor (but still, no bowling balls).
- Stack 1–2 long rectangular boxes or cut a wide strip of thick cardboard to span the top width of the fireplace.
- Secure it to the top edge with plenty of packing tape and hot glue, attaching support wedges underneath if needed.
- For a chunkier look, add another layer of cardboard or foam board on top, like a mantel cap.
To make the mantel look more finished, you can wrap it in faux wood contact paper, festive wrapping paper, or paint it a solid color like white or dark brown.
Step 4: Create a Brick or Stone Finish
Now comes the fun part: transforming the plain cardboard into a realistic (or delightfully unrealistic) fireplace surround.
You have two main options:
- Painted brick: Paint the front and sides with a coat of white paint or primer. Once dry, lightly sketch a brick grid with pencil. Use red or brown paint to fill in the rectangles, then dab on darker and lighter shades for texture. Add thin white “mortar” lines between bricks with a small brush.
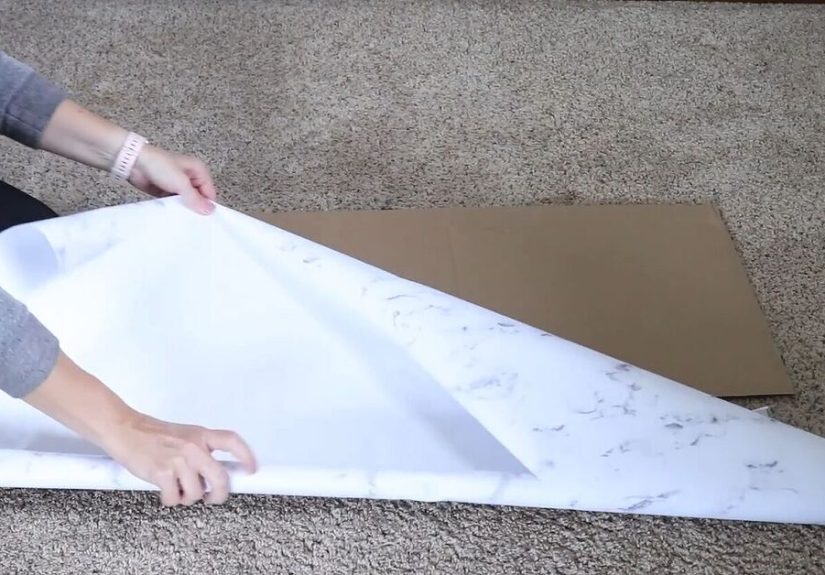
- Brick or stone wrap: Wrap the fireplace front in brick-print paper or peel-and-stick faux brick. Smooth out any bubbles as you go. Cut away the fireplace opening and tuck the edges inside for a clean look.
If you prefer a modern feel, skip the bricks and go for a solid white or charcoal-gray finish. A minimal faux fireplace looks stunning with greenery and warm lights.
Step 5: Design a Cozy “Fire”
No real flames allowed, but we can fake a very charming glow inside your cardboard fireplace.
- LED candle cluster: Arrange several battery-powered candles of different heights inside the opening.
- Fairy light campfire: Pile a few cardboard “logs” (rolled tubes painted brown) and weave warm fairy lights between them. Add red, orange, and yellow tissue paper “flames” sticking up from the center.
- Glowing backdrop: Line the back of the firebox with gold or copper foil, then place string lights at the base. The foil will bounce the light around and make the whole fireplace twinkle.
Whatever you choose, keep the cables tidy and the batteries easy to access. You’ll thank yourself when it’s time to turn everything off at midnight.
Step 6: Add Final Details
Little touches make your DIY cardboard fireplace feel finished:
- Paint or wrap the inside of the firebox in black for depth.
- Add a cardboard or foam board “trim” frame around the opening for a more architectural look.
- Glue on faux greenery or tiny pinecones along the edges.
Step back and check for any visible tape seams or raw edges. A quick swipe of paint or a strategically placed garland can hide most imperfections.
Decorating Your Cardboard Fireplace for Christmas
Classic Christmas Mantel
If you love traditional holiday decor, lean into the cozy red-and-green theme:
- Hang stockings from removable hooks or command strips along the mantel.
- Drape a faux pine garland, weaving in fairy lights and red ribbon.
- Place a few pillar “candles” (LED, of course) at different heights on one side.
- Add a framed holiday print or DIY cardboard “mirror” above the mantel for height.
Modern Minimalist Fireplace
Prefer a clean, Scandinavian-inspired Christmas look?
- Paint your faux fireplace matte white or soft gray.
- Decorate with eucalyptus garlands, wooden bead garlands, and white stockings.
- Use simple warm-white lights and a few neutral-toned ornaments.
- Style the hearth with wrapped gifts in kraft paper and twine.
Kid-Friendly North Pole Scene
For families, a playful DIY cardboard fireplace can become part of a larger North Pole setup:
- Cut out cardboard candy canes and glue them to the sides.
- Attach paper snowflakes and colorful pom-poms along the mantel.
- Add a “Santa Please Stop Here” sign above the fireplace.
- Hide a small elf figure or plush reindeer near the opening as a daily game.
Small Spaces and Backdrops
Don’t have room for a full-size faux fireplace? Scale down:
- Create a half-width mantel to sit under a wall-mounted TV.
- Build a narrower fireplace that fits perfectly behind a small tree.
- Use a flat, slim design to lean against a wall as a holiday photo backdrop.
Even a shallow, backdrop-style cardboard fireplace can frame your tree beautifully and give your photos a polished, magazine-worthy feel.
Smart Storage and Reuse Tips
One of the best perks of a cardboard Christmas fireplace is that it doesn’t have to live in your living room year-round.
- Modular build: If you design your fireplace in sections (columns, center, mantel), you can untape and stack them flat after the holidays.
- Dust protection: Wrap painted sections in plastic or old sheets to prevent scuffs and dust in storage.
- Reuse or recycle: Next year, you can refresh the colors, change the theme, or recycle the cardboard and start over with a new design.
Label each piece before putting it away, so “Left Column” doesn’t end up trying to be a mantel support next December.
Real-Life DIY Cardboard Fireplace Experiences & Lessons Learned
Once you’ve built one of these faux fireplaces, you quickly realize it’s more than just a cute backdrop. It becomes part of your family’s Christmas story. People who make DIY cardboard fireplaces often share the same reaction: “I didn’t expect something made from boxes to feel this magical.”
One common experience is how much kids love helping. Because the materials are inexpensive and forgiving, you can hand over a brush and let them paint bricks, draw swirls of “smoke” above the opening, or design their own stocking shapes. They get to see their artwork in the heart of the room, and that sense of ownership makes the fireplace extra special. Yes, some bricks will be crooked. That’s part of the charm.
Another frequent lesson is about stability. Many first-time builders underestimate how wobbly a tall cardboard structure can be, especially on carpet or with excited children rushing past. After one good bump, you quickly learn to reinforce the inside with extra panels, cardboard triangles, or a heavier base. Some crafters slide a couple of heavy books or small weights into the hearth area (hidden behind decor) to keep the fireplace from shifting. It’s a simple tweak that makes your faux fireplace feel surprisingly solid.
Decorating the mantel tends to evolve over the season. On day one, you might style it “Pinterest perfect” with carefully placed garlands and symmetrical candles. A week later, it’s holding handmade ornaments, school crafts, Christmas cards, and maybe a random toy car or two. That’s okay. Many people find that the more “lived in” their DIY fireplace looks, the more it feels like a real part of their home rather than a temporary prop.
There’s also the photo factor. A cardboard box fireplace practically begs to be in the background of every holiday photo. Families use it for Christmas morning snapshots, matching pajama pictures, and even holiday card shoots. You don’t need professional lightingjust switch on the fairy lights in the firebox, add a few LED candles, and suddenly your living room looks like a studio set.
Storage is another place where experience helps. The first year, you might try to shove the whole fireplace into a closet in one piece, only to discover it doesn’t fit through the door. The second year, you’ll likely plan for modular panels. Many DIYers save time by building the main structure once, then updating the surface each winter. One year it’s classic red brick, the next it’s painted white with gold accents. You get a “new” fireplace without rebuilding the bones.
Finally, there’s the emotional side. Even though it’s made from humble cardboard, your faux fireplace often becomes the anchor point for family traditions: where stockings hang, where kids leave cookies for Santa, where you gather for a quick hot cocoa photo before heading out to see Christmas lights. When you pull it out of storage the following year, it’s not just decorit’s a signal that the cozy, festive season has officially begun.
If you’re on the fence about building one, think of it this way: worst-case scenario, you spend an afternoon crafting, laugh at a few wobbly bricks, and recycle the whole thing in January. Best case, you end up with a DIY cardboard fireplace that feels so warm and inviting you’ll wonder why you didn’t build one years ago.
Conclusion: A Cozy Fireplace, No Chimney Required
A DIY cardboard fireplace for Christmas is the kind of project that looks impressive but is surprisingly achievable with simple supplies. You plan your size, build a sturdy frame, add a mantel, paint or wrap your “bricks,” and fill the opening with soft, safe lights. Finish with stockings, garlands, and your favorite festive touches, and suddenly your home feels like a holiday movie set.
Whether you’re decorating a rental, giving your kids a magical focal point, or creating a picture-perfect backdrop for your holiday photos, a cardboard box fireplace delivers big cozy energy on a small budget. And because it’s lightweight and customizable, you can reinvent it every year. That’s the true DIY spiritcreative, resourceful, and just a little bit extra.


