Table of Contents >> Show >> Hide
- First: What a Grease Trap Does (and Why It Gets Gross)
- Before You Start: Safety, Rules, and a Reality Check
- Tools and Supplies Checklist
- How to Clean a Grease Trap: 9 Steps
- Step 1: Confirm it’s time (and schedule smart)
- Step 2: Protect the area like you’re preparing for a tiny oil spill
- Step 3: Run cold water briefly, then shut off water to the fixture
- Step 4: Open the lid slowly and ventilate
- Step 5: Measure grease and solids (optional, but great for compliance)
- Step 6: Scoop the top grease layer into a sealable container
- Step 7: Remove food solids and scrape the walls and baffles
- Step 8: Wash, scrub, and reassemble (without overdoing the water)
- Step 9: Refill, test flow, and document disposal
- Common Mistakes That Turn a 30-Minute Job into an All-Day Event
- How to Keep Your Grease Trap Cleaner Longer
- Quick FAQ
- Real-World Experiences: Lessons from the Grease-Front (About )
- Conclusion
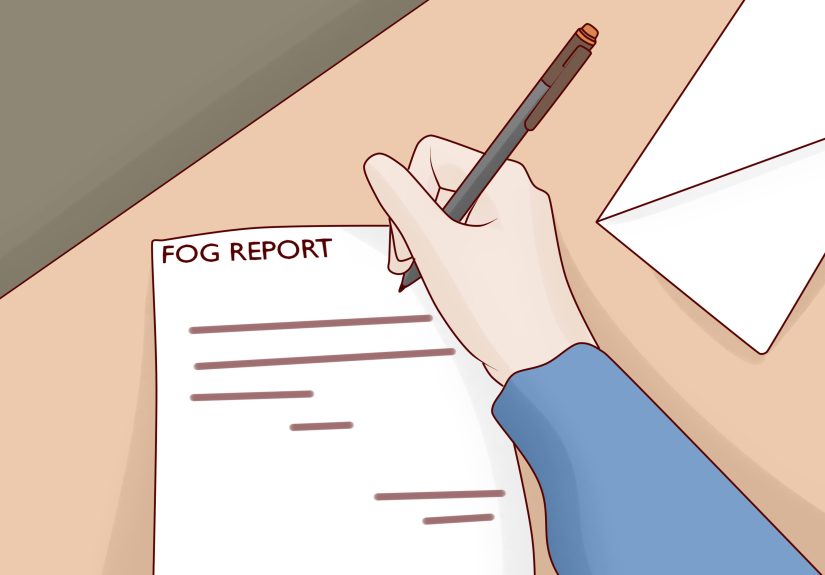
Cleaning a grease trap is like flossing: nobody’s excited to do it, everyone’s happier after it’s done,
and ignoring it long enough will eventually cost real money. The good news? If you’ve got a small, indoor
grease trap (the kind under a sink), you can usually clean it yourself with basic tools, a little patience,
and a strong commitment to not wearing your favorite shoes.
In this guide, you’ll learn how to clean a grease trap in 9 practical steps, how often to do it,
what not to pour down the drain (spoiler: basically everything fun), and how to keep your plumbing
and your inspector equally calm.
First: What a Grease Trap Does (and Why It Gets Gross)
A grease trap (or grease interceptor) is a plumbing device designed to slow wastewater down so
fats, oils, and grease (FOG) can float to the top while heavier food solids settle at the bottom.
Cleaner water exits in the middle and continues to the sewer. When the trap fills up with FOG and sludge,
it stops separating properly, and that’s when you get the unholy trio: odors, slow drains, and backups.
Before You Start: Safety, Rules, and a Reality Check
Grease trap vs. grease interceptor (yes, there’s a difference)
Most restaurants have one of two setups:
small indoor grease traps (often under sinks, measured in gallons) or
large outdoor/interior interceptors (often hundreds to 1,000+ gallons).
This article focuses on the DIY-friendly indoor unit, but we’ll call out when you should bring in a licensed hauler.
How often should you clean it? Use the “25% rule”
Many wastewater programs recommend cleaning when the combined thickness of the top grease layer and bottom solids
reaches about 25% of the liquid depth. In plain English: when the trap is one-quarter “stuff,” it’s time.
Some utilities also set maximum service intervals (often 30, 60, or 90 days depending on size and usage).
Quick example: If the liquid depth is 12 inches, and you measure 2 inches of grease on top plus 1 inch of sludge
at the bottom, that’s 3 inches total. 3 ÷ 12 = 25%. Congratulations (and condolences): you’re due.
Safety: don’t get brave around mystery fumes
Grease traps can release nasty gases (including hydrogen sulfide), and the contents are full of bacteria.
For small under-sink units, basic PPE and ventilation usually do the job. For large interceptors, confined spaces,
or anything requiring entry: stop and call professionals. No one needs a “grease trap hero” story.
Tools and Supplies Checklist
- PPE: long rubber gloves, eye protection, apron/old clothes, non-slip shoes
- Ventilation: open doors/windows, run exhaust hood/fans
- Basic tools: screwdriver or nut driver (for lid screws), small pry tool if needed
- Scooping gear: small bucket, disposable scoop/ladle, spatula/putty knife
- Cleaning supplies: dish soap/degreasing detergent, scrub brush, paper towels/rags
- Waste containers: sealable container or heavy-duty bag + a lidded bin
- Optional but helpful: measuring stick/tape, flashlight, deodorizing enzyme-free absorbent pads
How to Clean a Grease Trap: 9 Steps
-
Step 1: Confirm it’s time (and schedule smart)
Clean during a slow period, not in the middle of a dinner rush when the dishwasher is auditioning for a water park.
If you track the 25% rule, measure first. If you don’t, follow your local interval requirement and document it. -
Step 2: Protect the area like you’re preparing for a tiny oil spill
Put down absorbent pads or cardboard. Set a lined trash bin nearby. Have your waste container open and ready
so you’re not walking across the kitchen holding a dripping ladle like a bad decision. -
Step 3: Run cold water briefly, then shut off water to the fixture
Cold water helps firm up grease so it’s easier to remove. Run it for a minute, then shut off the water to that sink
(or stop dishwashing to that line). Avoid hot water during cleaningit can melt grease and push it downstream where it
re-solidifies later in your pipes. -
Step 4: Open the lid slowly and ventilate
Carefully remove the lid screws/bolts and lift the lid slowly. Give it a moment to “breathe.”
If the odor punches you in the soul, improve ventilation before you continue.
Use a flashlight to locate the baffles (internal flow-control pieces) and note how they’re positioned. -
Step 5: Measure grease and solids (optional, but great for compliance)
Use a measuring stick or tape to estimate the grease layer on top and the settled solids at the bottom.
Record it in a log. This helps you defend your cleaning schedule during inspections and prevents guessing games like,
“Is it full… or am I just emotionally full?” -
Step 6: Scoop the top grease layer into a sealable container
Skim the floating grease into your container. Go slowlysplashes are the enemy. This is where a small scoop/ladle
shines. Keep paper towels handy to wipe drips and your tools as you go. -
Step 7: Remove food solids and scrape the walls and baffles
After skimming the top, remove the baffles (if your unit allows) and scrape them clean.
Scoop out settled solids and sludge from the bottom. Then scrape the sides and lid underside with a putty knife or spatula.
The goal is to remove buildup mechanicallythink “dry wipe,” not “blast it into the sewer.” -
Step 8: Wash, scrub, and reassemble (without overdoing the water)
Using warm (not boiling) water and dish soap, scrub the interior surfaces, lid, and baffles.
Wipe out the dirty wash water with towels or scoop it into your waste container if possible.
Reinstall the baffles exactly as they were. If they’re backwards or missing, the trap won’t separate FOG correctly. -
Step 9: Refill, test flow, and document disposal
Refill the trap with clean water (many traps need water in them to work properly right away), secure the lid, and run
water briefly to confirm normal flow and no leaks. Log the date, measured levels, and who cleaned it. Store waste in a
sealed container and dispose of it according to local rules (often via a grease hauler or approved disposal route).
Common Mistakes That Turn a 30-Minute Job into an All-Day Event
-
Using hot water or harsh chemicals: Hot water can liquefy grease, sending it downstream to re-solidify.
Many programs also warn against solvents, caustics, and emulsifiers during cleaning. -
Relying on “miracle additives” instead of maintenance: Some cities prohibit enzymes/bacteria/chemical
treatments because they can break grease into smaller particles that pass through the interceptor and cause downstream problems. - Not reinstalling baffles correctly: Baffles control flow. If they’re wrong, separation fails.
-
Dumping grease trap waste into dumpsters or drains: That’s how you get violations, odors, pests, and
a reputation you don’t want. - No records: A simple log can prevent fines and helps you set the right cleaning frequency.
How to Keep Your Grease Trap Cleaner Longer
Want to clean less often without getting in trouble? Reduce how much grease you send to the trap in the first place:
- Dry-wipe first: scrape and wipe plates, pans, and grills into the trash before washing
- Use sink strainers: keep food scraps out of the line
- Recycle used cooking oil: store fryer oil in sealed containers for pickup
- Train the team: a grease trap is not a magical portal where bad decisions disappear
- Post reminders: “NO GREASE” signs above sinks really do help
Quick FAQ
Can I just “flush it clean” with boiling water?
Please don’t. Boiling or very hot water can liquefy grease and move it into pipes where it cools and hardens.
That’s trading one problem (a dirty trap) for a worse one (a clogged sewer line).
Do I need a professional service?
If you have a large grease interceptor (especially outdoors), if local rules require a licensed hauler, or if cleaning involves
confined-space hazards, hire a pro. For small under-sink traps, in-house cleaning is commonjust do it safely and keep records.
What are signs my grease trap is overdue?
Slow drains, recurring odors, gurgling sounds, grease downstream of the unit, or frequent plumbing clogs are common red flags.
Also: if you open the lid and it looks like a latte made of sadness, you’re late.
Real-World Experiences: Lessons from the Grease-Front (About )
The first time a kitchen team cleans a grease trap, there’s usually an optimistic assumption that it’ll be “kind of like cleaning
a blender.” That optimism lasts right up until the lid comes off and everyone learns that grease has a texture.
The most useful lesson I’ve heard from seasoned operators is simple: consistency beats heroics. A trap cleaned
on a steady schedule is a manageable nuisance. A trap ignored for months becomes a full-body workout with emotional damage.
One café manager told me they used to wait until “the smell reminded us.” Their reminder system worked… until it didn’t.
The odor stopped being a gentle nudge and became a daily complaint from customers sitting near the dish area.
The fix wasn’t fancy: they started a quick weekly measurement (just grease layer + solids layer) and a monthly clean.
The surprise benefit? Fewer slow-drain calls and less time spent plunging sinks like it’s an Olympic sport.
They didn’t “clean more,” they cleaned smarter.
Another story comes from a busy burger spot with a small under-sink trap that kept “mysteriously” clogging the line.
When they finally opened it, they found the baffle had been reinstalled incorrectly during a rushed cleaning.
So instead of separating grease, the unit basically became an expensive mixing bowl: grease in, grease out.
The solution was hilariously low-tech: they snapped a photo of the correct baffle position and taped it inside the cabinet door
with a note that read, “THIS SIDE UP. WE ARE NOT GUESSING TODAY.” Clogs dropped off immediately.
My favorite lesson is from a small prep kitchen that tried to “save time” by blasting the trap with hot water and extra degreaser.
It looked clean, smelled clean, and thentwo weeks laterthey had a downstream blockage that required a plumber and a painful invoice.
They learned the hard way that a grease trap’s job is to capture FOG, not melt it and send it on a sightseeing tour
of your plumbing. After that, they switched to mechanical removal (scoop, scrape, wipe), used warm soapy water sparingly,
and started recycling oil more aggressively. The trap stayed cleaner longer, and the plumbing stayed boringwhich is exactly what
you want from plumbing.
If you take anything from these stories, let it be this: make the process easy for your future self. Keep a dedicated kit
(gloves, scoop, scraper, bags), keep a simple log, and train the team on “dry wipe” habits. The goal isn’t to win an award for
Most Sparkling Grease Trap. The goal is to prevent backups, odors, and compliance headacheswhile keeping your kitchen running
like it’s got better things to do than think about grease.
Conclusion
Cleaning a grease trap isn’t glamorous, but it’s one of the highest-ROI habits in a commercial kitchen:
fewer clogs, fewer smells, fewer surprise visits from plumbers and inspectors. Follow the 9 steps above, stick to the 25% rule
(or your local schedule), document the work, and focus on preventionbecause the cleanest grease trap is the one that never got
overwhelmed in the first place.


