Table of Contents >> Show >> Hide
- Should You Paint a Brick House?
- Why I Decided to Paint My Brick Exterior
- Choosing the Right Paint Color for Brick
- Tools and Materials I Used
- Step 1: Clean the Brick Thoroughly
- Step 2: Let the Brick Dry Completely
- Step 3: Repair Cracks, Gaps, and Problem Spots
- Step 4: Protect Everything You Do Not Want Painted
- Step 5: Prime the Brick
- Step 6: Apply the First Coat of Masonry Paint
- Step 7: Apply the Second Coat
- Step 8: Paint the Trim, Door, and Details
- Common Mistakes to Avoid When Painting Brick
- How Long Does Painted Brick Last?
- Is Painting Brick Better Than Limewash?
- What I Spent the Most Time On
- My 500-Word Experience Section: What Painting My Brick House Really Taught Me
- Conclusion: Was Painting My Brick House Worth It?
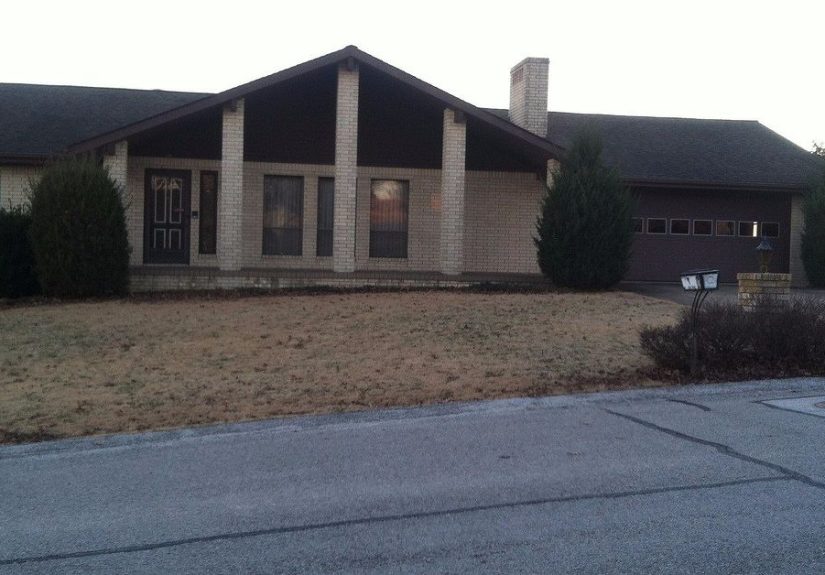
Painting a brick house sounds simple until you are standing in the driveway with a pressure washer, a suspiciously optimistic paint sprayer, and a spouse asking, “Are we sure this is a good idea?” That was the exact emotional weather report when I decided to paint my brick house. The brick was tired, the mortar looked cranky, and the whole exterior had that faded “I was stylish three decades ago” energy. Charming? Maybe. Fresh? Not even a little.
So I did what any brave homeowner with a weekend dream and a healthy fear of regret would do: I researched, overthought, sampled paint colors in every possible light, and learned that painting brick is not like painting drywall. Brick is porous. It absorbs moisture. It has texture, tiny holes, mortar joints, old dirt, mystery stains, and the ability to humble even confident DIYers. In other words, brick has personality. A lot of personality.
This guide walks through how I painted my brick house, what I learned, what I would do again, and what I would absolutely not repeat unless I suddenly develop a fondness for sore shoulders. Whether you are considering a clean white brick exterior, a soft greige update, a moody charcoal makeover, or a limewash-inspired look, the secret is not just picking a pretty paint color. The secret is preparation, patience, and respecting the fact that brick is not just a wallit is a breathing, moisture-managing building material.
Should You Paint a Brick House?
Before opening a single paint can, I had to answer the big question: should brick be painted at all? Painted brick can look beautiful. It can modernize an older home, brighten a dark exterior, unify mismatched brick, and give a house major curb appeal. A painted brick house can go from “forgotten ranch” to “architectural magazine casually left on the coffee table” very quickly.
But painting brick is also a commitment. Once brick is painted, returning it to natural brick is difficult, messy, expensive, and rarely perfect. Paint can also trap moisture if the wrong product is used or if the brick is not properly cleaned and dried first. That trapped moisture can cause peeling paint, flaking brick, damaged mortar, or stains that return like an uninvited party guest.
My rule was simple: if the brick is historic, severely damaged, constantly damp, or covered in heavy efflorescence, pause before painting. In those cases, it is smarter to talk with a masonry professional. If the brick is sound, dry, and structurally healthy, painting can be a practical way to refresh the exterioras long as you use the right prep process and breathable masonry-friendly products.
Why I Decided to Paint My Brick Exterior
My house had good bones, but the brick color was fighting everything around it. The roof had cooler undertones. The trim looked dingy against the old orange-red brick. The landscaping felt disconnected. Even after cleaning the windows and trimming the shrubs, the house still looked like it needed coffee.
I wanted a brighter, cleaner exterior without ripping off perfectly useful brick. Painting felt like the best middle ground: dramatic enough to change the whole look, but not as extreme as re-siding the house. I also wanted the front door, shutters, trim, and porch to feel intentional instead of “assembled by a committee of leftovers.”
The goal was not to erase the character of the house. It was to make the texture of the brick stand out in a softer, more updated way. That is one of the biggest advantages of painted brick: the color becomes calmer, but the texture remains. When done right, the final look still has depth, shadow, and charm.
Choosing the Right Paint Color for Brick
Choosing a brick paint color is where confidence goes to be tested. A color that looks perfect on a tiny paper chip can look wildly different on a full brick wall. I tested several exterior paint samples directly on the house, not on a loose board, because brick texture changes how color reads. The little ridges and mortar lines catch light differently throughout the day.
For painted brick exteriors, warm whites, soft creams, greiges, mushroom tones, warm grays, and muted charcoals tend to be safer than stark white or trendy high-contrast colors. Pure white can look crisp, but it can also glare in full sun and show dirt quickly. Very dark colors can look stunning, but they may absorb more heat and show dust, fading, or surface texture more dramatically.
My Color Testing Method
I painted sample patches on three sides of the house: one sunny wall, one shaded wall, and one near the front entry. Then I looked at them in the morning, noon, late afternoon, and after sunset. This may sound excessive, but exterior paint has a sneaky personality. The soft off-white I loved at 10 a.m. looked slightly yellow by dinner. The greige I thought was boring suddenly looked elegant under cloudy skies.
In the end, I chose a warm, soft neutral that worked with the roof, trim, and natural surroundings. The winning color did not scream for attention. It simply made the house look cleaner, calmer, and more expensive. That is usually the sweet spot for exterior brick paint: a color that flatters the architecture instead of trying to steal the neighborhood’s lunch money.
Tools and Materials I Used
Painting brick requires more than a brush and wishful thinking. The surface is rough, porous, and uneven, so the right tools matter. I used a pressure washer, stiff-bristle brushes, masonry cleaner, exterior caulk for small gaps, drop cloths, painter’s tape, a masonry primer, high-quality exterior masonry paint, an airless paint sprayer, rollers with a thick nap, angled brushes, extension poles, and plenty of patience.
The airless sprayer helped cover large areas quickly, but spraying alone was not enough. Brick has tiny pits and mortar lines that love to hide unpainted spots. Back-rolling after spraying helped push primer and paint into the texture. If you are rolling only, use a thick-nap roller made for rough surfaces. A smooth-wall roller will make you question your life choices by lunchtime.
Step 1: Clean the Brick Thoroughly
The first real step was cleaning. Brick collects dust, pollen, mildew, cobwebs, old paint residue, and whatever else the weather has been flinging at your house for years. Paint will not bond well to dirt, chalky residue, loose material, or mildew stains. I pressure washed the exterior carefully, keeping the pressure strong enough to clean but not so aggressive that it damaged mortar joints.
For stubborn areas, I used a scrub brush and masonry-safe cleaner. I paid extra attention to window ledges, corners, shaded areas, and places near the ground where mildew and dirt were heavier. This was not glamorous work. Nobody posts a dramatic before-and-after of “I scrubbed grime behind the downspout,” but that is exactly the kind of boring prep that makes the final paint job last.
Step 2: Let the Brick Dry Completely
This step is where impatient DIYers get into trouble. Brick absorbs water, and after washing, it needs time to dry. Painting damp brick can trap moisture beneath the coating, which may lead to peeling, blistering, or masonry problems later. I waited longer than I originally planned because several shaded sections stayed damp after the sunny walls looked dry.
A good rule is to wait at least 24 hours after pressure washing, but weather, shade, humidity, and brick condition can change that timeline. In humid climates or shady areas, waiting longer is often the smarter move. I treated this part like baking: just because the outside looks done does not mean the inside is ready. Brick can be sneaky that way.
Step 3: Repair Cracks, Gaps, and Problem Spots
Once the brick was clean and dry, the flaws became easier to see. I found small cracks in the mortar, gaps around trim, and a few areas where old caulk had failed. Paint can improve appearance, but it is not a magic structural repair potion. If there are open cracks, loose mortar, or water entry points, those need attention before painting.
I used exterior-rated, paintable masonry caulk for small gaps and left larger masonry concerns to proper repair methods. Around windows and trim, I made sure the caulk was compatible with exterior paint. This step made the final result look much cleaner. Painted brick highlights lines, edges, and shadows, so sloppy repairs can become very visible after everything is one color.
Step 4: Protect Everything You Do Not Want Painted
Exterior painting has a way of traveling. Overspray can land on windows, lights, plants, patio furniture, your neighbor’s car, and possibly your soul. I covered windows, doors, light fixtures, the porch floor, nearby plants, and walkways. I removed smaller items where possible instead of taping around them.
If you use a sprayer, do not underestimate wind. Even a mild breeze can carry paint farther than expected. I checked the weather carefully and avoided spraying on windy days. I also kept a damp cloth nearby for quick cleanup because exterior paint waits for no one.
Step 5: Prime the Brick
Primer was not optional for my project. Bare brick is porous, and masonry primer helps seal and condition the surface so the topcoat applies more evenly. It also improves adhesion, which matters when the surface has thousands of tiny holes and rough mortar joints.
I used a masonry primer designed for exterior brick and concrete surfaces. The first coat looked patchy, which briefly made me wonder whether I had ruined the house. Thankfully, patchiness during primer is normal on thirsty brick. Some areas absorbed more than others. The goal was not perfection yet; the goal was coverage, bonding, and a good foundation for the finish coats.
After spraying primer, I back-rolled it into the brick. This made a huge difference. The roller pushed primer into small gaps and helped even out the surface. Around edges, trim, and corners, I used a brush. This part took longer than expected, but it gave the final paint coat a much smoother, more professional look.
Step 6: Apply the First Coat of Masonry Paint
The first coat of paint was exciting and mildly terrifying. Suddenly the house looked completely different, but it also looked unfinished. Brick texture can make the first coat appear uneven, especially if the original brick color is dark or varied. I reminded myself that the first coat is not the final judgment. It is the opening act.
I used exterior masonry paint suitable for brick, stucco, and concrete. This is important because standard exterior paint may not perform the same way on masonry. Brick needs a coating that can handle texture, weather exposure, and moisture movement better than ordinary wall paint.
I worked in manageable sections, keeping a wet edge to avoid lap marks. The sprayer helped with speed, while the roller helped with penetration and consistency. Mortar joints needed extra attention. They are recessed, so they can look shadowy or missed if you move too quickly.
Step 7: Apply the Second Coat
The second coat is where the magic happened. The color became richer, the patchy areas disappeared, and the whole exterior started looking intentional. If the first coat made me nervous, the second coat made me want to stand in the yard holding iced coffee like I had personally invented curb appeal.
I followed the manufacturer’s recommended recoat time and made sure the first coat was dry before continuing. Rushing recoat times can affect adhesion and finish quality. Again, I sprayed and back-rolled, then brushed detailed areas by hand. The second coat also helped even out the brick and mortar so the house looked cohesive without losing texture.
Step 8: Paint the Trim, Door, and Details
Painting the brick changed the house, but painting the trim finished the story. Old trim that seemed “fine” before suddenly looked tired next to fresh brick. I repainted the trim in a crisp but not blinding white and chose a front door color that added contrast without looking cartoonish.
This is the part many people underestimate. A painted brick house is not just about the brick. The roof color, gutters, shutters, windows, porch, railings, landscaping, and front door all affect the final look. Once the brick was updated, I added fresh mulch, cleaned the walkway, and swapped a dated light fixture. Small changes made the paint job look more polished.
Common Mistakes to Avoid When Painting Brick
Painting Dirty or Damp Brick
This is the fastest way to shorten the life of the paint job. Dirt prevents adhesion, and moisture can get trapped. Clean thoroughly and let the brick dry completely.
Using the Wrong Paint
Brick needs masonry-friendly exterior paint or a mineral-based coating designed for masonry. The wrong product can peel, blister, or seal moisture inside the wall.
Skipping Primer
On bare brick, primer helps create a stable surface and reduces uneven absorption. Skipping it may save time upfront but can cost more later.
Ignoring Weather
Exterior paint performs best in mild, dry conditions. Extreme heat, cold, rain, high humidity, or direct blazing sun can affect drying and adhesion.
Choosing a Color Too Quickly
Always test paint colors outside. Look at samples during different times of day. Brick texture and sunlight can dramatically change how a color appears.
How Long Does Painted Brick Last?
A properly painted brick house can look good for years, but it is not maintenance-free. The exact lifespan depends on climate, sun exposure, paint quality, prep work, drainage, and whether moisture is managed correctly. South-facing walls may fade faster. Shaded sides may collect mildew sooner. Areas near the ground may need more frequent cleaning.
My plan is to inspect the exterior every spring and fall. I look for peeling, cracks, mildew, caulk failure, or spots where water may be hitting the wall too often. Gutters, downspouts, and grading matter more than people realize. If water constantly runs over painted brick, the paint will eventually complainand it will not complain quietly.
Is Painting Brick Better Than Limewash?
Paint and limewash create different looks and behave differently. Paint gives solid, even coverage and a more dramatic color change. Limewash creates a softer, aged, more breathable finish that allows some brick variation to show through. Mineral-based masonry coatings can also be a good option for homeowners who want a painted look while still thinking carefully about breathability.
I chose paint because I wanted full coverage and a cleaner transformation. If I had wanted a historic, European cottage look with more variation, I would have considered limewash. The right choice depends on your house, climate, maintenance expectations, and personal style.
What I Spent the Most Time On
Surprisingly, the actual painting was not the longest part. Cleaning, drying, masking, repairing, and color testing took far more time. That is the honest truth about painting a brick house: the pretty part is only a slice of the project. The prep is the project.
If you hire professionals, much of the cost reflects labor, equipment, preparation, and experience. If you DIY, you save money but spend energy. Lots of energy. My shoulders filed a formal complaint after day two.
My 500-Word Experience Section: What Painting My Brick House Really Taught Me
The biggest lesson I learned from painting my brick house is that exterior projects are less about speed and more about sequencing. Every step depends on the step before it. If the brick is not clean, the primer cannot do its job. If the primer is rushed, the paint will not look even. If the caulk is sloppy, the final finish will highlight it. This project taught me that “good enough” has a funny way of becoming “why does that spot look weird?” once sunlight hits the wall.
I also learned that confidence comes in waves. On cleaning day, I felt productive. On masking day, I felt like I was wrapping the house for a very strange birthday party. During the primer coat, I briefly panicked because the house looked blotchy and unfinished. After the first paint coat, I felt better, but still unsure. After the second coat, everything clicked. The house finally looked like the version I had imagined.
One practical experience I would pass along is to work in sections that make sense visually. I divided the house by walls and architectural breaks instead of randomly jumping around. This helped me avoid lap marks and made cleanup easier. I also labeled paint cans and kept a small touch-up container for each color. That tiny bit of organization saved me later when I noticed a missed spot under a window ledge.
Another lesson: do not judge the color too early. Wet paint, fresh primer, cloudy weather, and surrounding old trim can all trick your eyes. My chosen color looked slightly dull before the trim was painted. Once the trim, door, and landscaping were refreshed, the same brick color looked polished and intentional. Exterior design is a team sport; brick paint is just one player.
I also became deeply respectful of ladders, extension poles, and comfortable shoes. Painting a brick house involves more bending, reaching, stepping back, climbing, and squinting than expected. I took photos throughout the process, which helped me spot uneven areas I missed in person. A camera can be brutally honest in a useful way.
Would I paint my brick house again? Yes, but only with the same careful prep. I would never treat it like a quick weekend paint job. The result changed the entire personality of the home. It looked brighter, cleaner, and more welcoming. The front porch suddenly made sense. The landscaping looked greener. Even the windows seemed sharper. It was one of those projects where the house did not just look paintedit looked cared for.
Conclusion: Was Painting My Brick House Worth It?
Painting my brick house was absolutely worth it, but it was not a casual project. It required research, cleaning, drying, repairing, priming, painting, back-rolling, and resisting the urge to rush. The final result gave the home a fresh identity while keeping the charm and texture of the original brick.
If you are thinking about painting your brick house, start with the condition of the brick, not the color chart. Make sure the surface is healthy, dry, and suitable for paint. Choose masonry-friendly products. Test colors outside. Watch the weather. Respect drying times. And please, for the love of curb appeal, do not skip the prep.
A painted brick exterior can be stunning when done correctly. It can turn a tired home into the house people slow down to admire. Just remember: the paint color gets the compliments, but the prep work deserves the trophy.


